How to Remote into Ubuntu
What is a Virtual Network Computing (VNC)?
VNC is a graphical desktop sharing system that allows you to remotely control the desktop interface from another computer or mobile device (running VNC Viewer). VNC Viewer transmits the keyboard and the mouse events to VNC Server, and receives updates to the screen in return. Setting up a VNC Server on our RPI 4 is very beneficial to gain access to it from another device.
Vino VNC Server on Ubuntu
Vino is the default VNC server in Ubuntu which allows us to share our graphical desktop form other devices. If you have multiple RPI 4, utilizing VNC server to remote into these Pis (nodes) from your main device is definitely a great way to gain access.
How to configure Vino VNC Server on Ubuntu
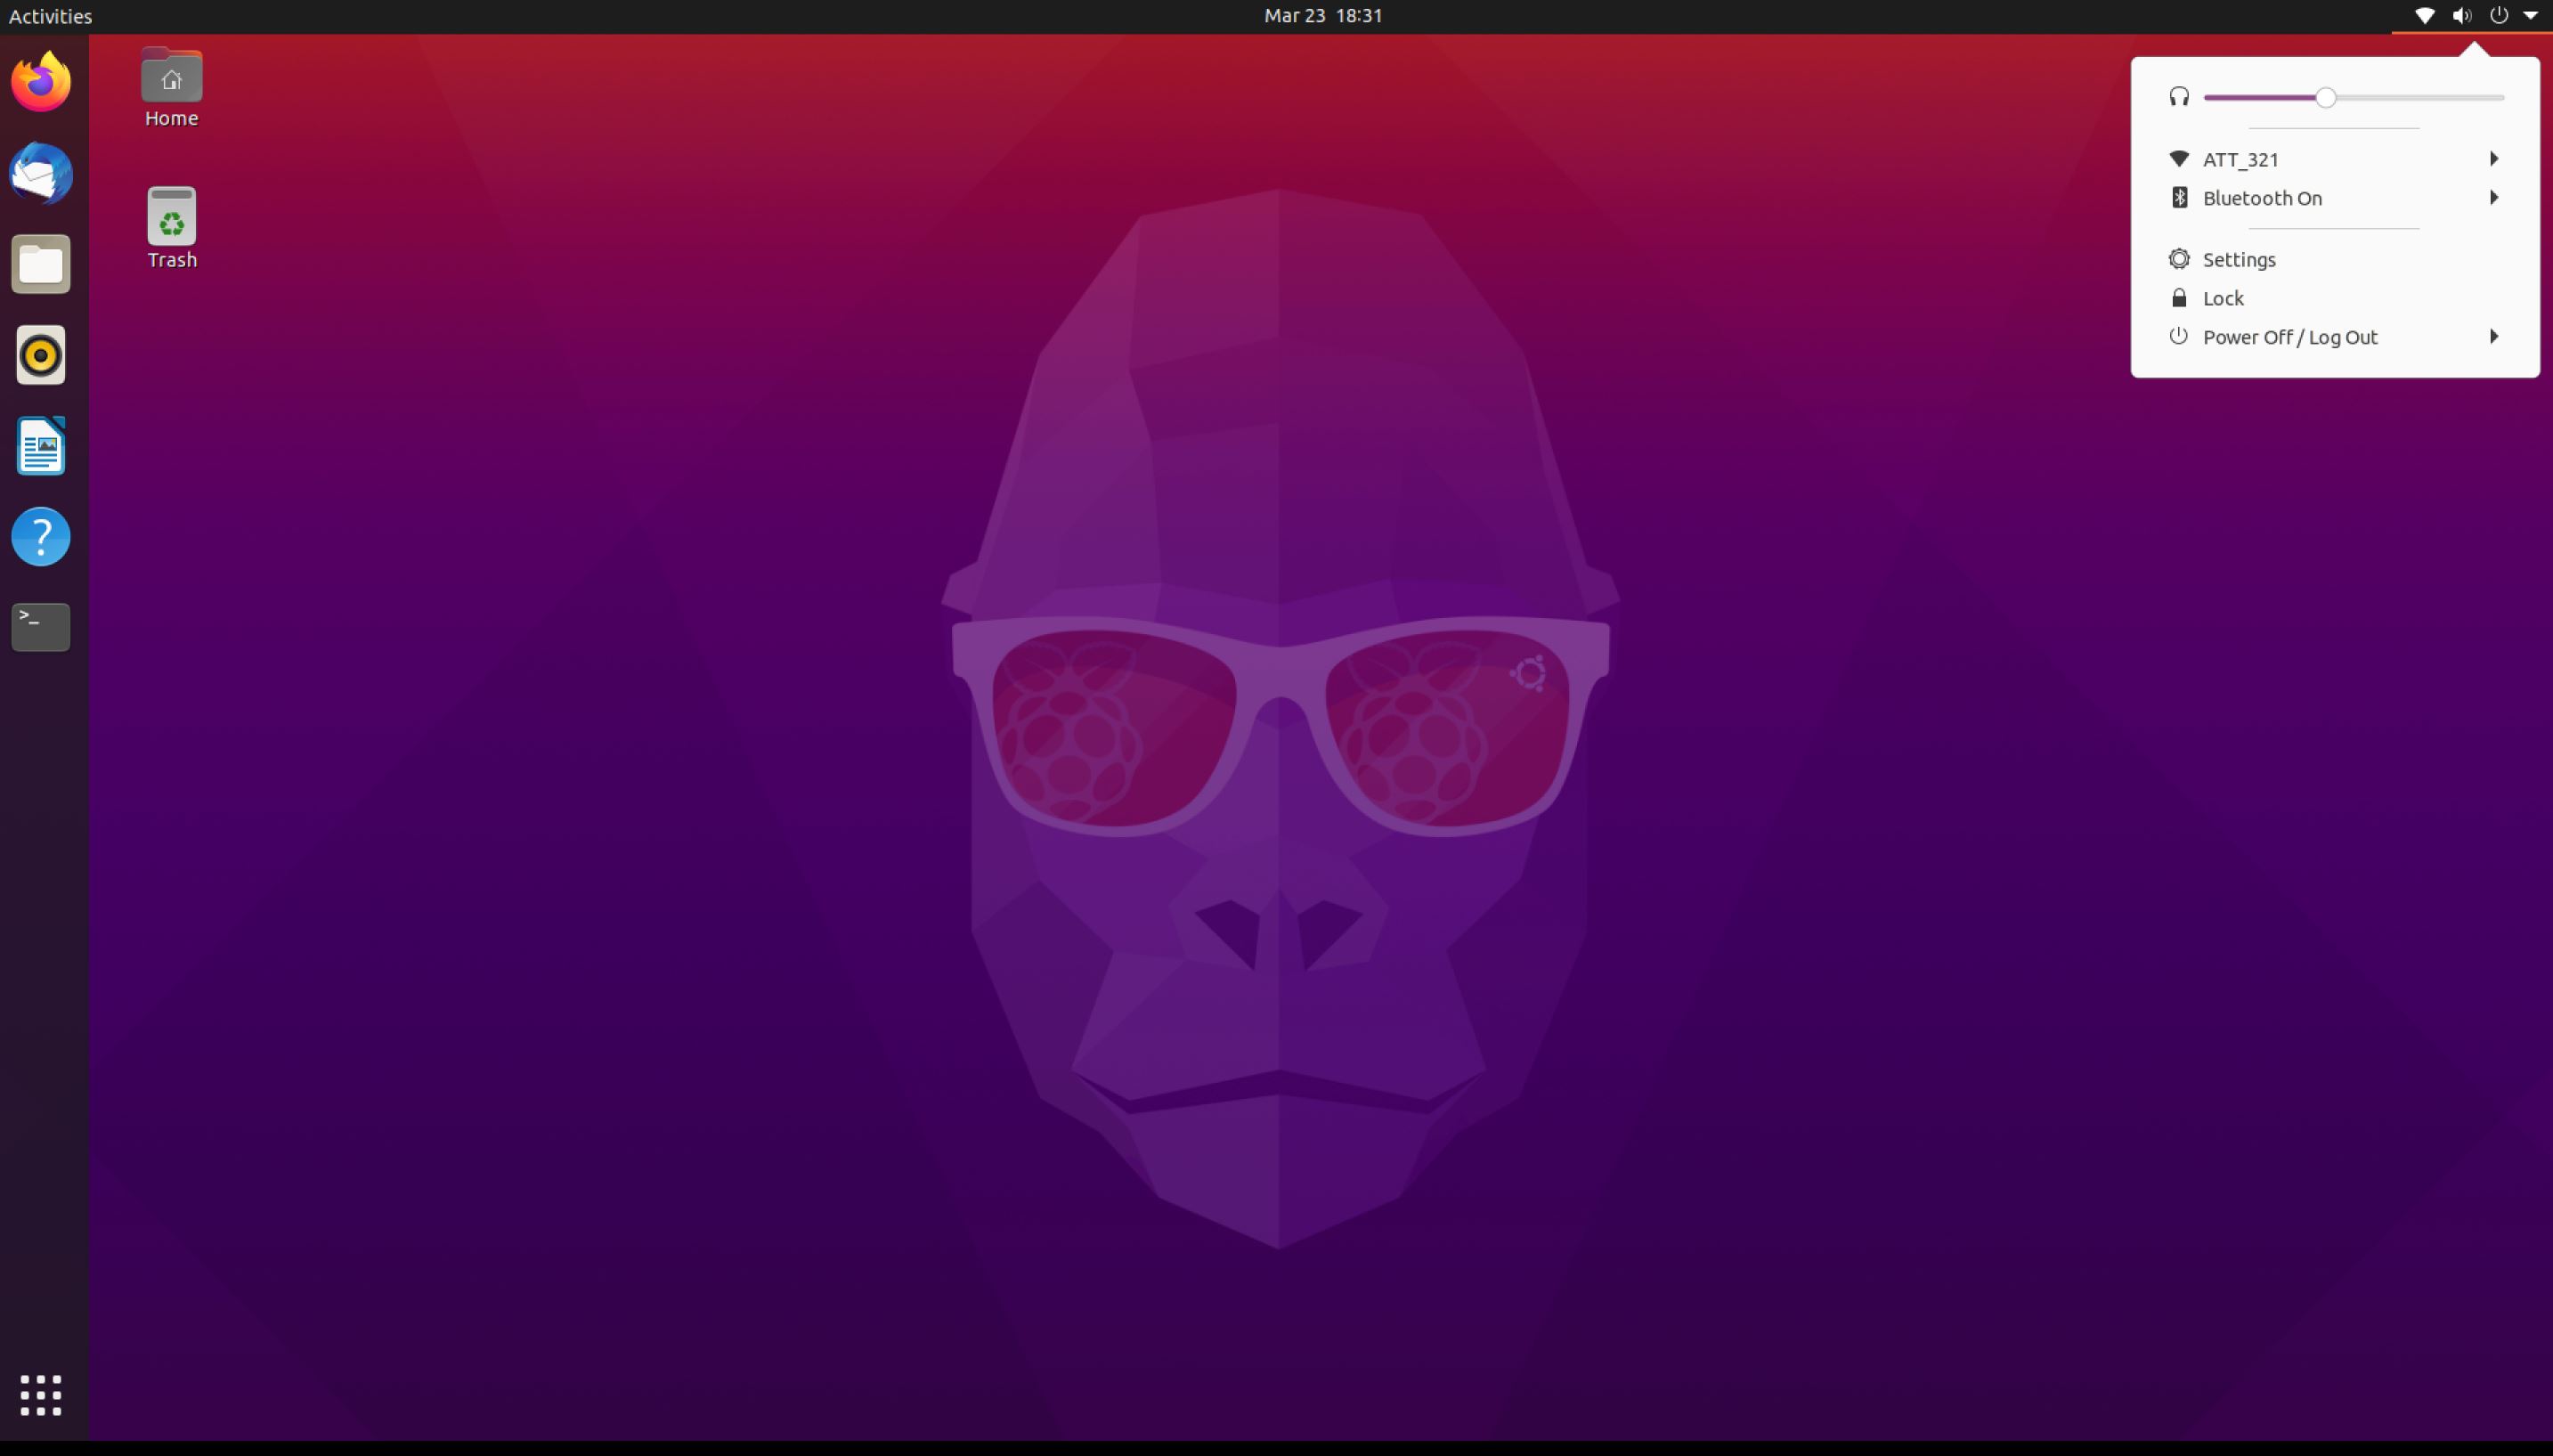
1- Click on settings and then navigate to “Sharing.”
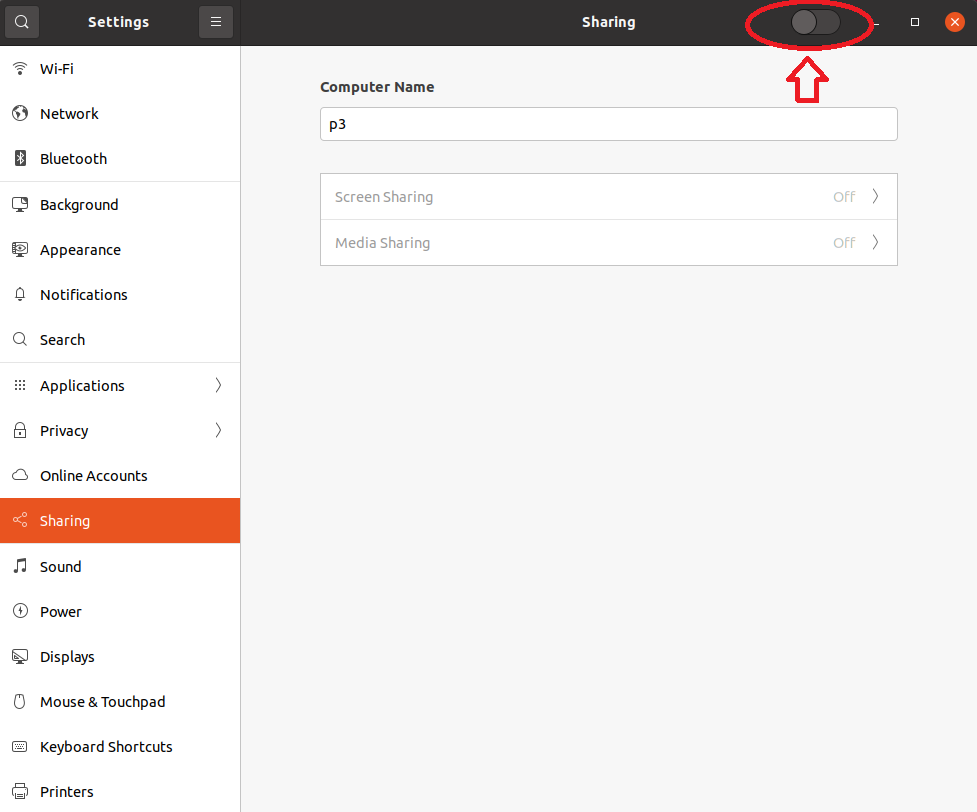
2- On Sharing, toggle sharing to on.
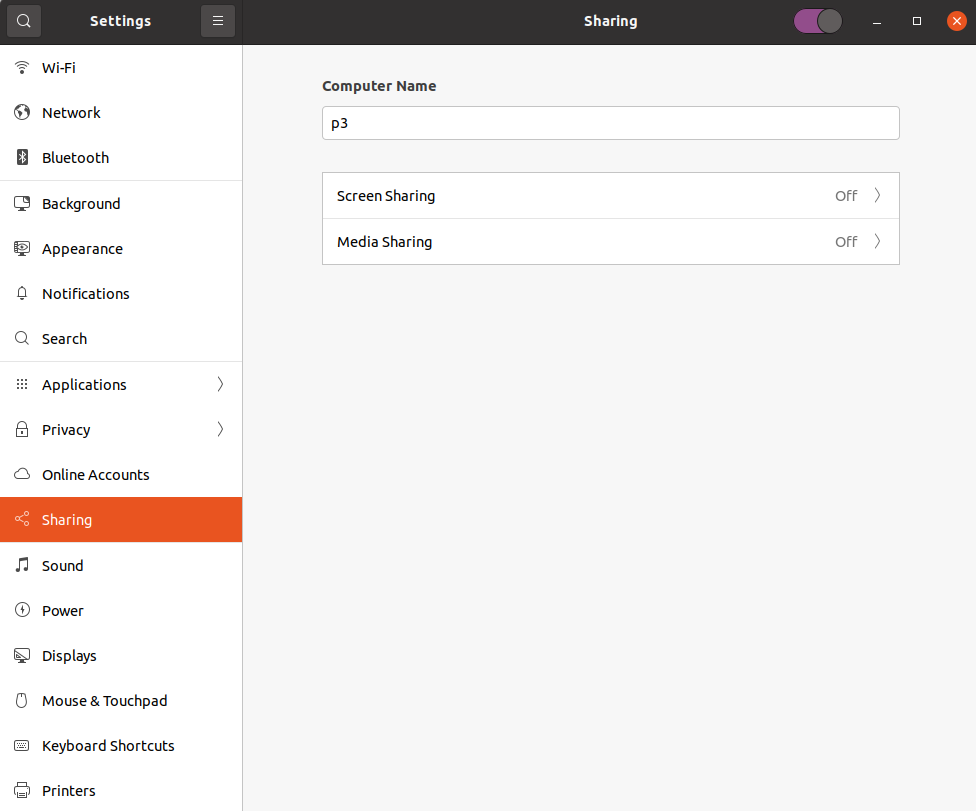
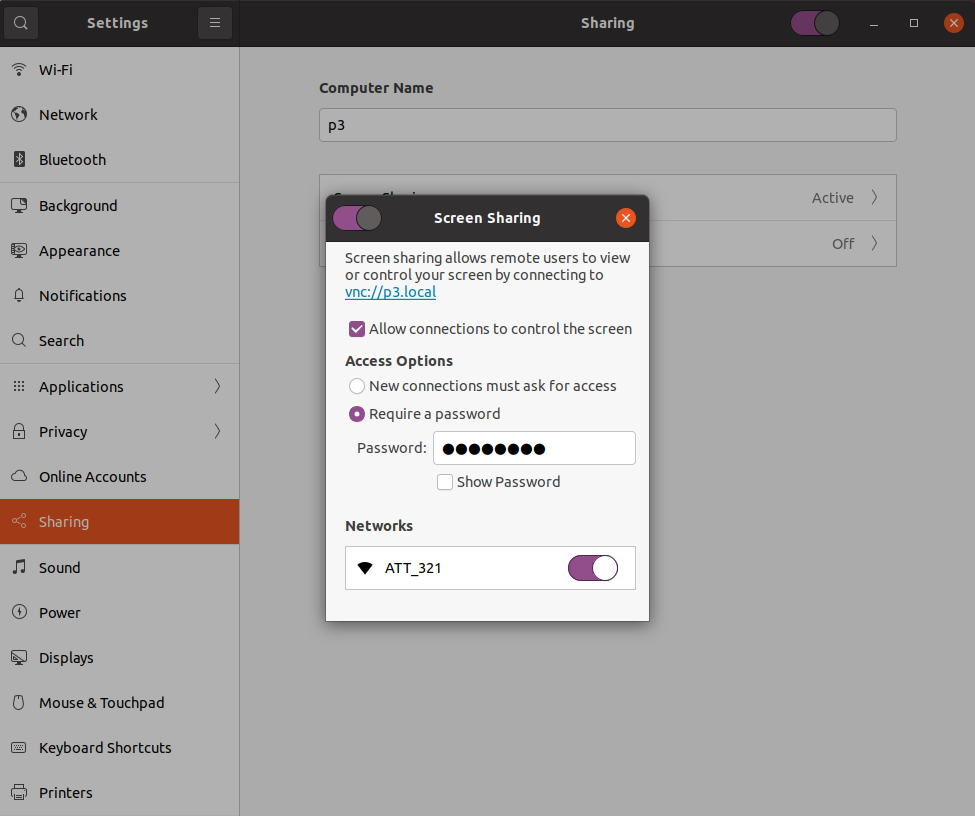
3- To set Vino to request access each time, check “Allow connections to control the screen.”
4- To add a layer of security, select “require a password,” and set a password hard-to-guess.
5- Toggle the “Networks” which you will allow the sharing over. All local networks should show up under “Networks.”
6- Now, we will need to locate our IP address. Let’s open Terminal and type the following command.
ip addr show
or
ip a
or
hostname -I
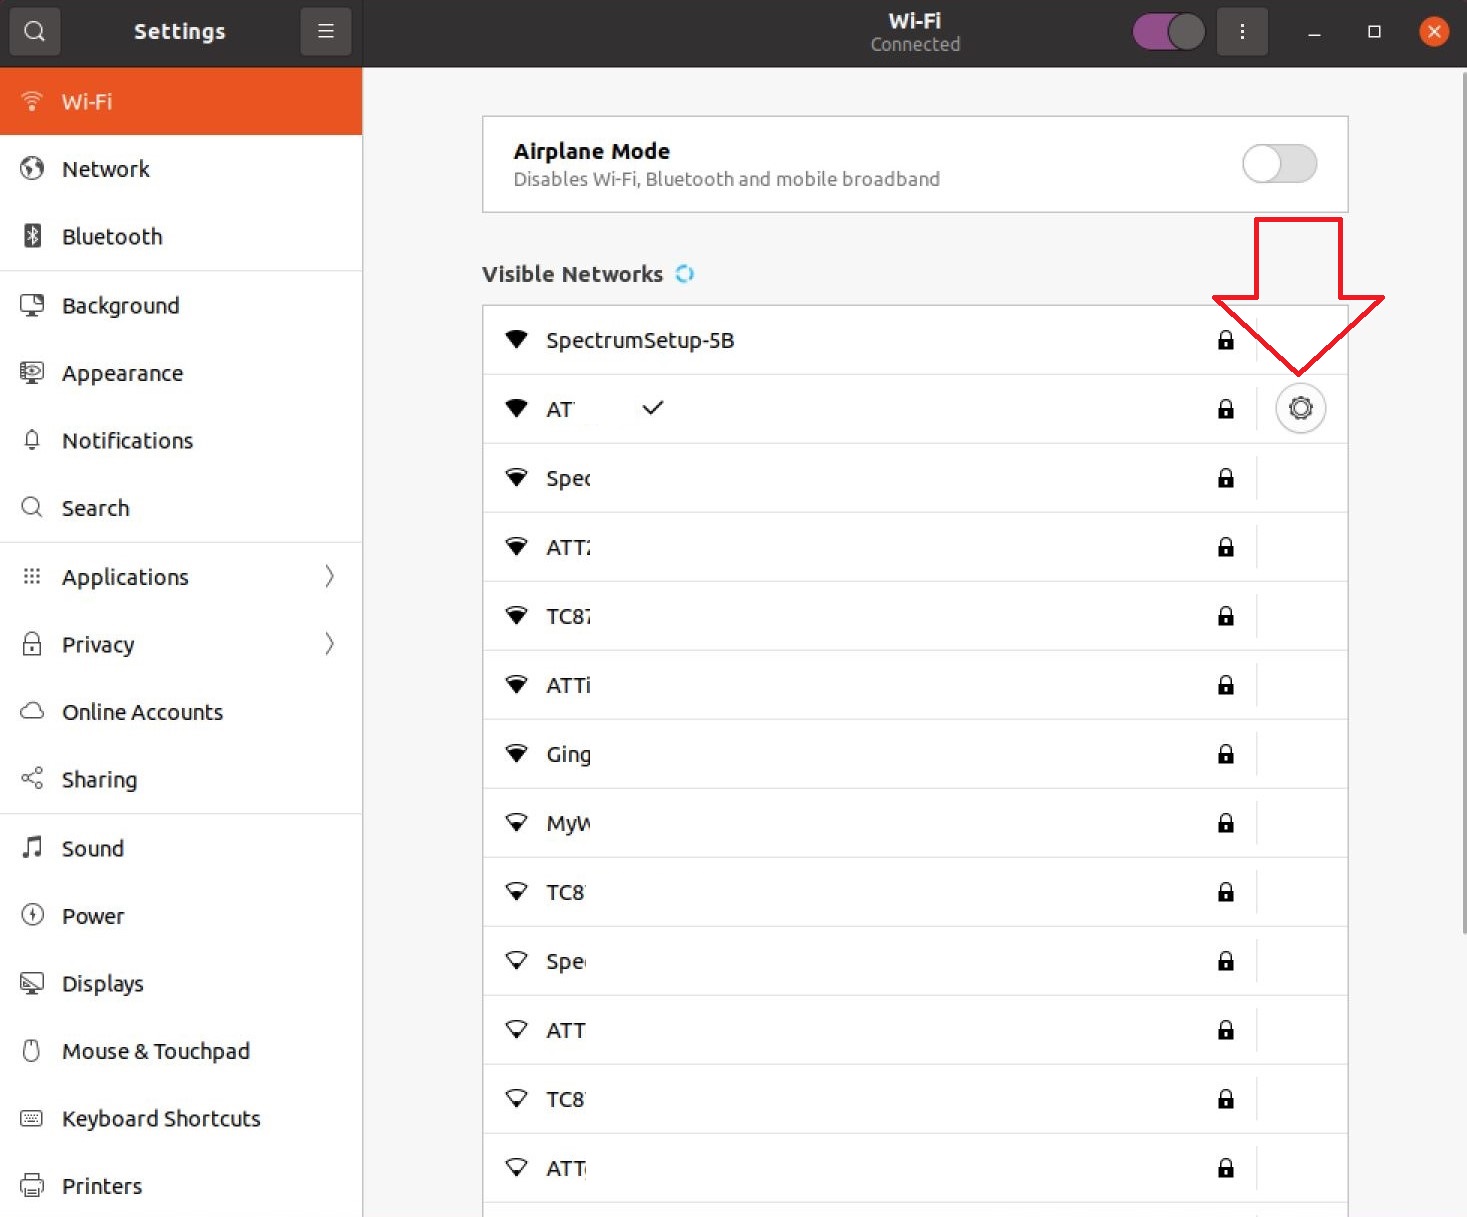
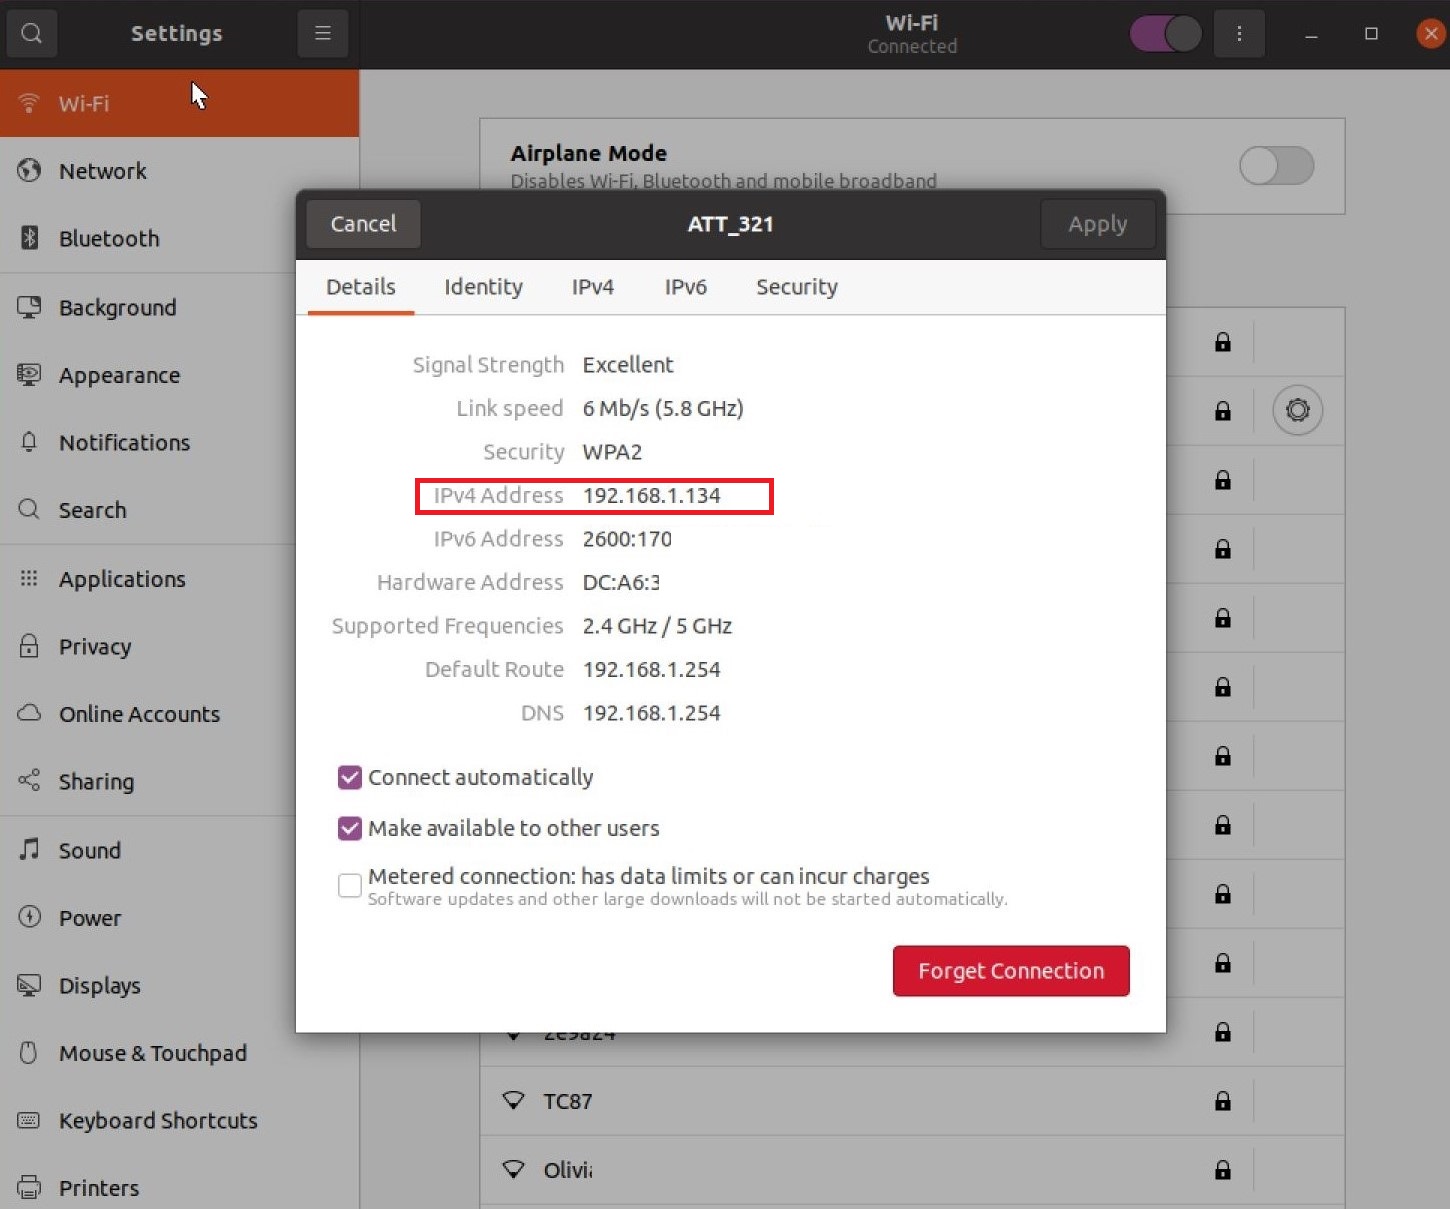
If you prefer a graphical method to obtain the IP address, then we shall go back to settings, Wi-Fi and clock on the settings of the Wi-Fi network.
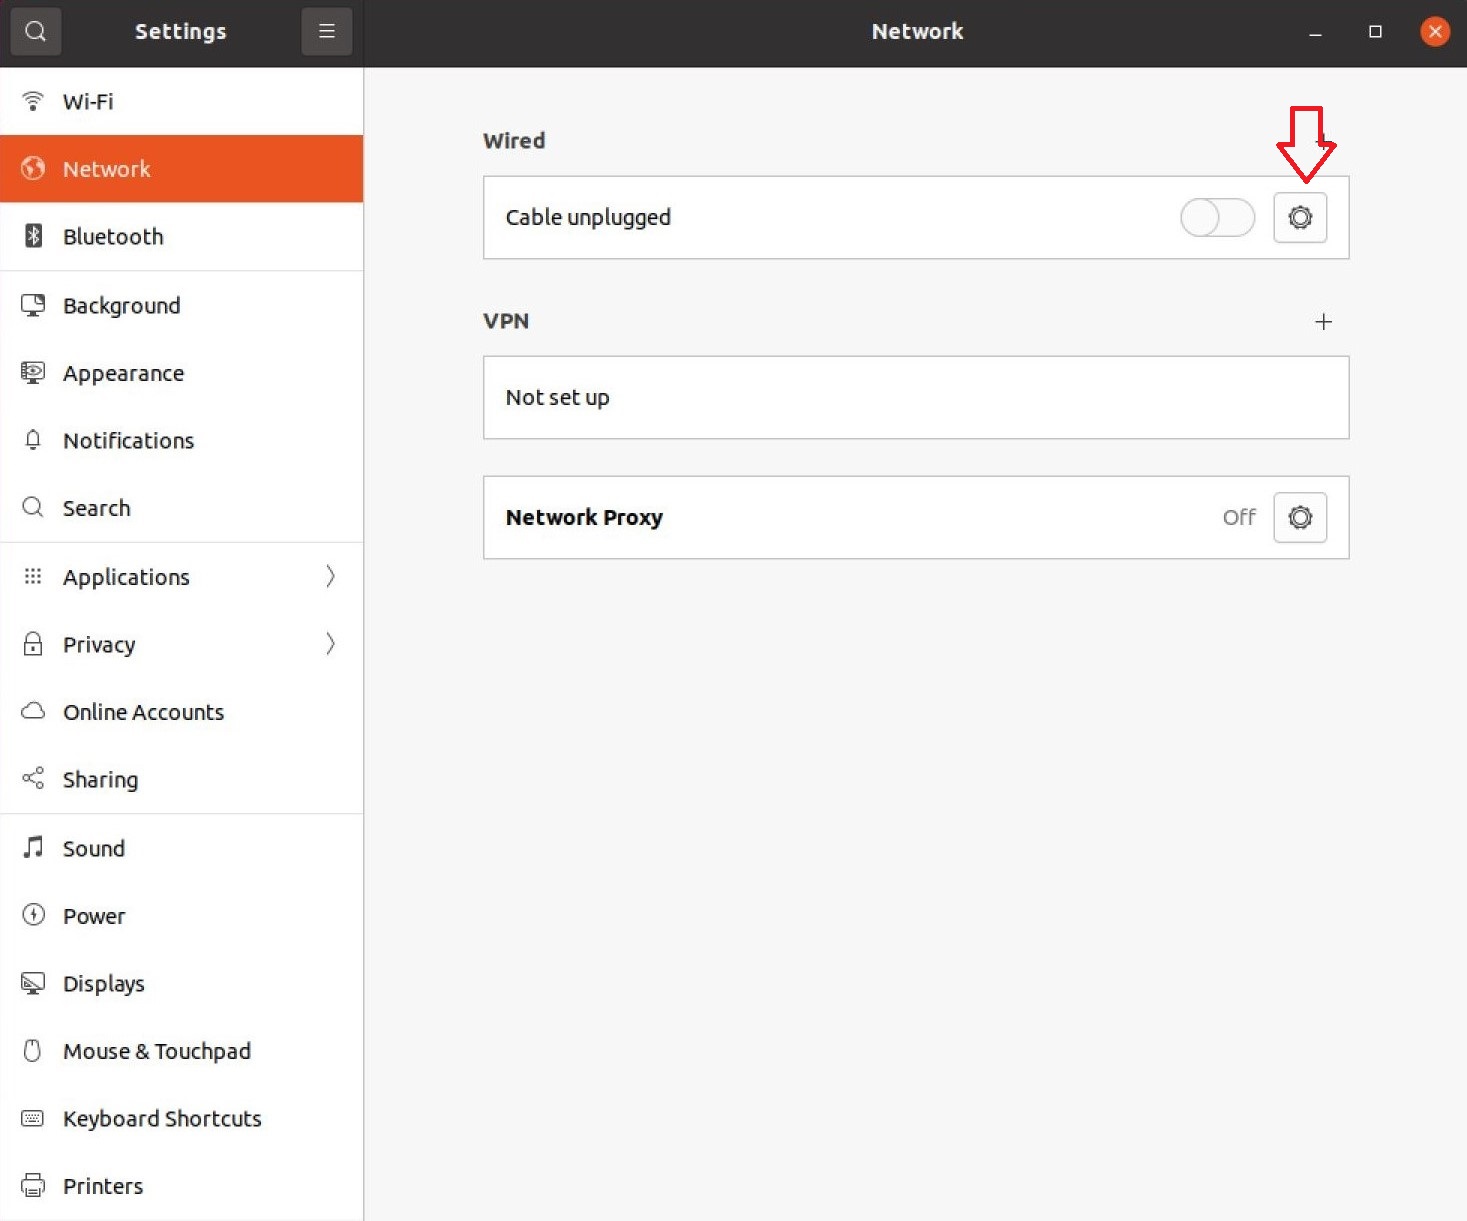
If you have you RPI 4 wire, then you could obtain the IP address from the settings of the wired network.
7- The last step is to download a VNC viewer on your primary device to remote into our RPI 4. I would recommend to download RealVNC as VNC viewer. We will use the IP address of our RPI 4 and port 5900 or 5901 to access our RPI4 remotely.
Conclusion:
This tutorial concludes the activation of Vino the default VNC server of Ubuntu on RPI 4.
