Create a Free Cloudflare Tunnel
Tutorial Scenario:
- Signup for a free Cloudflare for Teams.
- Install and authenticate cloudflared on a Raspberry Pi 4.
- Create a Cloudflare Tunnel.
- Configure the Tunnel details.
- Create DNS records to route traffic to the Tunnel.
- Run and manage the Tunnel.
- Add a Zero Trust policy.
- Run Tunnel as a service.
Step 1: Signup for a free Cloudflare for Teams:
Navigate to Cloudflare for Teams and signup for a free account. Cloudflare has a well documented Get started site to walk you through the setup process. For this step, you don’t need to go beyond signing up.
Step 2: Install and authenticate Cloudflared on a Raspberry Pi 4:
- First of all, if you’d like to check your device’s architecture, run the following command:
uname -a
- Navigate to Install Cloudflared site to download the proper package for your architecture. In my case, I will install the Cloudflared daemon on my RPI-4, which is an arm64 architecture.
arm64 architecture (64-bit Raspberry Pi 4):
sudo wget -O cloudflared https://github.com/cloudflare/cloudflared/releases/latest/download/cloudflared-linux-arm64
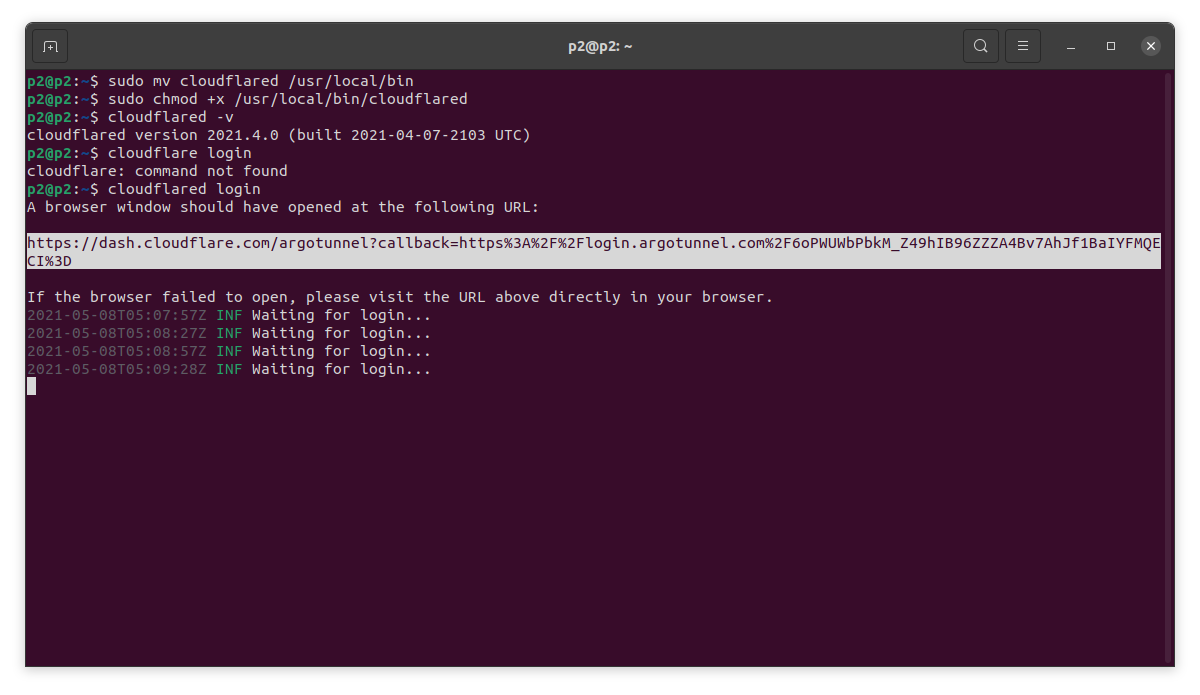
sudo mv cloudflared /usr/local/bin
sudo chmod +x /usr/local/bin/cloudflared
cloudflared -v
AMD64 architecture (Debian/Ubuntu):
sudo wget https://bin.equinox.io/c/VdrWdbjqyF/cloudflared-stable-linux-amd64.deb
sudo apt-get install ./cloudflared-stable-linux-amd64.deb
cloudflared -v
armhf architecture (32-bit Raspberry Pi):
sudo wget https://bin.equinox.io/c/VdrWdbjqyF/cloudflared-stable-linux-arm.tgz
tar -xvzf cloudflared-stable-linux-arm.tgz
sudo cp ./cloudflared /usr/local/bin
sudo chmod +x /usr/local/bin/cloudflared
cloudflared -v
- Once we have installed Cloudflared successfully, we will run the following command to authenticate the cloudflared to our Cloudflare account.
cloudflared login
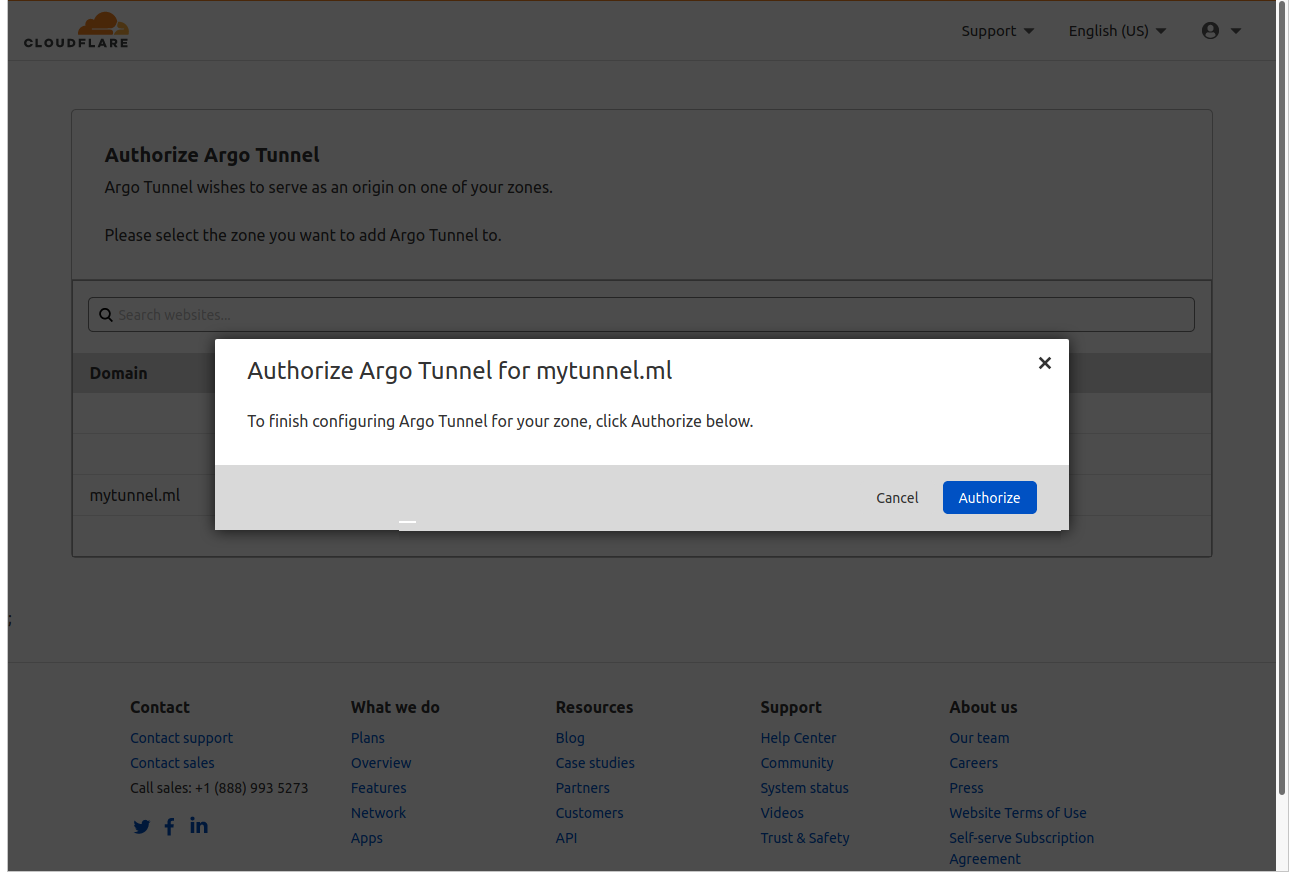
Running the above command will launch the default browser window and prompt you to login to your Cloudflare account. Then, you will be prompted to select a hostname site, which we have create previously in Part 1: Step 2.
As soon as you have chosen your hostname, Cloudflare will download a certificate file to authenticate Cloudflared with Cloudflare’s network.
The cert.pem gives Cloudflared the capabilities to create tunnels and modify DNS records in the account. Once you have created a named Tunnel, you no longer need the cert.pem file to run that Tunnel and connect it to Cloudflare’s network. However, hte cert.pem file is still required to create additional Tunnels, list existing tunnels, manage DNS records, or delete Tunnels.
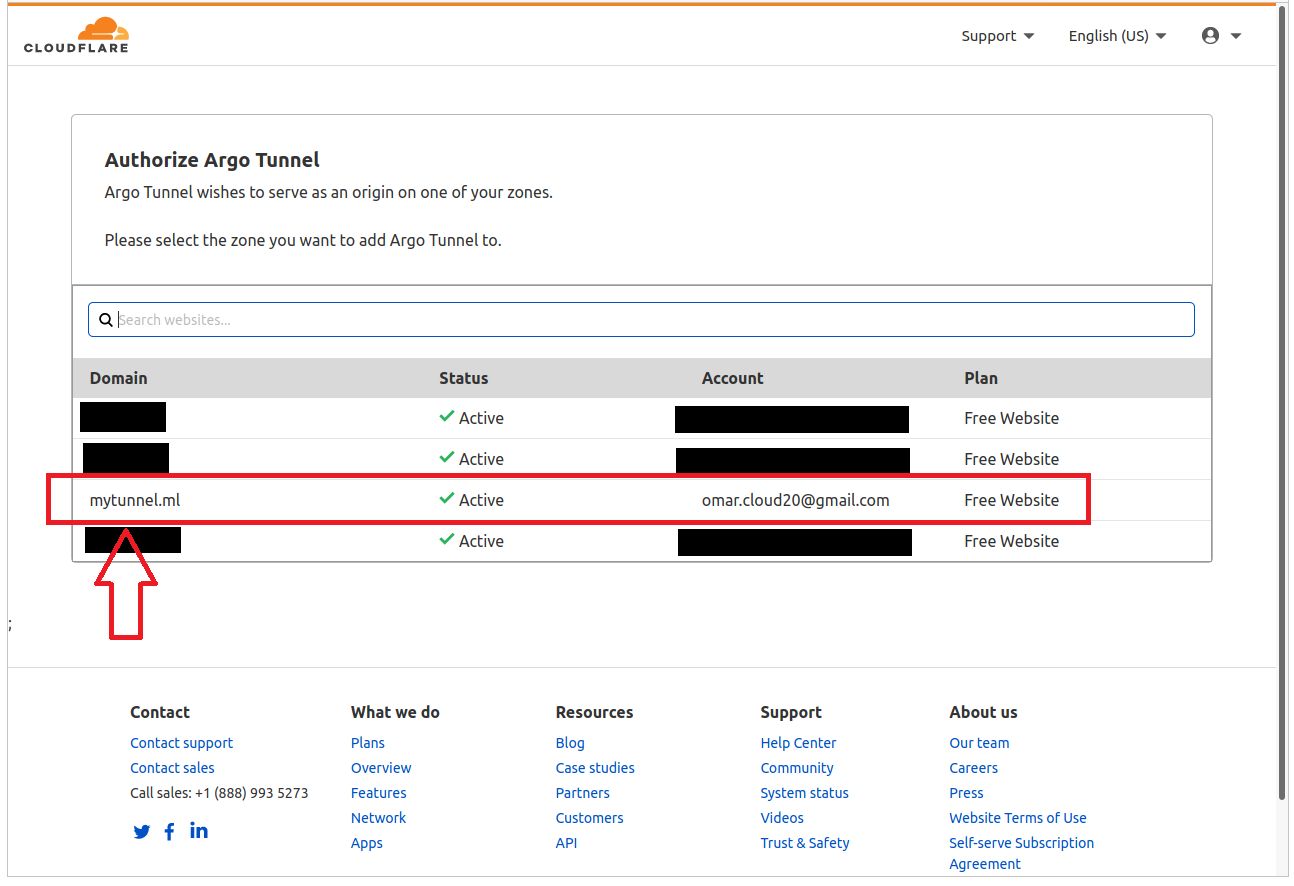
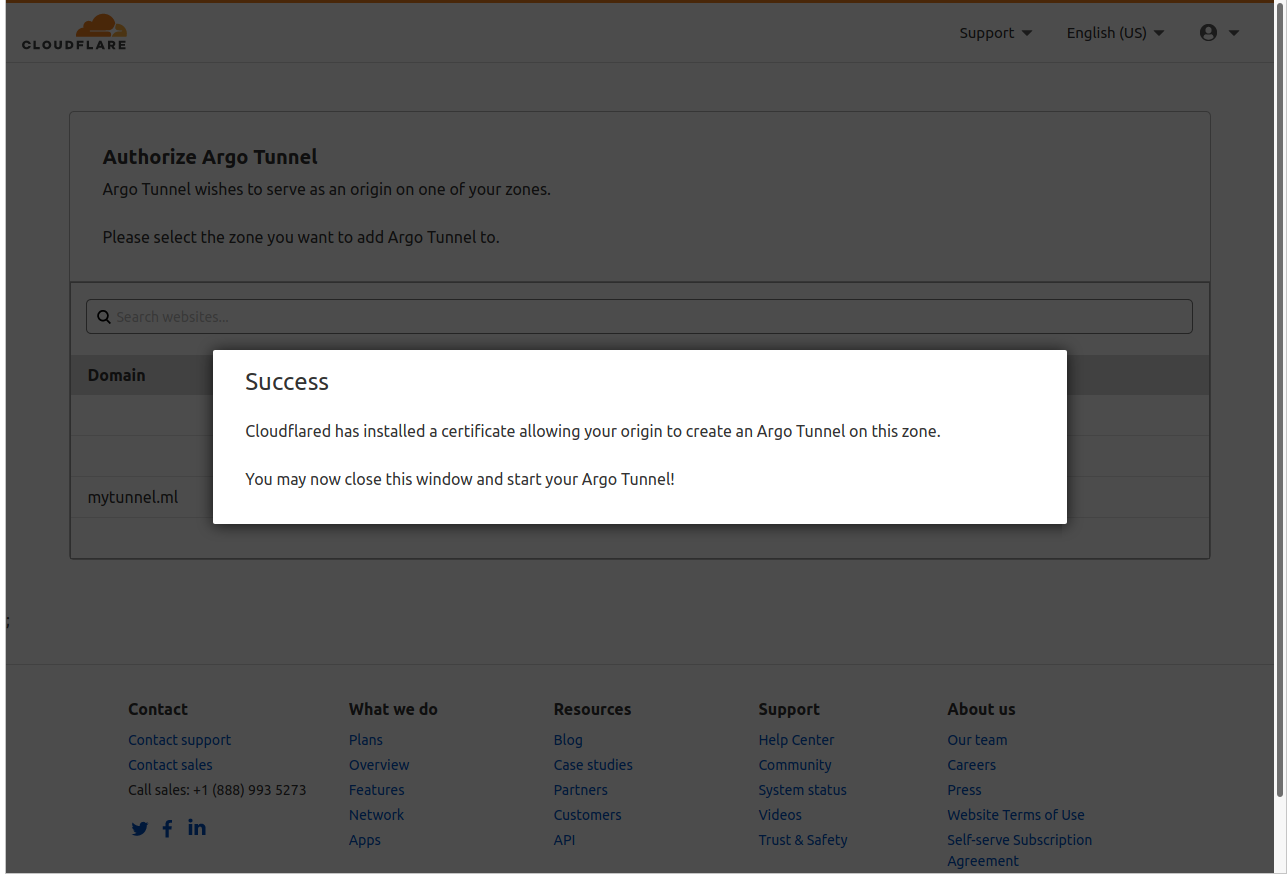
Once authorization is completed successfully, your cert.pem will be download to the default directory as shown below.
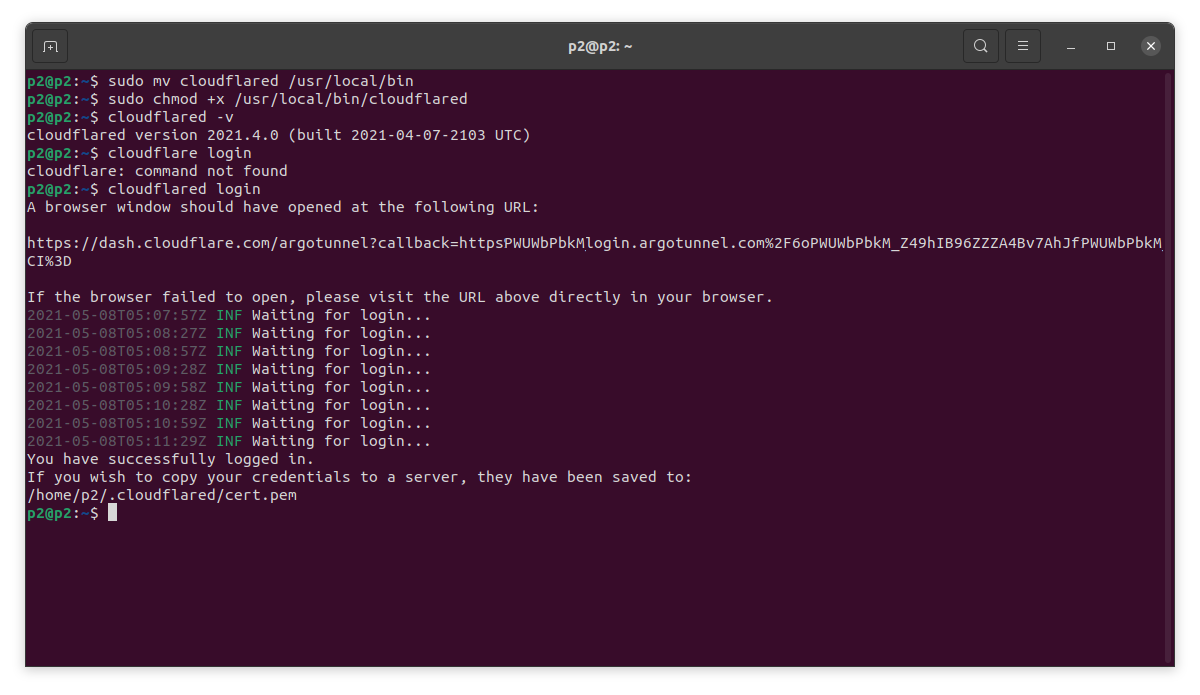
If you’re running a headless server (no monitor or keyboard), you could copy the authentication URL and paste it in a browser manually.
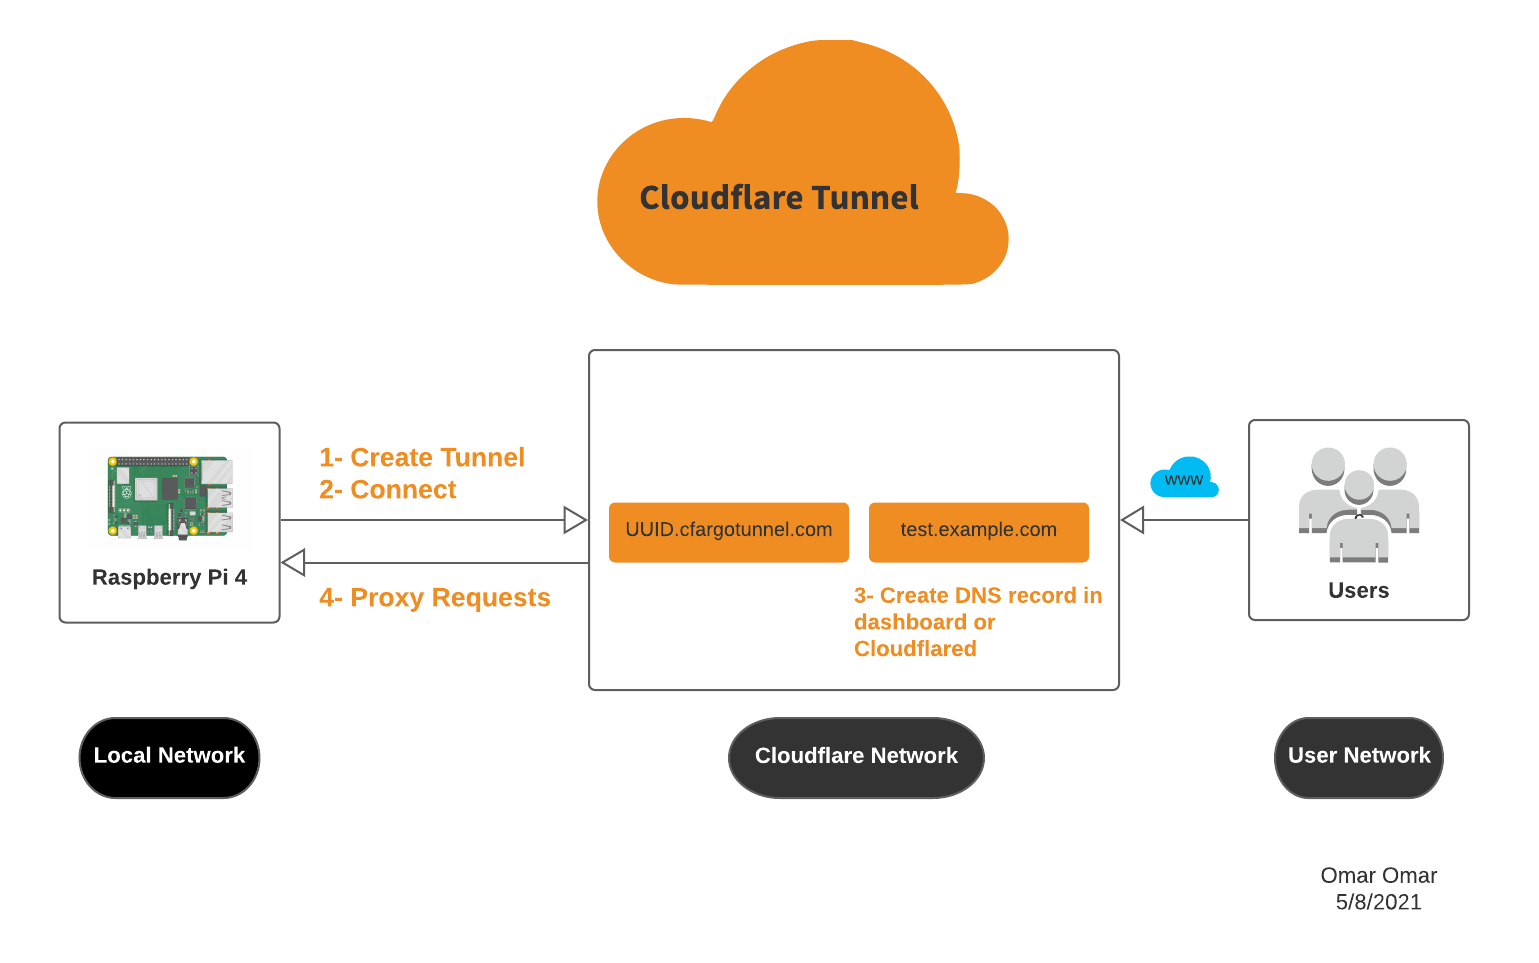
The credentials file contains a secret scoped to the specific Tunnel UUID which establishes a connection from cloudflared to Cloudflare’s network. cloudflared operates like a client and establishes a TLS connection from your infrastructure to Cloudflare’s edge.
Step 3: Create a Cloudflare Tunnel:
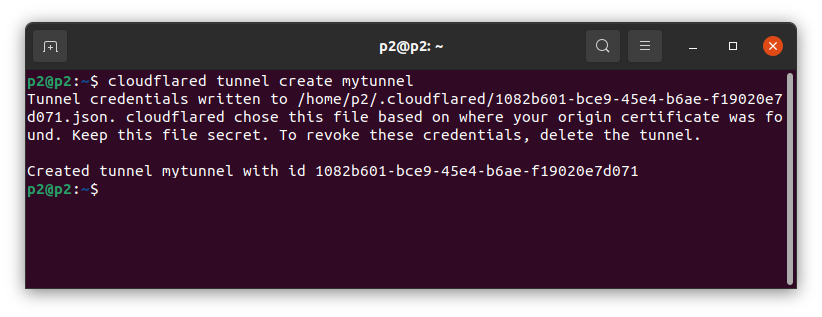
- Now, we are ready to create a Cloudflare Tunnel that will connect Cloudflared to Cloudflare’s edge. Utilizing the following command will create a Tunnel with tht name and generate an ID credentials file for it.
Prior to creating the Tunnel, you may need to exit the Command Line (CL). Next, let create the Tunnel.
Note: replace <NAME> with any name of your choosing for the Tunnel.
cloudflared tunnel create <NAME>
Once the Tunnel is created, a credential file is generated. It’s a JSON file that has the Universally Unique Identifier (UUID) assigned for the Tunnel.
Note: although the Tunnel is created, the connection is not established yet.
Step 4: Configure the Tunnel details:
Although we can configure the Tunnel run in an add hoc mode, we will go over creating a configuring the Tunnel to automatically run it as a service.
Cloudflare utilizes a configuration file to determine how to route traffic. The configuration file contains keys and values, which is written in YAML syntax. You may need to modify the following keys and values to meet your configuration file requirements:
| Keys | Values |
|---|---|
| tunnel | Tunnel name or Tunnel UUID |
| credentials-file | location of credentials file (JSON) |
| hostname | subdomain.hostname.xxx (example, test.example.com) |
| service | url to local application - http://localhost:8000 |
| service | http_status:404 |
| port of your app | 80 |
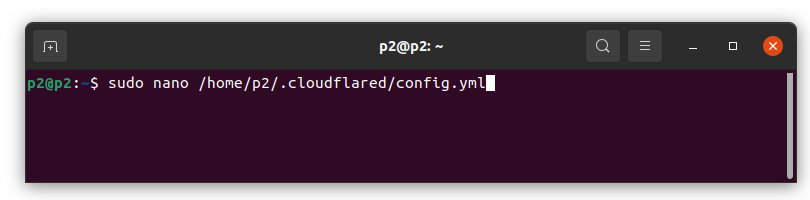
By default, on Linux systems, Tunnel expects to find the configuration file in ~/.cloudflared, /etc/cloudflared and /usr/local/etc/cloudflared in that order. Let’s create our config file and save in the default expected directory for this tutorial.
sudo nano ~/.cloudflared/config.yml
Or,
sudo nano home/<username>/.cloudflared/config.yml
Then, we will paste our keys and values as shown below:
tunnel: 1082b601-bce9-45e4-b6ae-f19020e7d071
credentials-file: /root/.cloudflared/1082b601-bce9-45e4-b6ae-f19020e7d071.json

ingress:
  - hostname: test.mytunnel.ml
    service: http://localhost:80
  - service: http_status:404
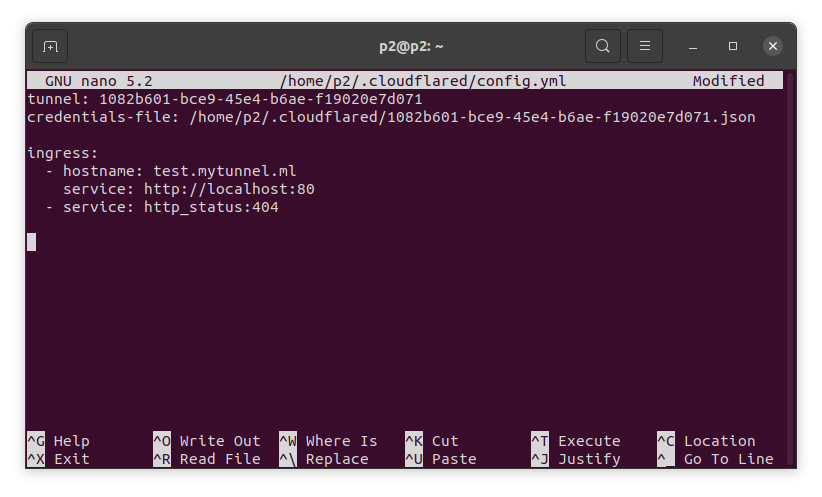
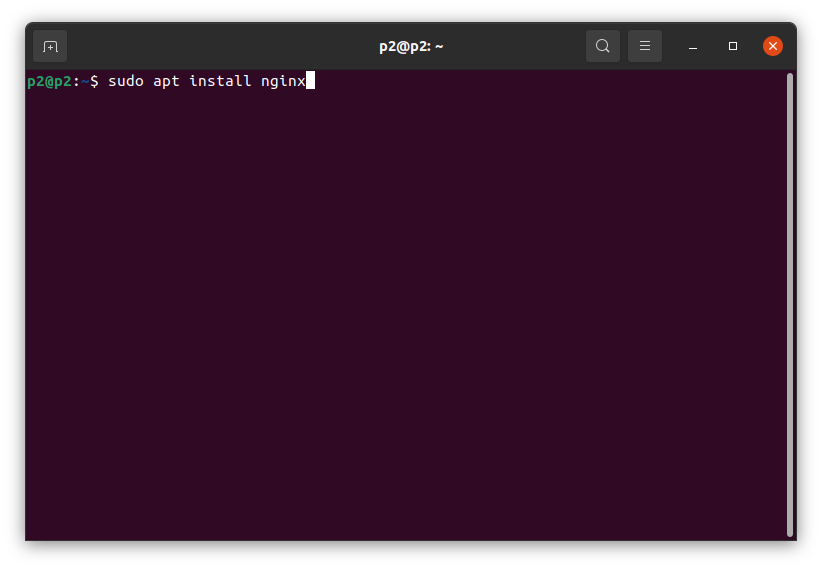
If you don’t have any application ready to test the Tunnel, I’d suggest installing NGINX web server and port mapping it to port 80 as I’ve done in the configuration file.
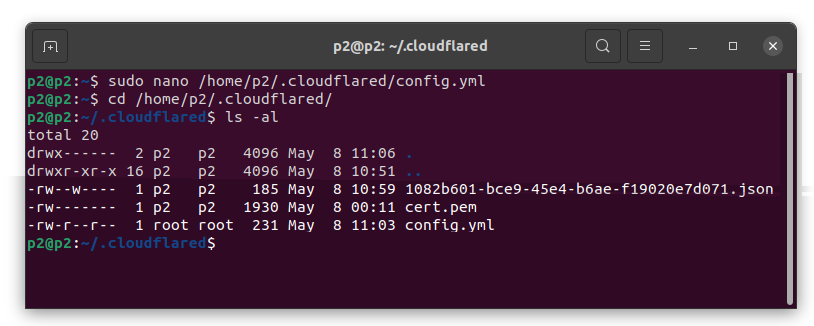
Let’s make sure that we have all files in this directory:
ls -al
Now, we have configured all required files to run the Tunnel in the default directory.
Step 5: Create DNS records to route traffic to the Tunnel:
Cloudflare can route traffic to our Tunnel connection using a DNS record or a loud balancer. We will configure a DNS CNAME record to point to our Tunnel subdomain. There are two ways to acheive this mission:
A. Manually: navigate to the DNS tab on Cloudflare Dashboard, create a new CNAME record and add your subdomain of your Tunnel as follows:
- Type: CNAME
- Name: any subdomain name of your choosing.
- Target: consists of two parts: <UUID> and <cfargotunnel.com> such as, <UUID.cfargotunnel.com>
B. Programmatically: run the following command from the command line. This command will generate a CNAME record that points to the subdomain of a specific Tunnel. The result is the same as creating a CNAME record from the dashboard as shown in step A.
cloudflared tunnel route dns <UUID or NAME> test.example.com
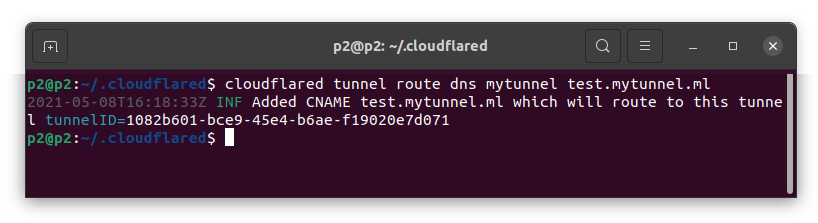
Note: unlike the previous Argo Tunnel architecture, this DNS record will not be deleted if the Tunnel disconnects.
Step 6: Run and manage the Tunnel:
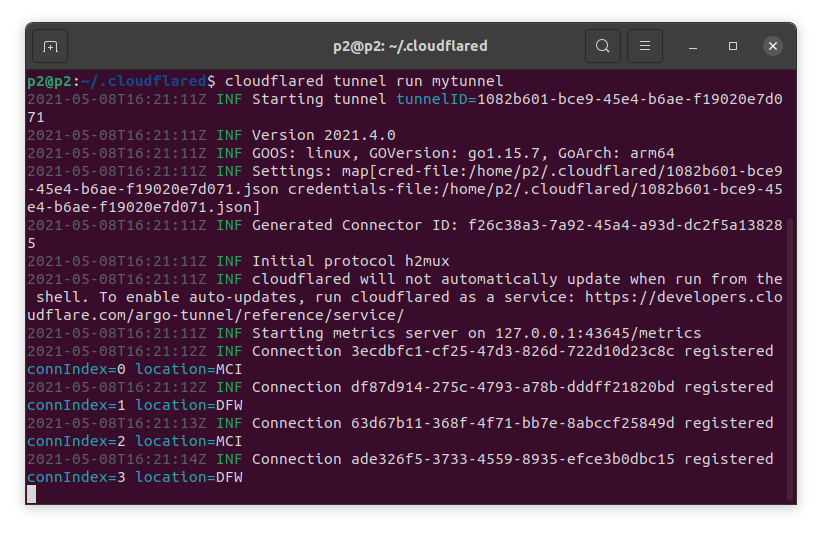
The run command will connect cloudflared to Cloudflare’s edge network using the configuration created in step 4. We will not specify a configuration file location so Cloudflared retrieves it from the default location, which is ~/.cloudflared/config.yml
cloudflared tunnel run <UUID> or <Tunnel Name>
If the config.yml file is not placed in the default directory, we need to pinpoint to its location to run the Tunnel:
cloudflared tunnel --config path/config.yml run <NAME> or <UUID>
We can review the list of Tunnels we have created by running the following command:
Cloudflared Commands:
| Functions | Commands |
|---|---|
| Create a Tunnel | cloudflared tunnel run <NAME> |
| List Tunnels | cloudflared tunnel list |
| Stop Tunnel | cloudflared tunnel stop <NAME> |
| Restart Tunnel | cloudflared tunnel restart <NAME> |
| Delete Tunnel | cloudflared tunnel delete <NAME> |
| Force Delete Tunnel | cloudflared tunnel delete -f <NAME> |
| Show each Cloudflared info | cloudflared tunnel info <NAME> |
Stopping Cloudflared will not delete the Tunnel or the DNS record created. Although Tunnel deletes DNS records after 24-48 hours of a Tunnel being unregistered, it does not delete TLS certificates on your behalf once the Tunnel is shut down. If you want to clean up a Tunnel you’ve shut down, you can delete DNS records in the DNS editor and revoke TLS certificates in the Origin Certificates section of the SSL/TLS tab of the Cloudflare dashboard.
To update Cloudflared:
sudo cloudflared update
To uninstall Cloudflared
sudo cloudflared service uninstall
Step 7: Add a Zero Trust policy:
Now, we are ready to head back to Teams dashboard to configure our application and create a Zero Trust Policy.
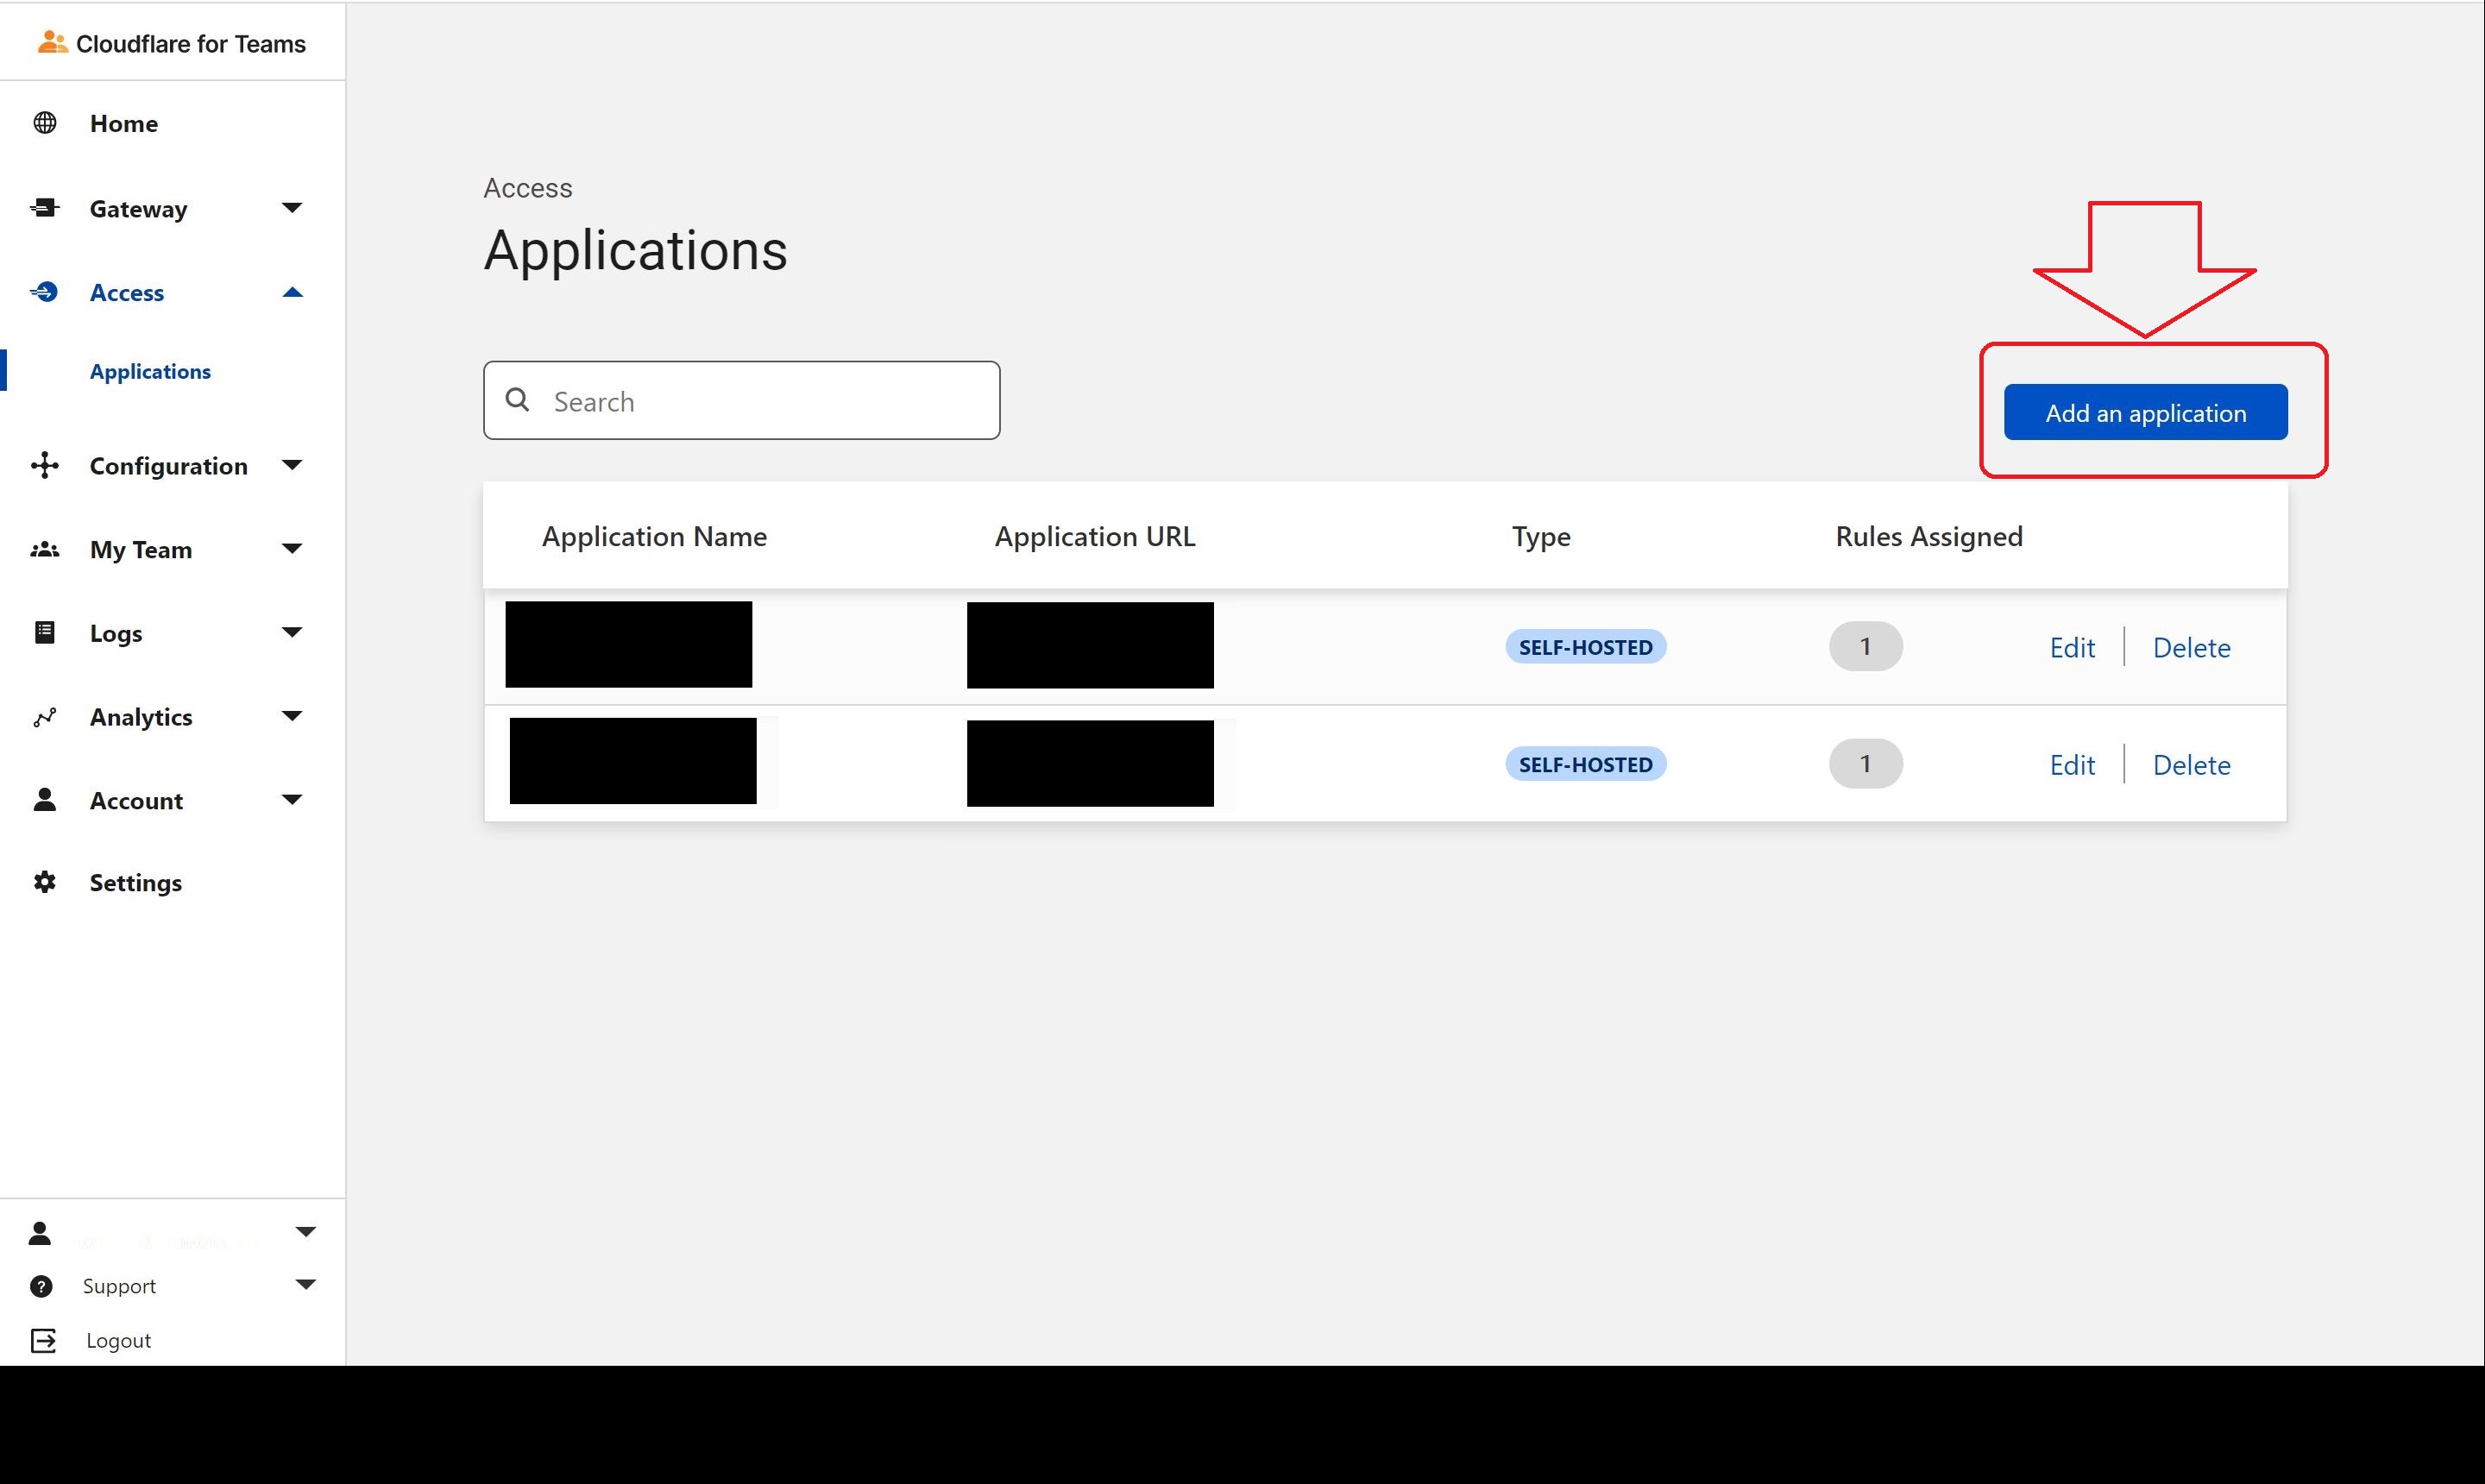
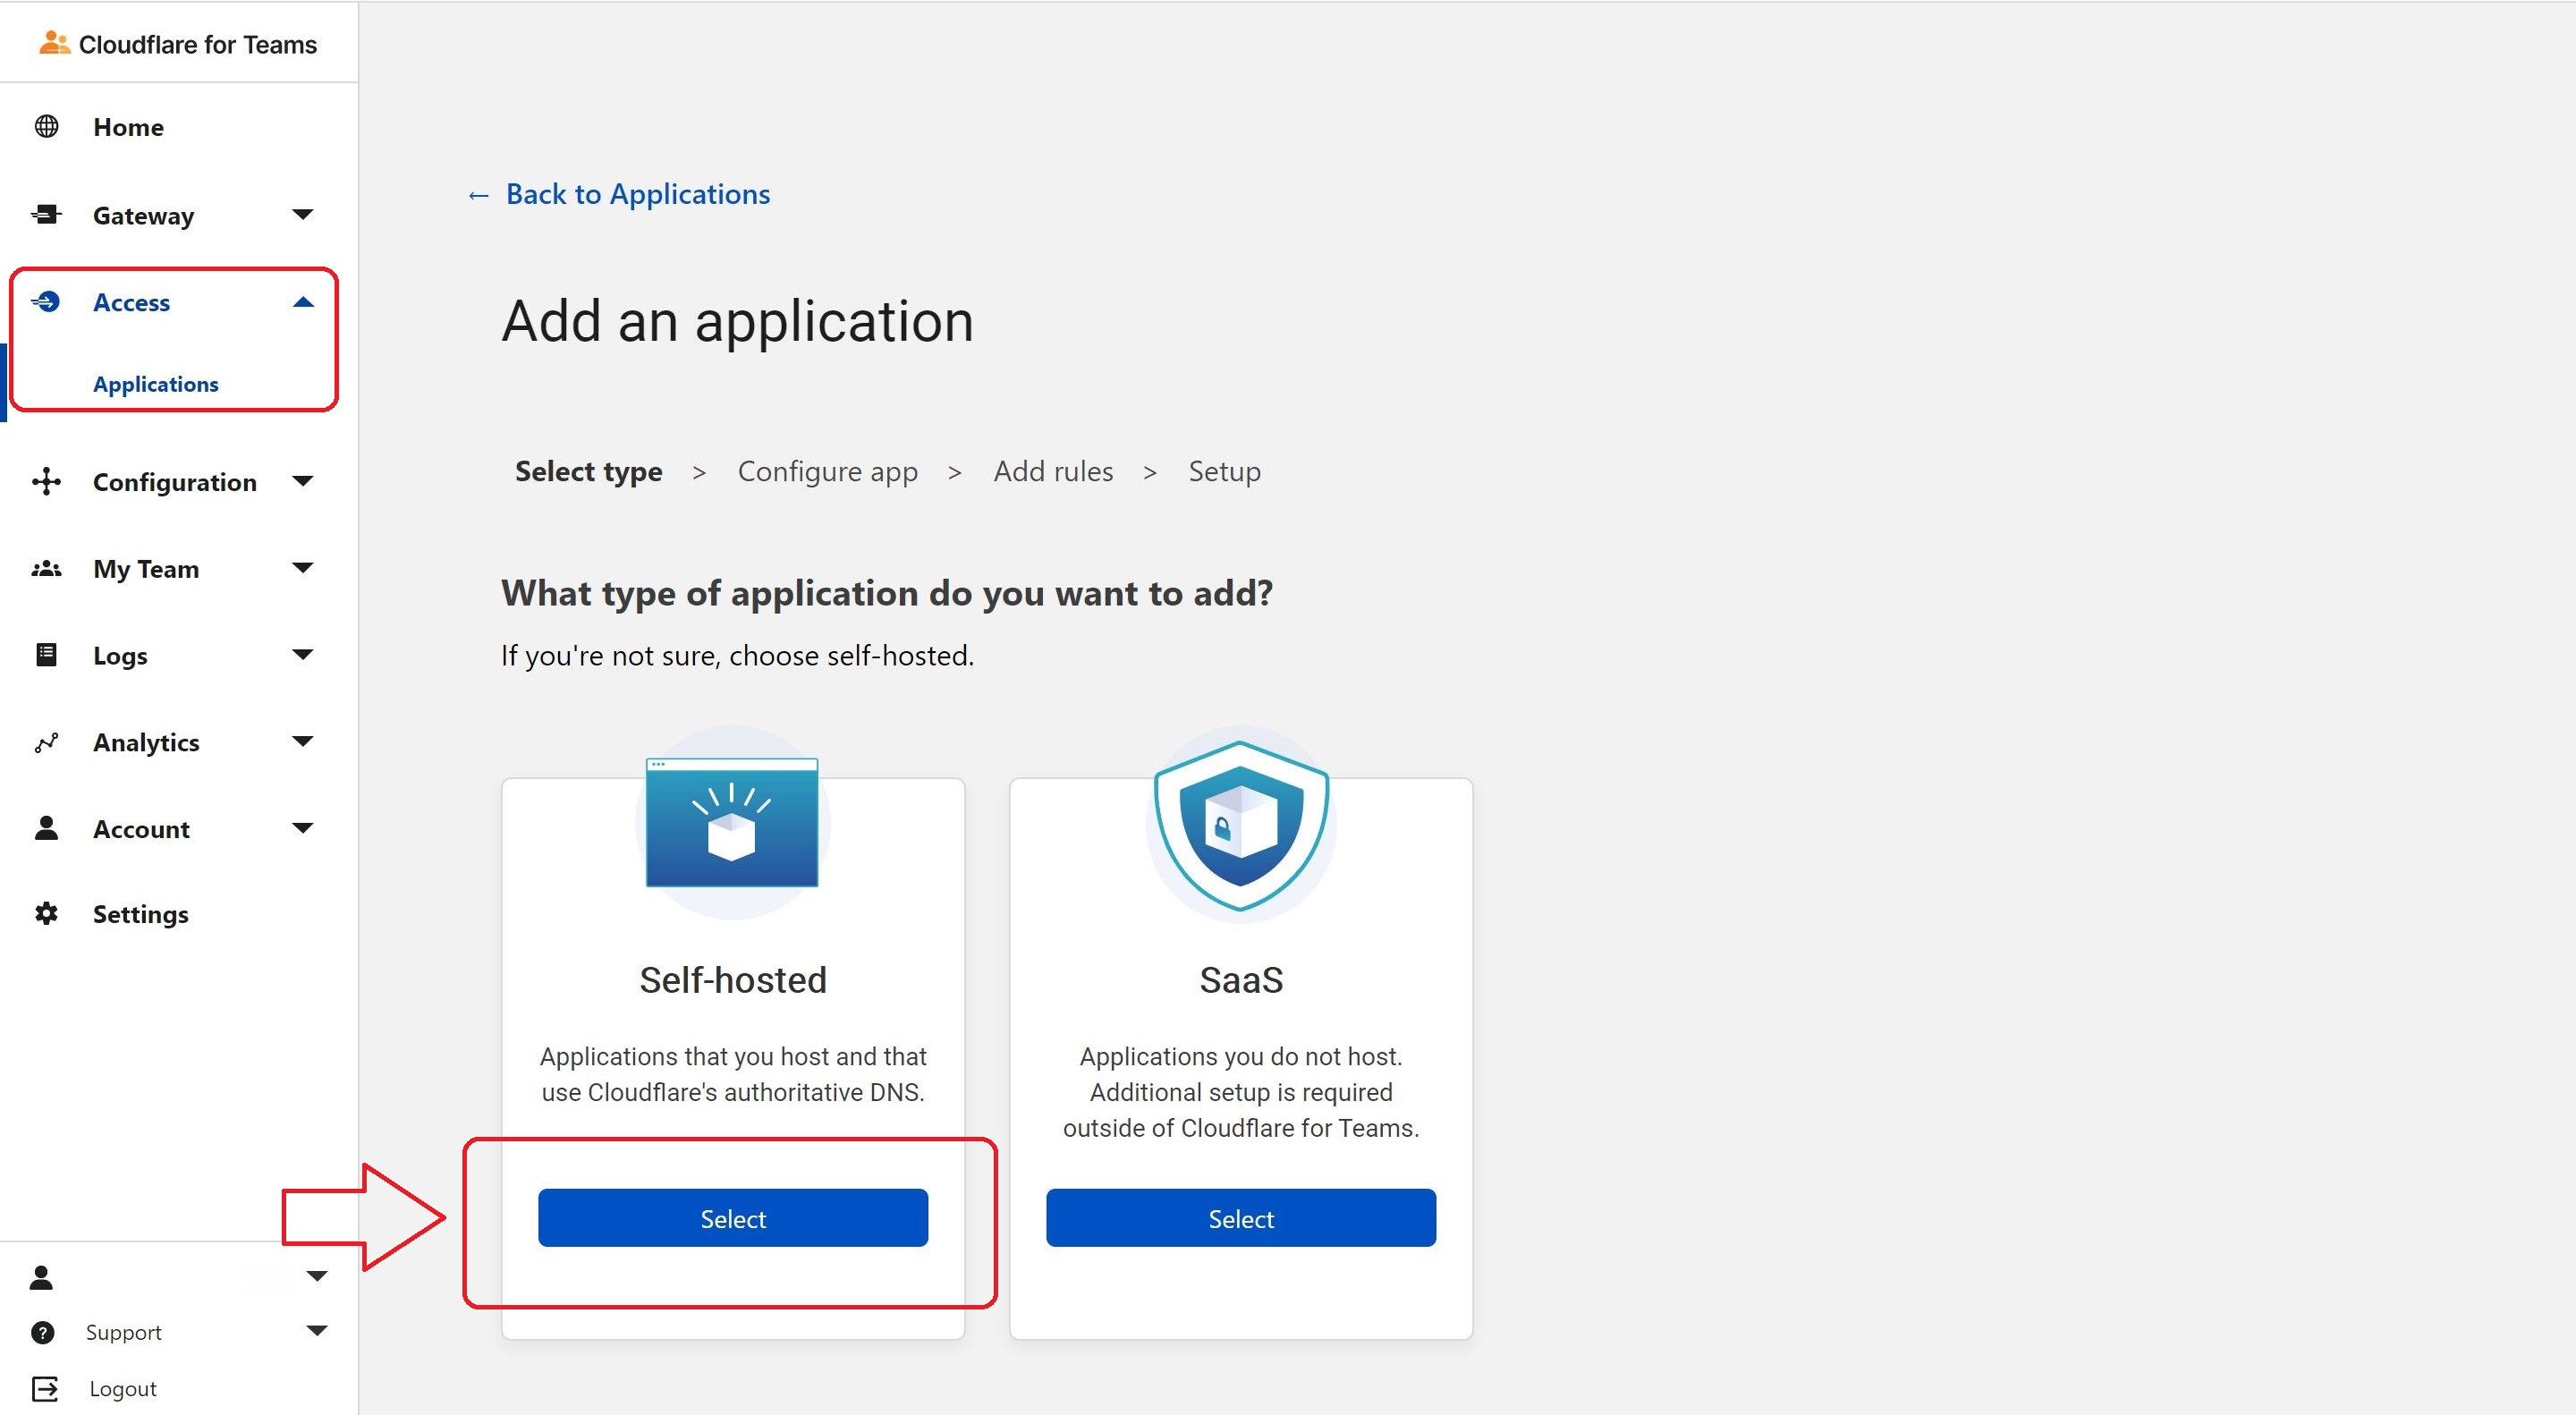
- On Teams dashboard, navigate to the Application tab and click on Add an application.
- Select Self-hosted.
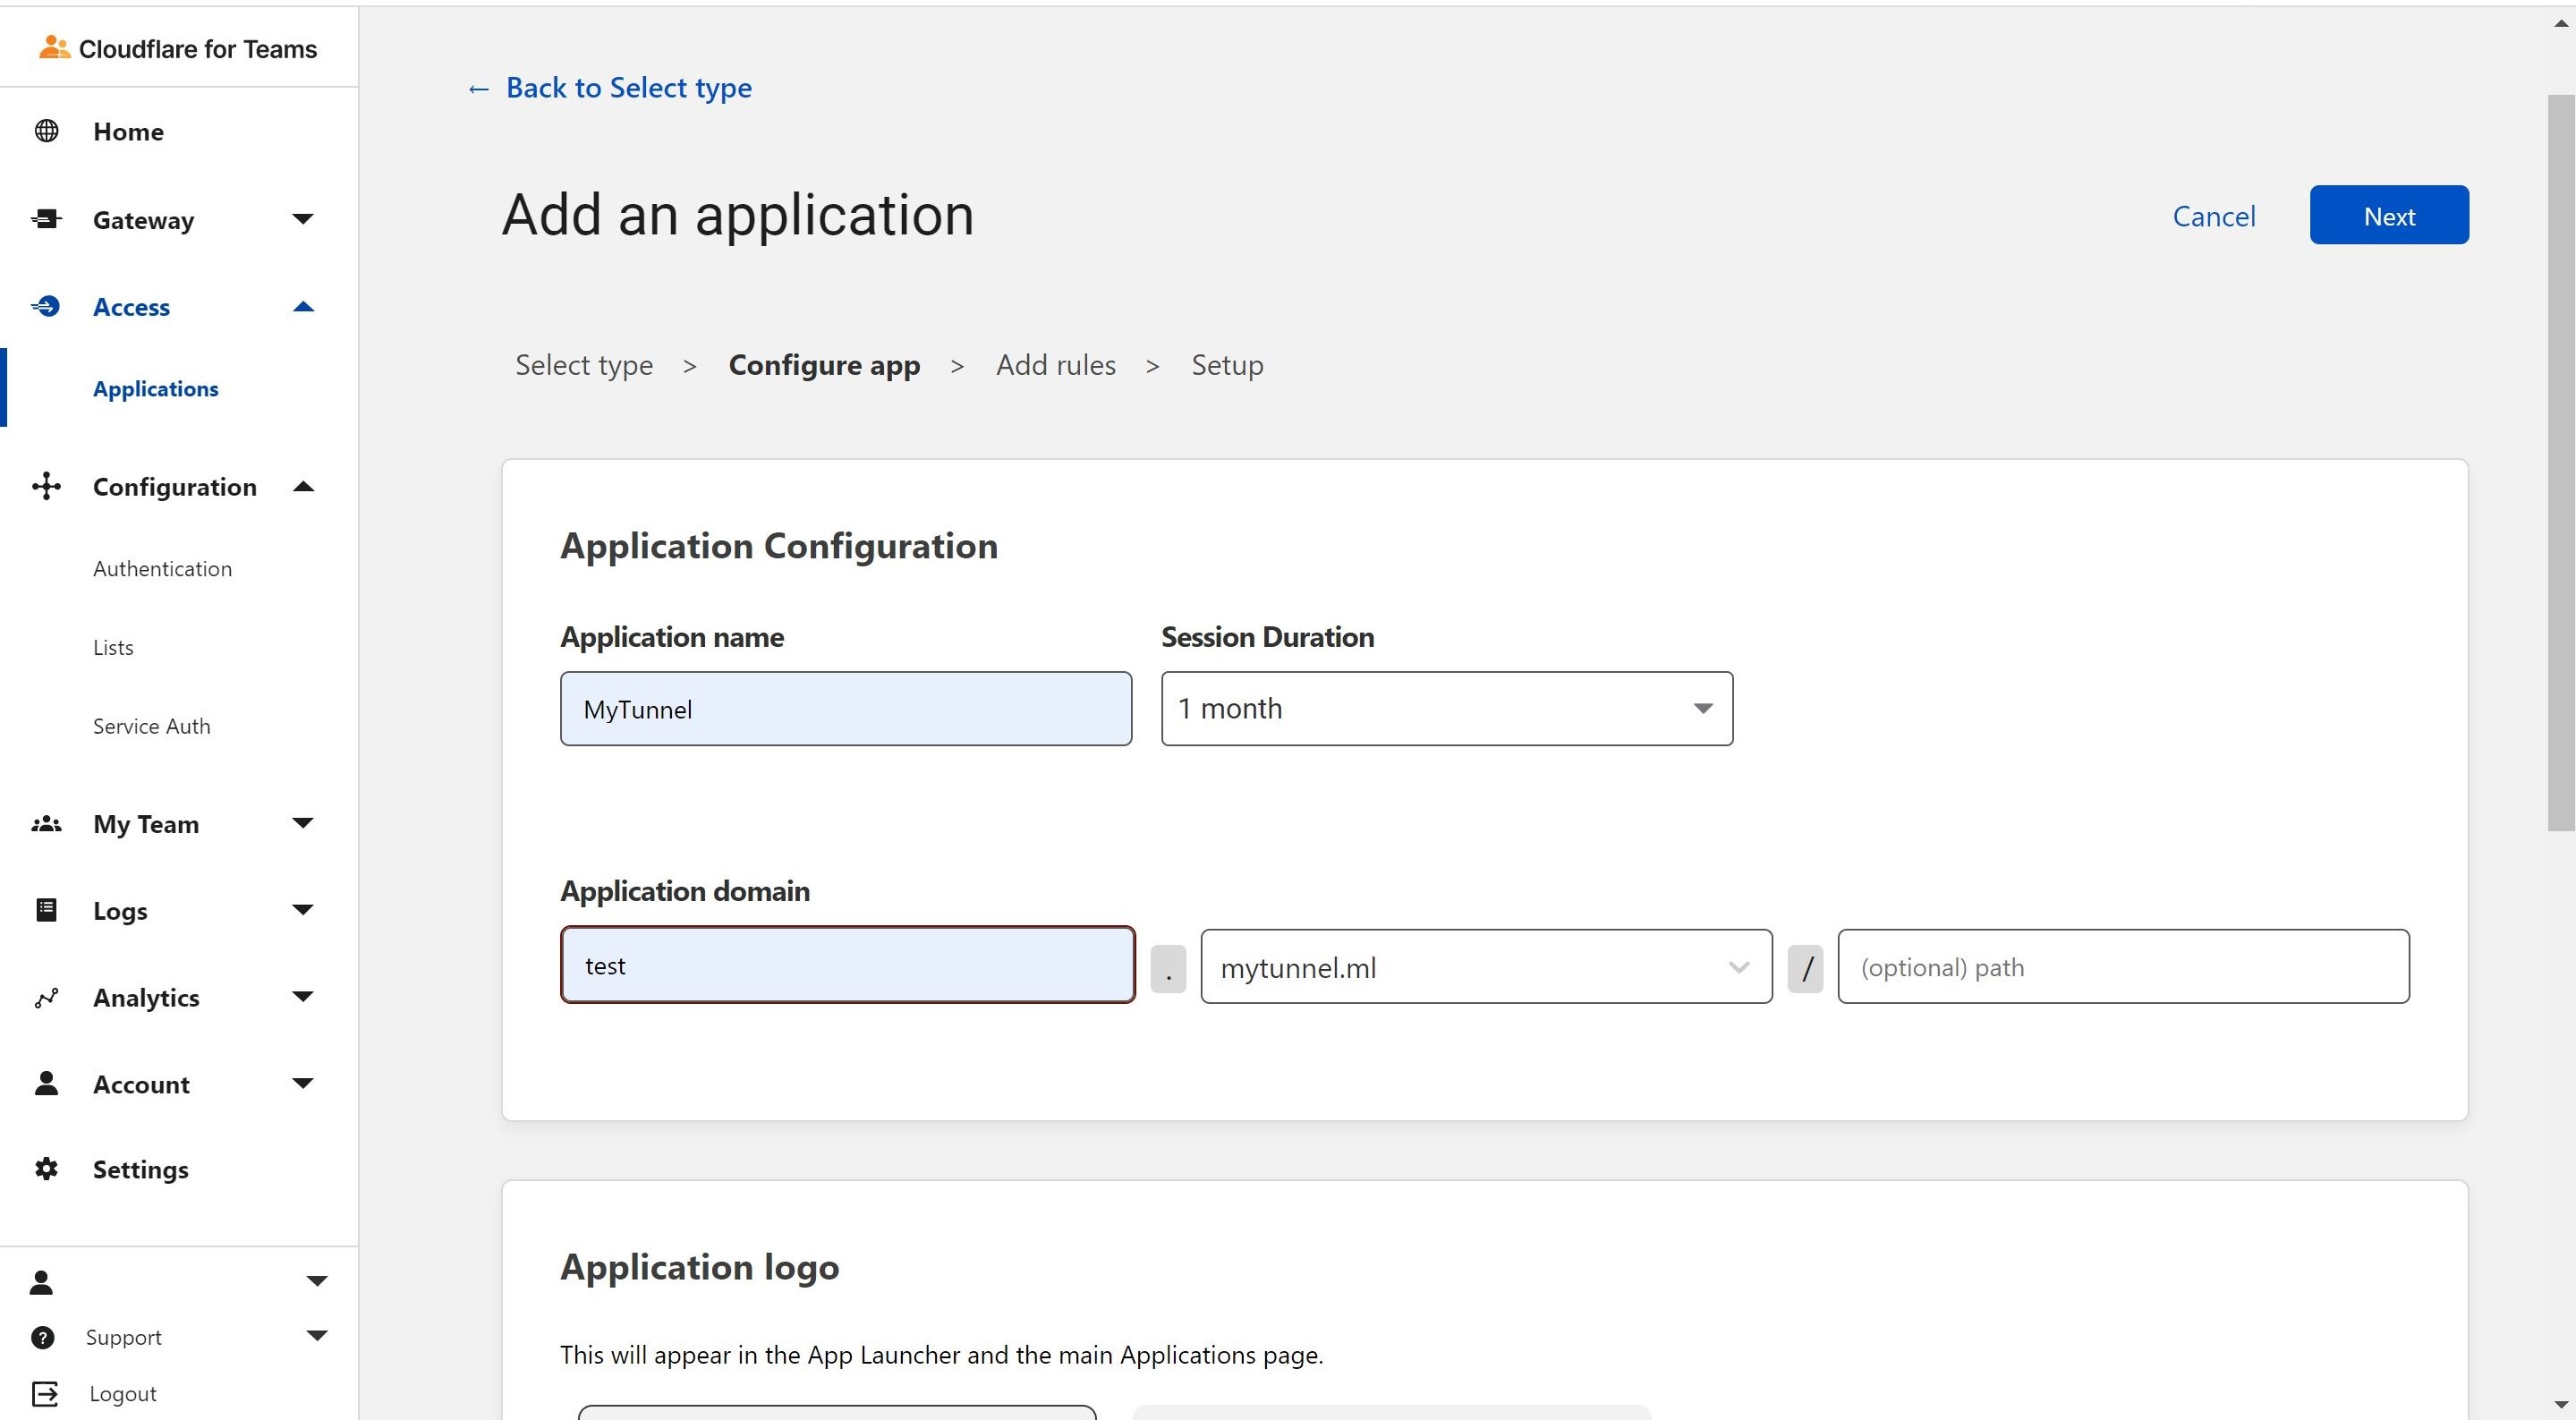
- Choose an application name, Session Duration, subdomain and Application domain. Then, click on Next.
Notice that the Tunnel duration ranges from 15 mins to 1 month.
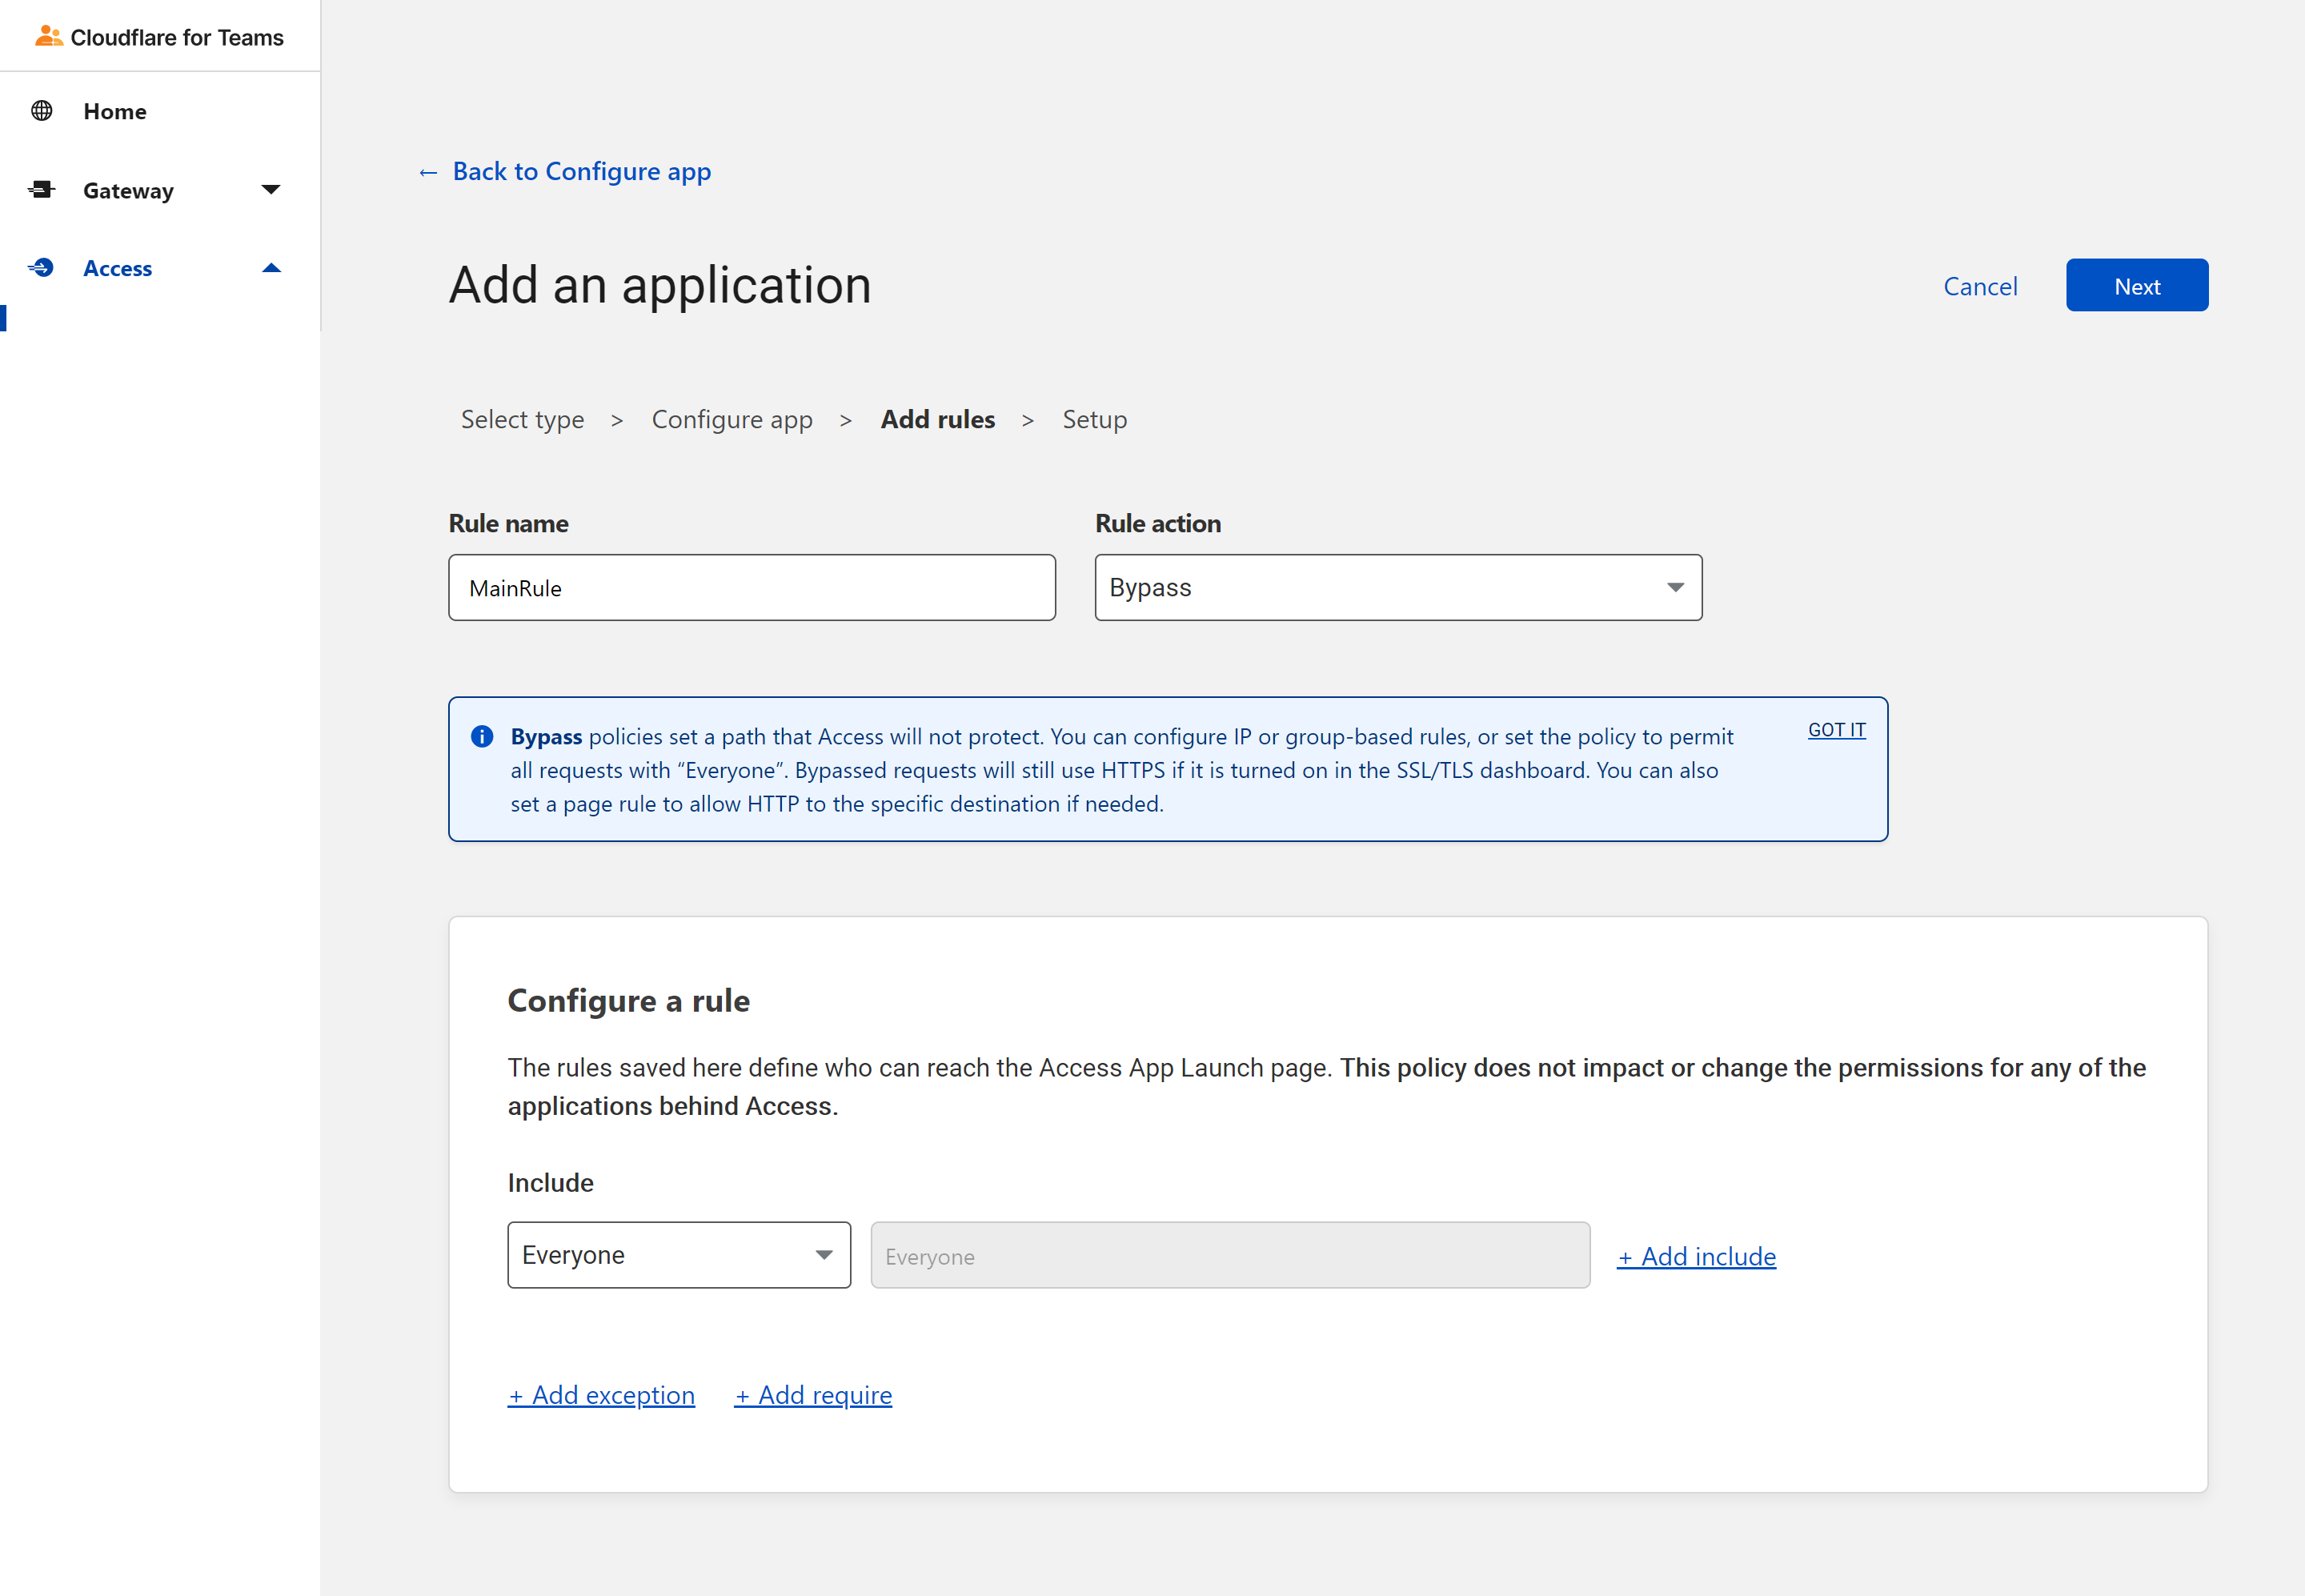
- Add a name to the rule and select Bypass as a Rule action. On Configure a rule, include Everyone. This rule allows everyone to view our NGINX site at test.mytunnel.ml
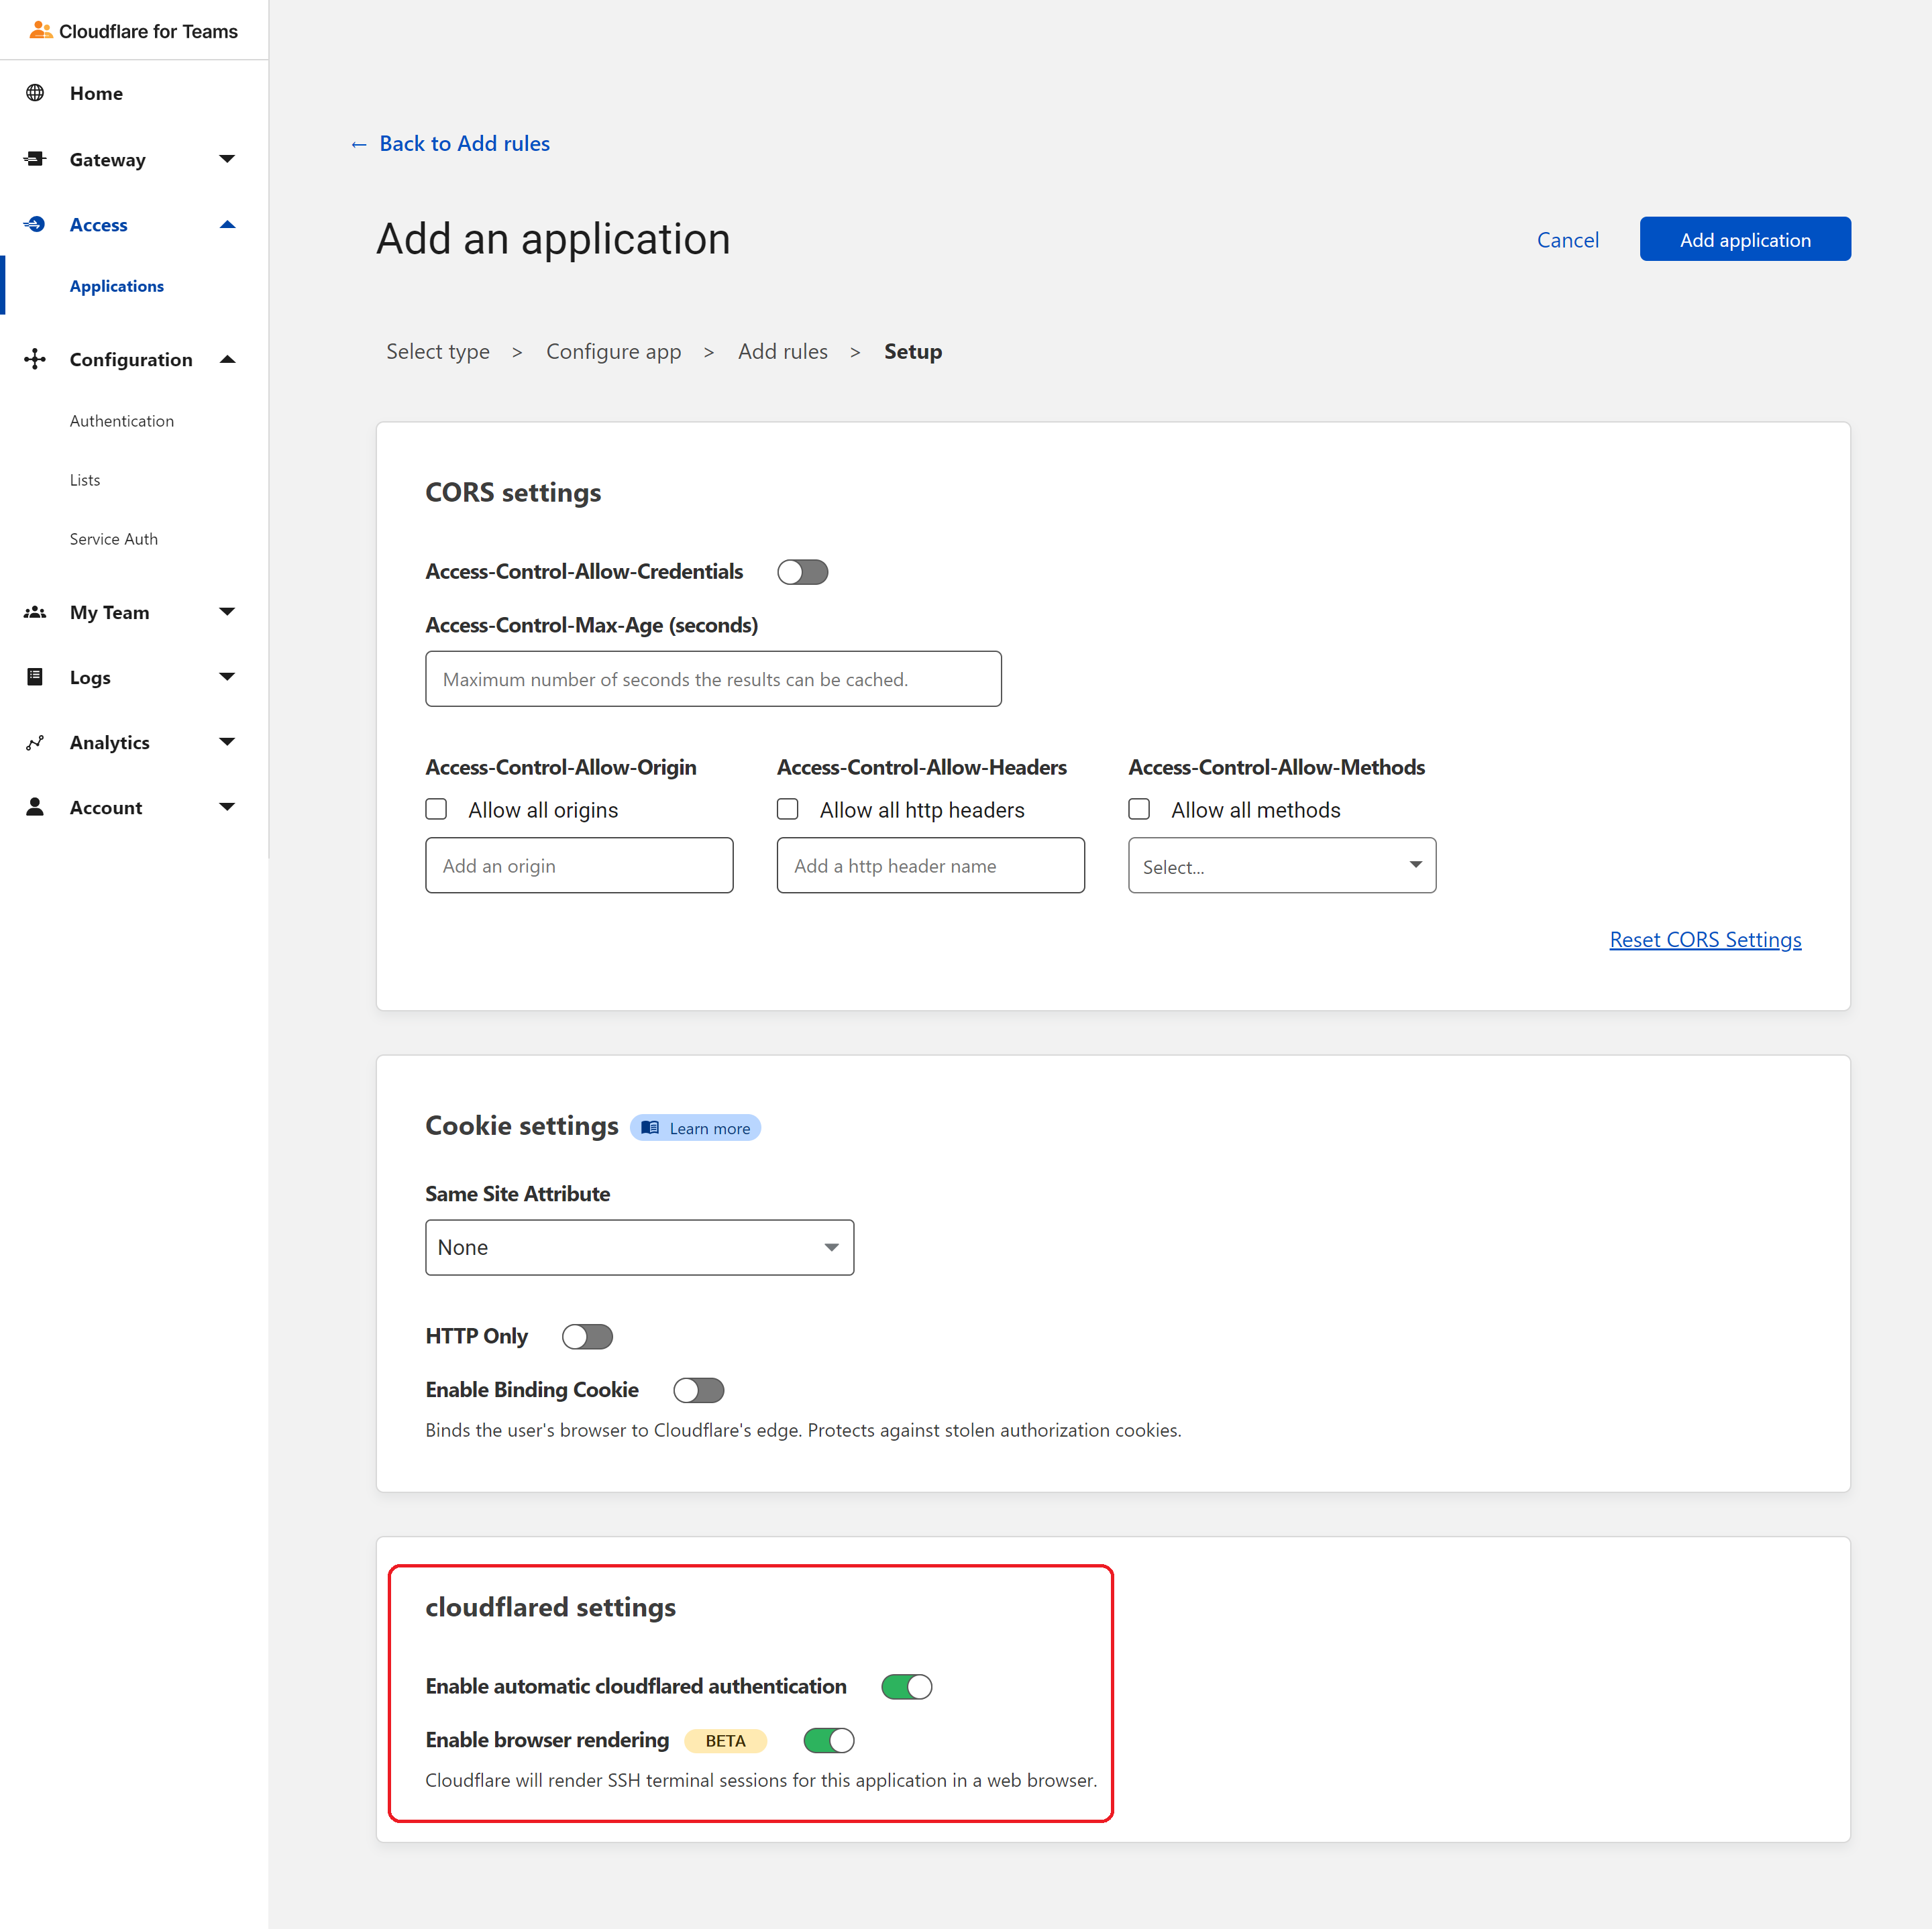
- In the Advanced settings, enable automatic cloudflared authentication and browser rendering.
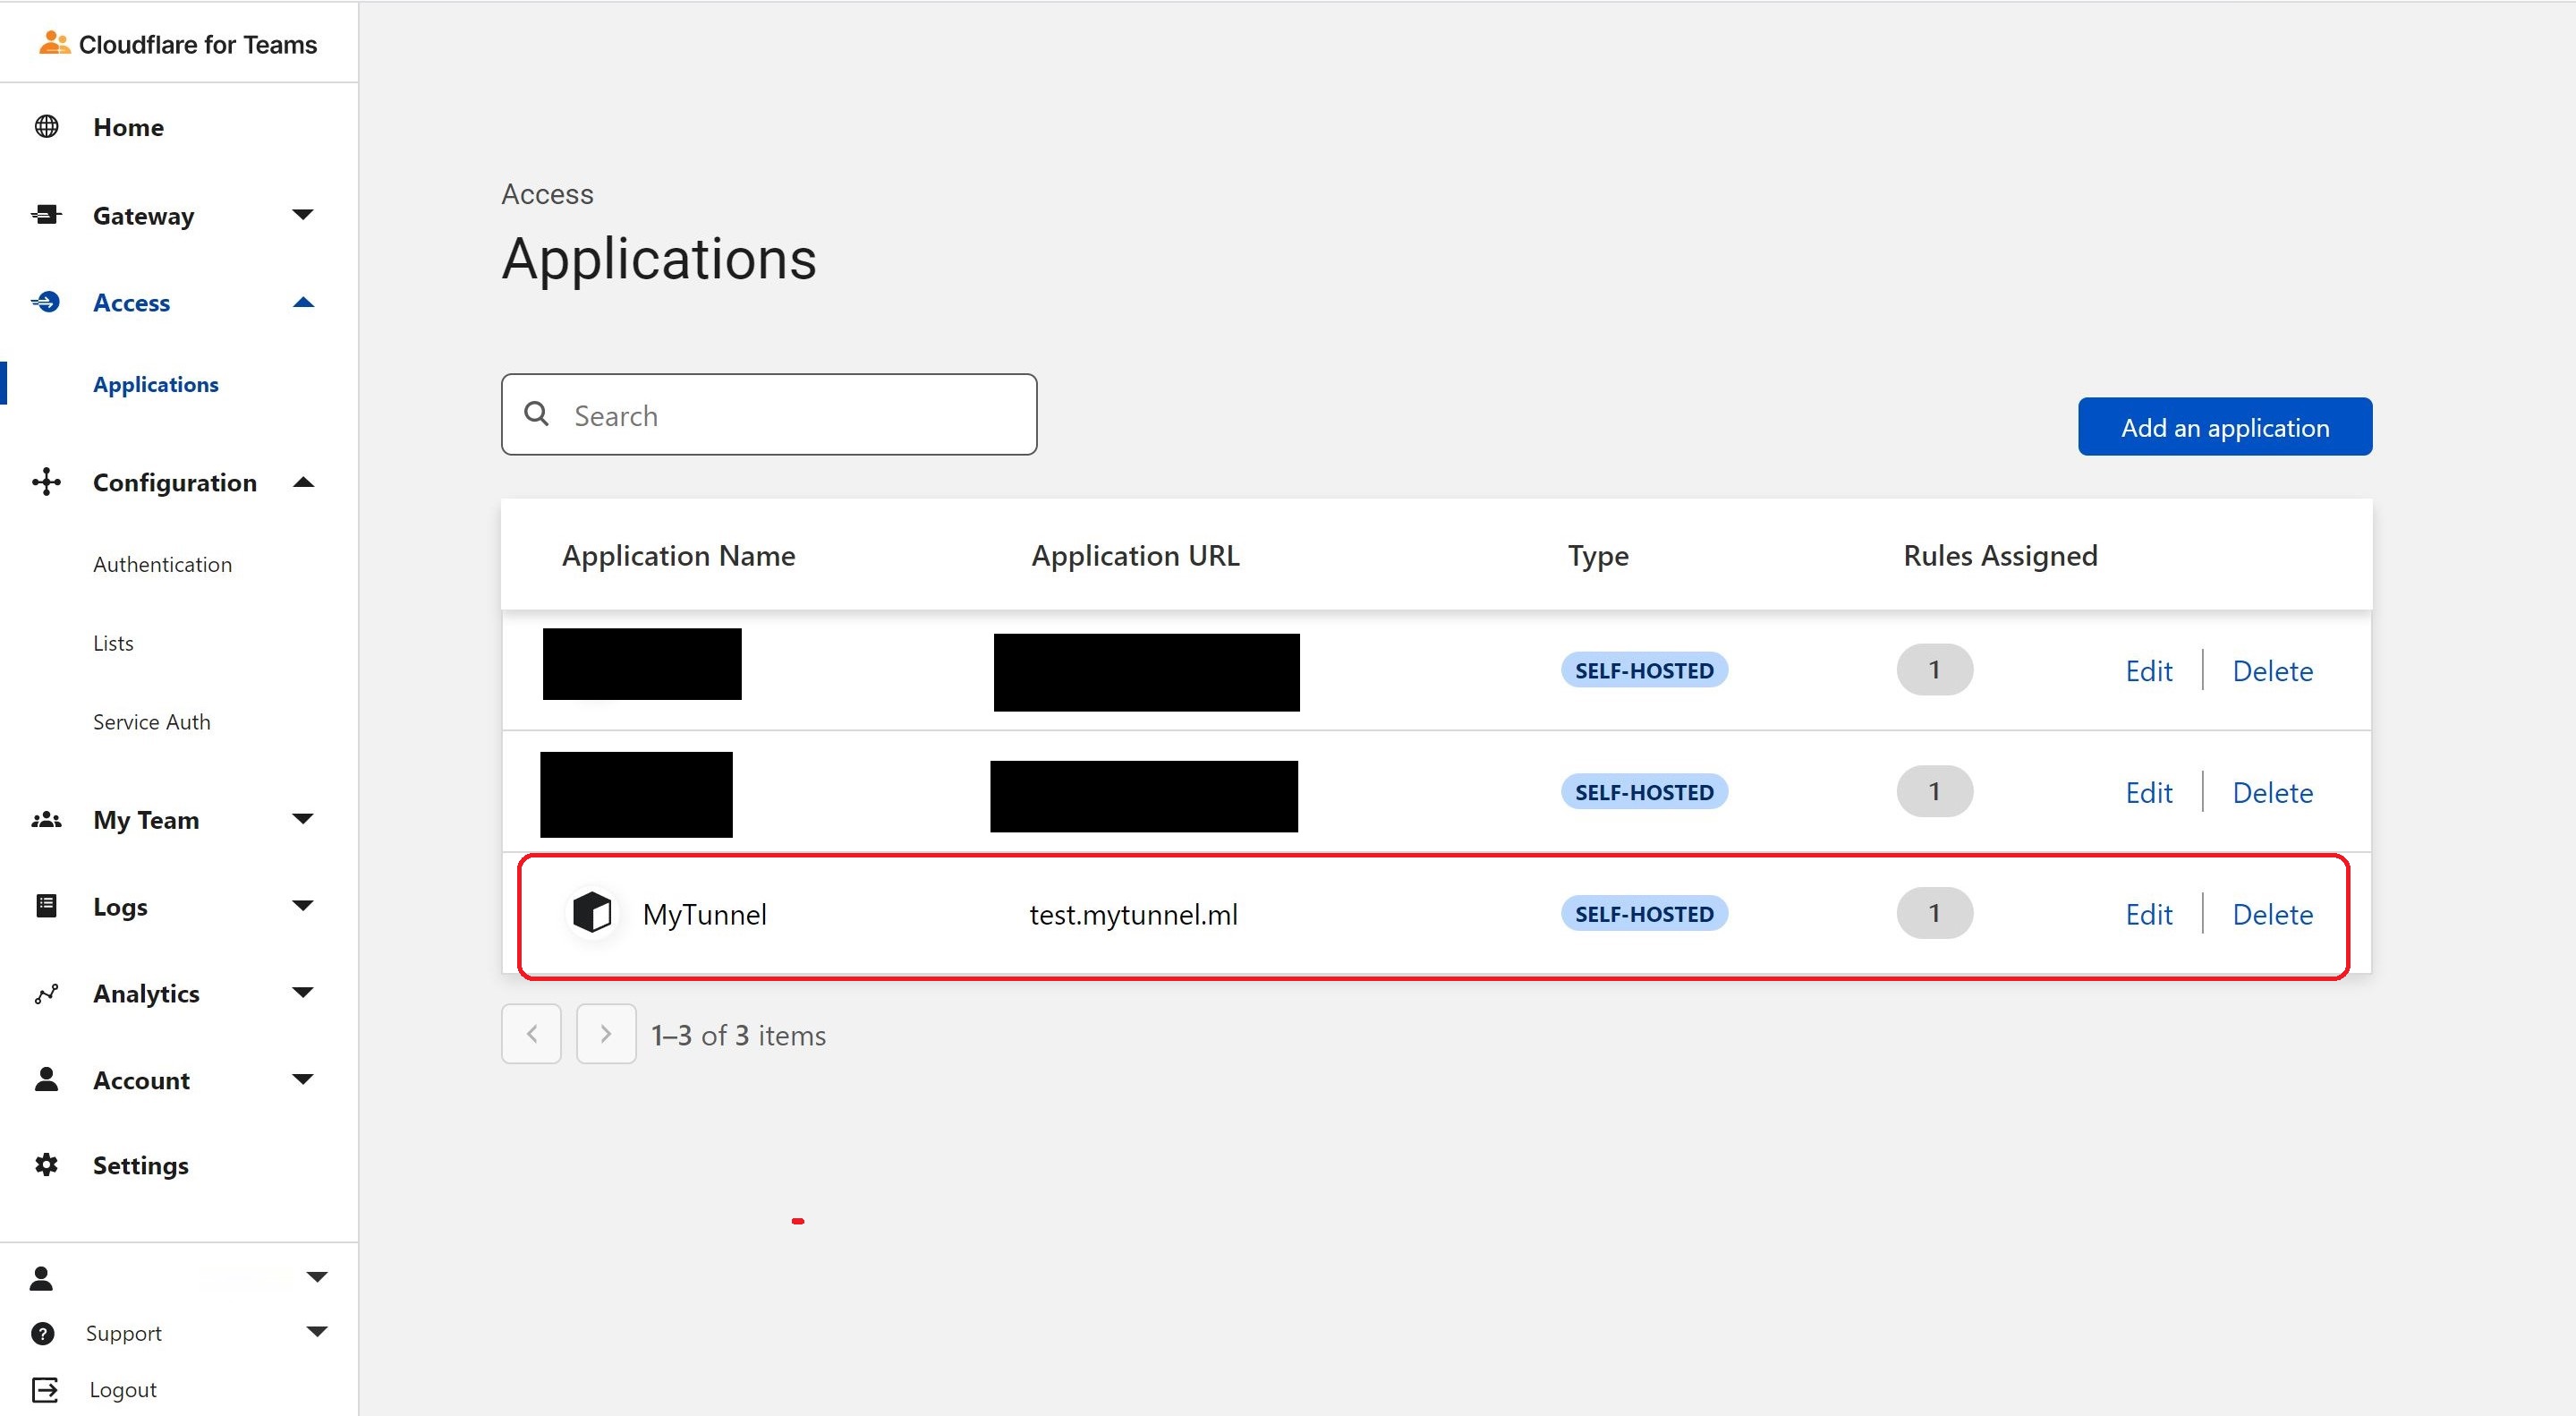
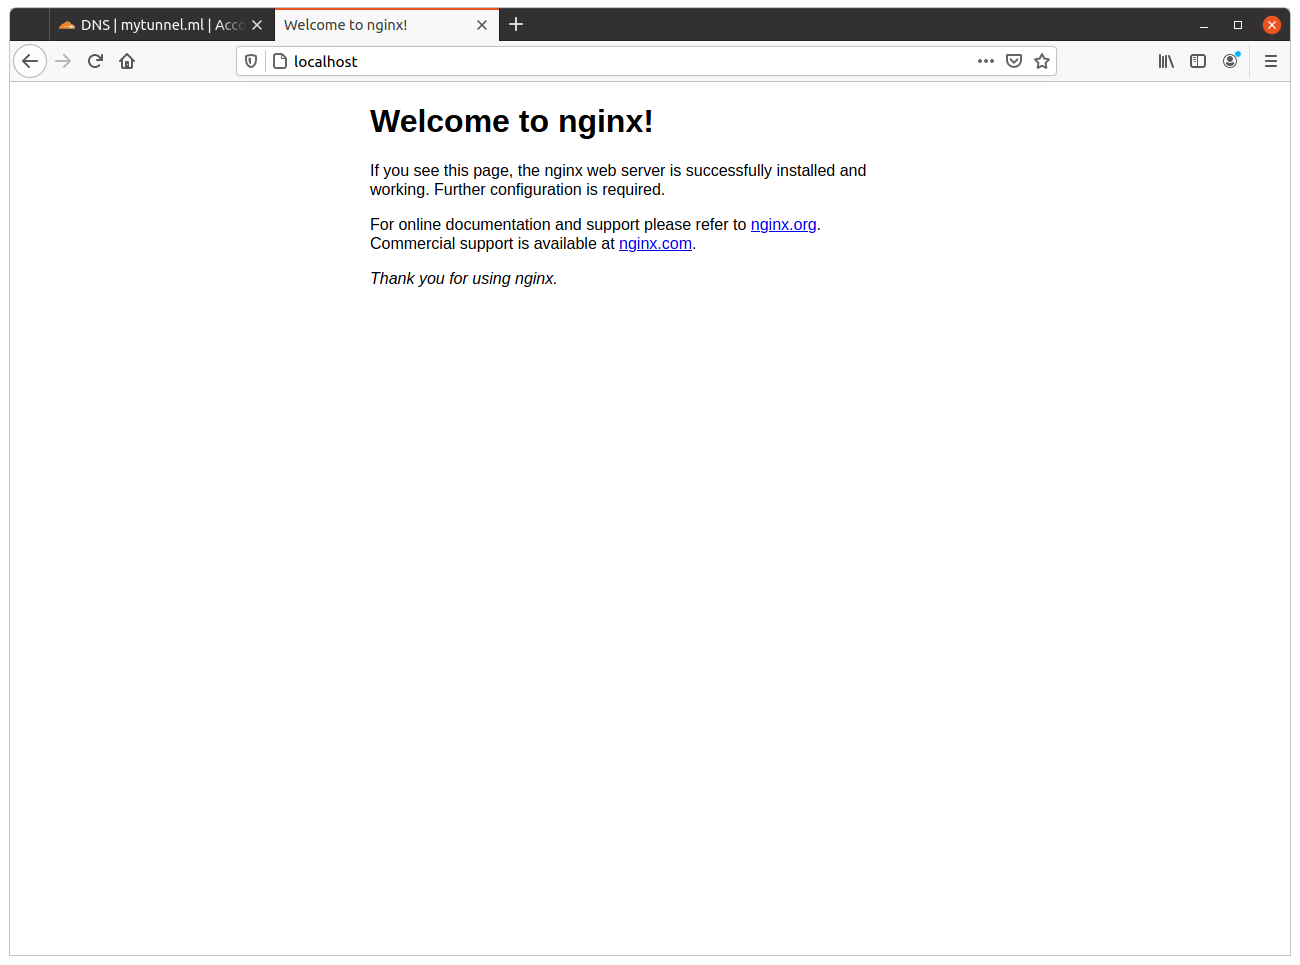
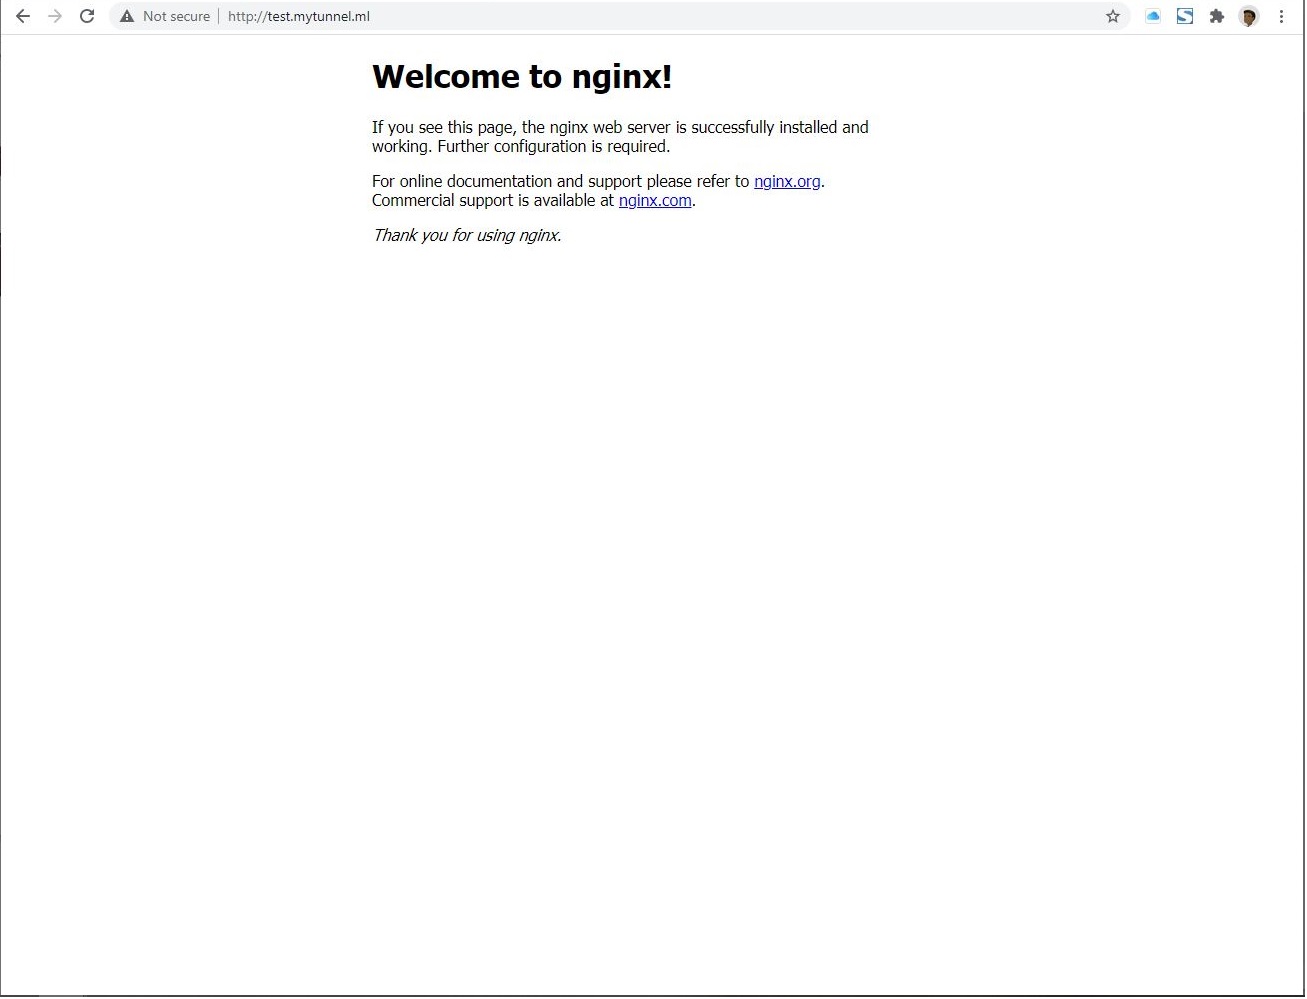
Finally, our application is now available in Cloudflare Access and is part of our Application list. We can navigate to a browser and type in our url test.MyTunnel.ml and if our Tunnel is established correctly, we shall see our NGINX web server running as shown below.
Step 8: Run Tunnel as a service:
By running the following command, the Tunnel can be installed as a system service which allows the Tunnel to run at boot automatically as launch daemon. By default, the Tunnel expects to find the configuration file in the default directory, ~/.cloudflared/config.yml but to run Tunnel as a service, we might need to move the config.yml file in ~/etc/cloudflared/.
We can employ the move mv command to do the job: mv <path/config.yml> to </etc/cloudflared/>
The below command is in my case with my RPI-4 and how I moved the config file to /etc/cloudflared/
sudo mv /home/p2/.cloudflared/config.yml /etc/cloudflared/
Now, we are ready to run Tunnel as a service utilizing the command below:
sudo cloudflared service install
Conclusion:
We have successfully established a secure Cloudflare Tunnel that links our locally hosted NGINX web server to Cloudflare’s network without requiring any public IP address, port-forwarding or punching through a firewall. We have also configured the Tunnel as a service to start at boot, and now we have our NGINX web server associated and accessible via our domain name, test.MyTunnel.ml