Docker on Ubuntu 20.04 Raspberry Pi 4
As of 11/25/21, if you were unable to install Docker on RPI-4 running Ubuntu 21.10, you may need to install extra kernel modules by running the following command $ sudo apt install linux-modules-extra-raspi
Updating the Operating System
Now, we have a secured connection with our instance, let’s update and upgrade the operating system. Updating and upgrading the operating system of the instance is always a good habit to have. We will run the following update/upgrade commands. The -y in the end of the command line will automatically enters “yes” as a confirmation before installing the updates.
sudo apt update && sudo apt upgrade -y
Cleaning up after an update
If this is not the packages first time to run an update, there might have some unnecessary packages left for cleaning. Removing these packages will free space and prevent your system from cluttering. The following command shall do the job.
sudo apt autoremove
Step 1: Install Docker
There are different methods to install Docker Engine. The following approach is the method from the official Docker site.
We will setup Docker’s repository and then install from them for ease of installation and upgrade tasks as it’s the recommended approach.
1 - Setup the Repository:
sudo apt-get update
 sudo apt-get install \
    apt-transport-https \
    ca-certificates \
    curl \
    gnupg \
    lsb-release
2- Add Docker’s Official GPG Key:
The commands below is to download and install Docker’s official GPG key, which is used to validate packages installed from Docker’s repository making sure they’re trusted.
curl -fsSL https://download.docker.com/linux/ubuntu/gpg | sudo gpg --dearmor -o /usr/share/keyrings/docker-archive-keyring.gpg
If you were unable to download the GPG key, check if you have the CURL command-line utility installed on your Ubuntu 20.04 by typing $ curl –version. If you need to install the CURL, type in $ sudo apt-get install curl -y
curl --version
sudo apt-get install curl -y
3 - Setup the Stable Repository:
Docker Engine is supported on x86_64 (or amd64), armhf, and arm64 architectures. We should know that RPI 4 is an arm64 architecture, but the Raspberry Pi OS is a 32-bit operating system. We have decided to utilize Ubuntu 20.04 LTS on our RPI 4 because it’s a 64-bit operating system. Therefore, we will need to install Docker Engine that supports 64-bit operating system on an arm64 architecture such as our current Ubuntu 20.04 LTS on RPI 4.
I would like to suggest studying the differences between amd64, 64 and armhf.
Now, let’s use the following command to setup the stable repository for arm64.
 echo \
  "deb [arch=arm64 signed-by=/usr/share/keyrings/docker-archive-keyring.gpg] https://download.docker.com/linux/ubuntu \
  $(lsb_release -cs) stable" | sudo tee /etc/apt/sources.list.d/docker.list > /dev/null
4 - Install Docker Engine:
Firstly, we will update the apt package index and then install the latest version of Docker Engine and containerd.
sudo apt-get update
sudo apt-get install docker-ce docker-ce-cli containerd.io
Let’s verify that we have installed Docker Engine by running the hello-world image.
sudo docker run hello-world
The response should be similar to the below:
Hello from Docker!
This message shows that your installation appears to be working correctly.

To generate this message, Docker took the following steps:
 1. The Docker client contacted the Docker daemon.
 2. The Docker daemon pulled the "hello-world" image from the Docker Hub.
    (arm64v8)
 3. The Docker daemon created a new container from that image which runs the
    executable that produces the output you are currently reading.
 4. The Docker daemon streamed that output to the Docker client, which sent it
    to your terminal.

To try something more ambitious, you can run an Ubuntu container with:
 $ docker run -it ubuntu bash

Share images, automate workflows, and more with a free Docker ID:
 https://hub.docker.com/

For more examples and ideas, visit:
 https://docs.docker.com/get-started/
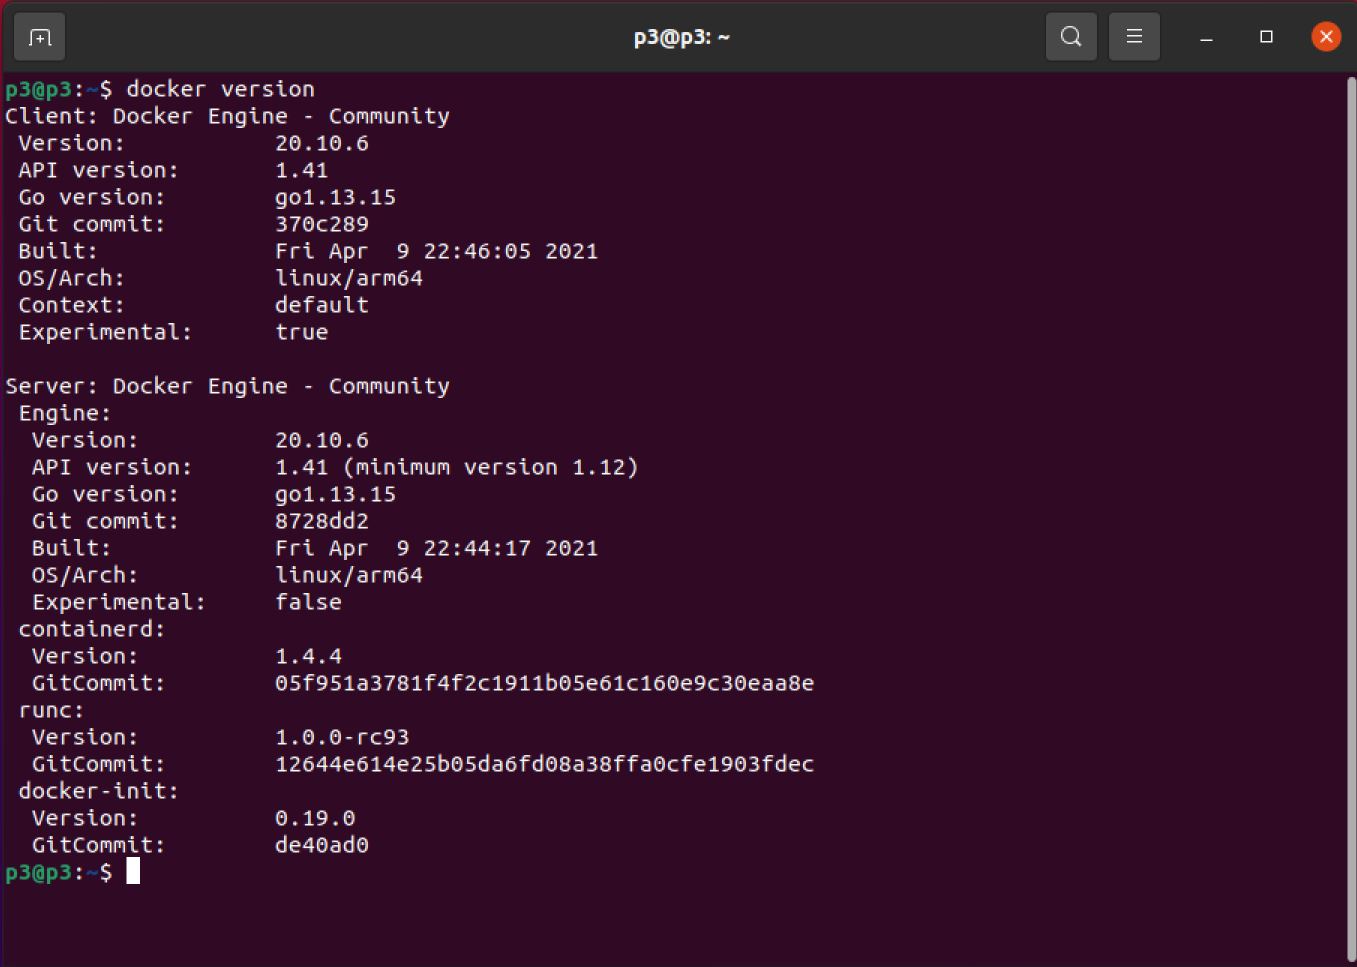
Let’s run the following command to find out the Docker version we have just installed.
docker version
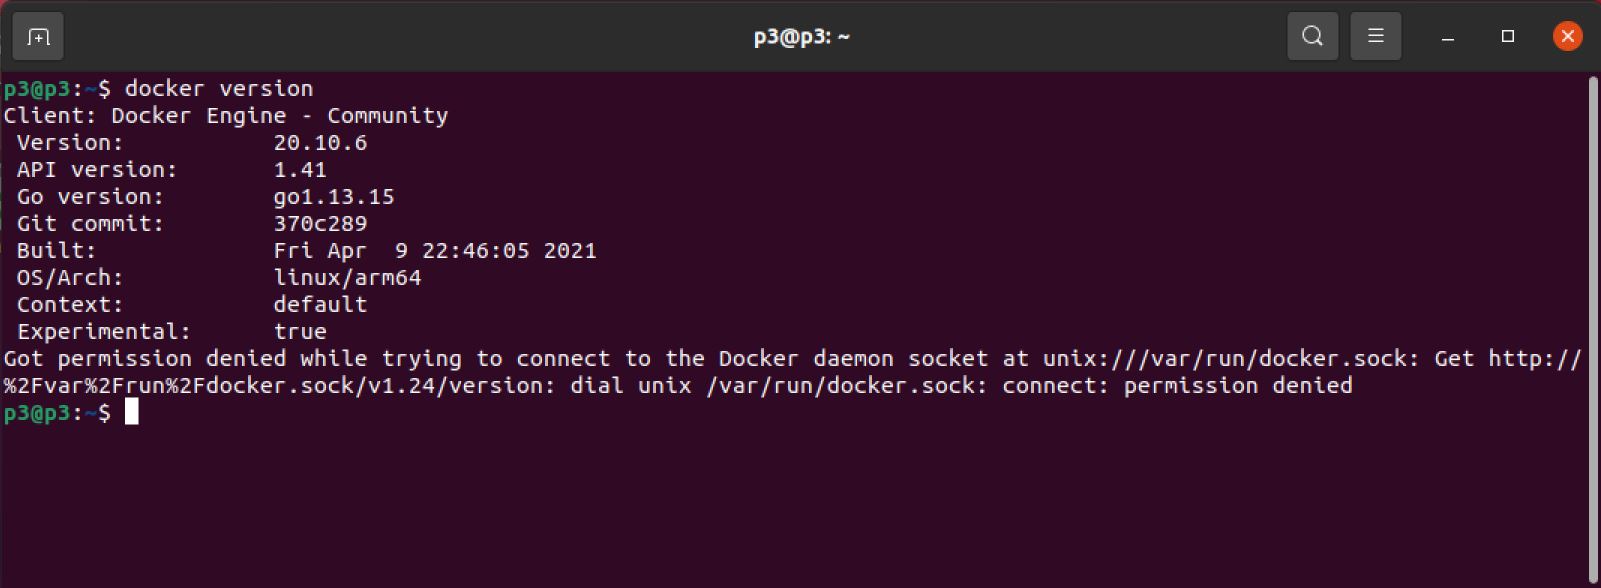
You might notice that we have received a permission denied message because we have not used sudo in front of the command and we are not the root user. But, what if we don’t want to use sudo all the times; in this case, we will assign the non-root user to docker group as follows:
sudo usermod -aG docker $USER
Note: exit out of the terminal for the change to take effect, and check the docker verion once more.
Now, we have installed Docker successfully, let’s move on to installing Docker-Compose.
Step 2: Install Docker-Compose
Compose is a tool for defining and running multi-container Docker applications. With Compose, you use a YAML file to configure your application’s services. Then, with a single command, you create and start all the services from your configuration. To learn more about all the features of Compose, see the list of features.
If you try to install Docker-Compose from Docker’s official website, you will face some hiccups as shown below.
sudo curl -L "https://github.com/docker/compose/releases/download/1.28.5/docker-compose-$(uname -s)-$(uname -m)" -o /usr/local/bin/docker-compose
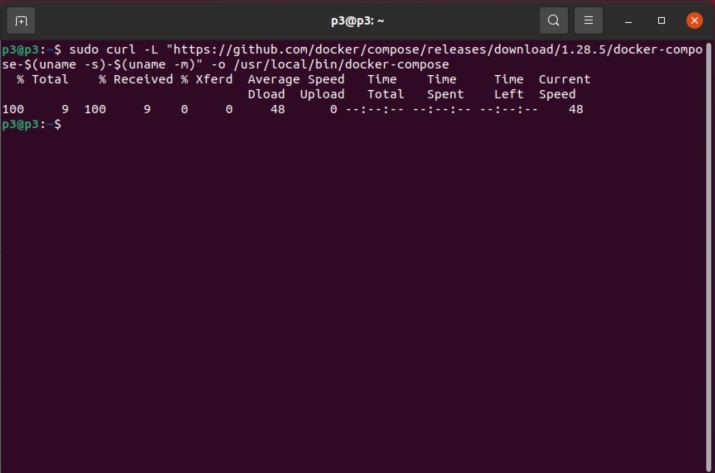
Docker does not have a release for Docker-Compose for arm64 yet; however, I have a shell script which will allow us to download a compatible Docker-Compose container with arm64 from my GitHub.
To install it, run the commands below to download version 1.28.5 As of this writing, this was the current version.
sudo curl -L --fail https://github.com/OmarCloud20/docker-compose/releases/download/1.28.5/run.sh -o /usr/local/bin/docker-compose
if 1.28.5 is not th latest Docker-Compose version, you could use the below command to download the latest version.
sudo curl -L --fail https://github.com/AppTower/docker-compose/releases/download/latest/run.sh -o /usr/local/bin/docker-compose
Let’s apply executable permissions to the binary:
sudo chmod +x /usr/local/bin/docker-compose
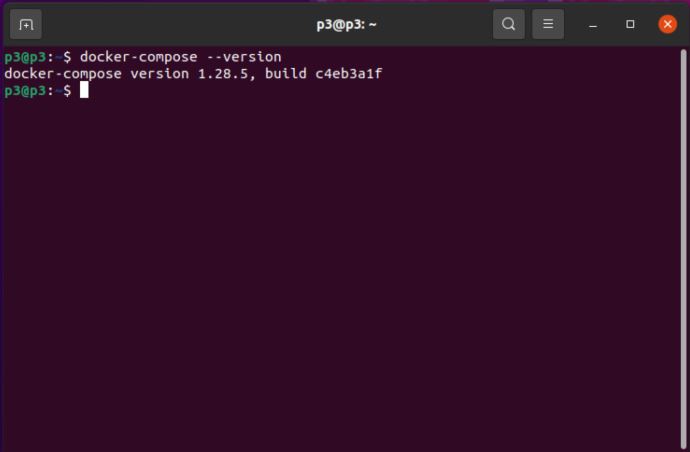
Let’s test our installation.
docker-compose --version
We should see a result similar to the below.
docker-compose version 1.28.5, build c4eb3a1f
Reboot your RPI 4.
sudo reboot
So far, we have installed Docker and Docker-Compose successfully. We will move on to installing Portainer.
Some useful Docker commands:
To list all Docker images:
docker images
To list all Docker image port information:
docker ps
Prior to removing an image, make sure it’s container is not running.
docker stop [container ID]
To force a removal of a Docker image (portainer/portainer:tag is an example of the image name and tag):
docker image rm -f portainer/portainer:latest
To force removal of a Docker image by the Image ID.
docker rmi -f [image ID]
Step 3: Install Portainer
Now that Docker and Docker Composer are installed, follow the steps below to get Portainer setup.
You can use Docker command to deploy the Portainer Server; note the agent is not needed on standalone hosts, however, it does provide additional functionality if used.
To get the server installed, run the commands below. Firstly, let’s get to home directory.
cd ~/
Let’s run the following command to download the Portainer image that is compatible with our RPI 4 64arm processor.
docker pull portainer/portainer-ce:latest
If you download a Docker image that is incompatible with the RPI 4 arm64 architecture, you will get a warning once you try to create a container as shown below.
WARNING: The requested image's platform (linux/arm/v7) does not match the detected host platform (linux/arm64/v8) and no specific platform was requested
We will create Portainer data volume first.
docker volume create portainer_data
Now, we will create a container which will run Portainer. We will dedicate port 9000 to Portainer; however, you could allocate another port if you’re using port 9000 with another application.
sudo docker run -d -p 9000:9000 --name=portainer --restart=always -v /var/run/docker.sock:/var/run/docker.sock -v portainer_data:/data portainer/portainer-ce
You’ll just need to access the port 9000 of the Docker engine where Portainer is running using your browser.
Note: the -v /var/run/docker.sock:/var/run/docker.sock option can be used in Linux environments only.
After a successful pull, you should get a similar message as below:
latest: Pulling from portainer/portainer
d1e017099d17: Pull complete
a7dca5b5a9e8: Pull complete
Digest: sha256:4ae7f14330b56ffc8728e63d355bc4bc7381417fa45ba0597e5dd32682901080
Status: Downloaded newer image for portainer/portainer:latest
2fd5f4a0883a9d358ad424fd963699445be8839f3e6a2cf73d55778bcc268523
At this point, all you need to do is access Portainer portal to manage Docker. Open your web browser and browse to the server’s hostname or IP address followed by port #9000
http://localhost:9000 or http://your_EC2_instance_public_ip_adress:9000
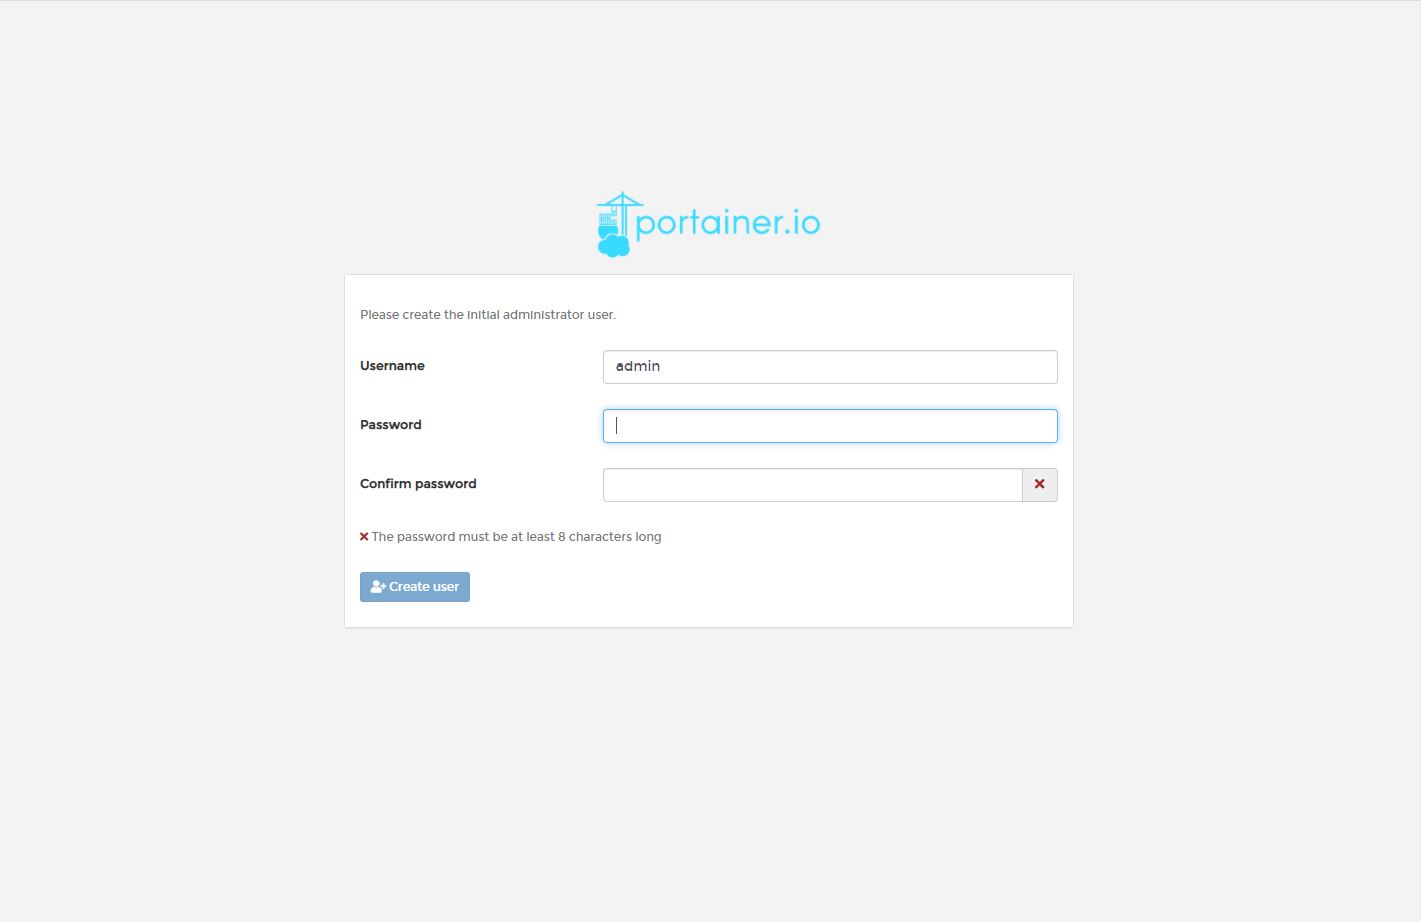
You should get Portainer login page to create an admin password.
Submit a new password.
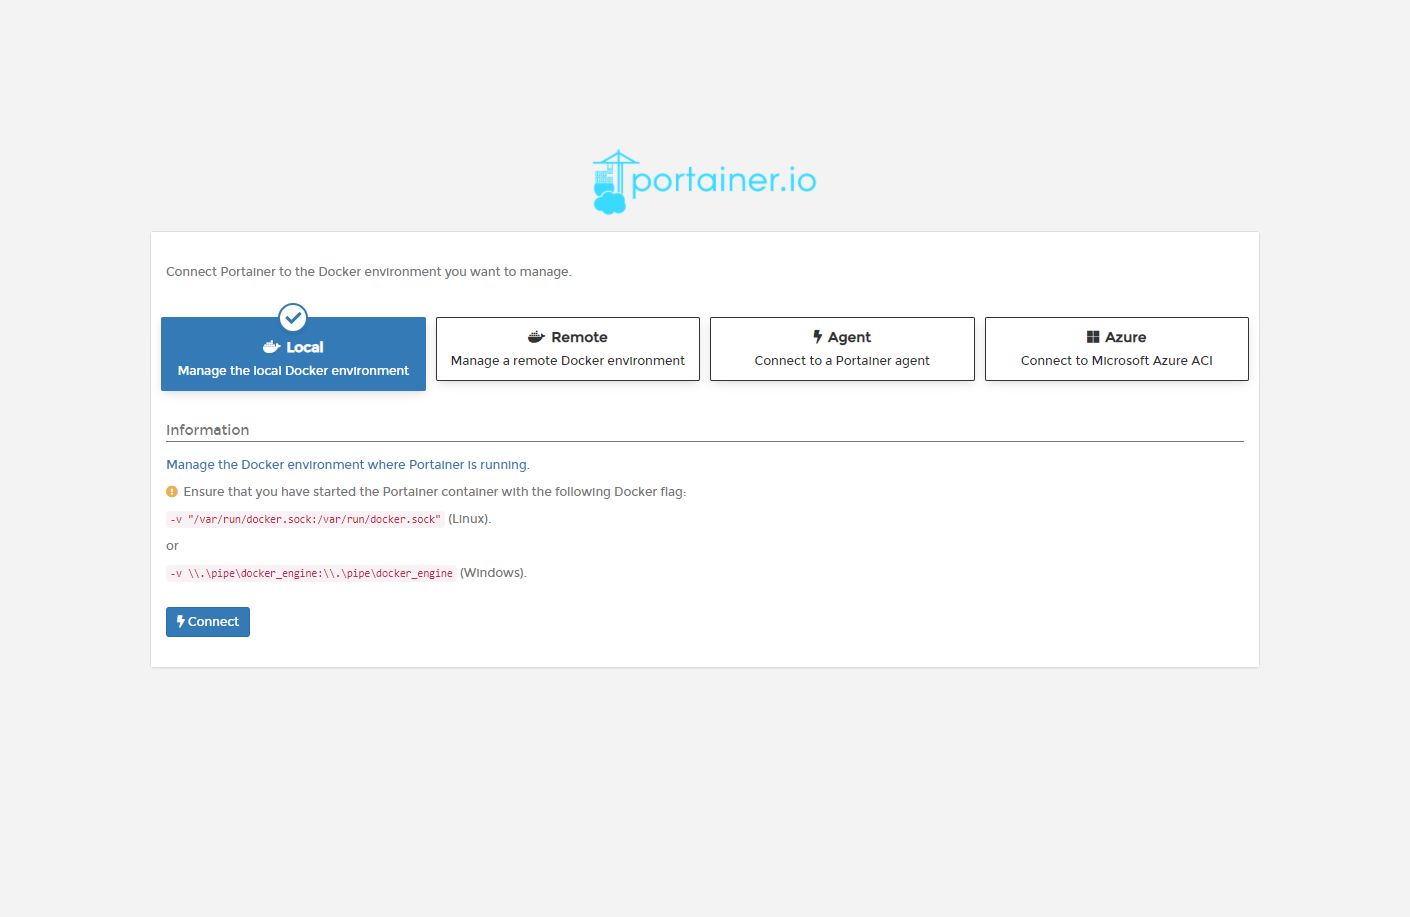
Now, you see some options to choose the environment you want to manage. Since we installed Docker on the same instance, select to connect and manage Docker locally.
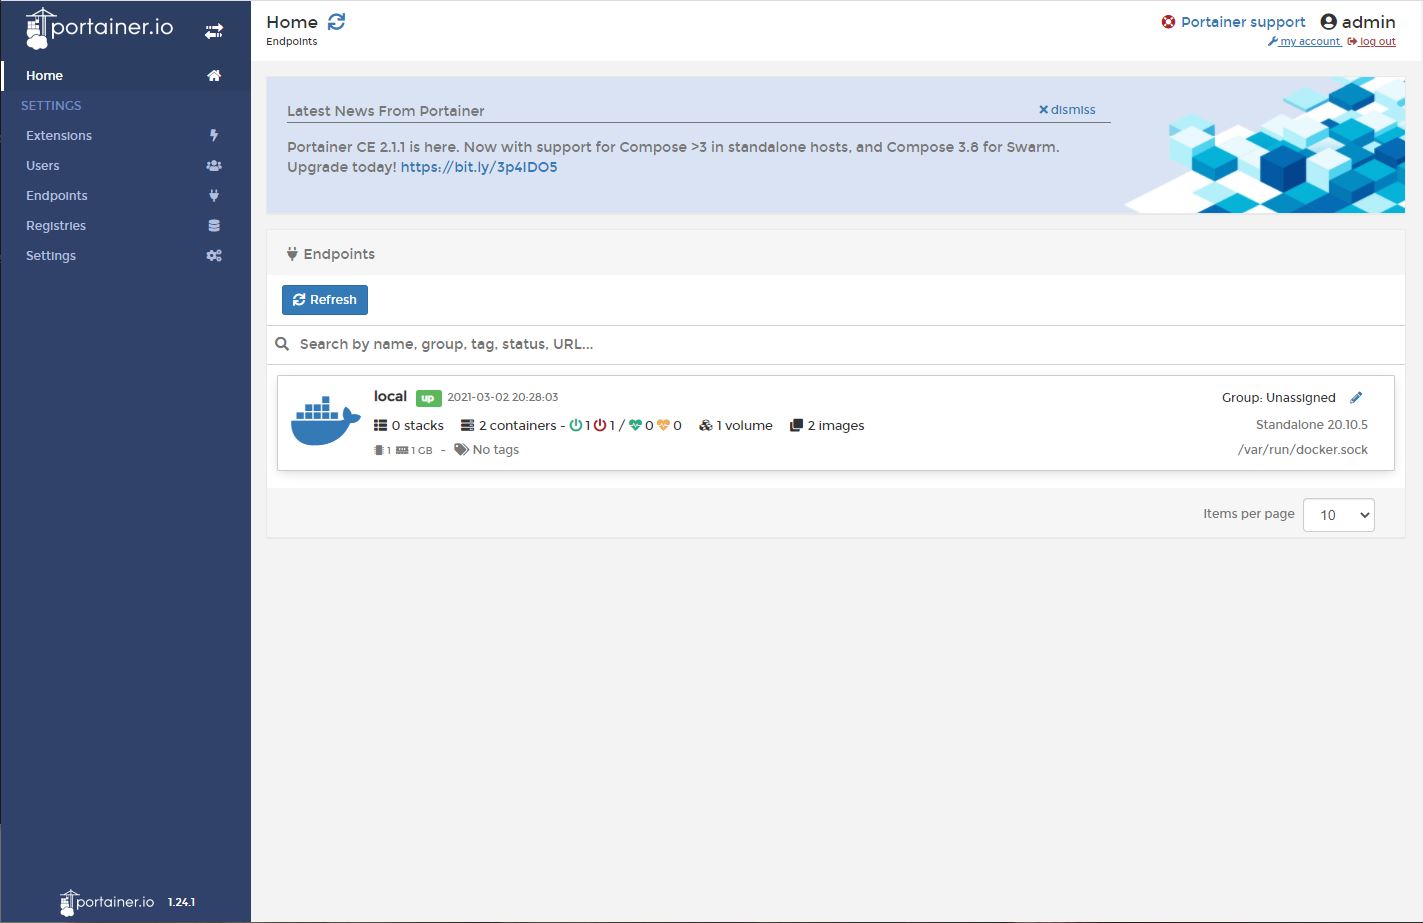
You’ll be directed to Portainer dashboard where you can start managing Docker. If you see a notification for upgrade, click on it and proceed with the upgrade process.
Conclusion:
By the end of this tutorial, we have successfully installed Portainer Docker management UI on our Ubuntu 20.01 RPI 4.