Create a Simple AWS CodePipeline from CodeCommit and Elastic Beanstalk
AWS CodeCommit, Elastic Beanstalk and CodePipeline
AWS CodeCommit is a fully-managed source control service that hosts secure Git-based repositories. It makes it easy for teams to collaborate on code in a secure and highly scalable ecosystem. CodeCommit eliminates the need to operate your own source control system or worry about scaling its infrastructure. You can use CodeCommit to securely store anything from source code to binaries, and it works seamlessly with your existing Git tools. For more information about AWS CodeCommit.
AWS Elastic Beanstalk is an easy-to-use service for deploying and scaling web applications and services developed with Java, .NET, PHP, Node.js, Python, Ruby, Go, and Docker on familiar servers such as Apache, Nginx, Passenger, and IIS. For more information about AWS Elastic Beanstalk.
AWS CodePipeline is a continuous delivery service offered by AWS to model, visualize, and automate the release of applications. This service allows for rapid modeling and configuring of different steps of an application release process. It automates the necessary process of change of application deployment. For information about AWS CodePipeline.
Learning Outcomes and Tutorial Scenario:
In this tutorial, we will create a two-stage pipeline that uses a AWS CodeCommit as repository and AWS Elastic Beanstalk to release a sample application.
- Creating a CodeCommit repository and upload the sample application zip file.
- Creating an application in Elastic Beanstalk.
- Creating a pipeline in CodePipeline.
Step 1: Creating a CodeCommit repository for the sample application.
- Download the sample application from AWS GitHub and save it into a folder or directory on your local device. Do not unzip the file.

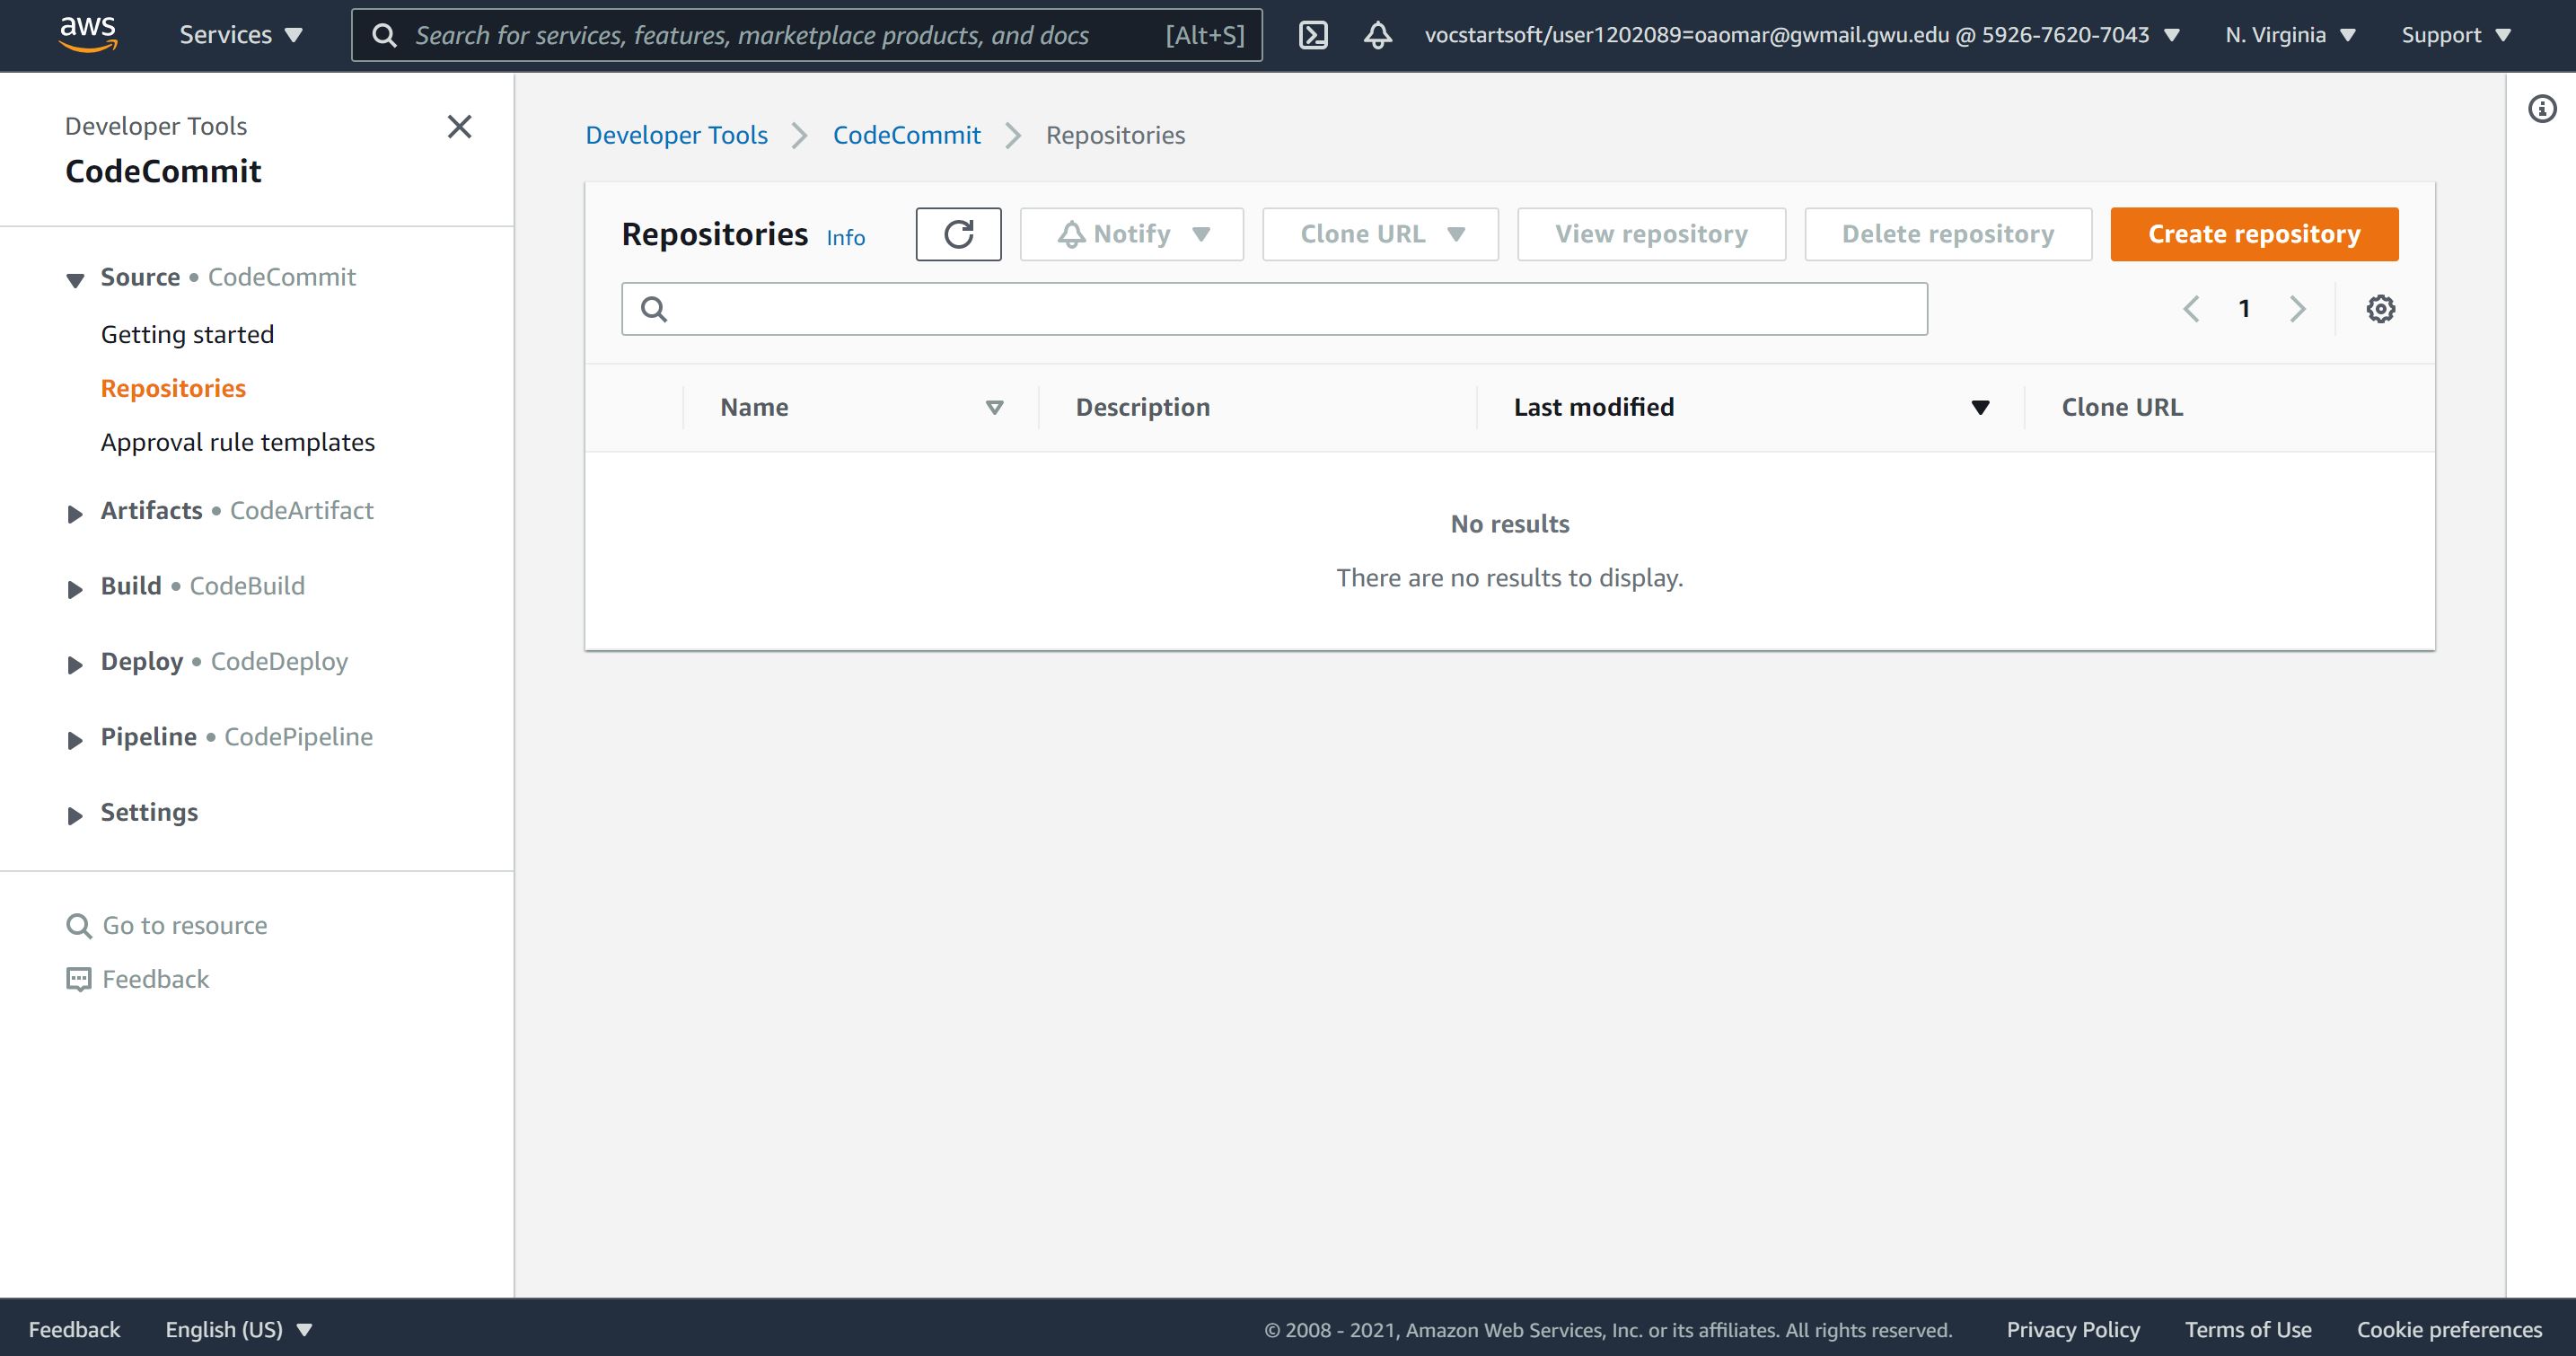
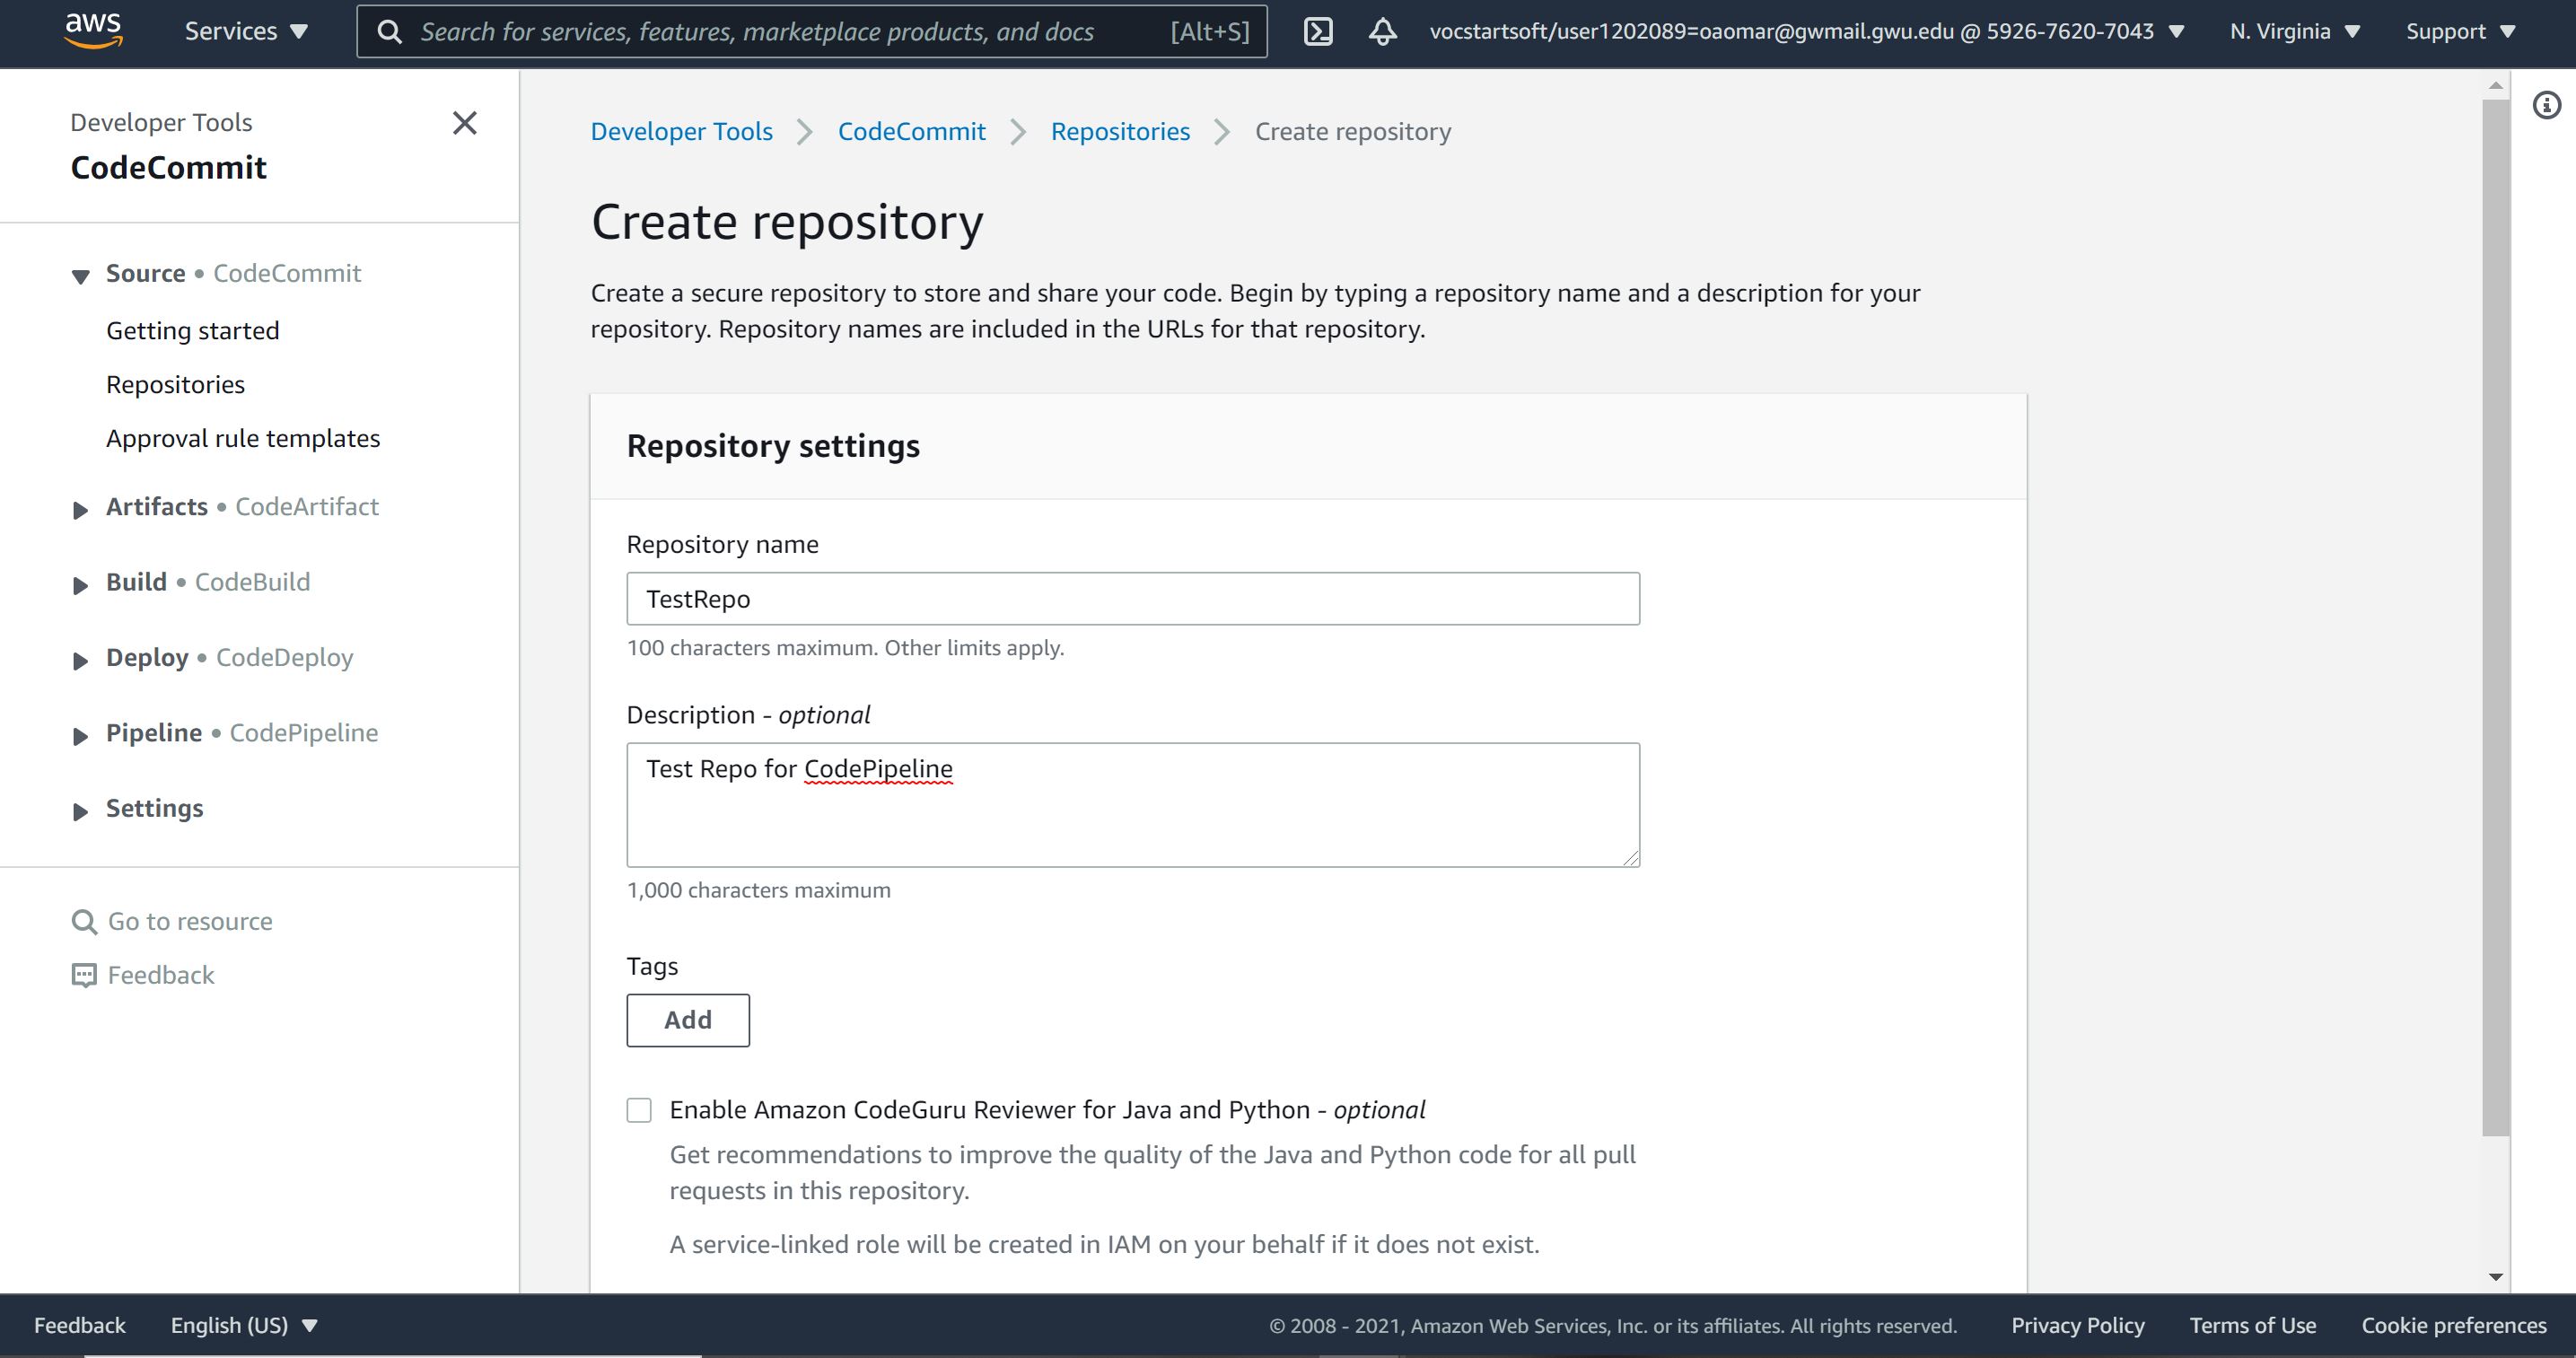
- Navigate to CodeCommit and create a repo by giving it a name and an optional description.
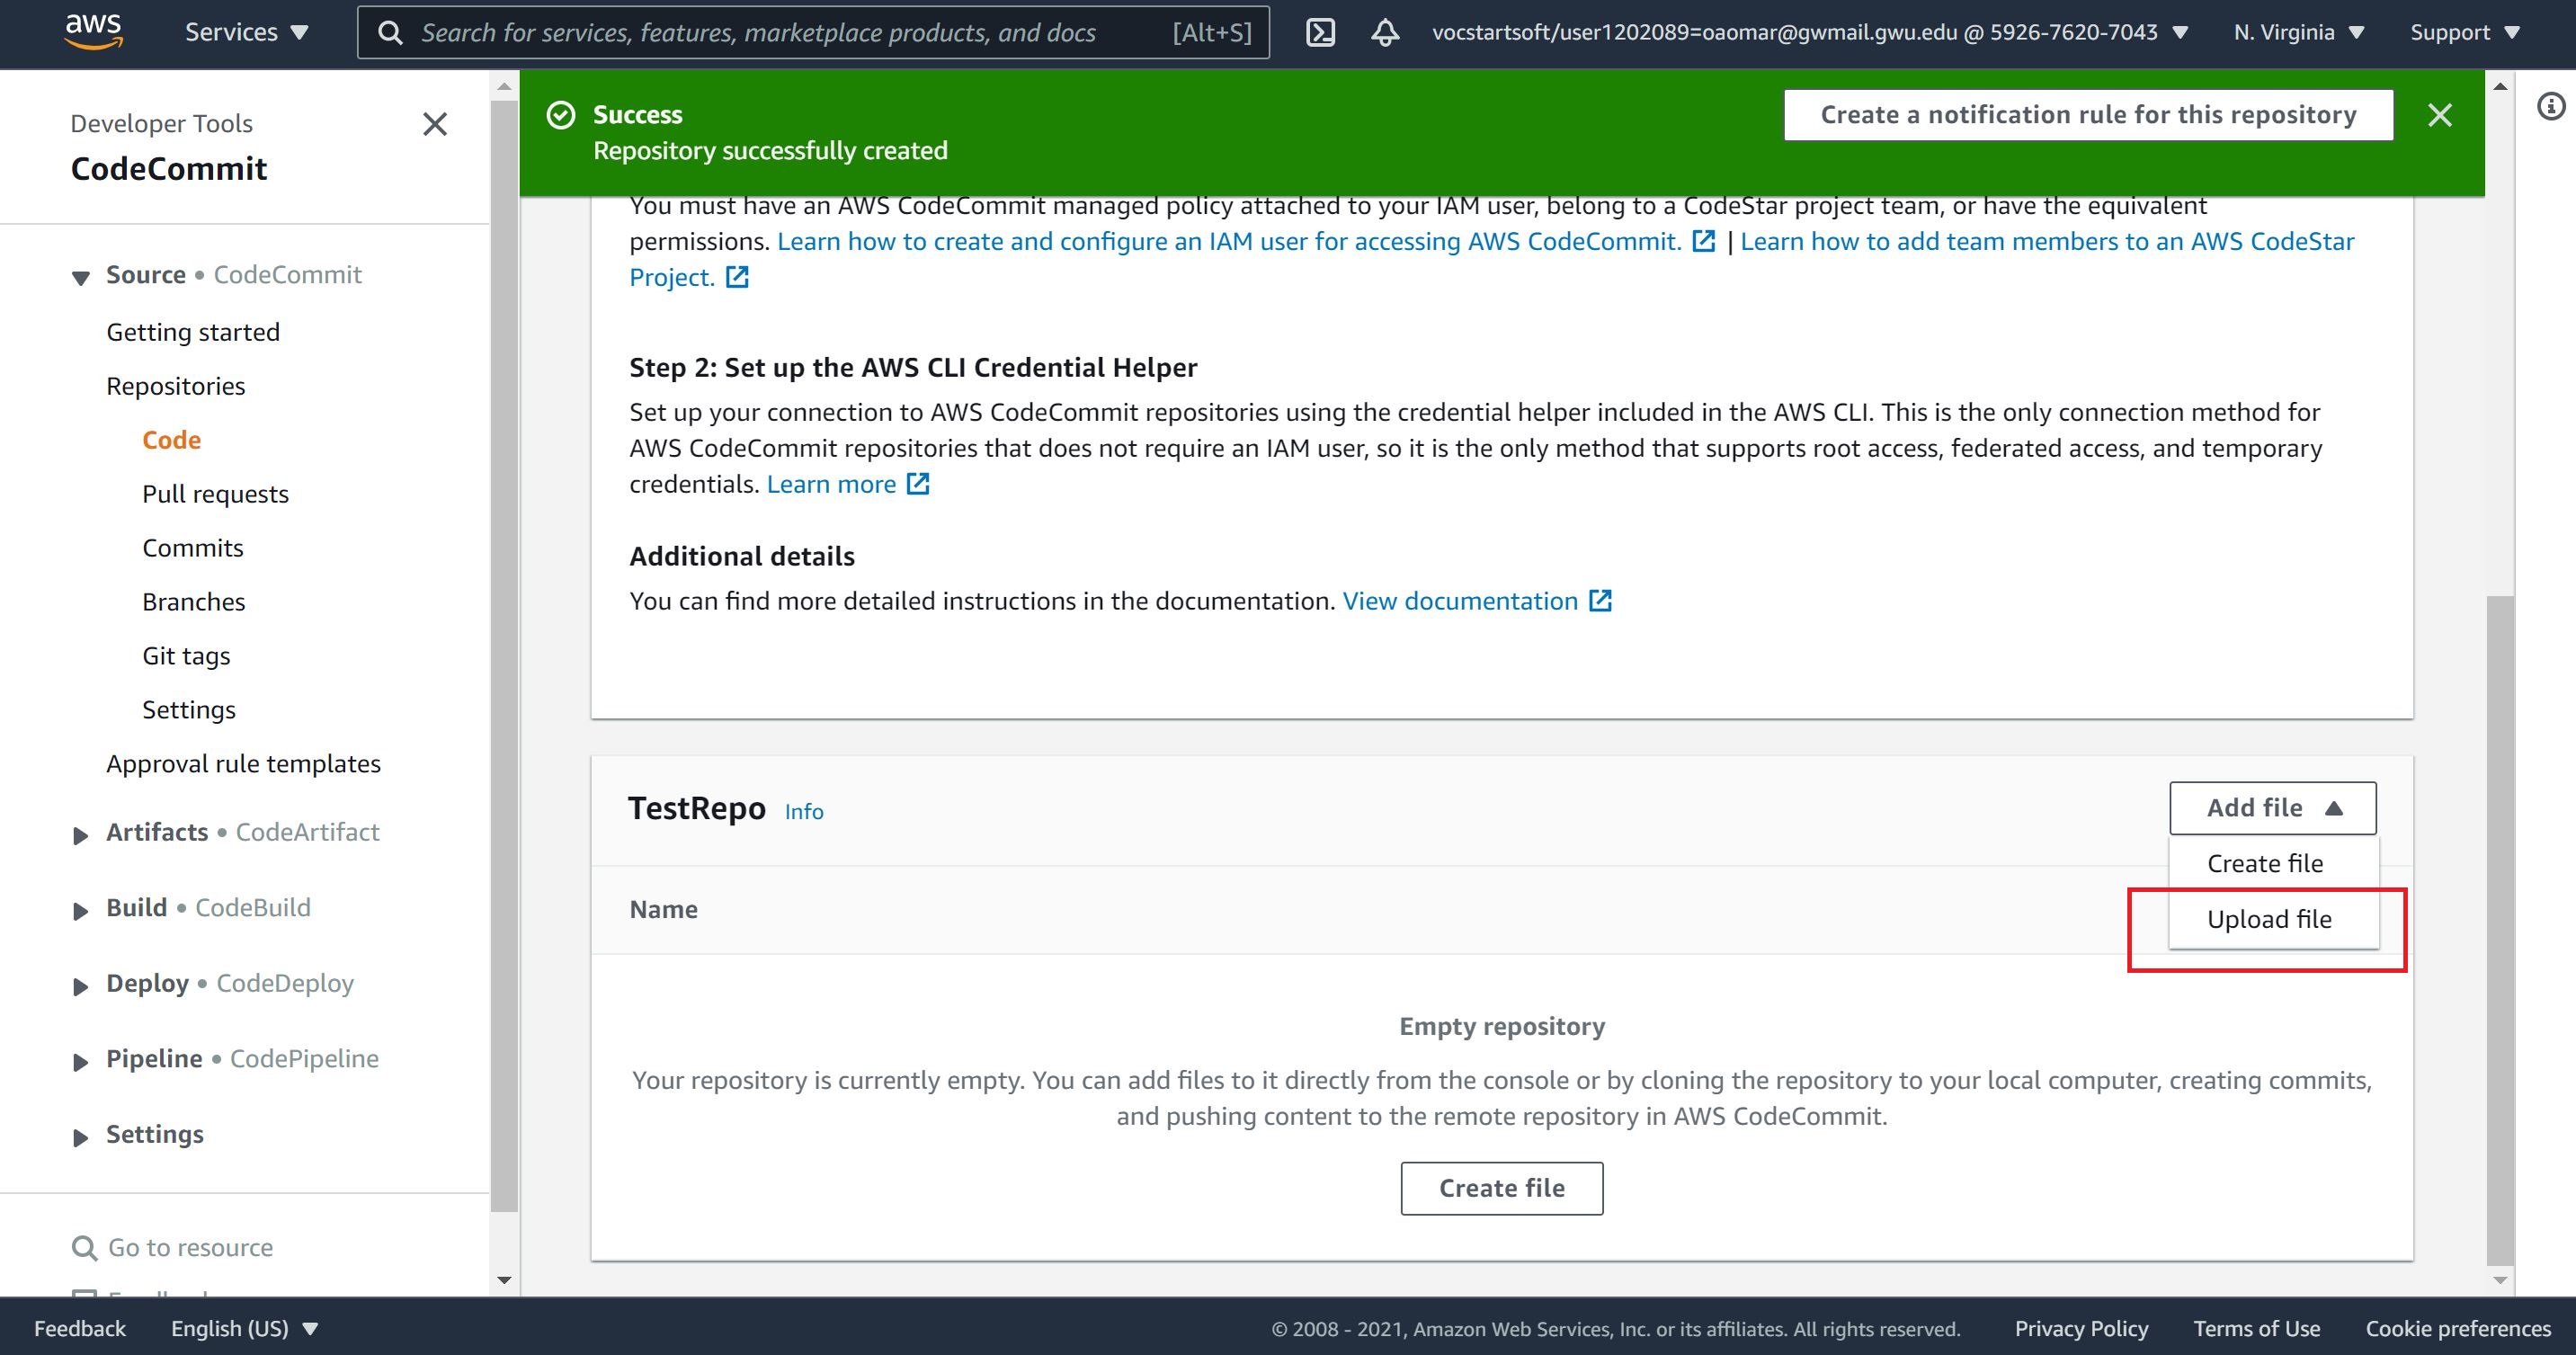
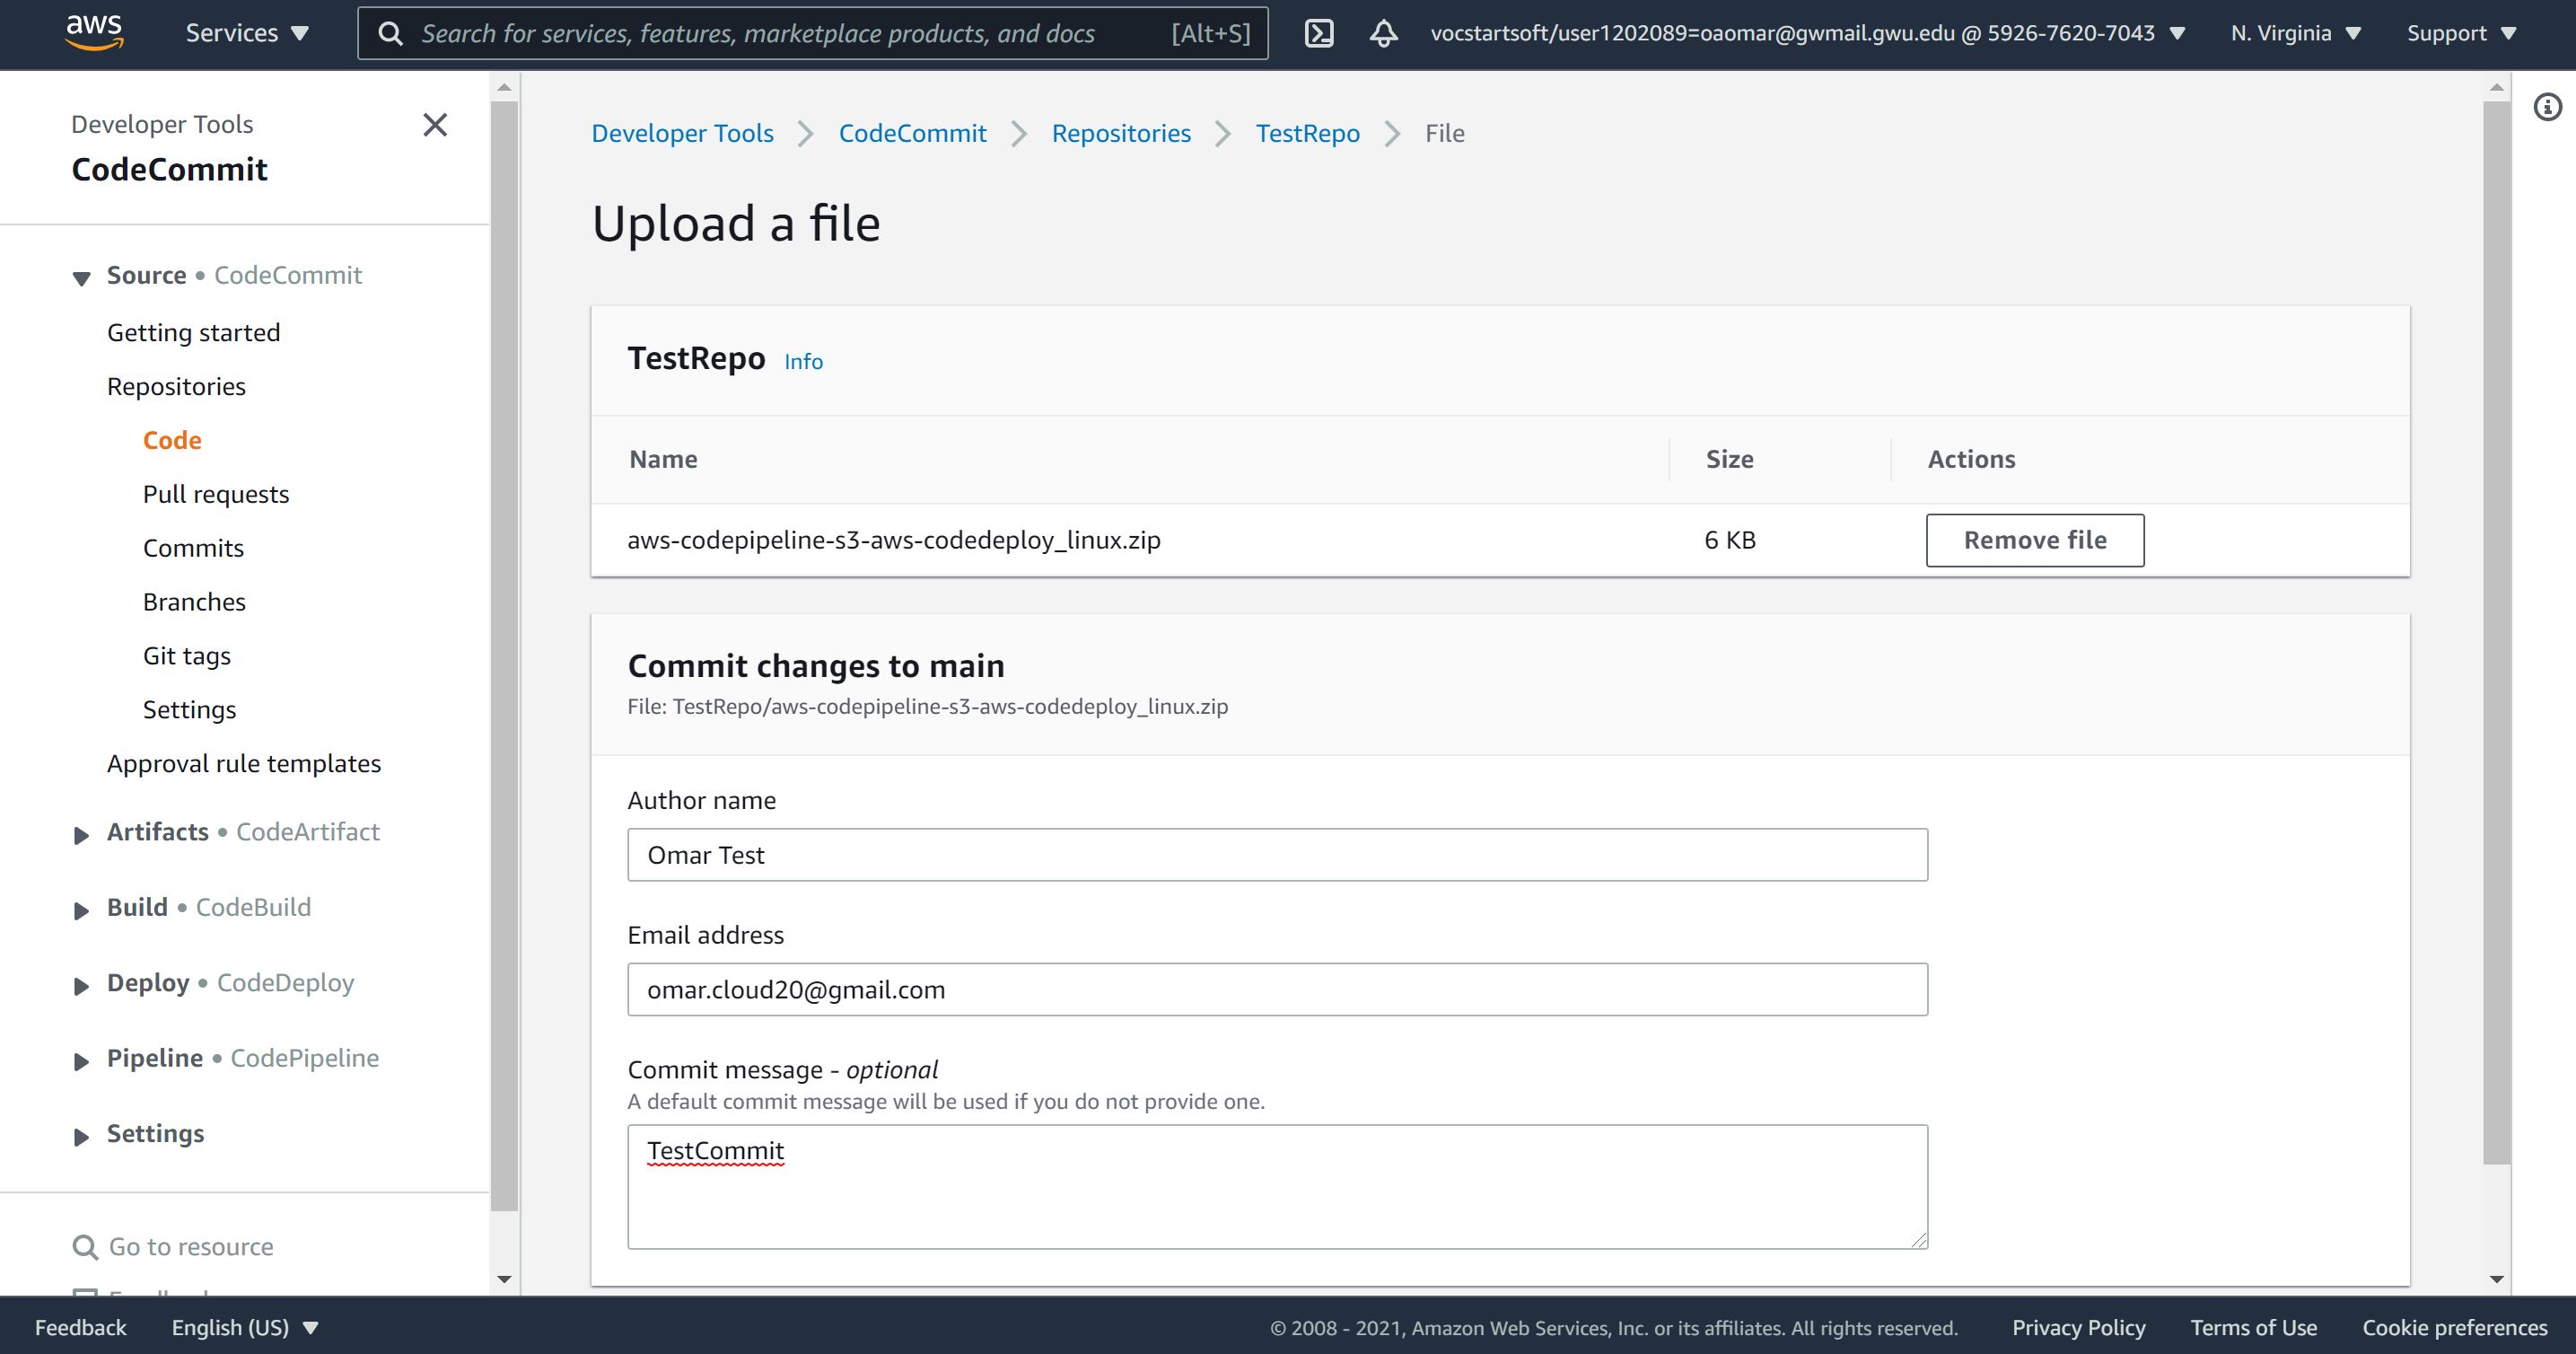
- Next, upload the sample application zip file to the repo. You may need to give the Author name, Email address and description. Then, click on COmmit change as shown below.

Step 2: Creating an application in Elastic Beanstalk
- Navigate to Elastic Beanstalk and click on Create Application.
- On the left hand menu, click on Environments and select Web server environment. Then, enter a name for the application, Application tag, choose PHP for a platform as shown below and then click on Create application.
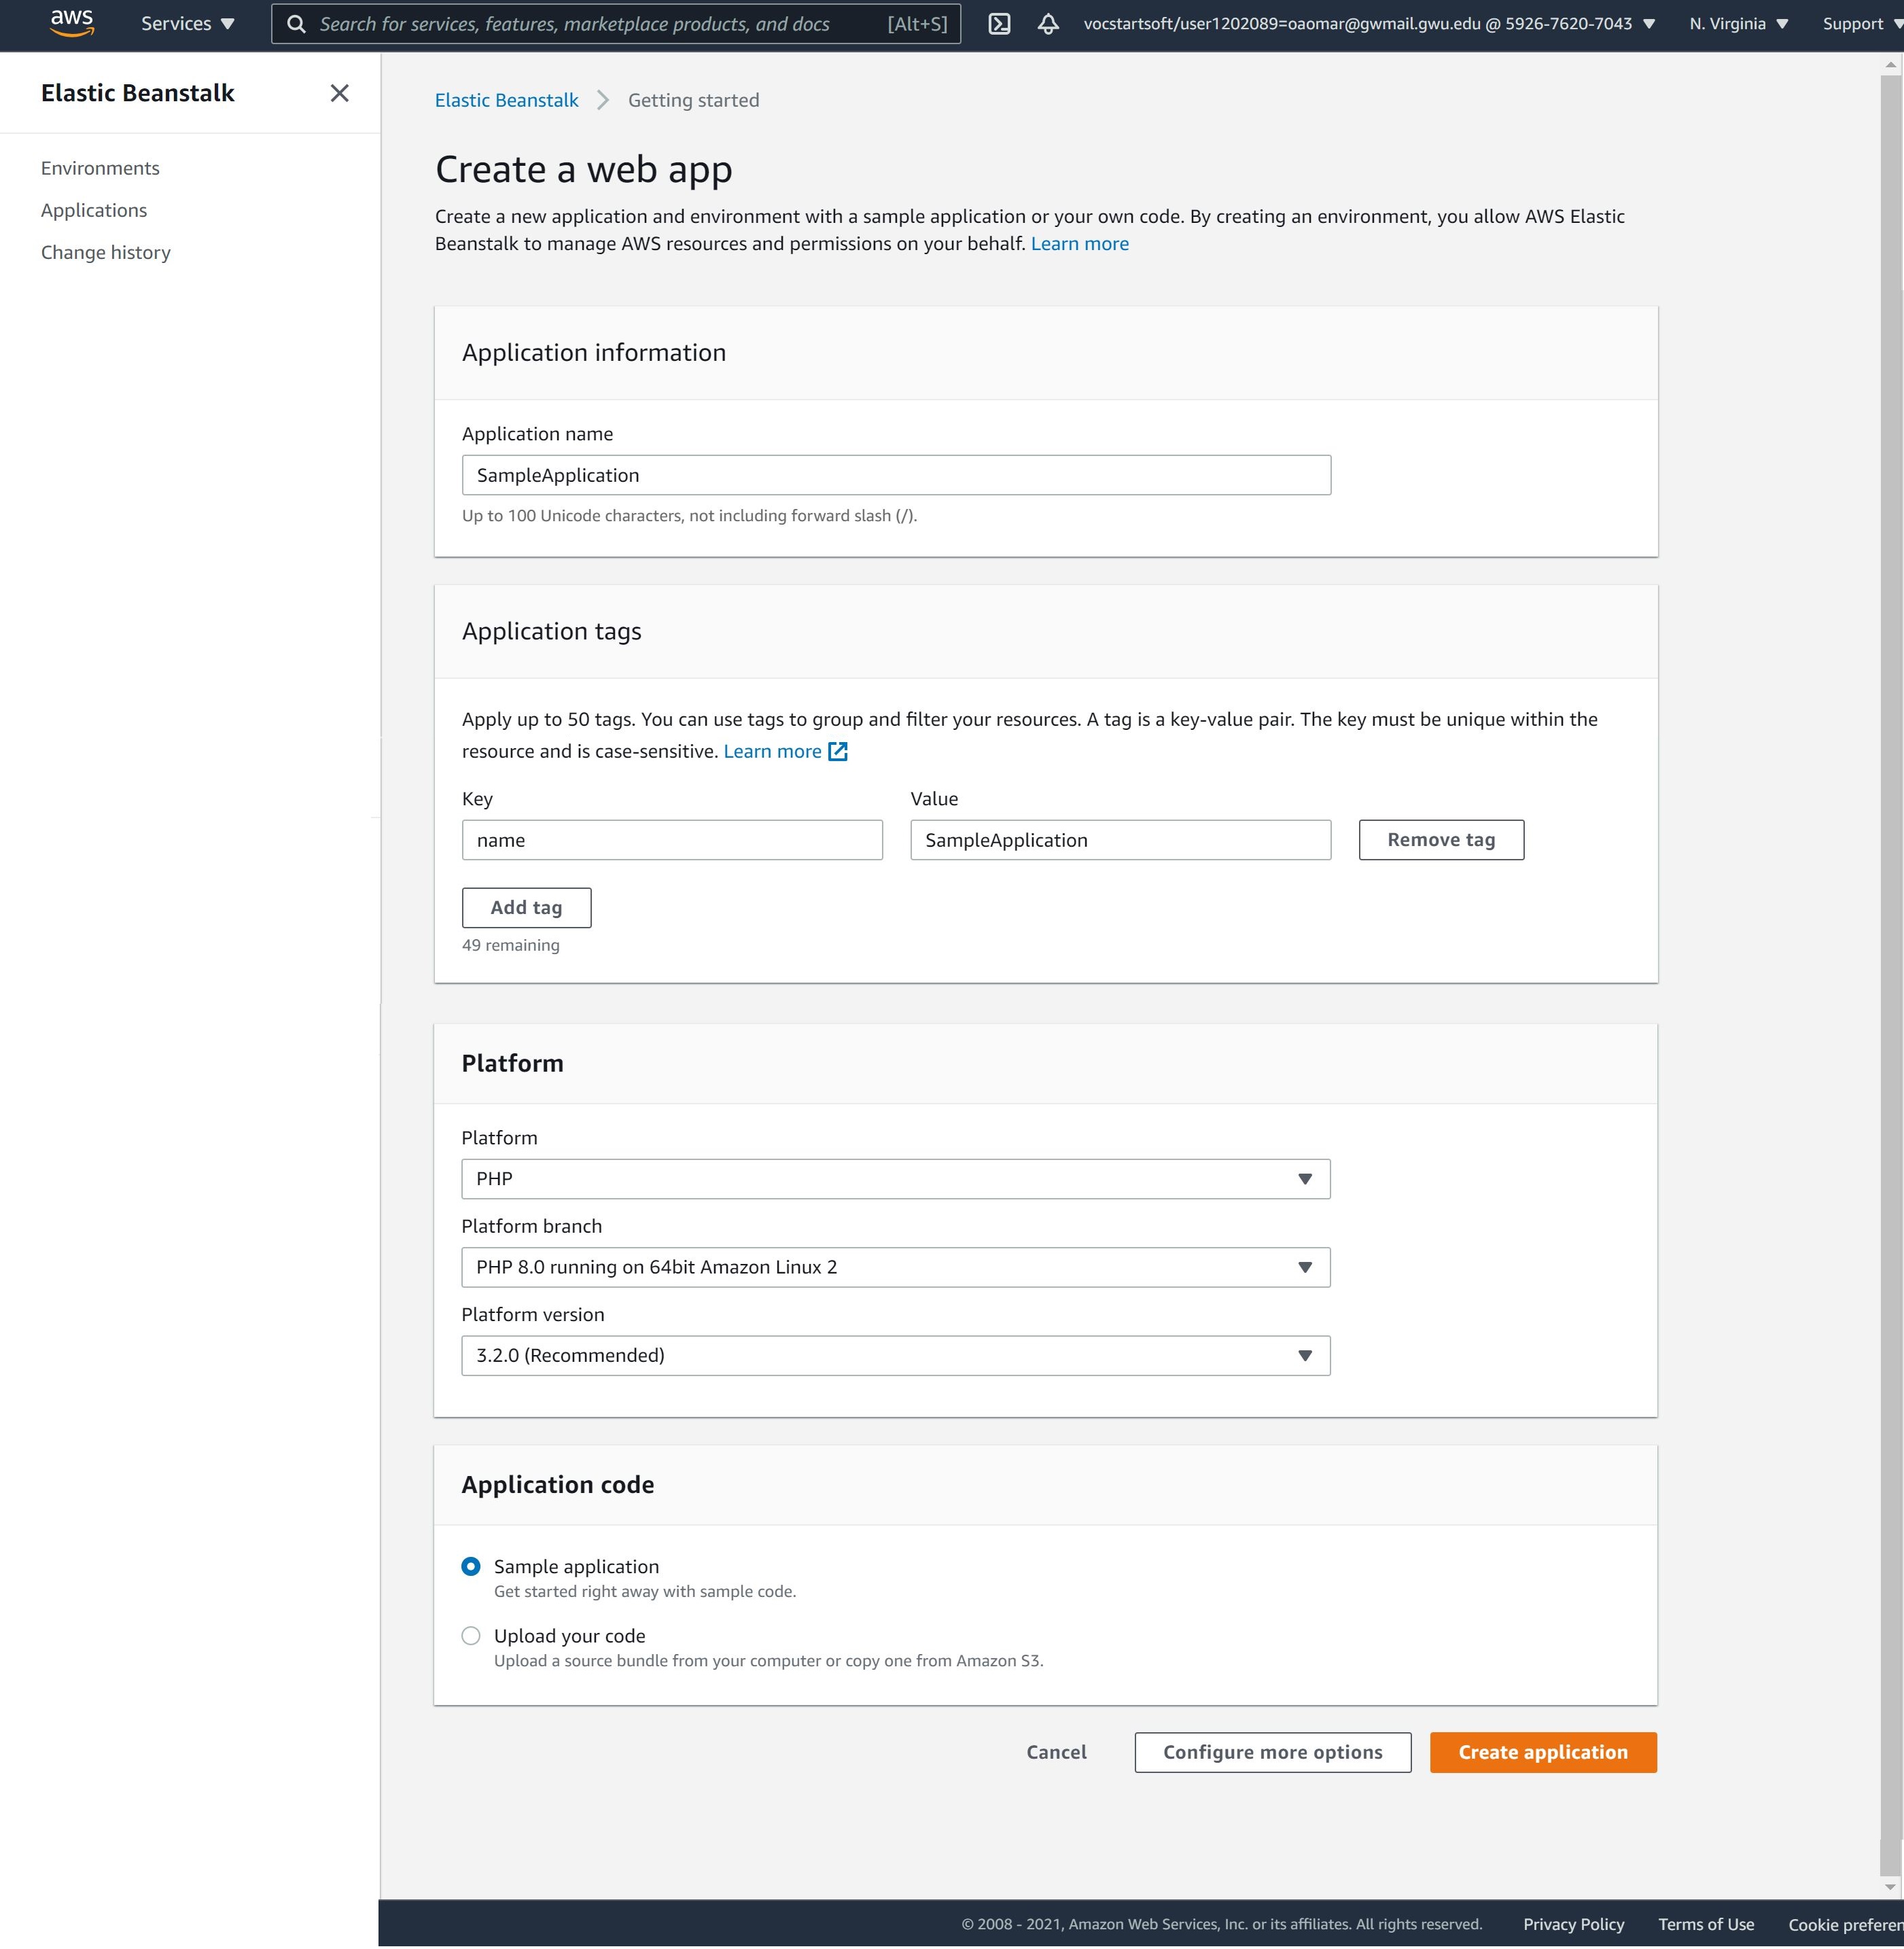
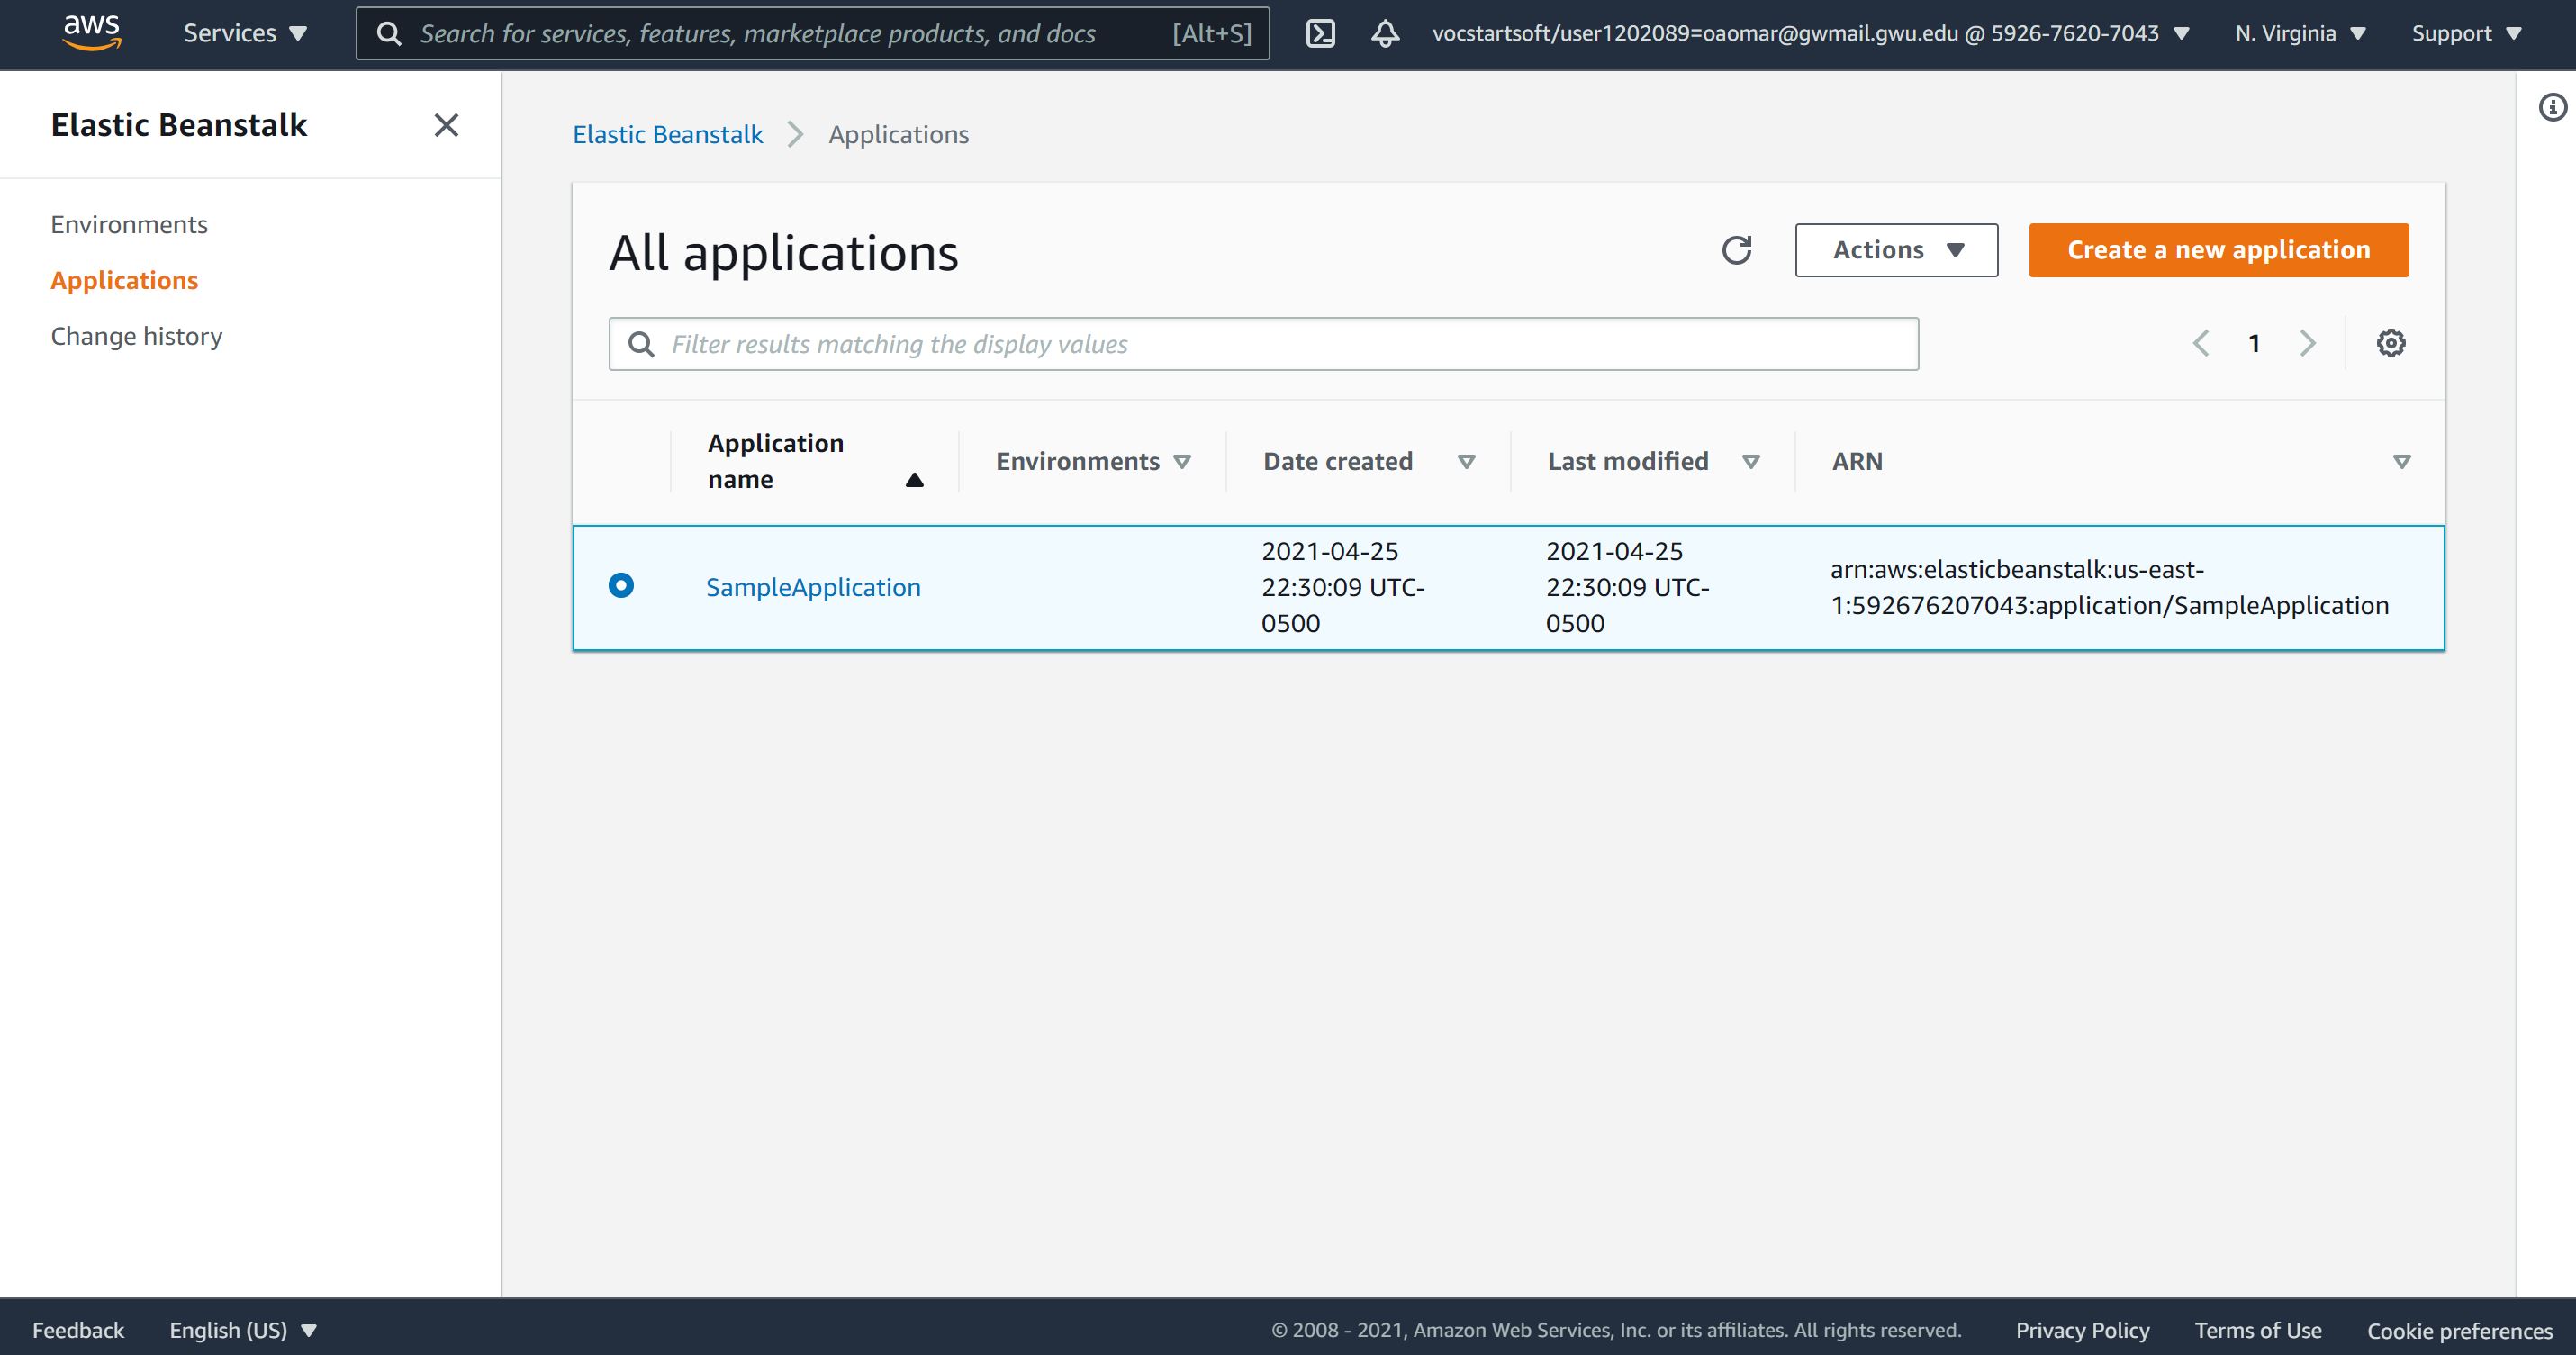
Note: it will take a few minutes to setup the environment. Once the environment is setup, you should see the screen below
stopped here.
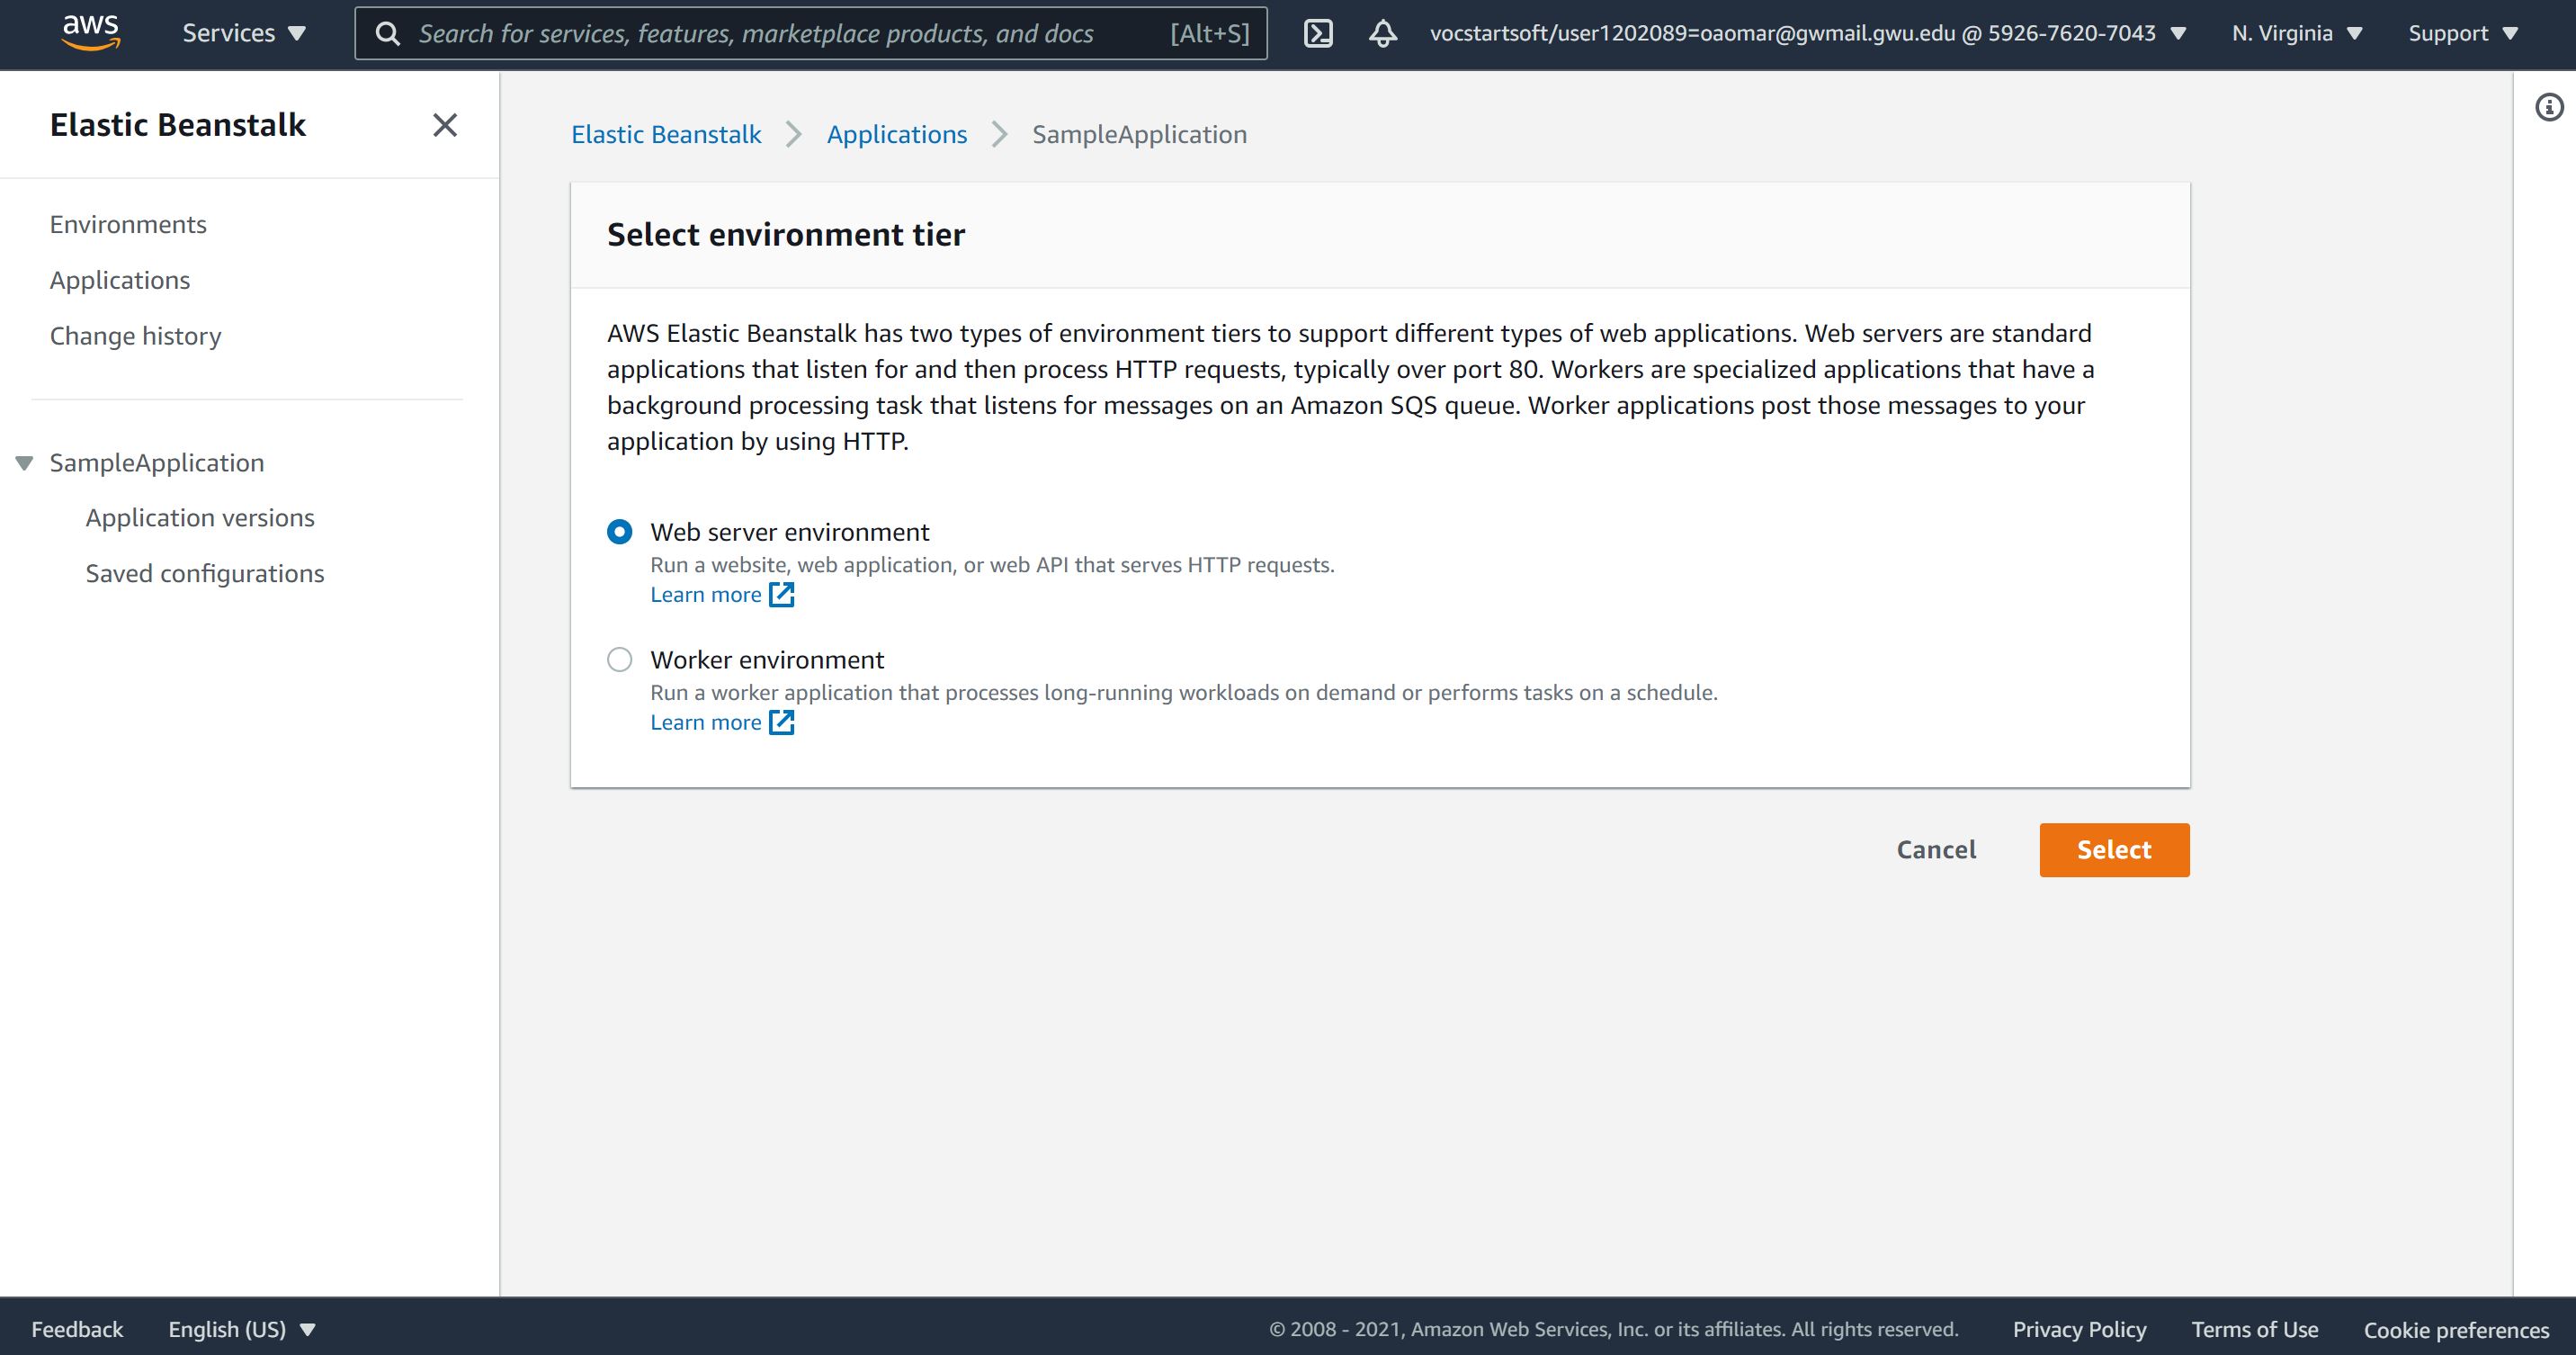
- Click on the Application to create a new environment and then click on Create a new environment. Select Web server enviornment and click Select.
Step 4: Creating our first pipeline in CodePipeline
To create a CodePipeline automated release process:
-
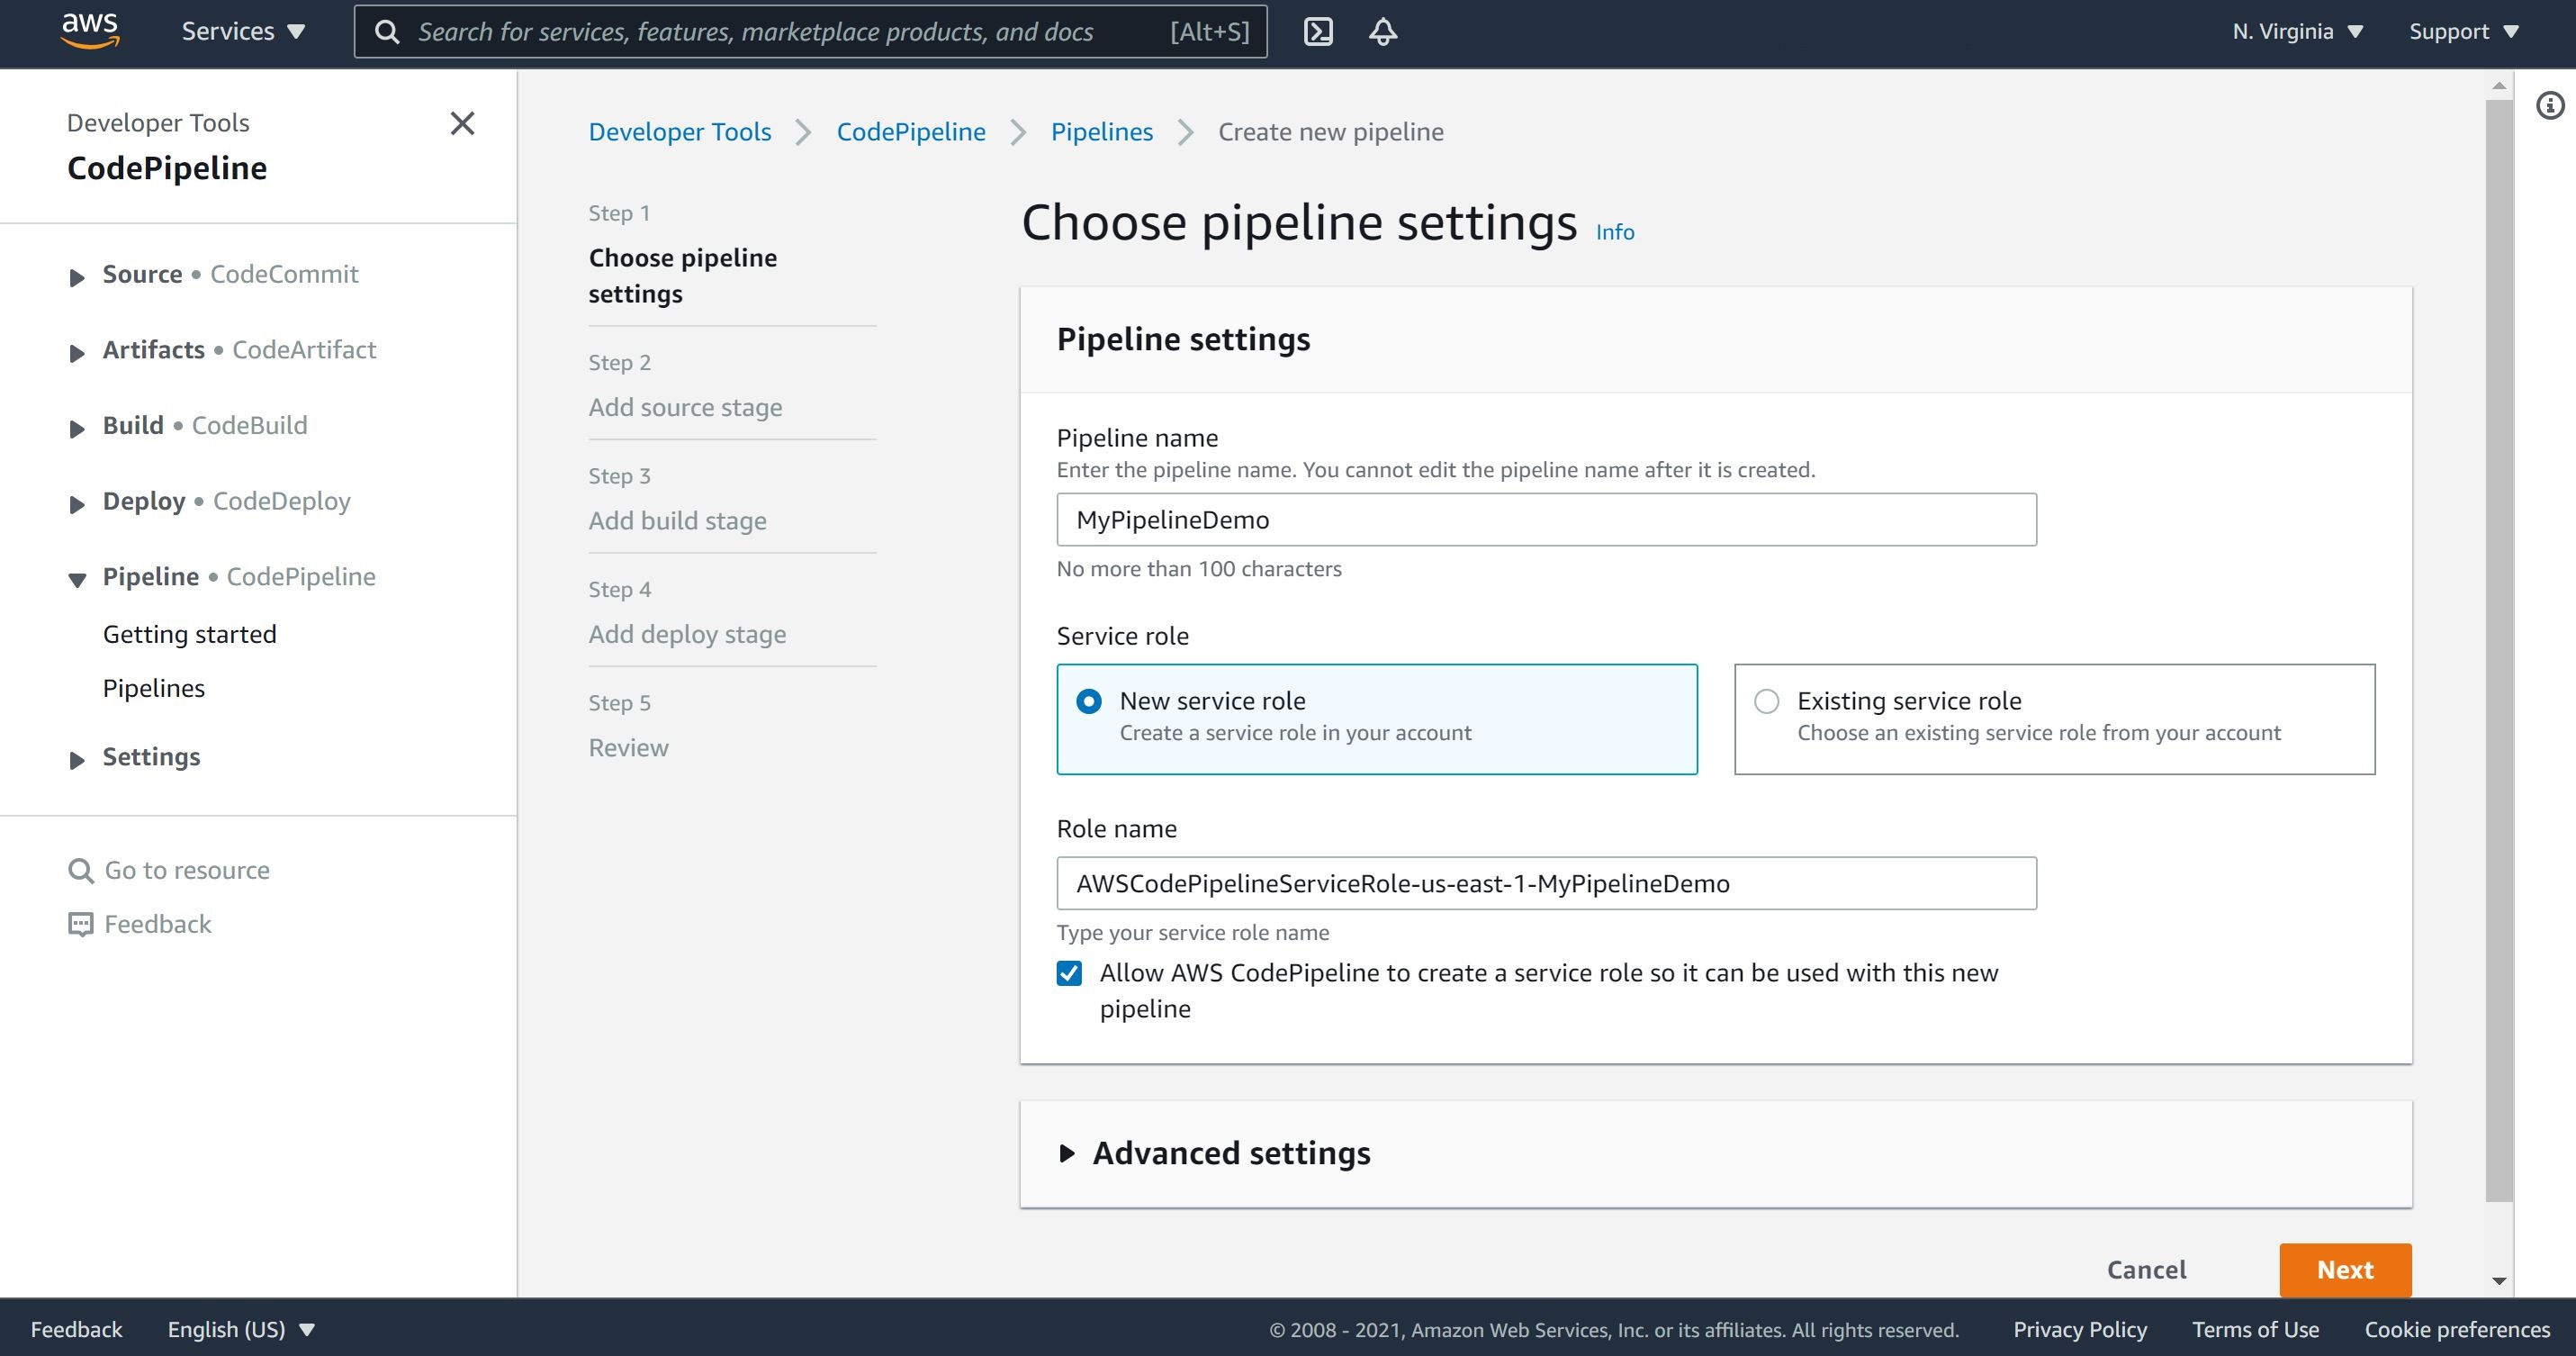
Navigate to Pipeline menu and Create pipeline.
-
Enter a name for the pipeline.
-
In Service role, choose new service role to allow CodePipeline to create a new service role in IAM. In Role name, the role and policy name both default to this format: AWSCodePipelineServiceRole-region-pipeline_name.
-
Leave the defaults for the Advanced section and then choose Next.
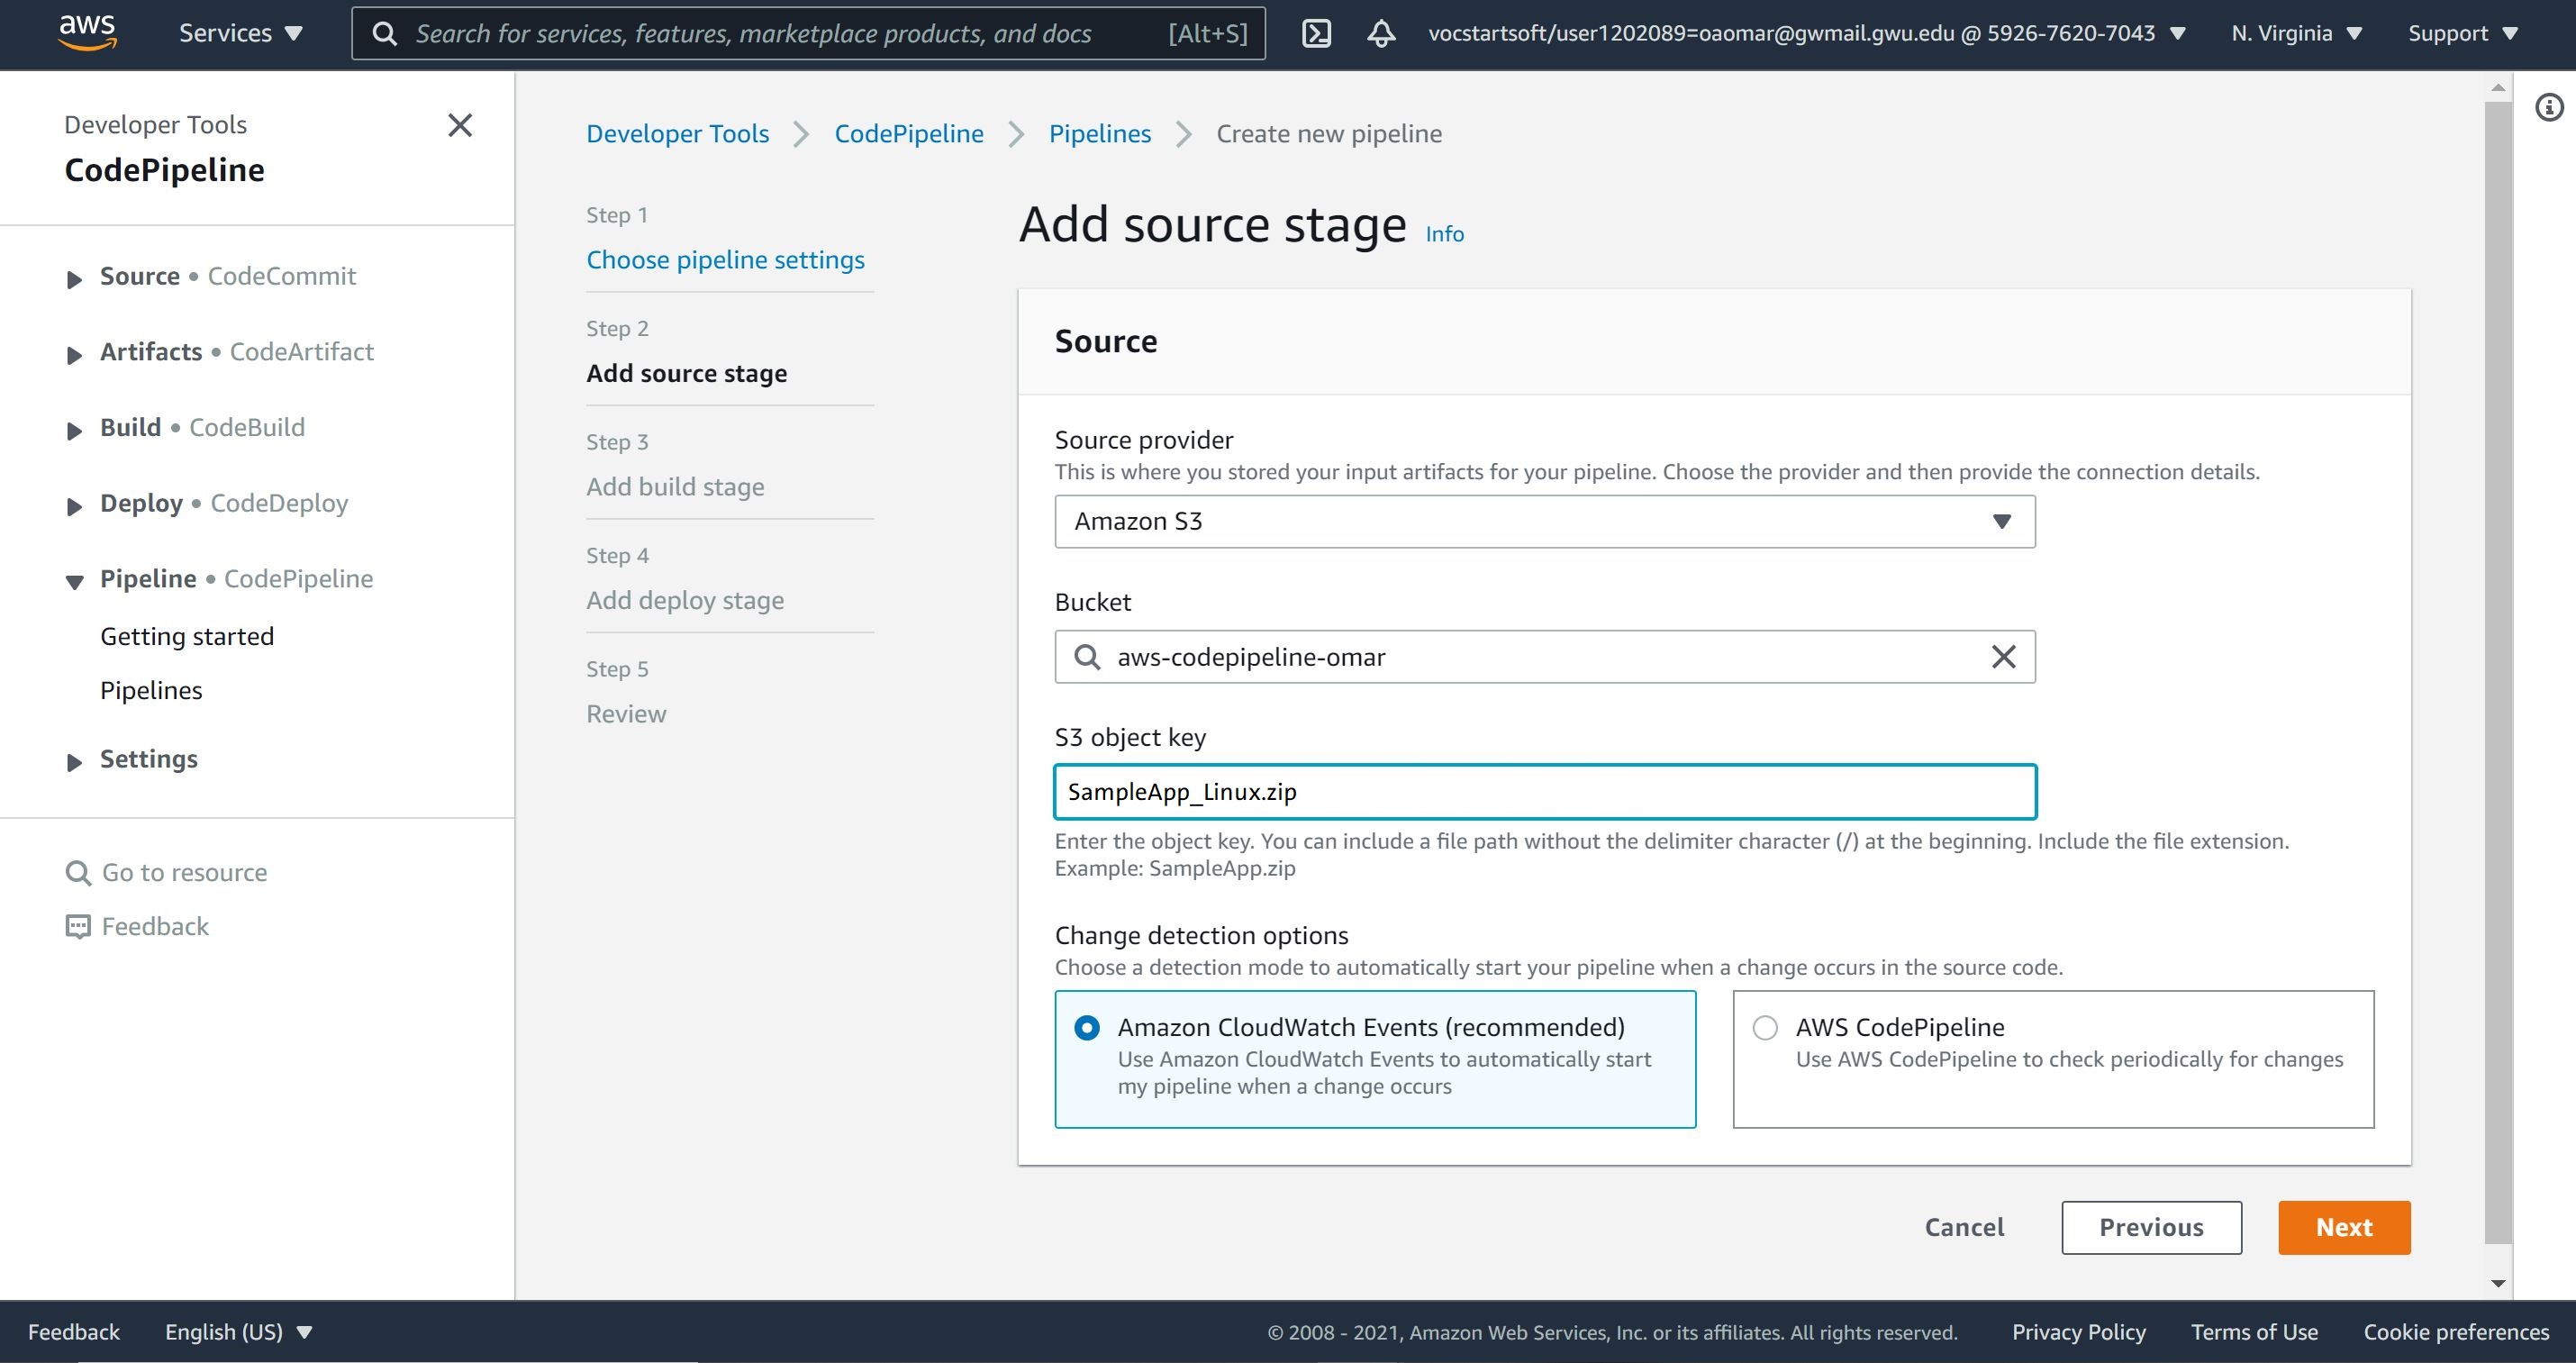
- In Step 2: Add source stage, in Source provider, choose Amazon S3. In Bucket, enter the name of the S3 bucket we have previously created. In S3 object key, enter the object key with or without a file path, and remember to include the file extension. For example, for SampleApp_Windows.zip, enter the sample file name as shown in this example:
aws-codepipeline-s3-aws-codedeploy_linux.zip
- Choose Next step and leave defaults for Amazon CloudWatch Events as recommended. Choose Next.
- In Step 3: Add build stage, choose Skip build stage, and then accept the warning message by choosing Skip again. Choose Next.
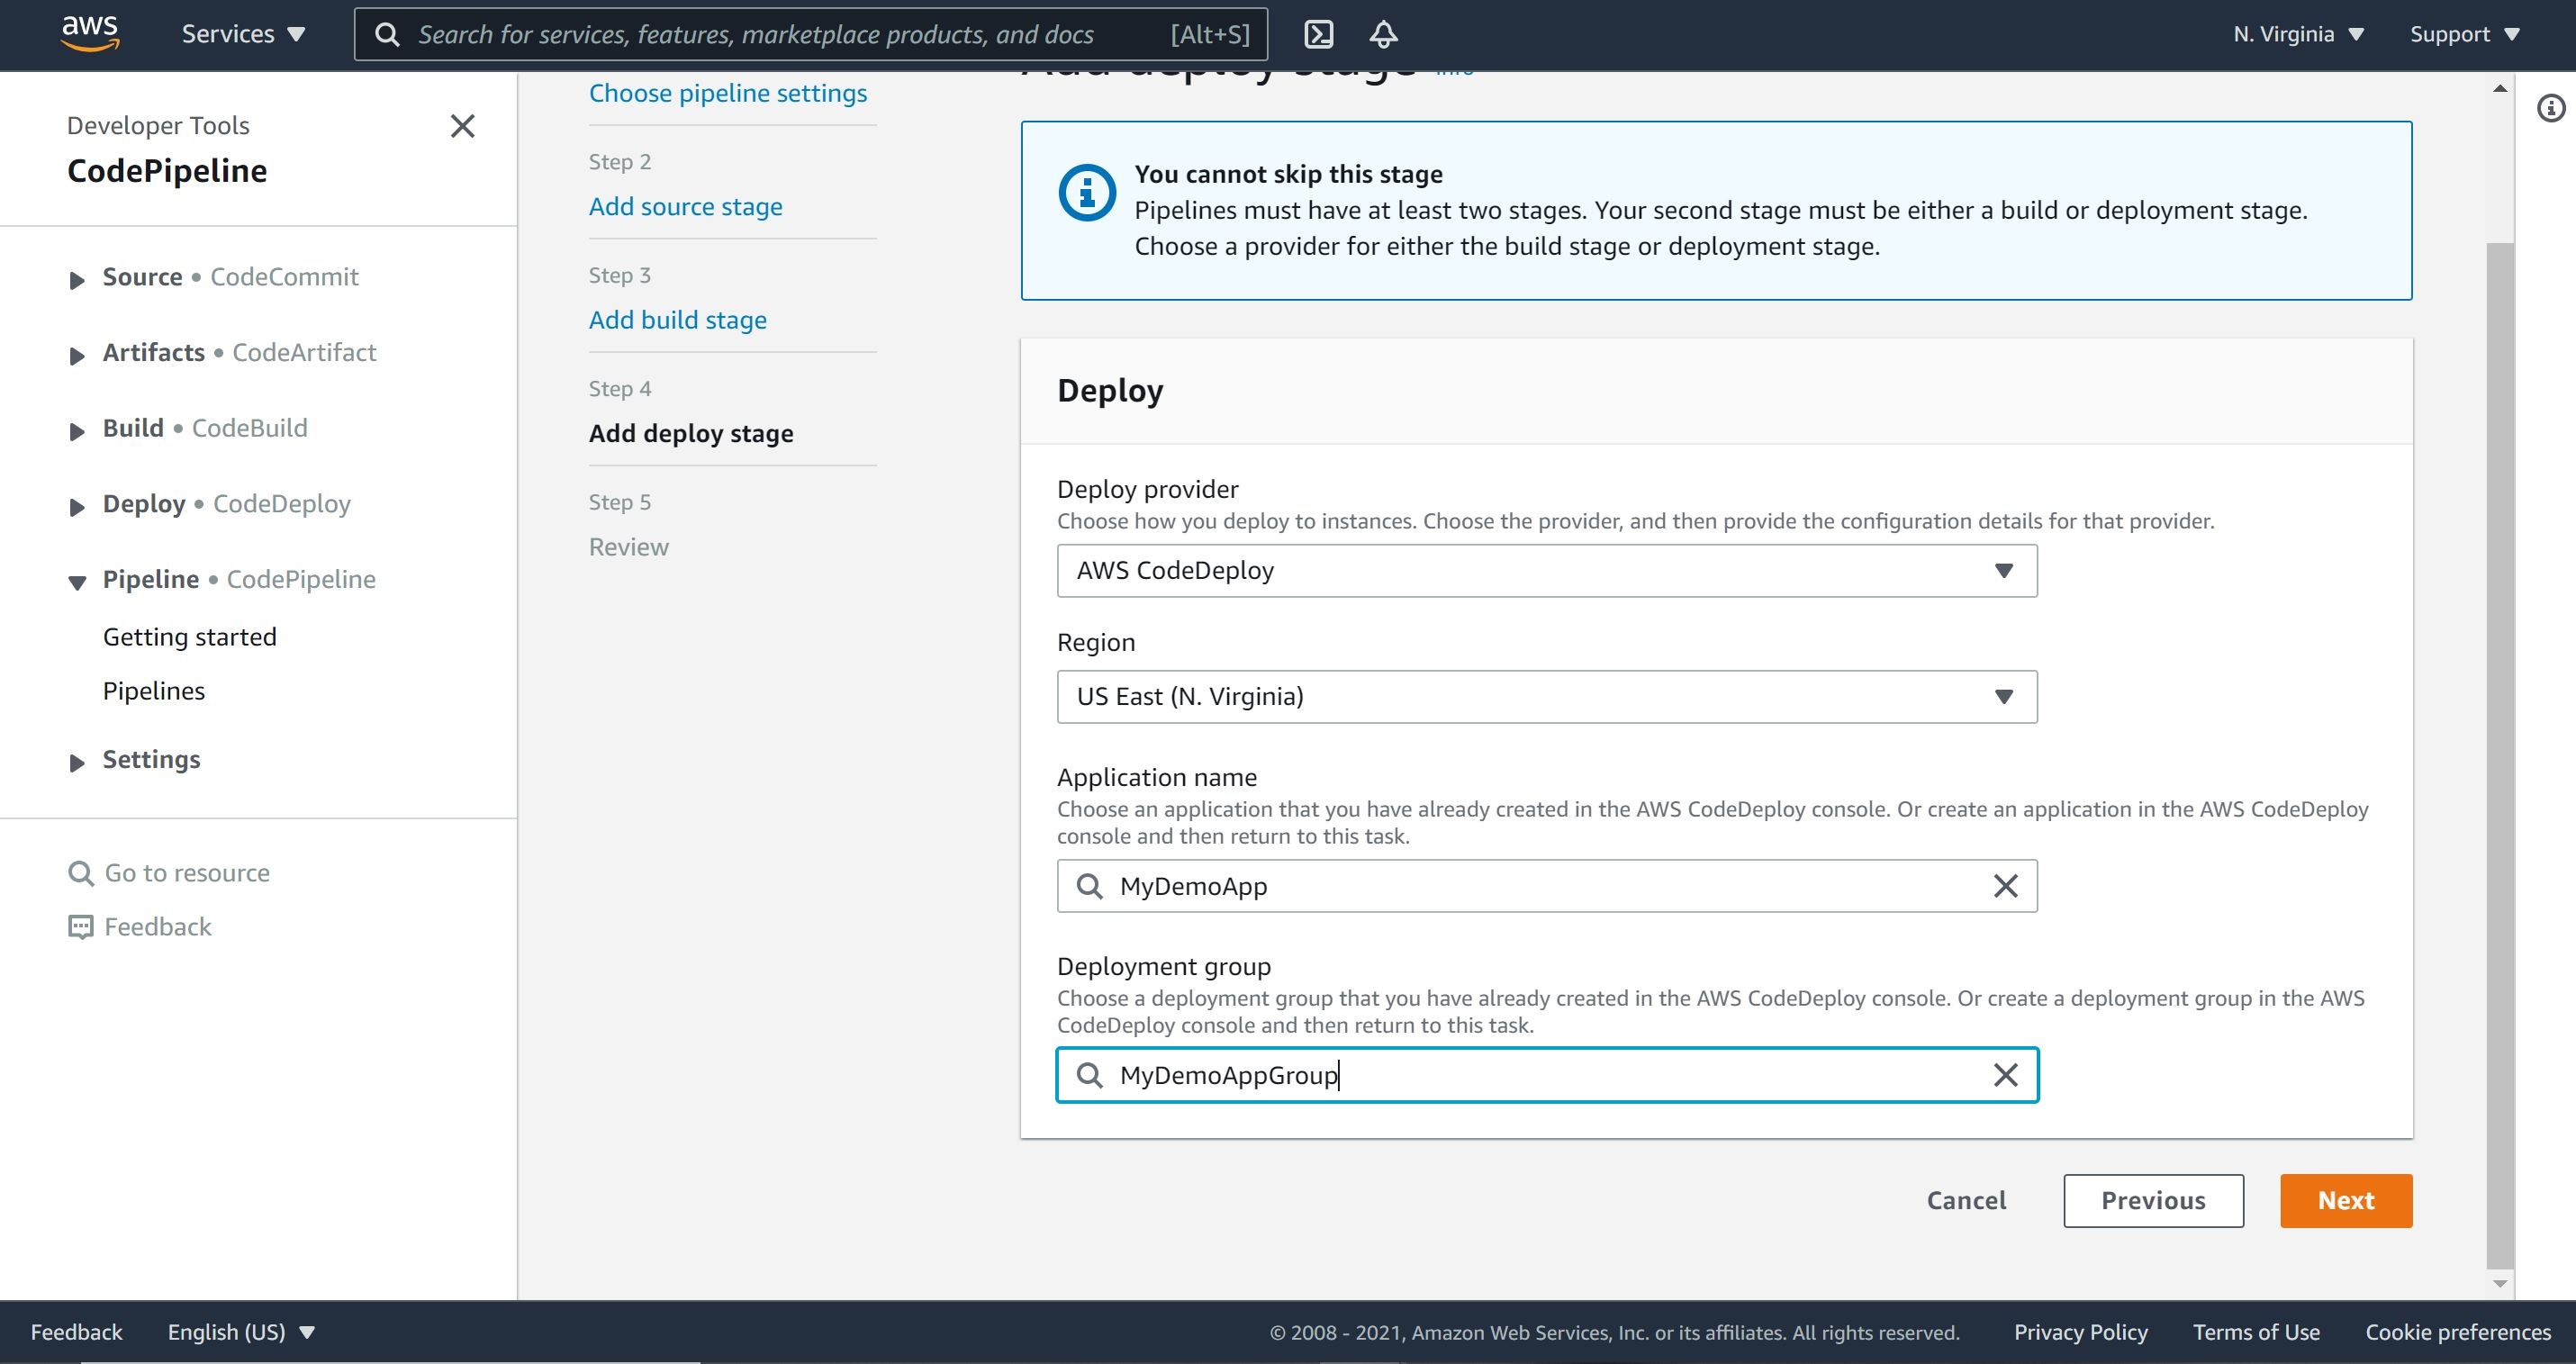
- In Step 4: Add deploy stage, in Deploy provider, choose AWS CodeDeploy. The Region field defaults to the same AWS Region as your pipeline. In Application name, enter the name your chose previously for the application, or choose the Refresh button, and then choose the application name from the list. In Deployment group, enter the name your chose previously for the deployment group, or choose it from the list, and then choose Next.
- In Step 5: Review, review the information, and then choose Create pipeline.
- The pipeline starts to run. You can view progress and success and failure messages as the CodePipeline sample deploys a webpage to each of the Ubuntu EC2 instances in the CodeDeploy deployment.
To verify your pipeline ran successfully
On the Description tab, in Public DNS, copy the address, and then paste it into the address bar of your web browser. View the index page for the sample application you uploaded to your S3 bucket.
Conclusion:
By the end of this tutorial, we have successfully created a simple pipeline in CodePipeline. The pipeline has two stages:
-
A source stage named Source, which detects changes in the versioned sample application stored in the S3 bucket and pulls those changes into the pipeline.
-
A Deploy stage that deploys those changes to EC2 instances with CodeDeploy.
Congratulations!