Docker Image on ECS Fargate
A Sample Web Application Containerized as a Docker image Deployed on AWS ECS Fargate
In this tutorial, we will package and containerize a sample web application as a Docker image running on Apache Tomcat having JRE-8 as a runtime. Then, we will push this new Docker image to our public repository at Dockerhub. The web application, which is packaged into a Docker image will be deployed on AWS ECS Fargate cluster. Finally, to view and access our web application cluster, we will utilize a DNS of a load balancer.
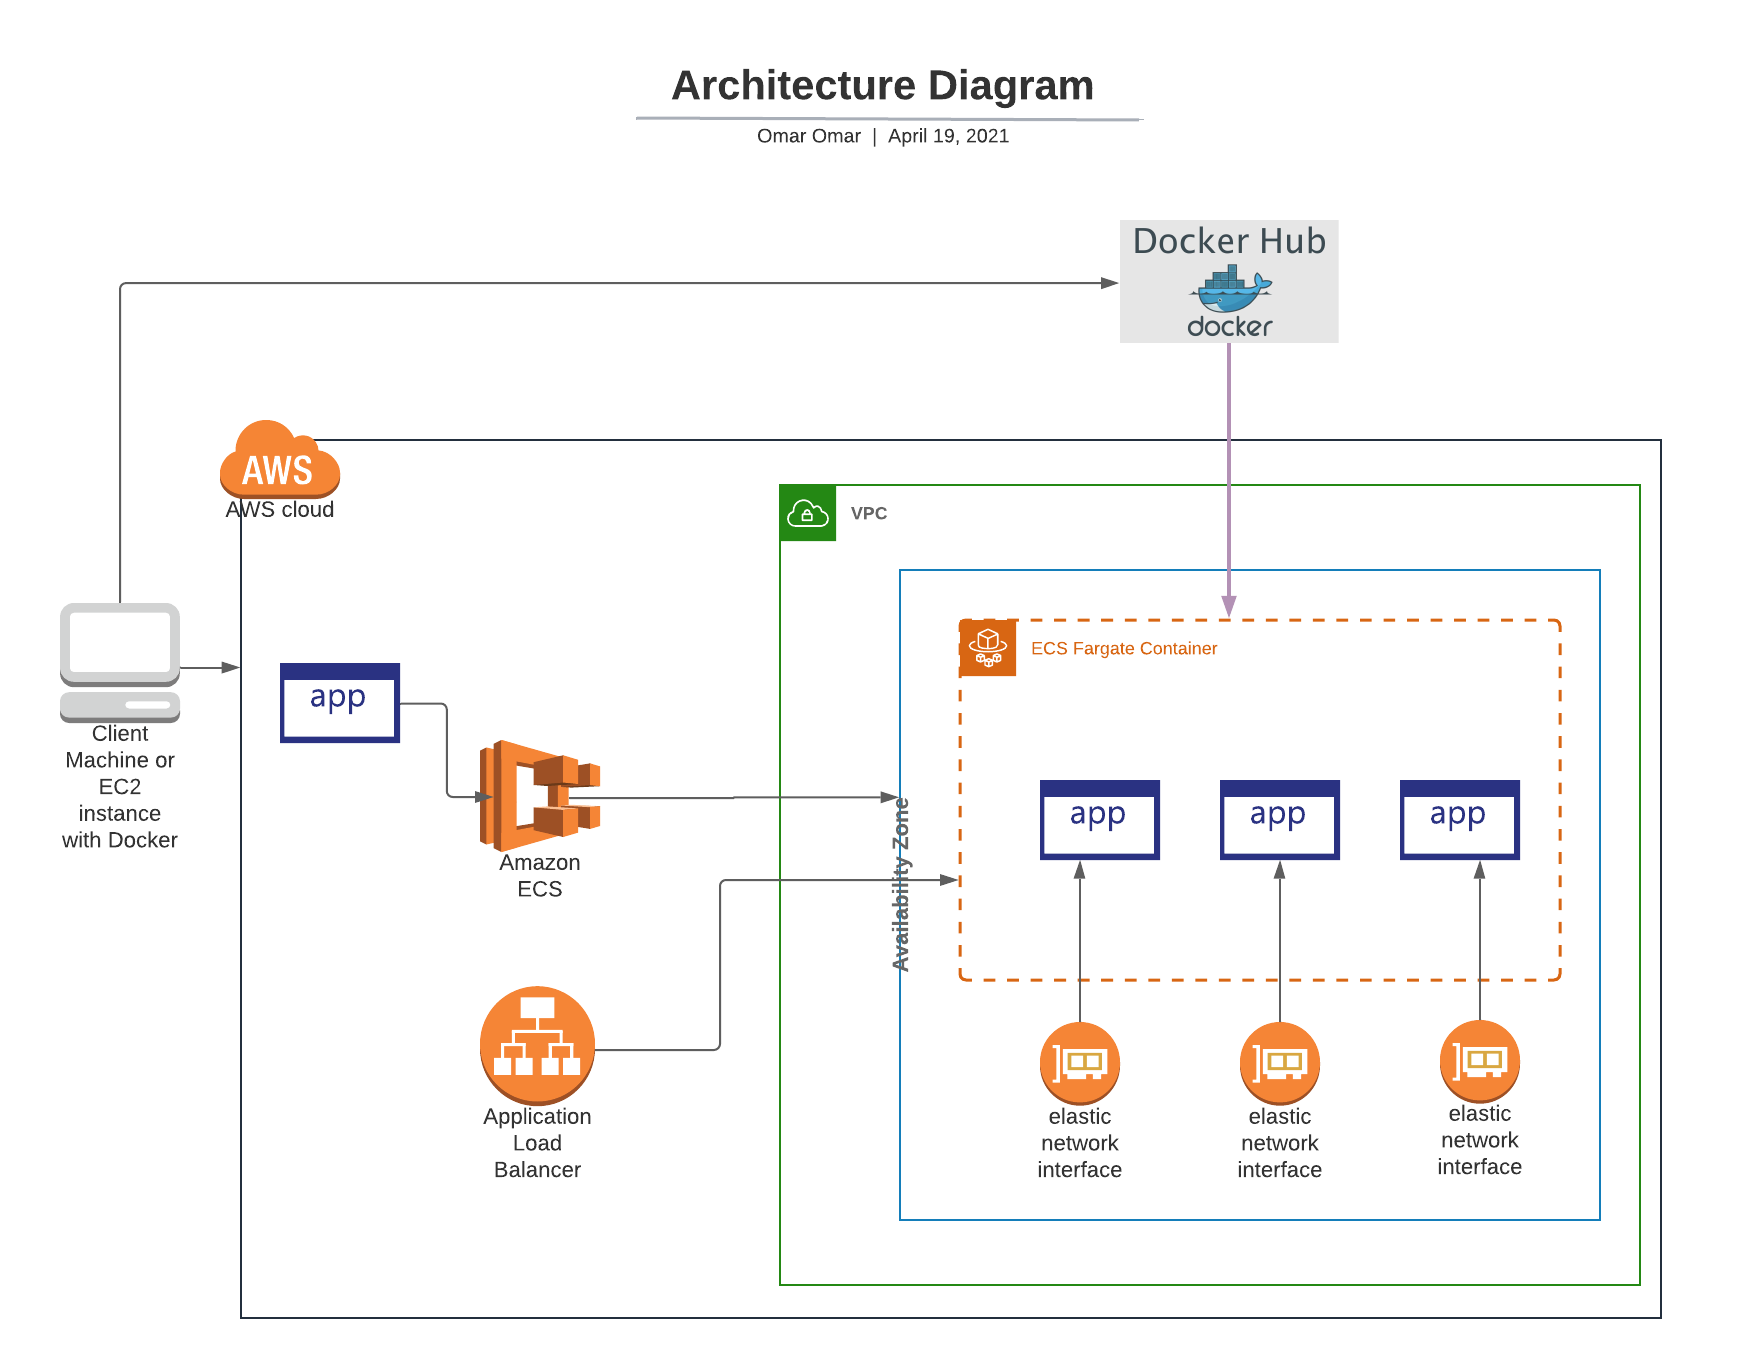
The below diagram is our design architecture for this tutorial.
It’s optional to either utilize Ubuntu EC2 instance or your own device to package and push the Docker image to Dockerhub. I expect that you have Docker installed on your instance or device, if not, please refer to my previous tutorial install Docker.
Architecture Implementation - Tutorial Scenario:
- Download the WAR file from my GitHub
- Web application needs to be packaged as a Docker image running on Tomcat having JRE8 - you will have to write a Dockerfile
- Once the image is created, run and verify image by accessing web application using ec2 instance public-ip
- Sign up for docker hub and create public repository.
- Tag the image appropriately and push to Docker Hub Repository.
- Using AWS ECS Fargate create a cluster, task and service(s).
Step 1: Create a Docker image
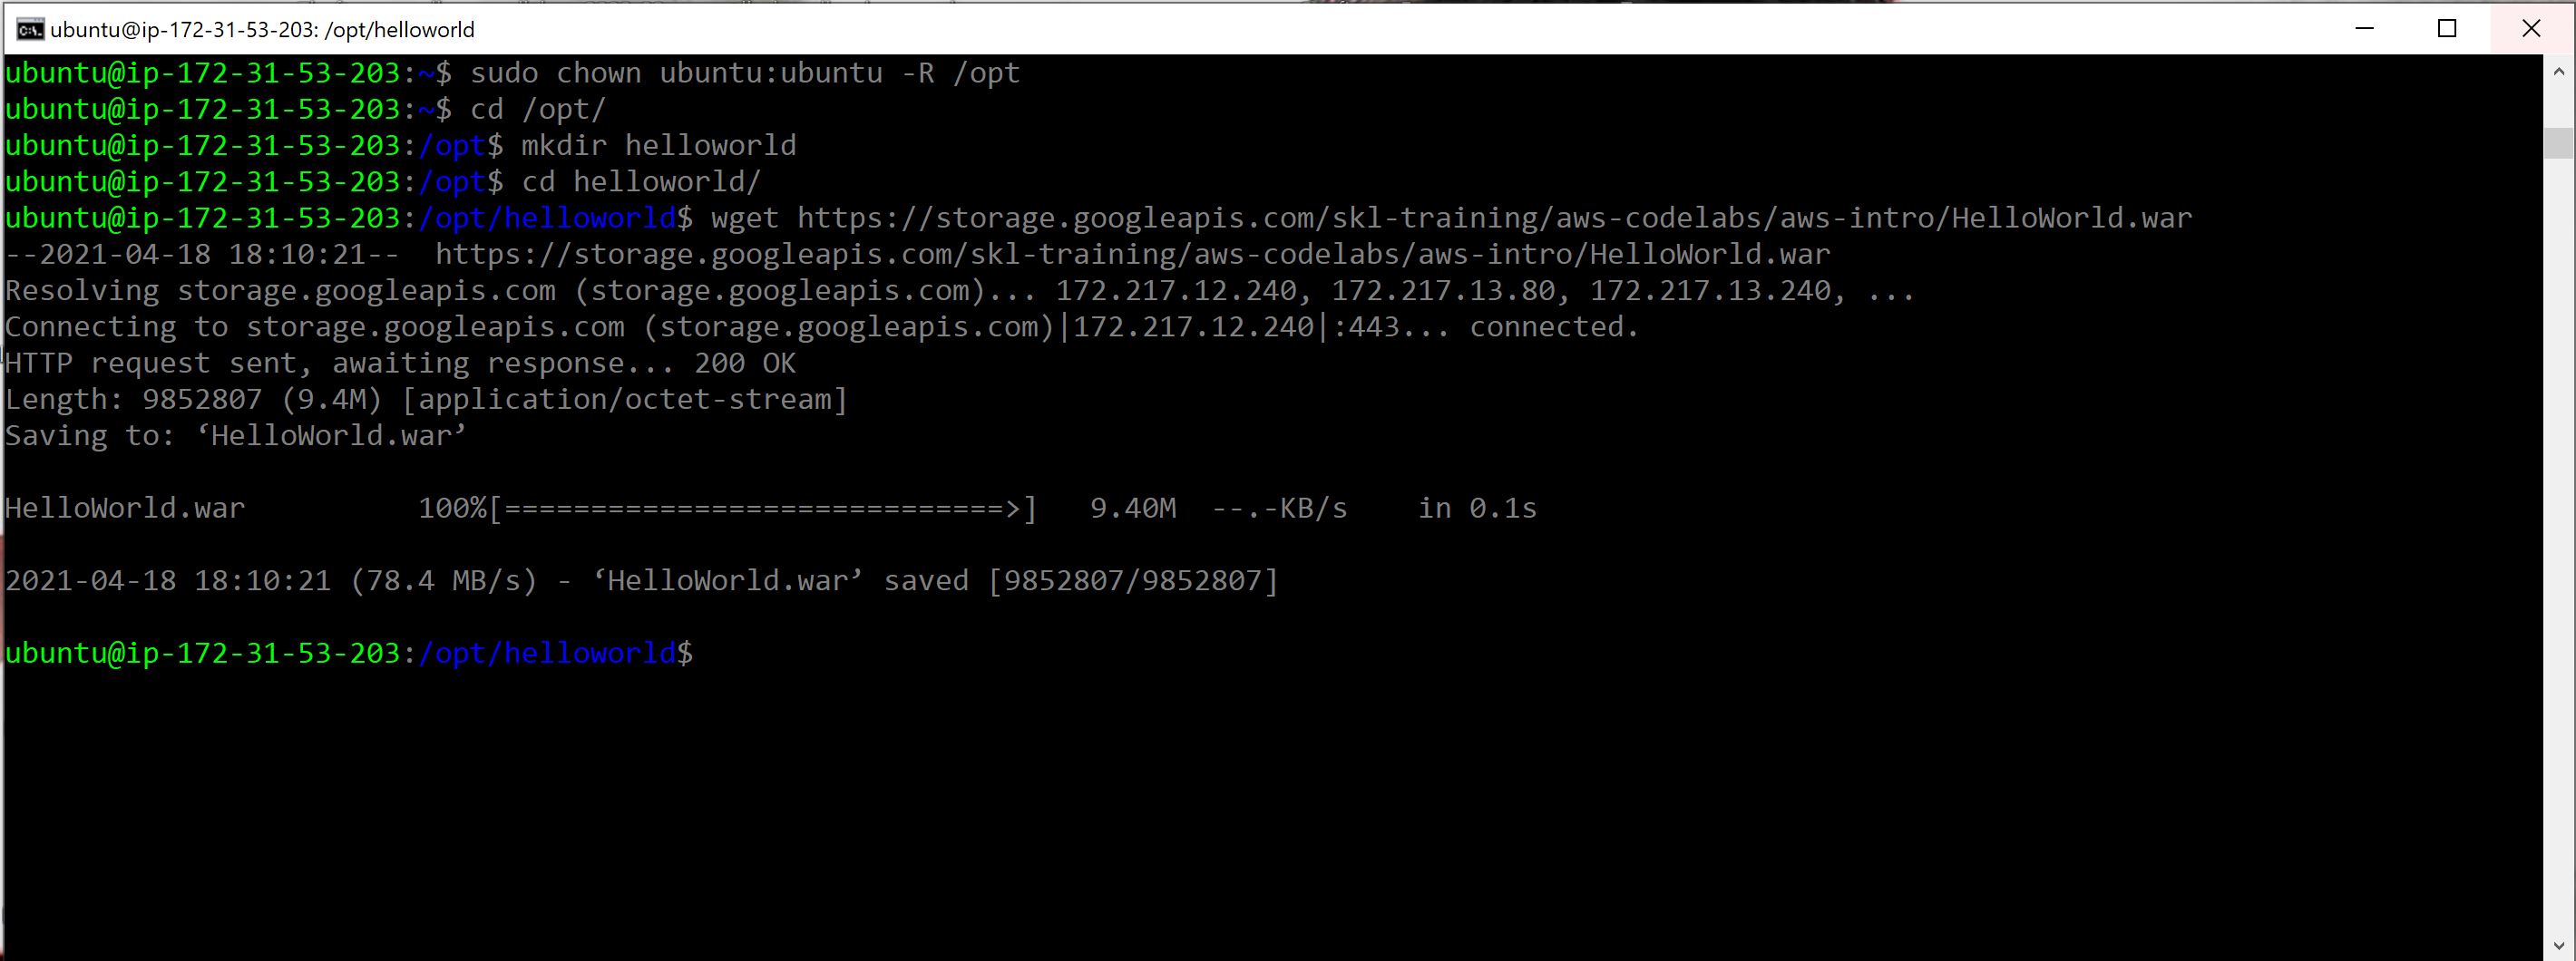
- Navigate to folder /opt and create helloworld folder.
sudo chown ubuntu:ubuntu -R /opt
cd /opt
mkdir helloworld
cd helloworld/
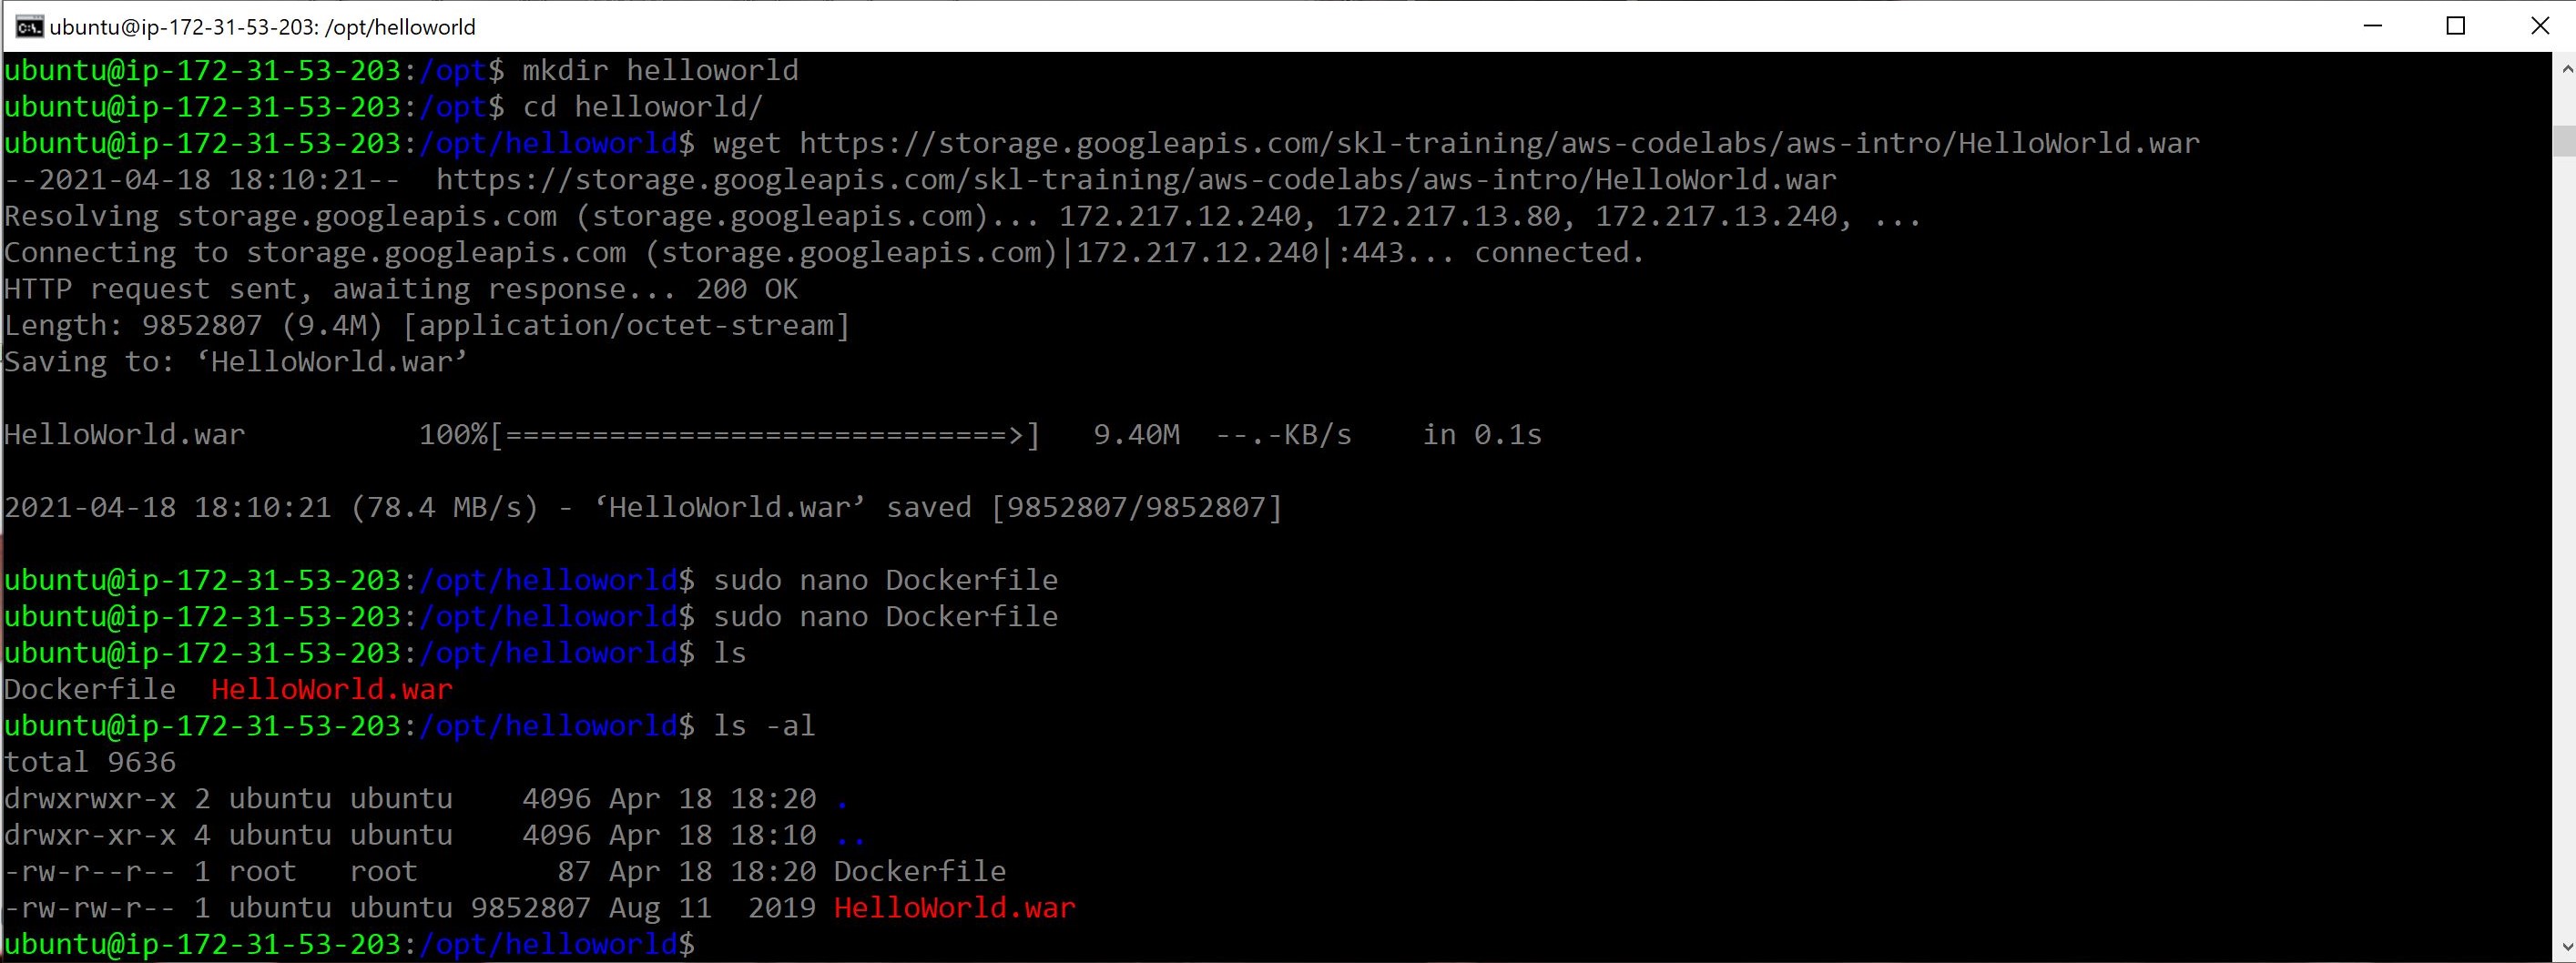
- Download the War file from my GitHub to /opt/helloworld
wget https://github.com/OmarCloud20/aws-tutorials/raw/main/prj3/HelloWorld.war
- Create a Docker file in the helloworld folder.
cd /opt/helloworld/
sudo nano Dockerfile
Then, add or type the following sentences into the Dockerfile. Note, you could add your name and email address as a maintainer.
FROM tomcat:jre8
MAINTAINER [your name]
COPY HelloWorld.war /usr/local/tomcat/webapps
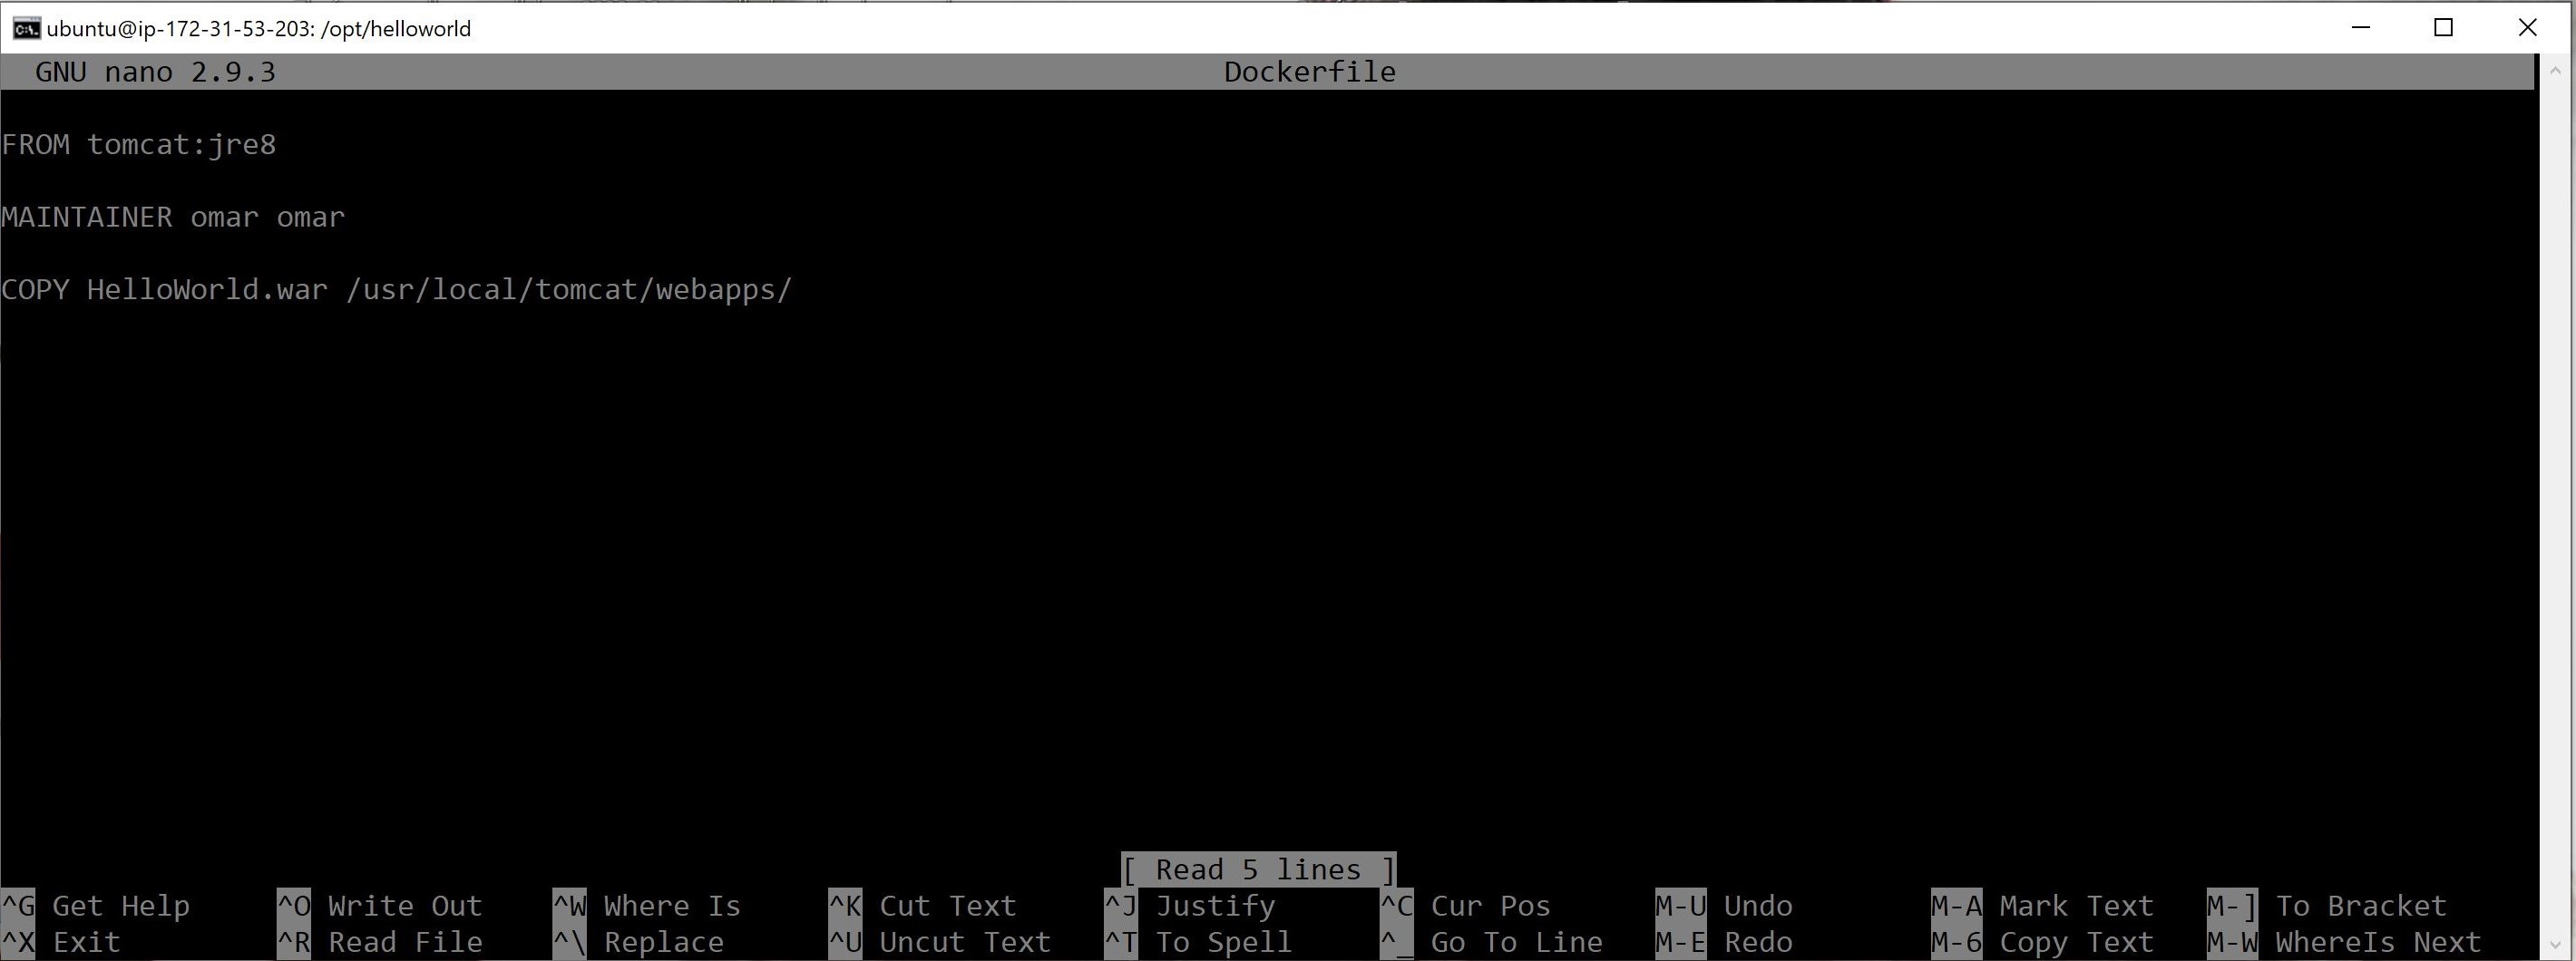
Note: to save the file in nano text editor, hold ^x, type yes and click enter.
- Verify that the file is created.
ls -al
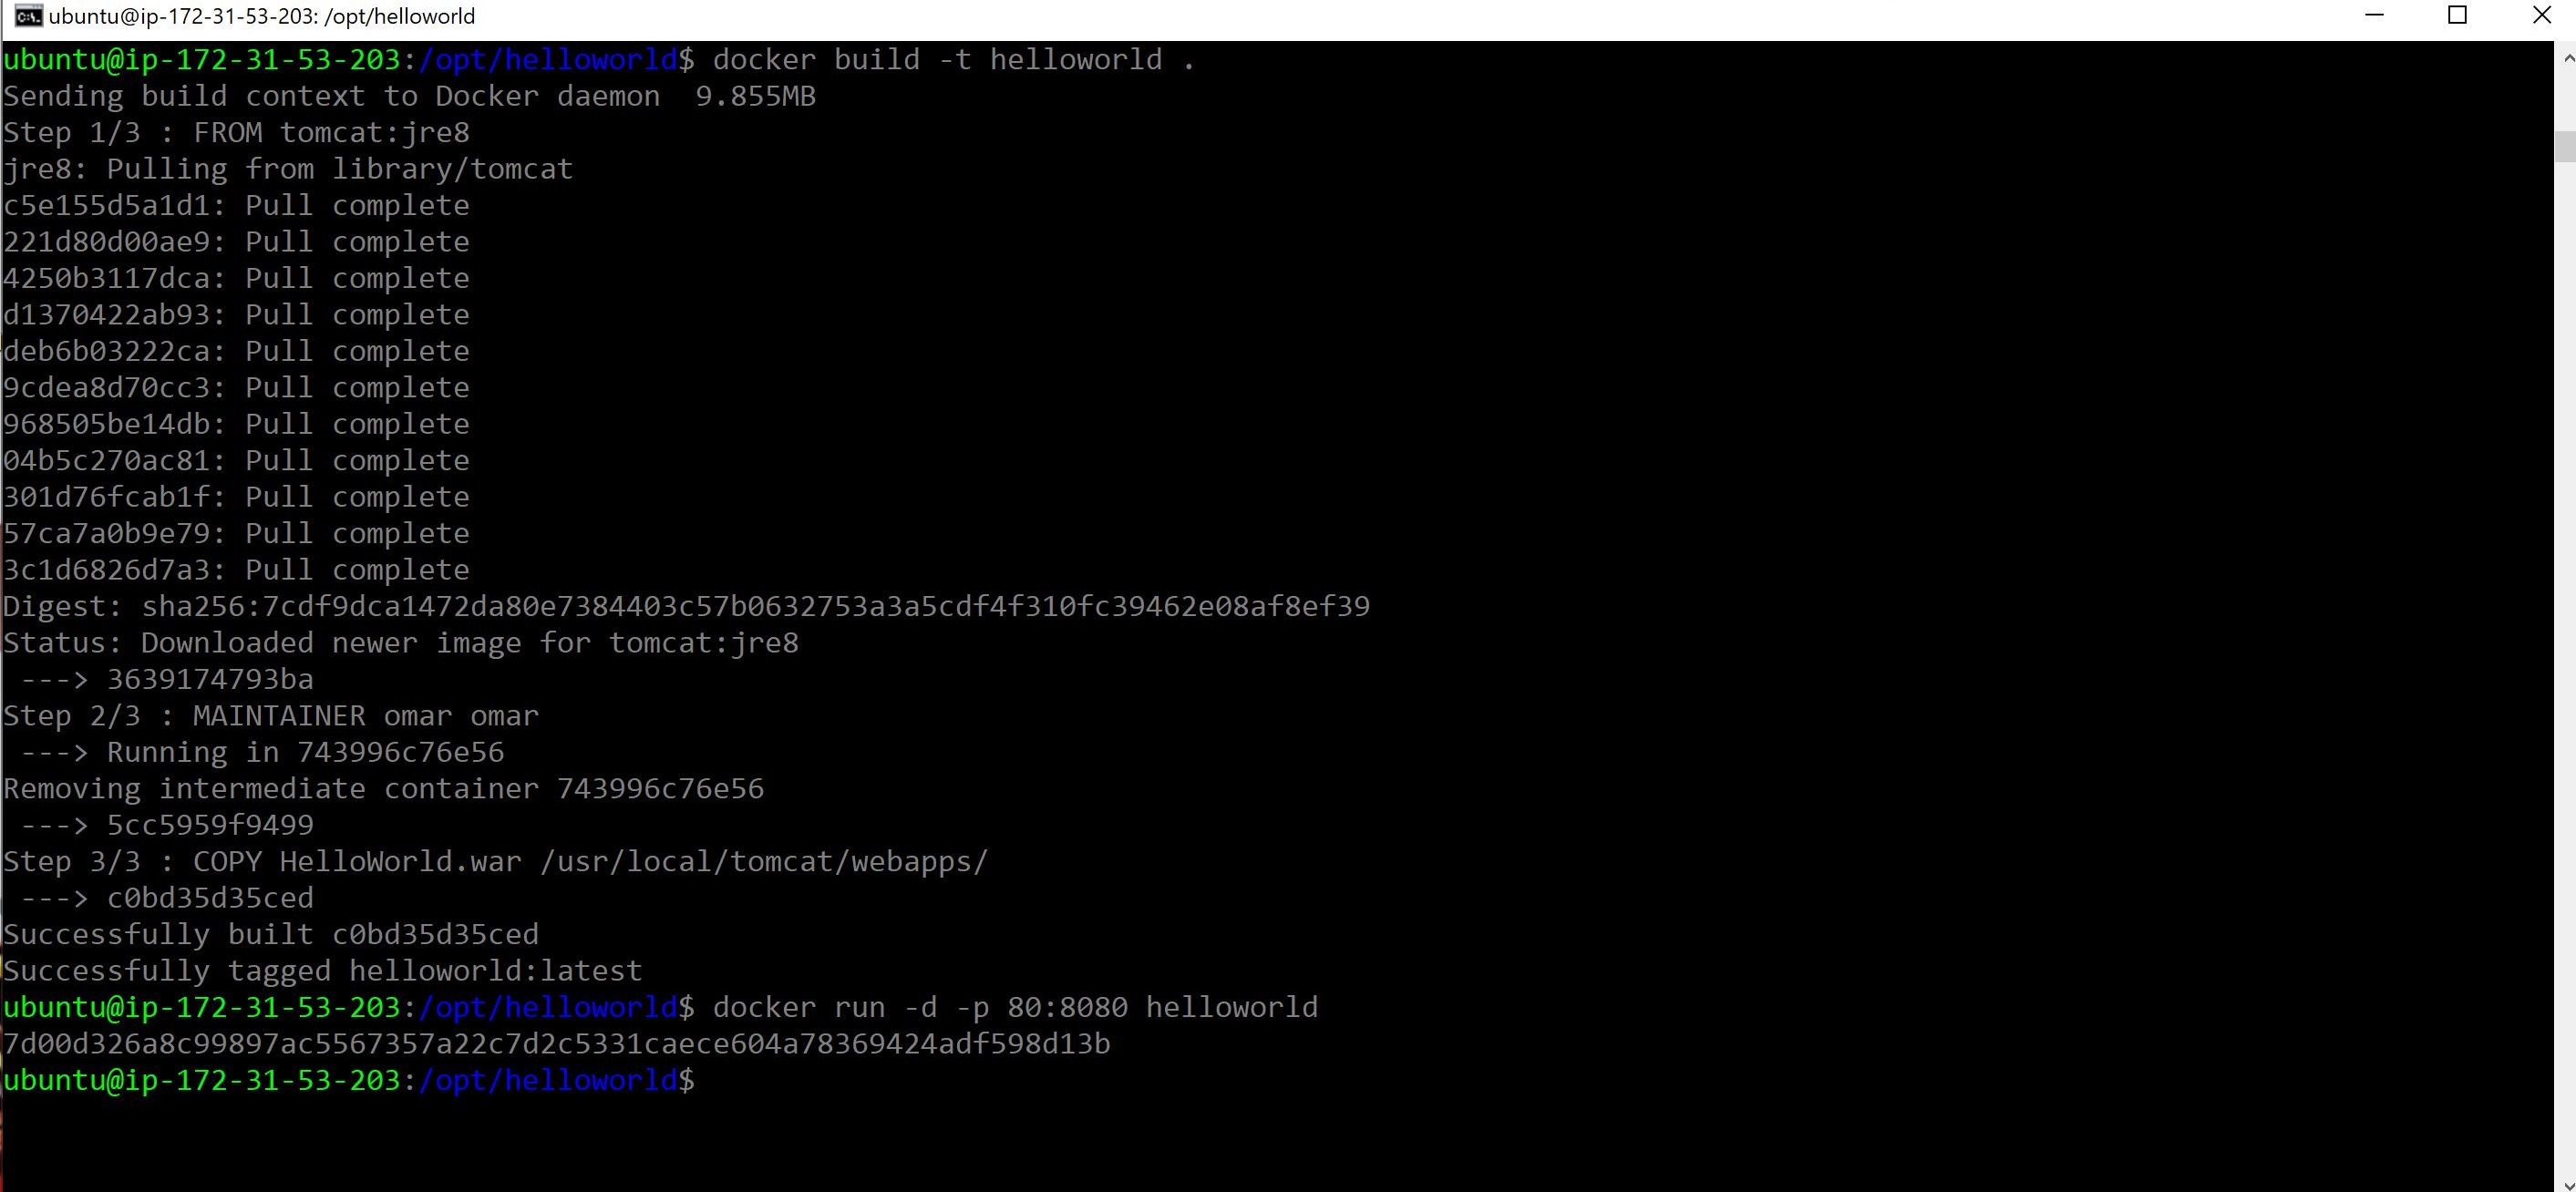
- Build the Docker image using the Docker build command:
docker build -t helloworld .
Note: if you receive any permission error during the build, add sudo to the command line
sudo docker build -t helloworld .
- Run the image created above using the command given below. We will use -p to port mapping port 8080 of the container to port 80 of the host:
docker run -d -p 80:8080 helloworld
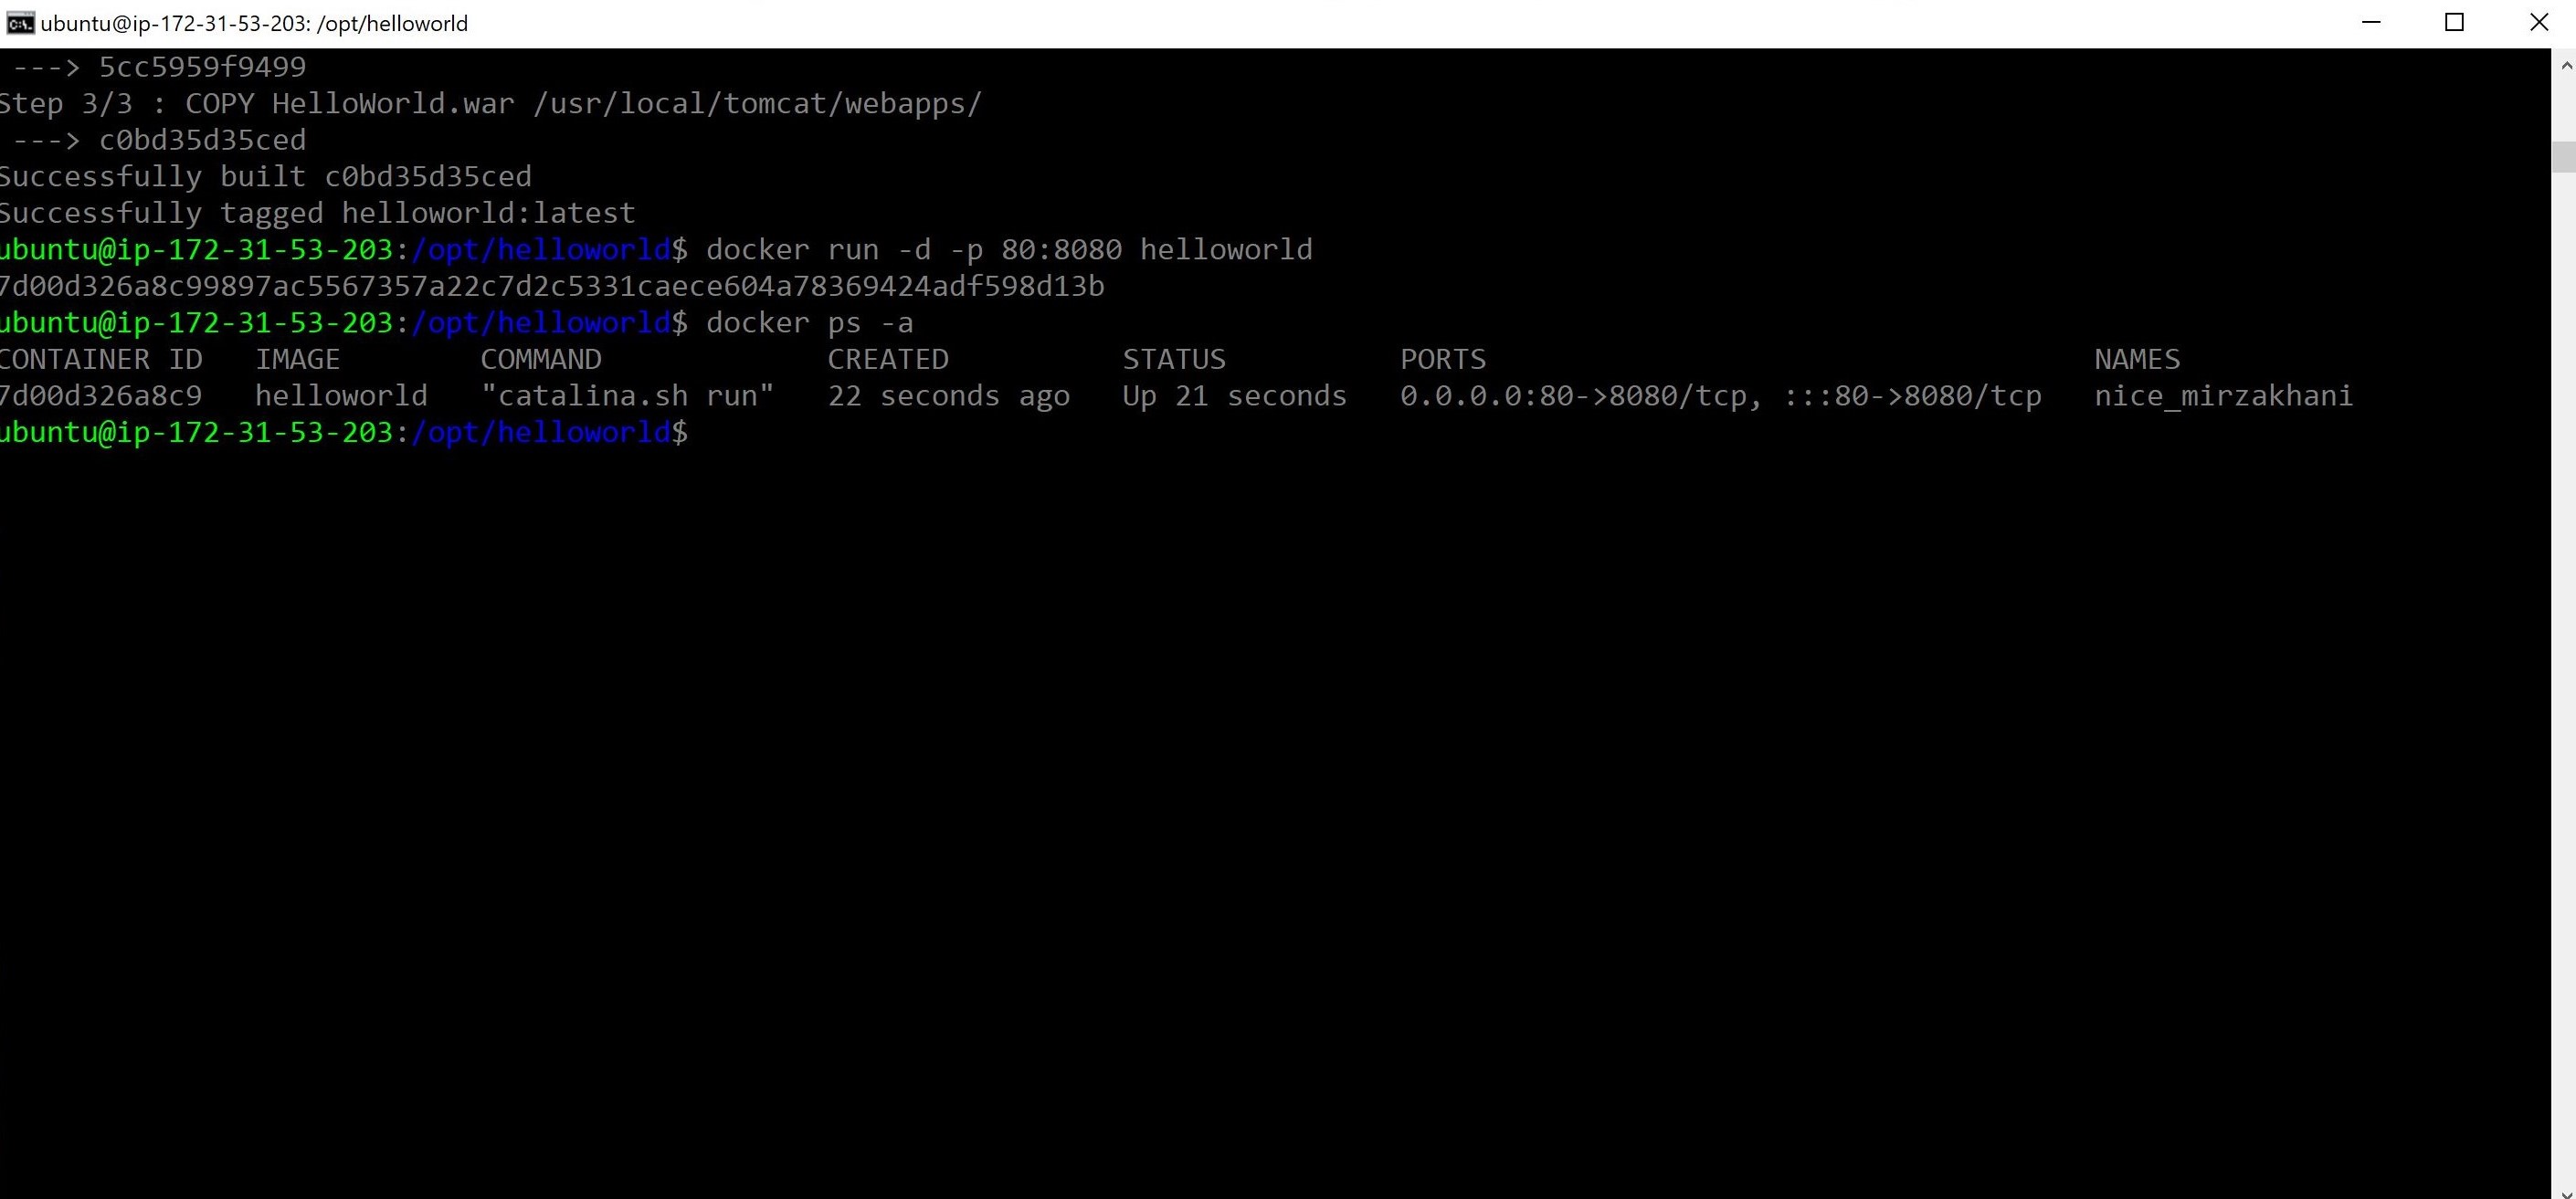
- Let’s check whether or not our container is running:
docker ps -a
-
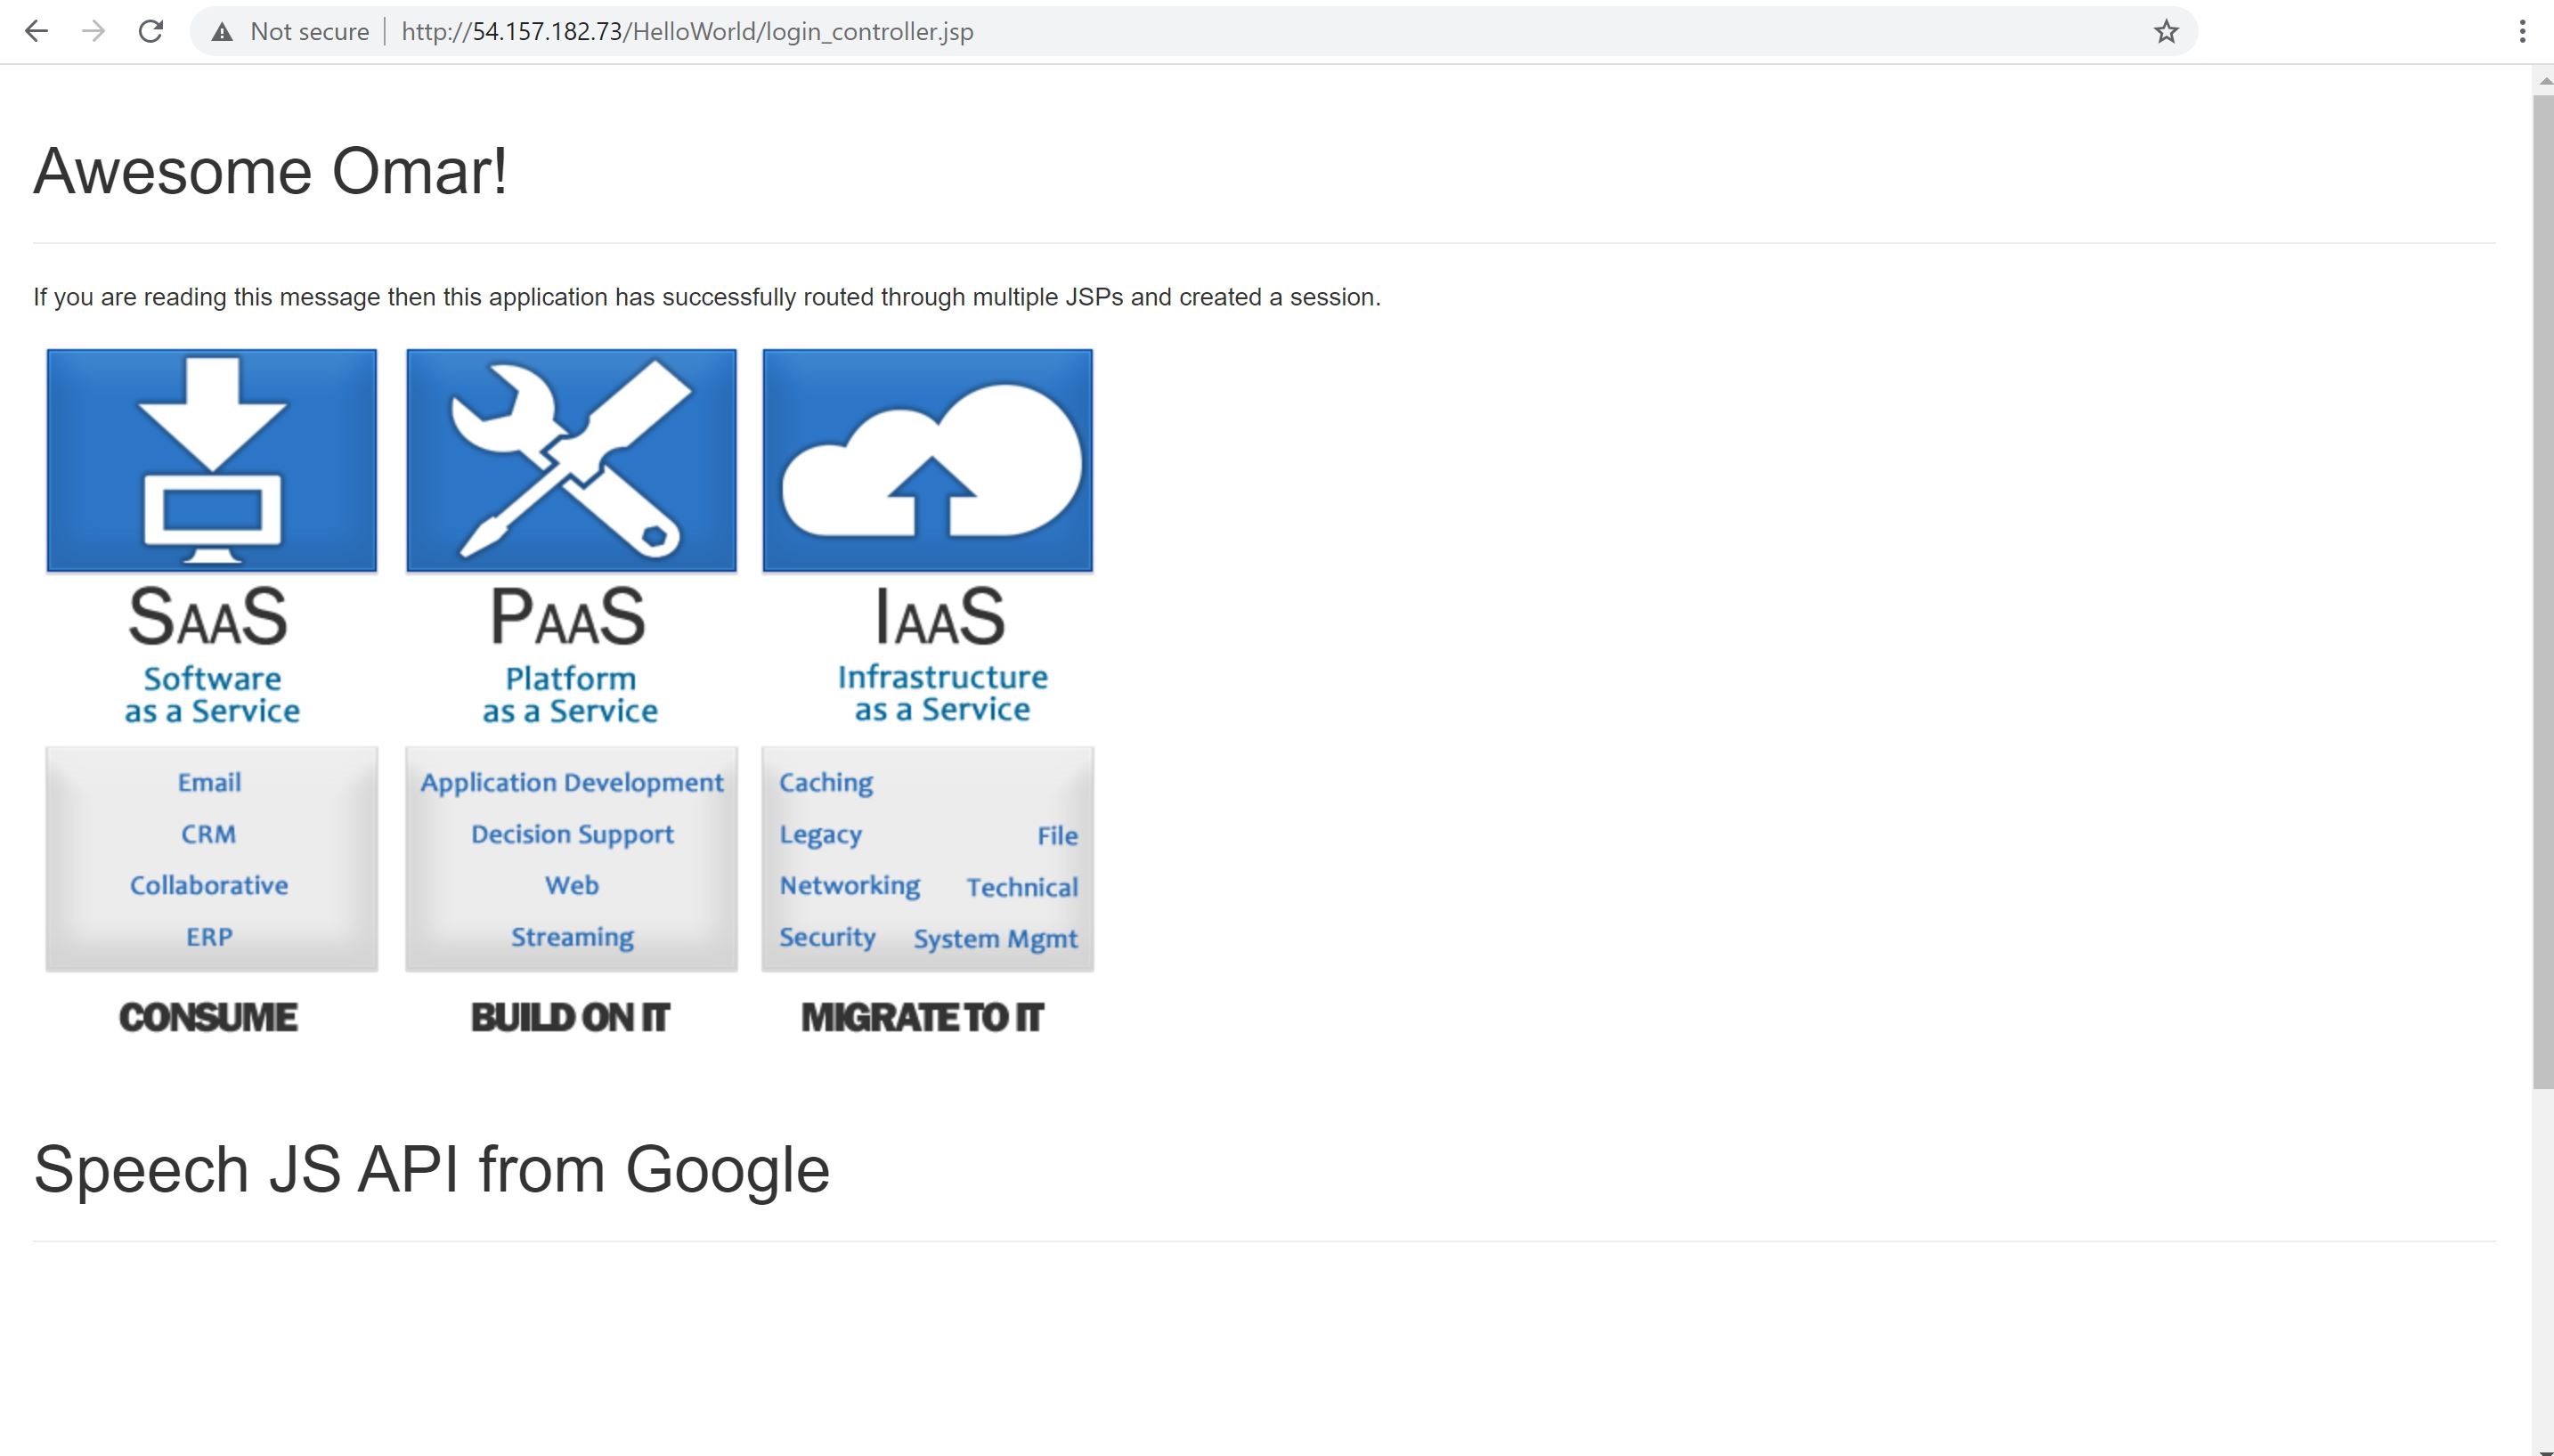
Now, let’s verify that our application can be accessed from the device using the URL:
<public IP address of instance>/HelloWorld>
Step 2: Push the Packaged Web Application Docker Image to Docker Hub
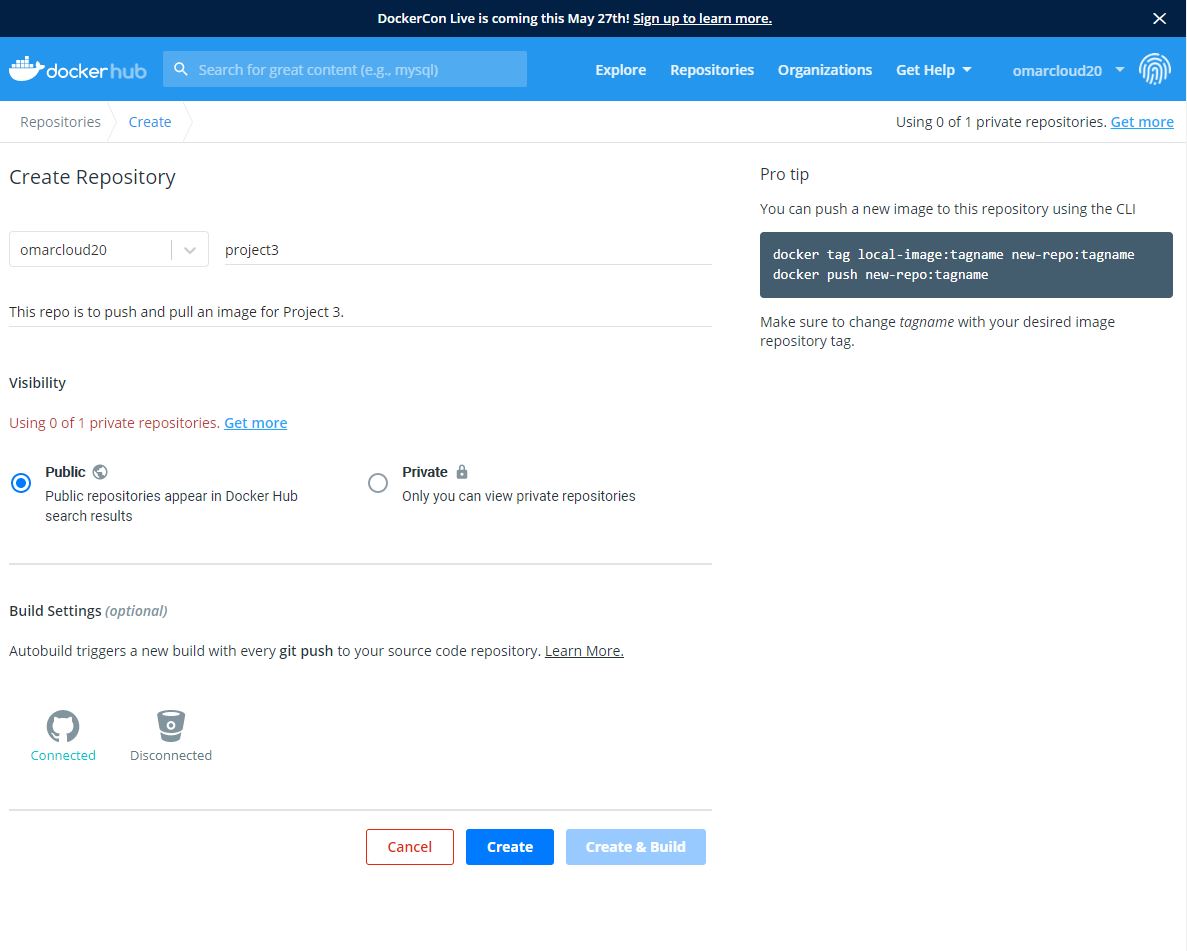
- Create a new free account at Docker Hub.
- Create a new public repository in your Dockerhub account.
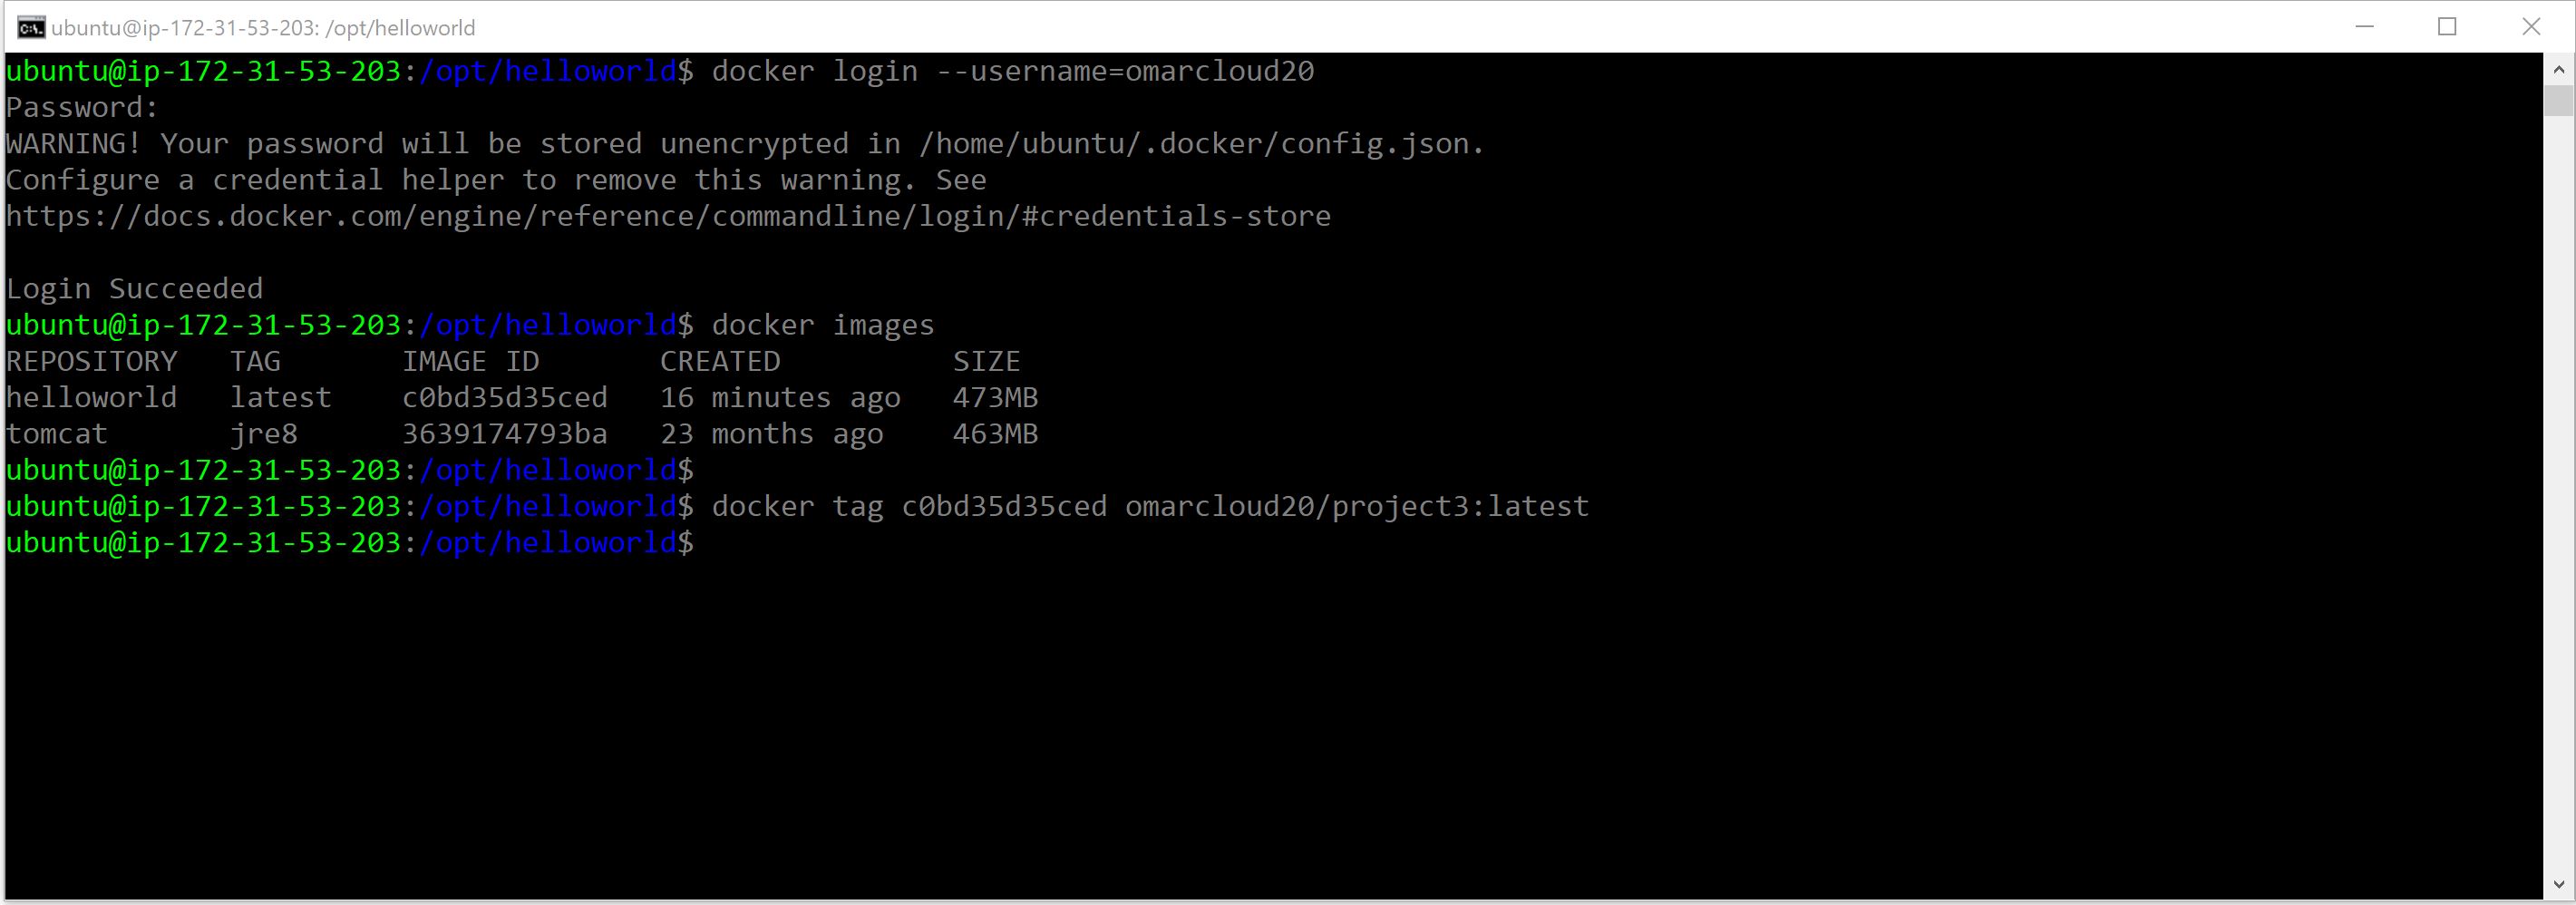
- Login to the Dockerhub account from the CLI using the command below:
Example:
docker login --username=<DockerHub username>
Actual:
docker login --username=omarcloud20
Note: you will be prompted to enter your password.

- We will need to tag the image which we will upload to Docker hub using the Image ID, then we will use the tag command as shown below:
To find the Image ID:
docker images
Then, we use the tag command:
Example:
docker tag <image id> <dockerhub username>/<repository name>:latest
Actual:
docker tag c0bd35d35ced omarcloud20/project3:latest
- Finally, we will push the image to Dockerhub:
Example:
docker push <image id> <dockerhub username>/<repository name>:latest
Actual:
docker push c0bd35d35ced omarcloud20/project3:latest
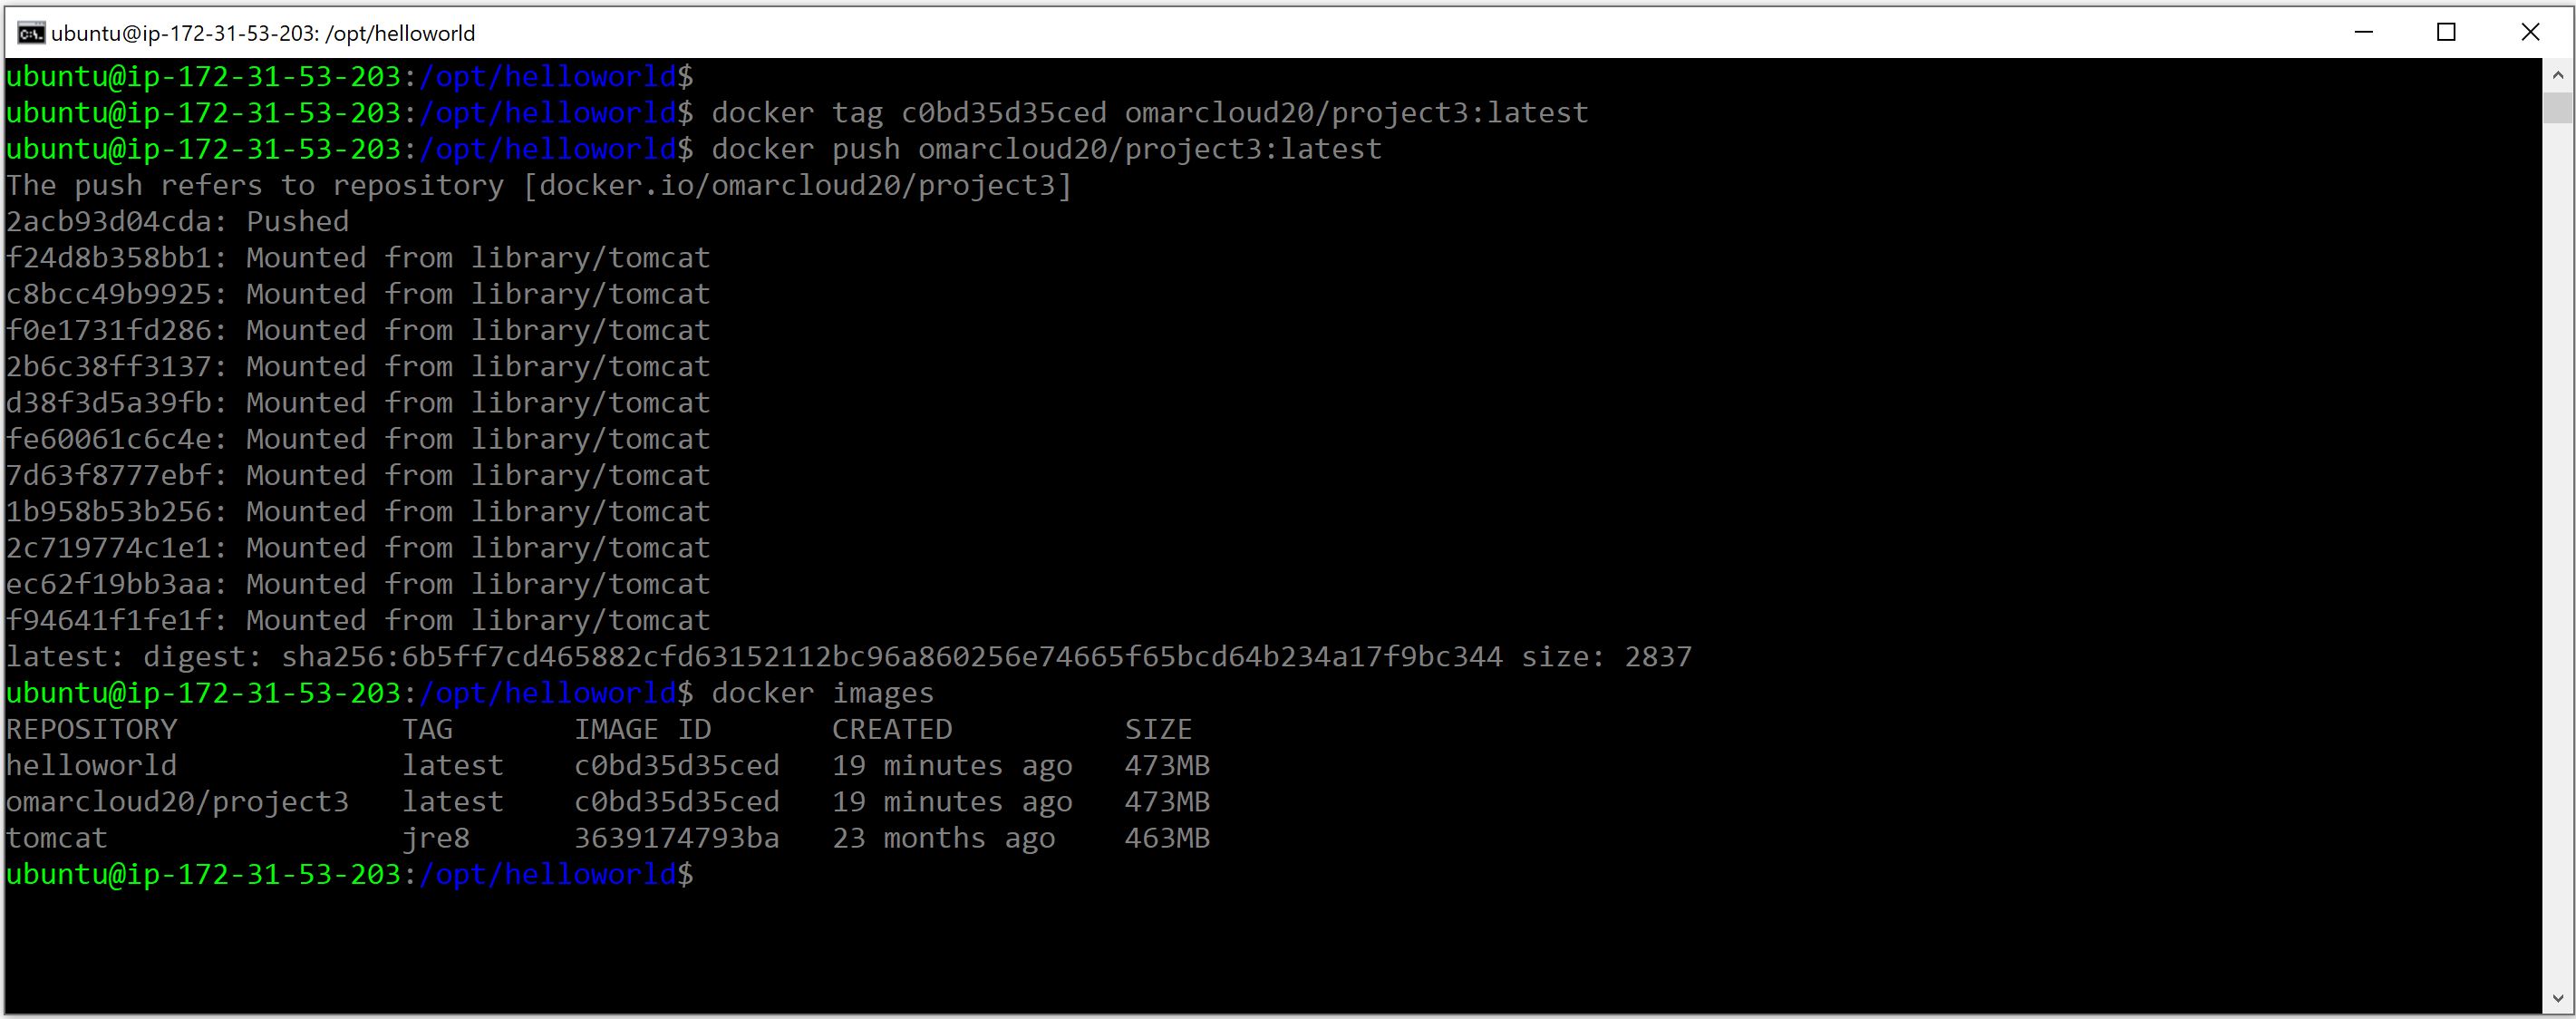
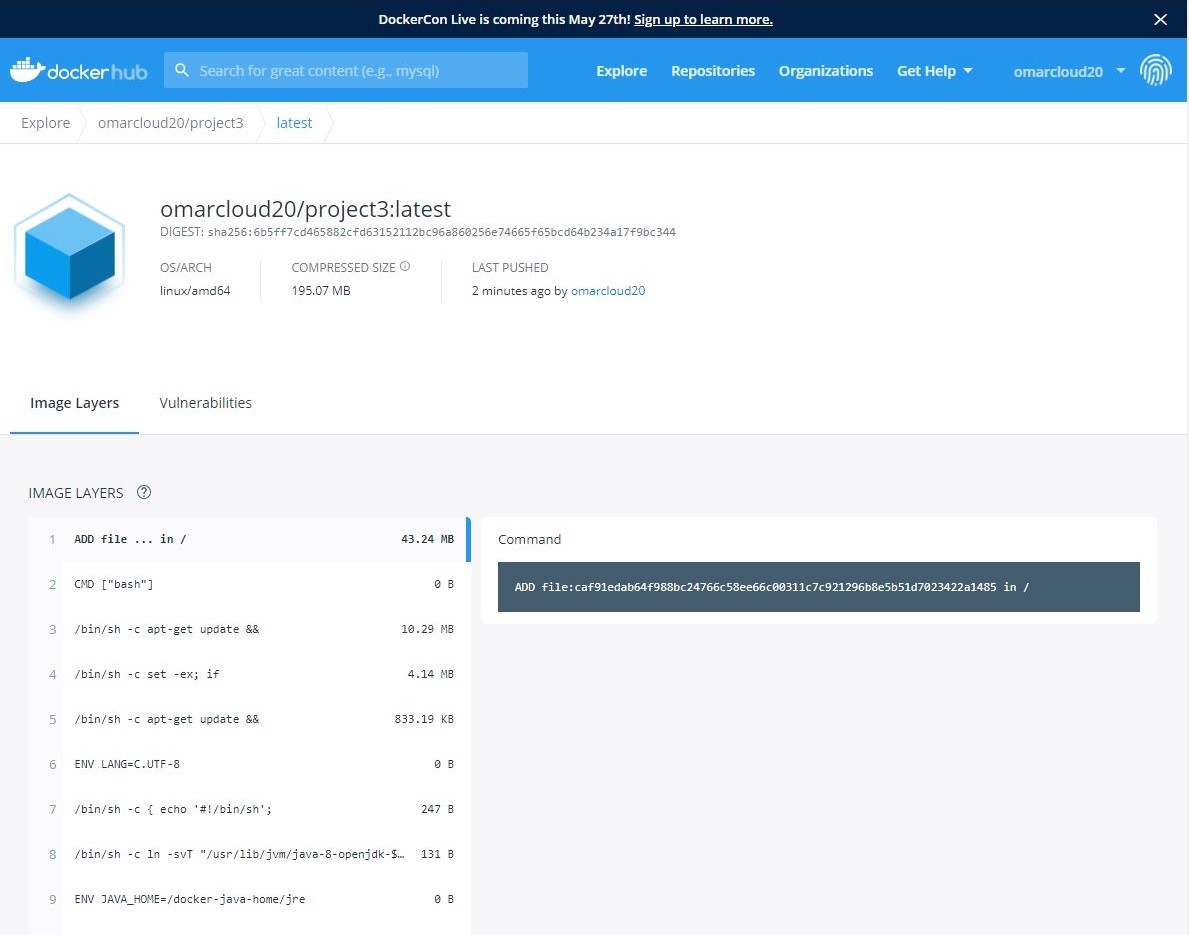
- Verfiy that the image is uploaded to your public dockerhub account.
Step 3: Create an AWS ECS cluster to run the Docker image
-
Navigate to the ECS service in your AWS account and click Get Started.
-
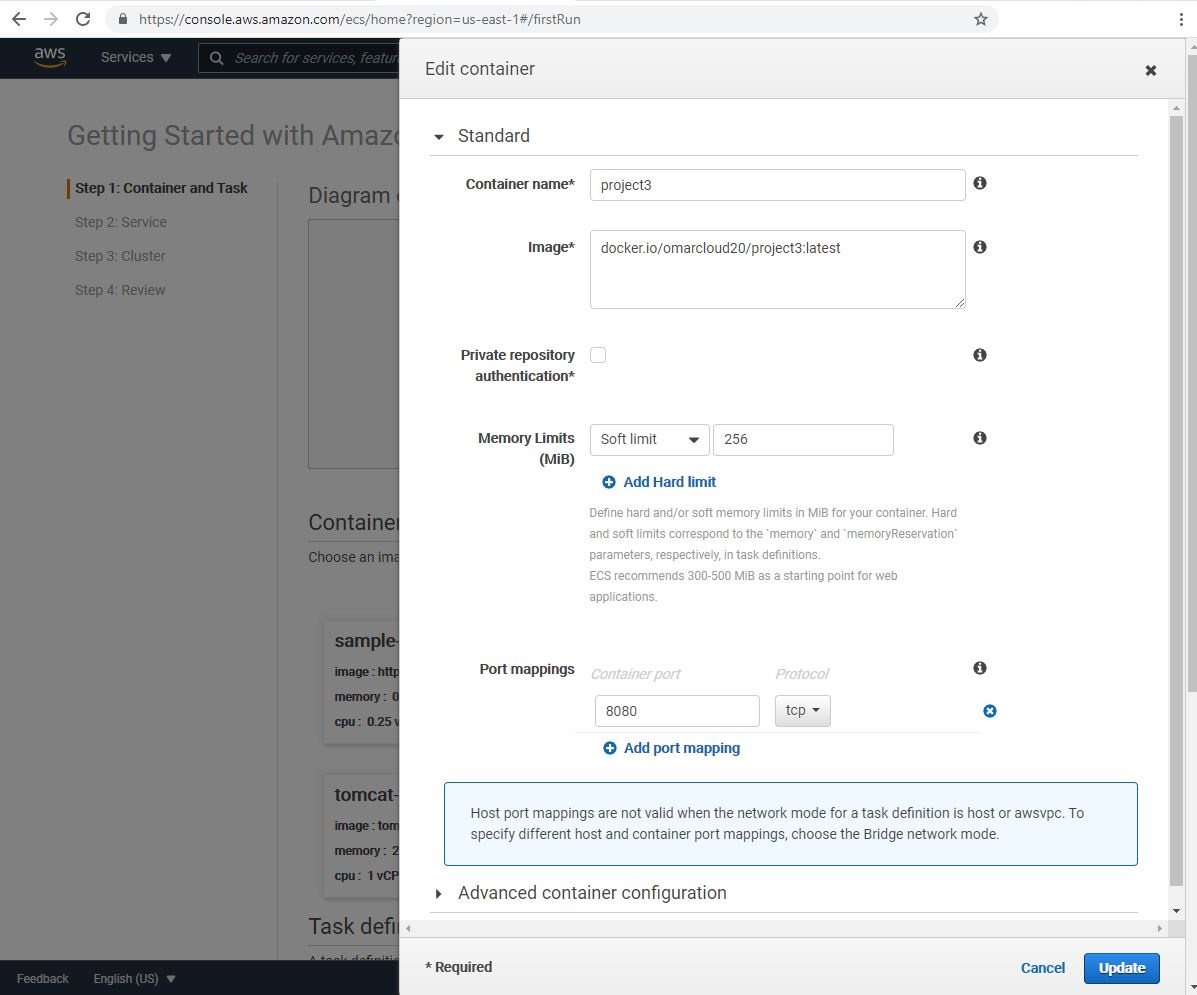
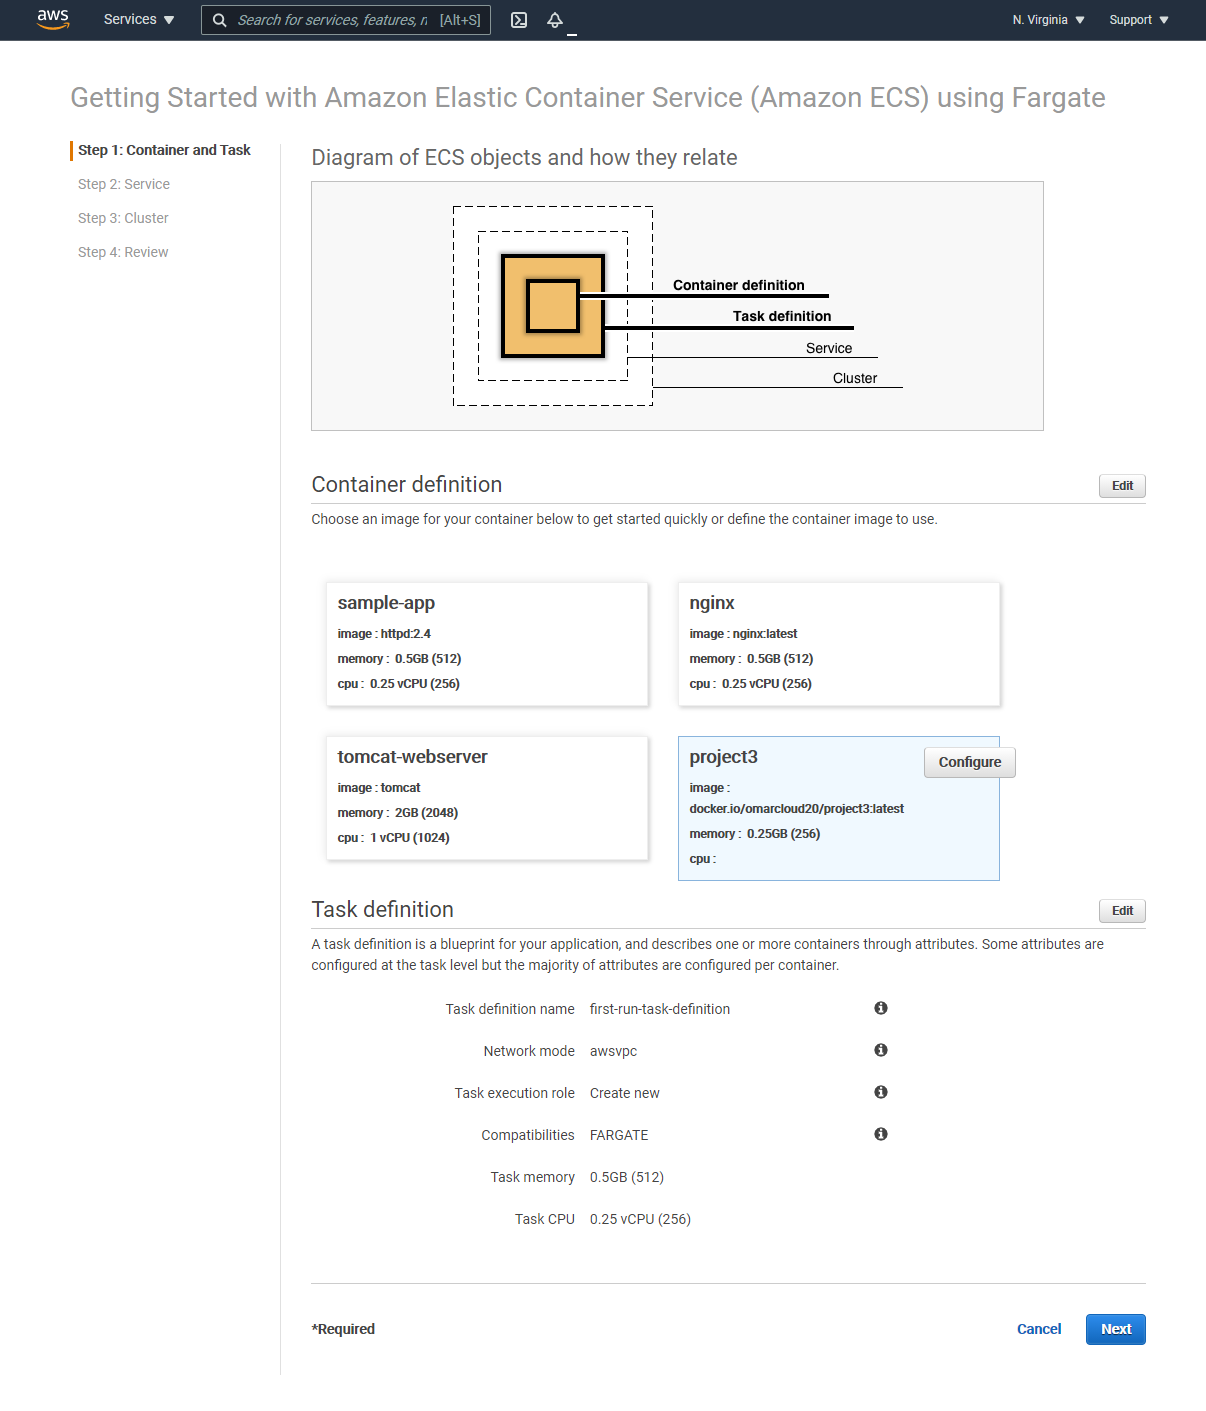
Under Container and Task Definitions, select Custom->Configure, and enter the following values:
A. Container name. Mine is project3.
B. Image location: docker.io/dockerhub username/dockerhub repository:latest
C. Memory Limits: Soft limit - 256MB
D. Port mappings: 8080 - tcp
E. Click update and hen Next
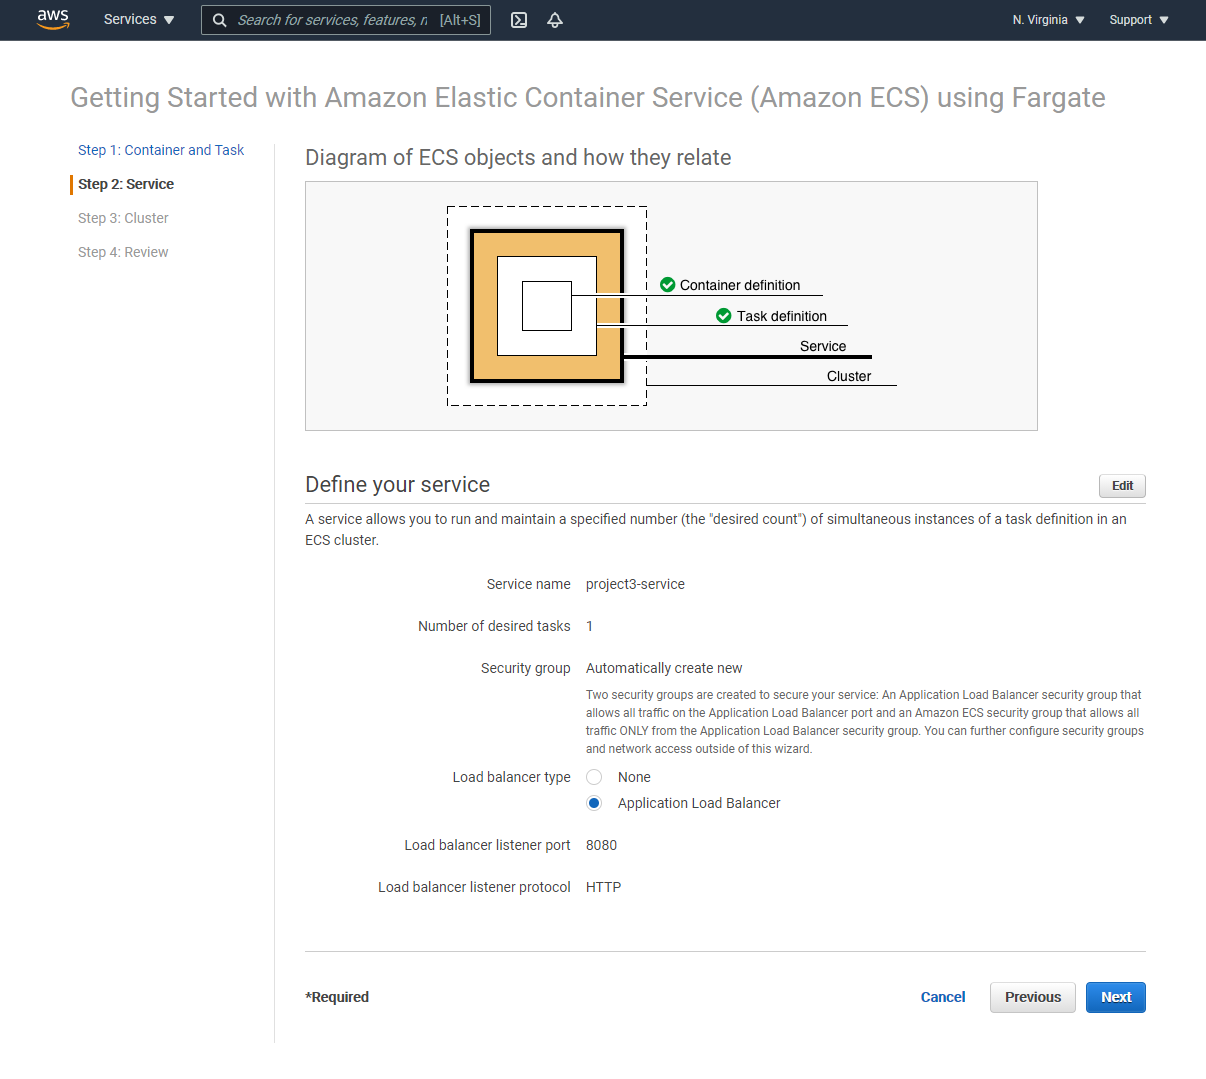
- On the defining the Service, select Application Load Balancer and click Next.
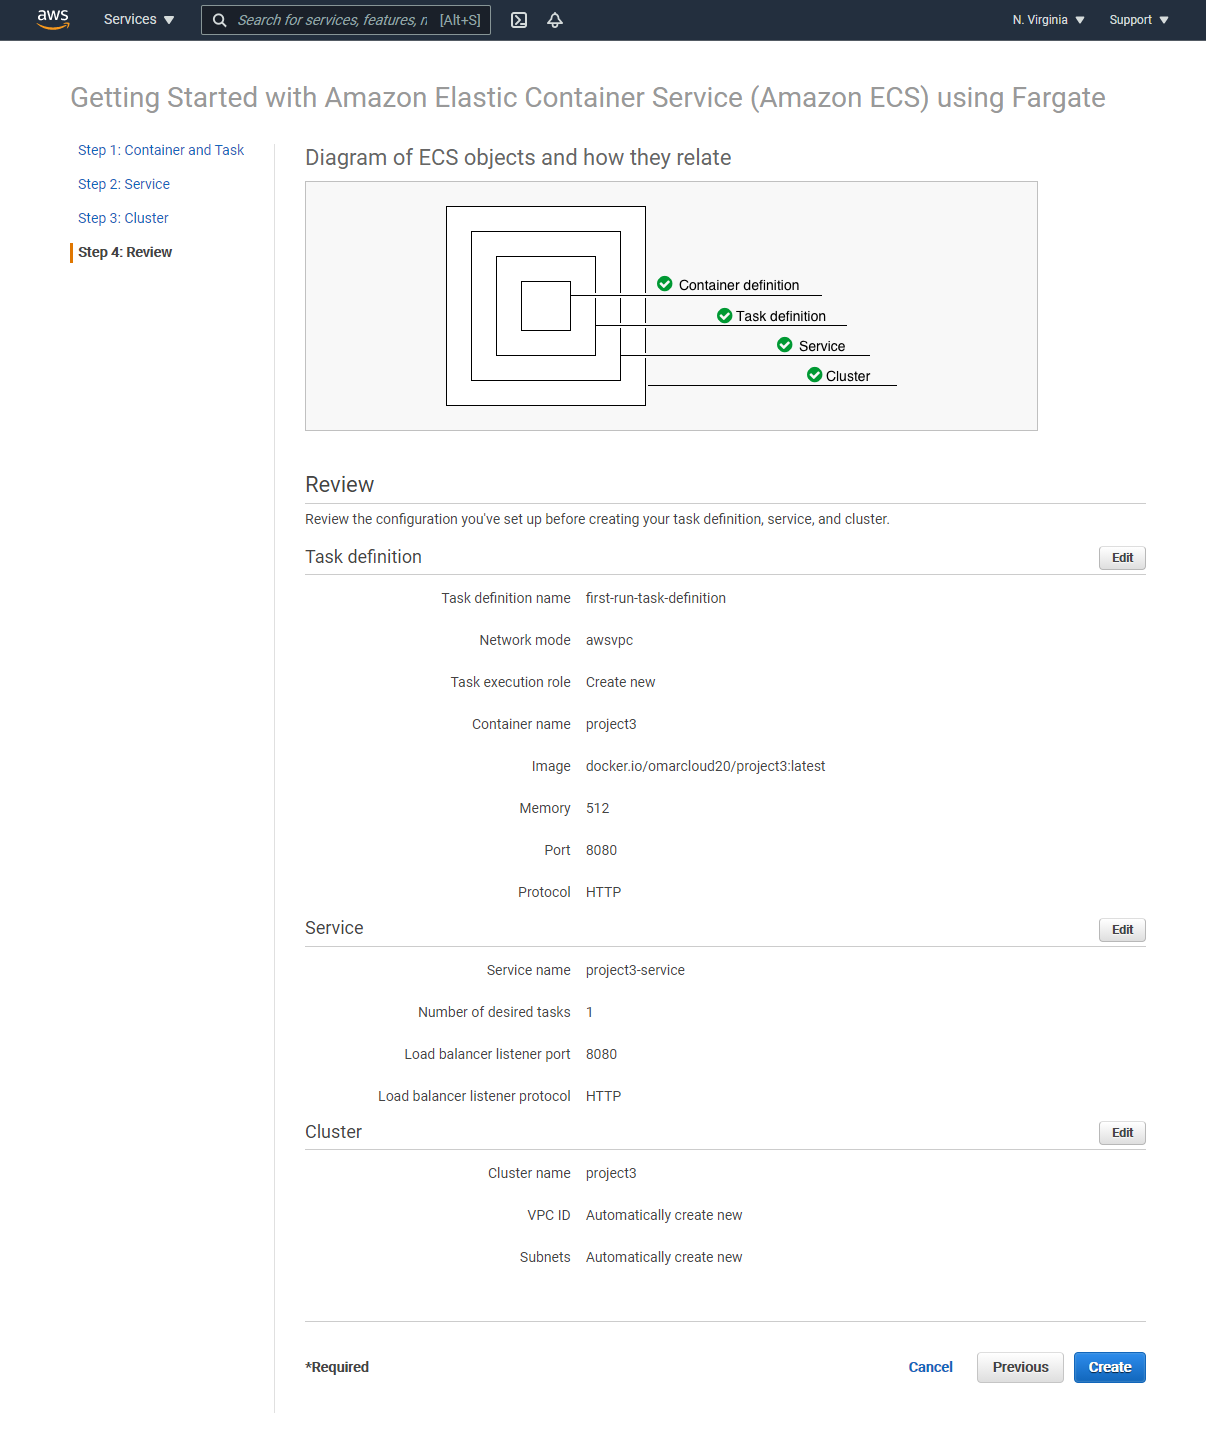
- On the defining the Cluster, enter a Cluster name and click Next.

- On the final review, click Create.
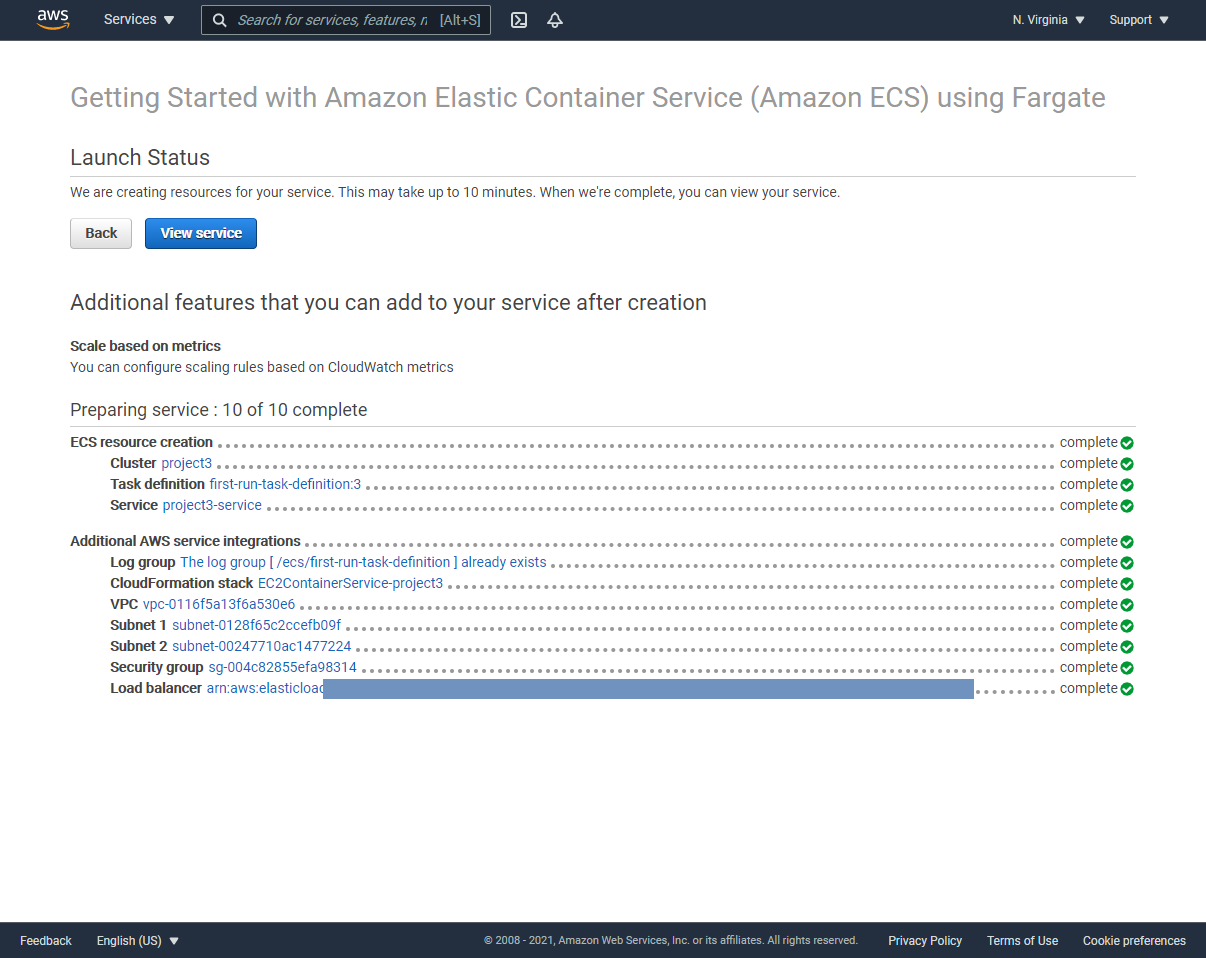
- AWS ECS Fargate will create all necessary services and the cluster on your behalf. If you have encounter any errors, you may need to repeat the process one more time.
Step 4: Verification of Running Container on ECS Fargate
-
Navigate to EC2 using the Services Menu.
-
Navigate to Load balancer.
-
Select the Load Balancer that has been created by the ECS Cluster.
-
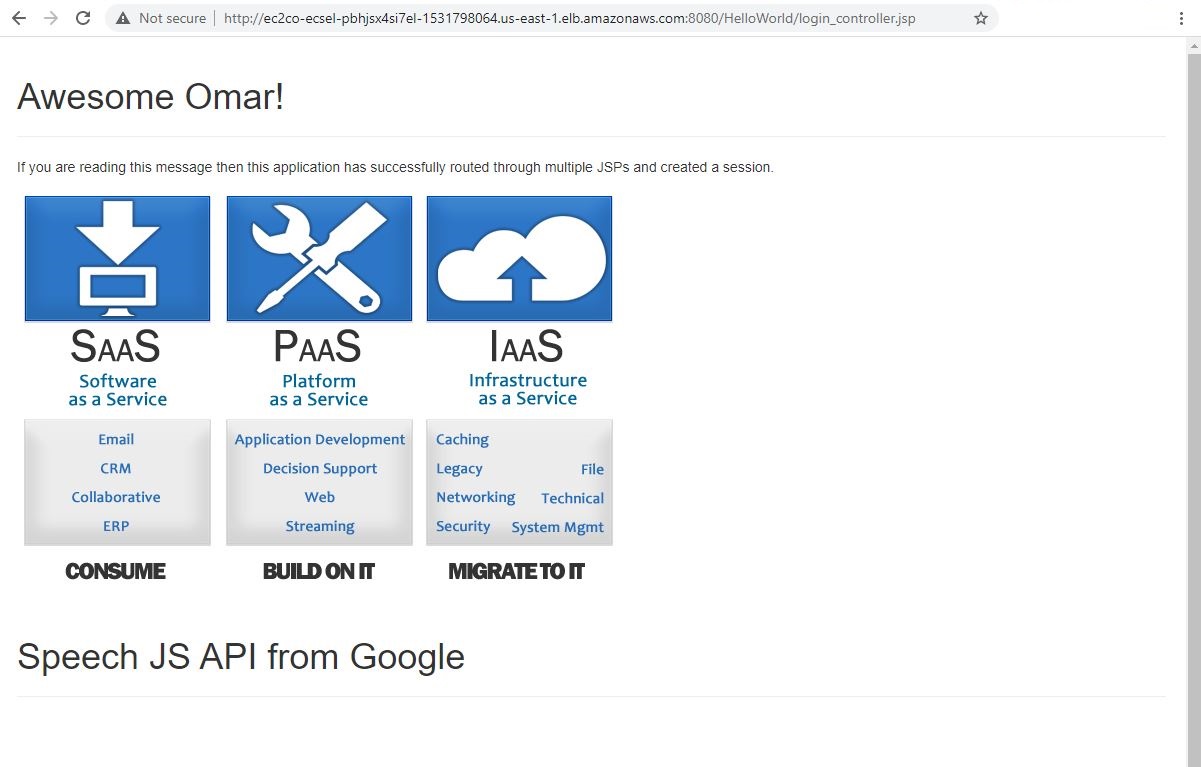
Take note of the DNS of the load balancer and visit the below URL to verify that the ECS cluster is running the container:
<DNS of load balancer>:8080/HelloWorld

Conclusion:
Congratulations, we have successfully packaged a sample web application into a Docker image utilizing Apache Tomcat and JRE-8 runtime. From our newly created Dockerhub public account, we pushed the new image to AWS ECS Fargate cluster.