Invoice Processing Application
Invoice Processing Application
The Invoice Processing Application is to parse the content of the uploaded text format invoices to S3 bucket using a Python custom code running on a Ubuntu EC2 to convert them into CSV records. Once a record is processed, it will be saved in DynamoDB for retention and the converted CSV record is saved in S3 destination bucket. AWS Athena is to query the CSV records to aggregate expenses grouped by date.
Please note that some parts of the images in this tutorial will be pixilated or hidden to hide all personal information such as account numbers, ip addresses and any other personal or sensitive information.

Architecture Implementation - Tutorial Scenario:
- The customer uploads the invoice data to S3 bucket in a text format as per their guidelines and policies. This bucket will have a policy to auto delete any content that is more than 1 day old (24 hours).
- An event will trigger in the bucket that will place a message in SNS topic
- A custom program running in EC2 will subscribe to the SNS topic and get the message placed by S3 event
- The program will use S3 API to read from the bucket, parse the content of the file and create a CSV record along with saving the original record in DynamoDB
- The program will use S3 API to write CSV record to destination S3 bucket as new S3 object.
- Athena is used to query the CSV file (query to show aggregated expenses grouped by date).
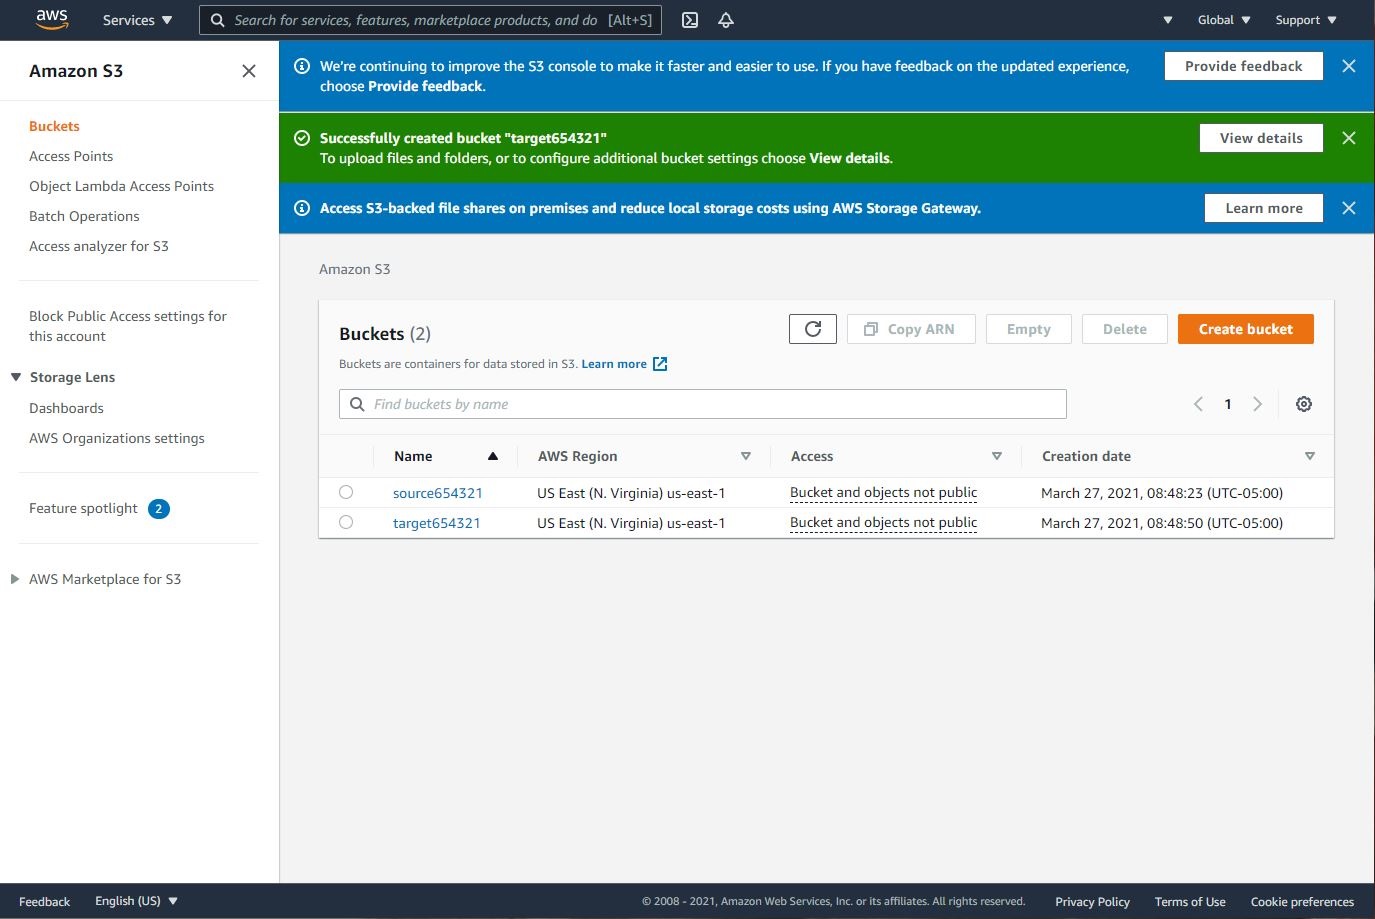
Step 1: S3 Buckets
- Navigate to S3 using the Services button at the top of the screen.
- Select “Create Bucket”
- Enter a source bucket name and use the default options for the rest of the fields.
- Repeat 1 to 3 steps to create a target bucket
Step 2: SNS Subscription
Lets' create a lambda function and attach the role we have previously created.
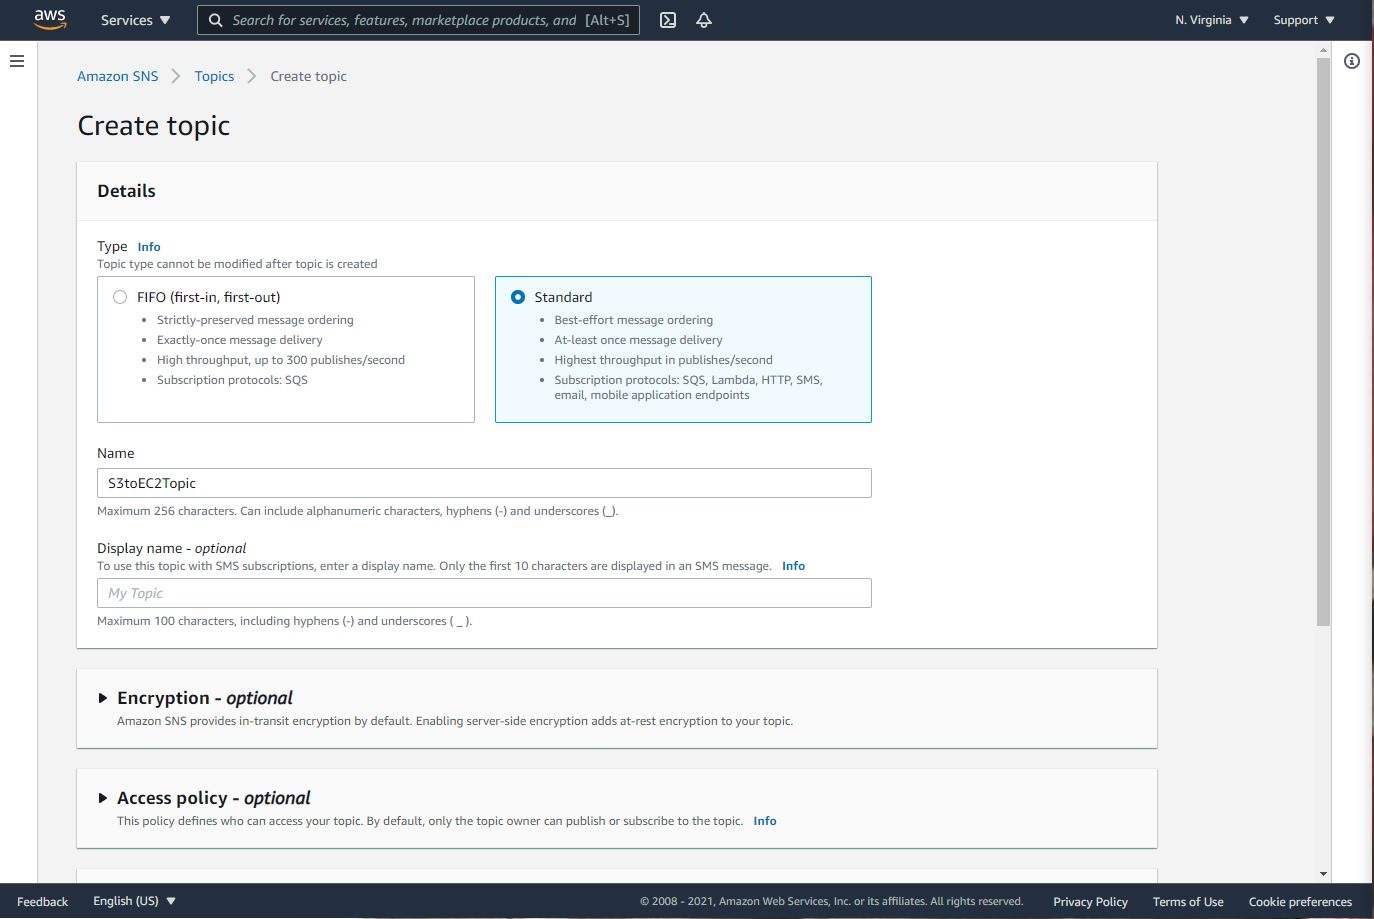
- Navigate to SNS -> Topics -> Standard
- Click on “Create Topic”
- Enter the following fields Name: S3toEC2Topic
- Click on Create Topic
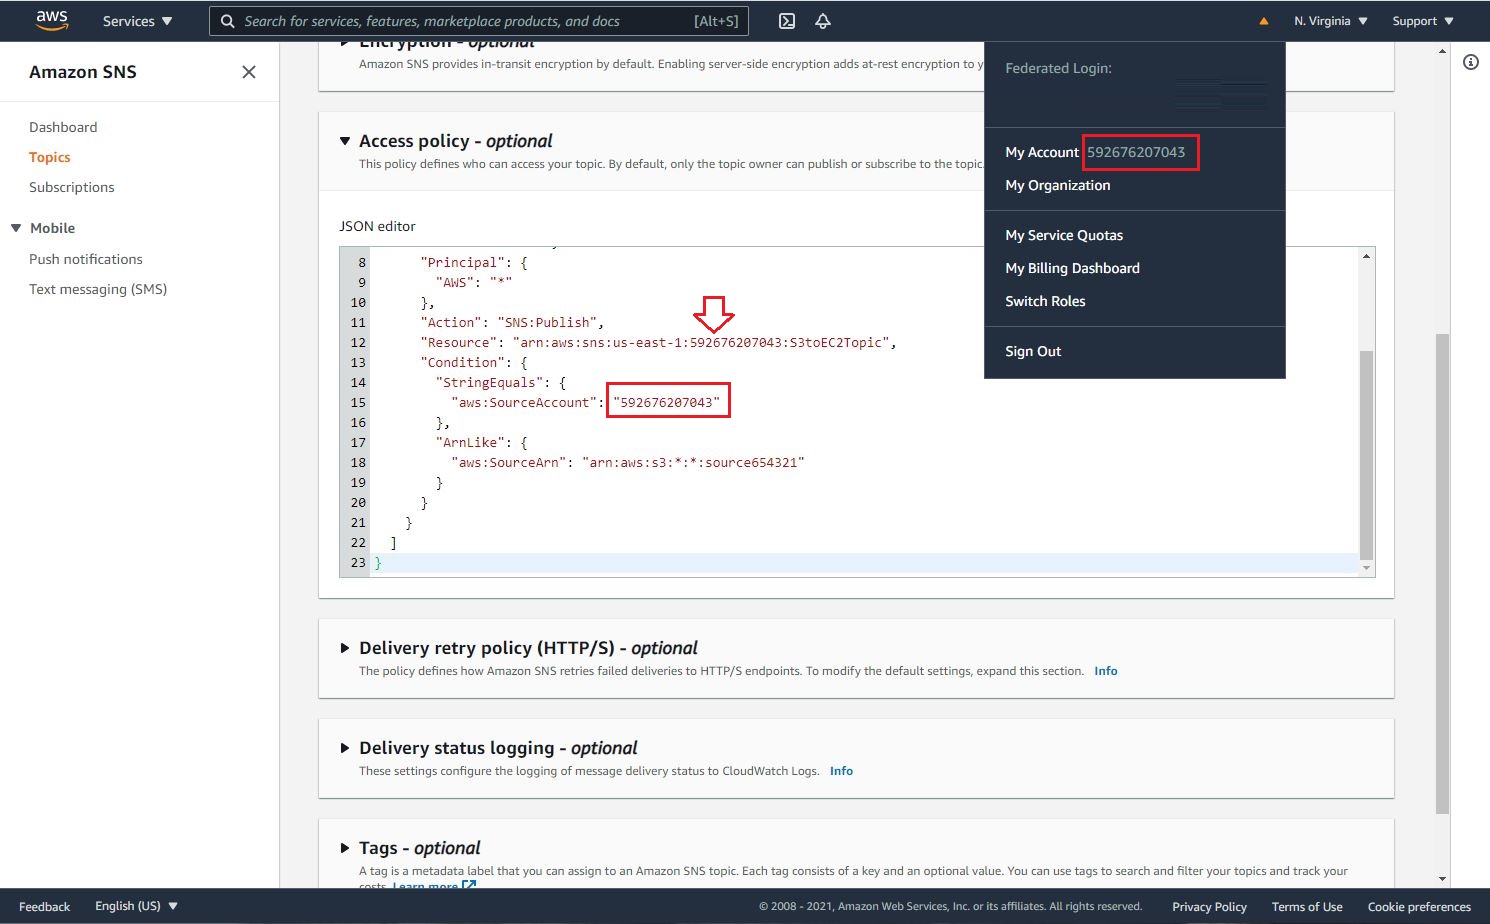
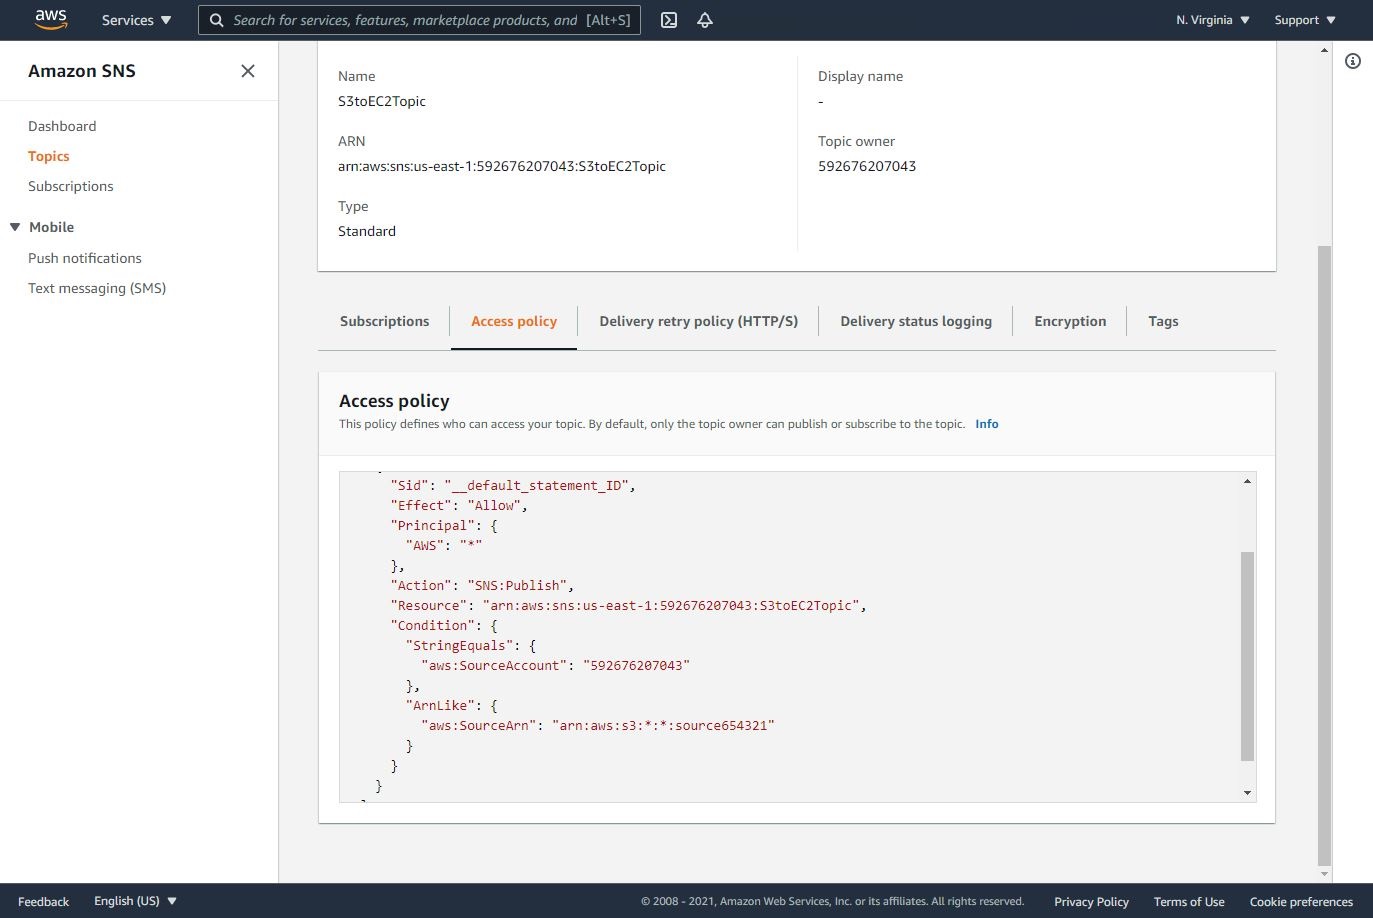
- Let’s modification of SNS Access Policy as follows:
{
  "Version": "2008-10-17",
  "Id": "__default_policy_ID",
  "Statement": [
    {
      "Sid": "__default_statement_ID",
      "Effect": "Allow",
      "Principal": {
        "AWS": "*"
      },
      "Action": "SNS:Publish",
      "Resource": "arn:aws:sns:us-east-1:Your AWS Account Number:S3toEC2Topic",
      "Condition": {
        "StringEquals": {
          "aws:SourceAccount": "Your AWS Account Number"
        },
        "ArnLike": {
          "aws:SourceArn": "arn:aws:s3:*:*:"S3 Source Bucket Name"
        }
      }
    }
  ]
}
Note:
A. Replace SNS-topic-ARN as shown below.
B. Replace bucket-name with your source bucker name as shown below.
C. Replace bucket-owner-account-id with yours as shown below.
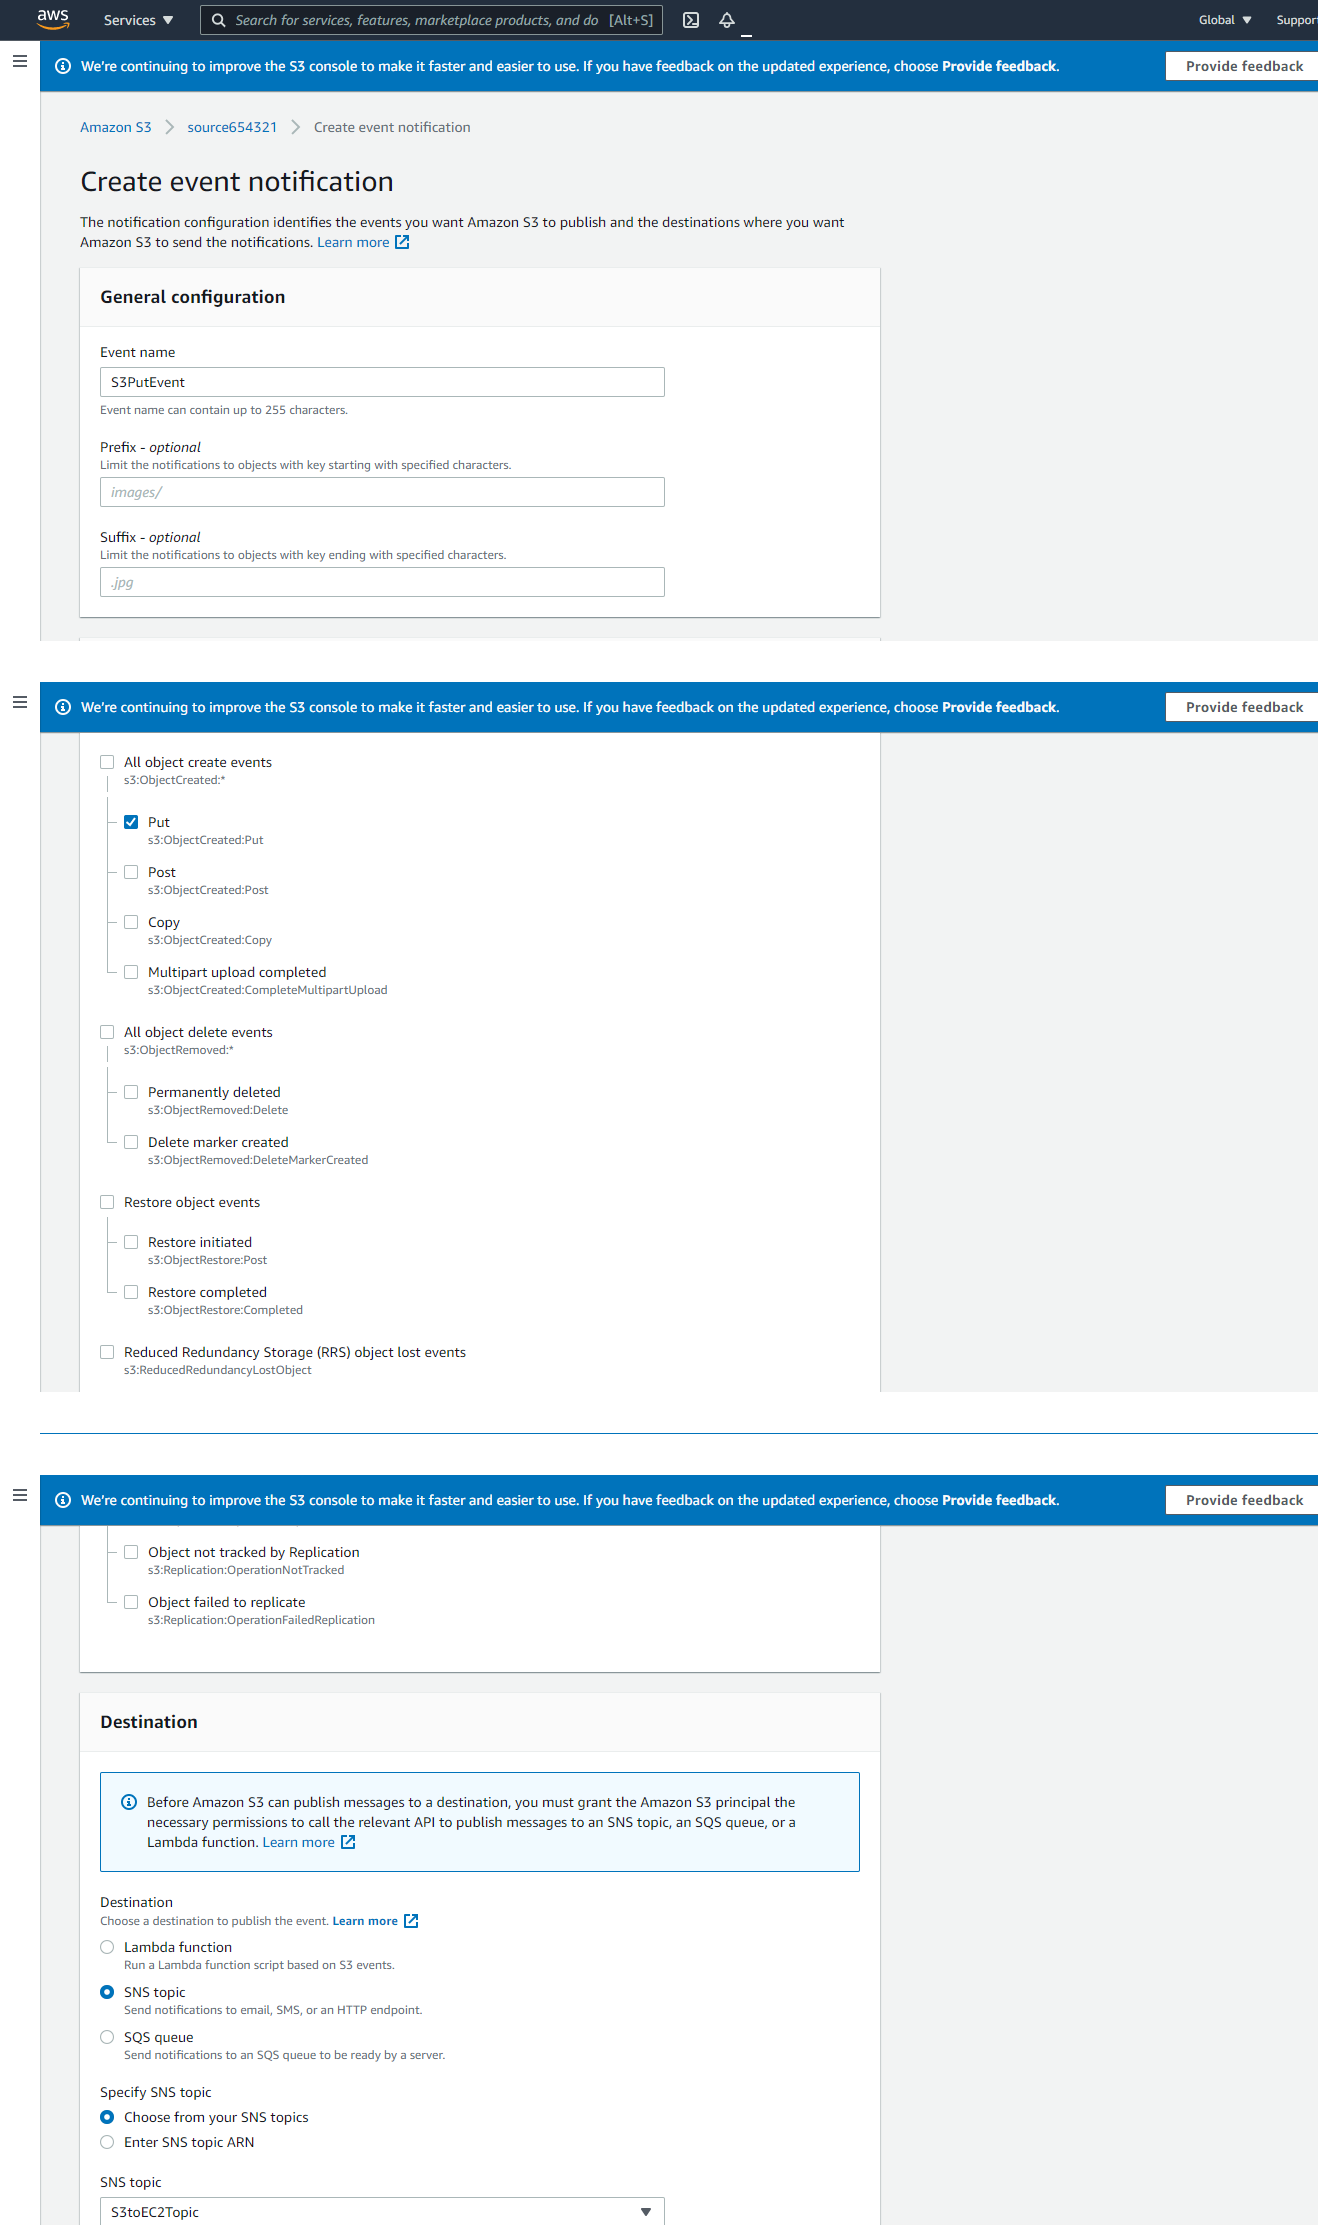
Step 3: Configuring SNS Notification for S3
-
Navigate to S3 and select the source bucket, which we have previously created.
-
Select Properties and scroll down to Event Notifications and select it.
-
Follow the following details:
A. Name: S3PutEvent B. Select PUT from the list C. Destination: SNS Topic D. SNS: S3toEC2Topic
-
Save changes.
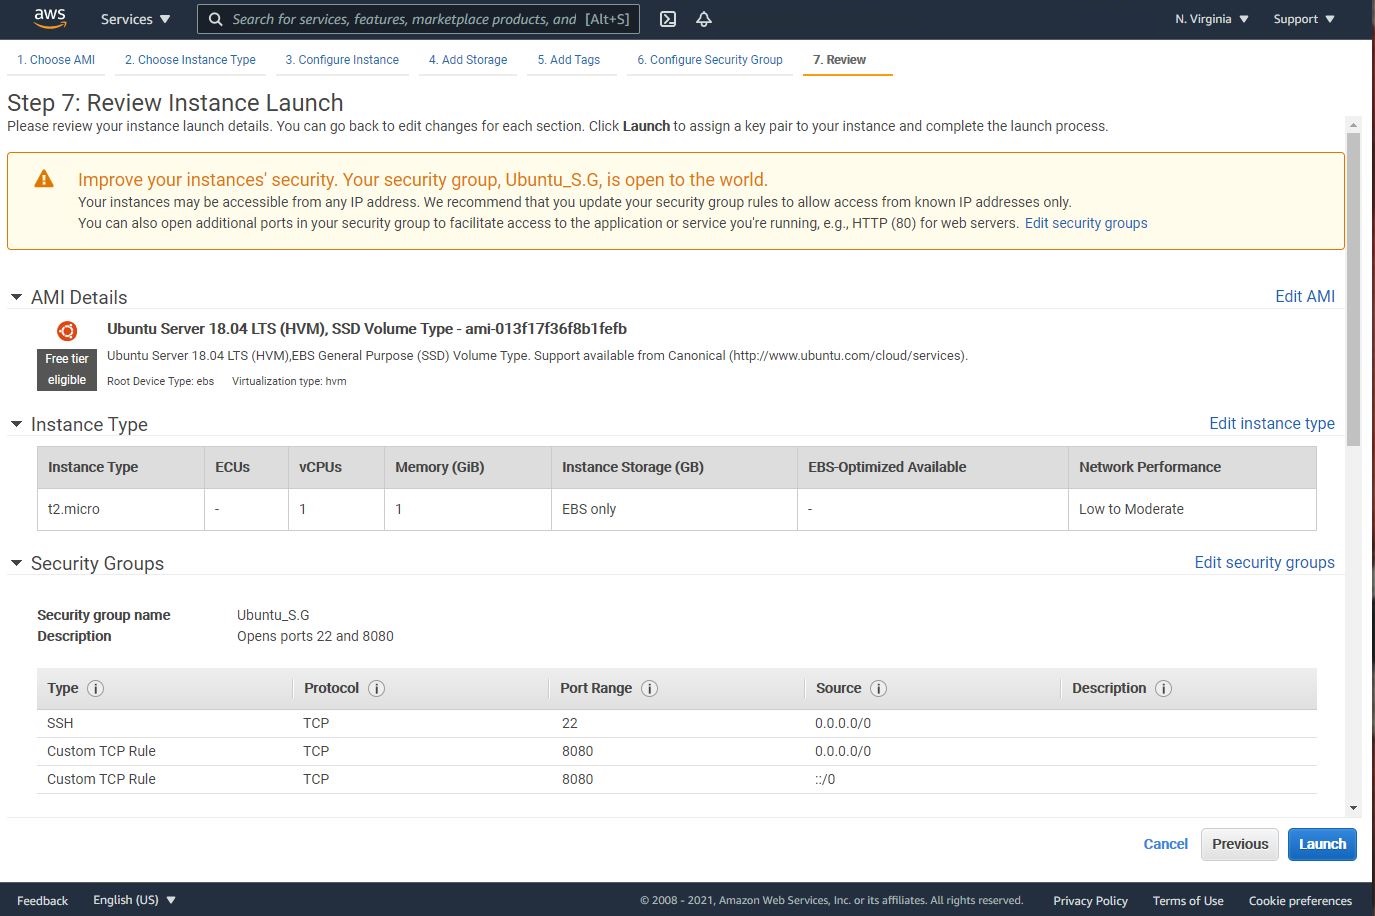
Step 4: Spin an EC2 Instance to Run the Custom Code
-
Navigate to EC2 -> Instances
-
Create an EC2 instance with the following parameters:
A. AMI: Ubuntu 18.04 LTS B. VPC: Default C. Security Group: Open ports 22 and 8080
Note: to enhance the security, you could select opening port 22 ONLY to your home public IP address. This will limit the SSH access to request coming from your home IP address.
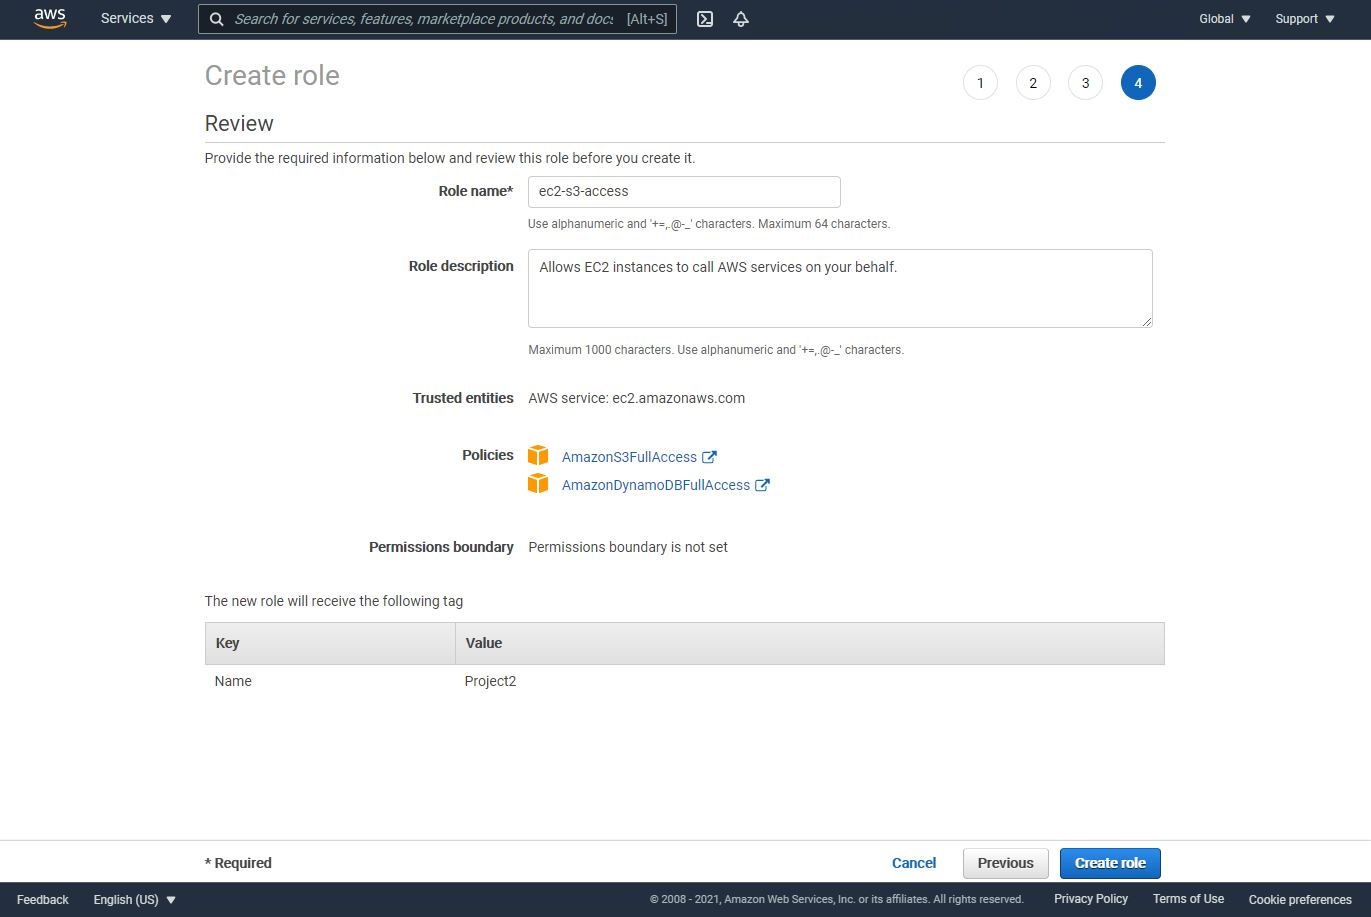
Step 5: IAM role for the EC2 instance
-
Navigate to IAM -> Roles -> Create role
-
Attach the following two policies:
A. AmazonS3FullAccess
B. AmazonDynamoDBFullAccess
-
Name the role, EC2S3Access
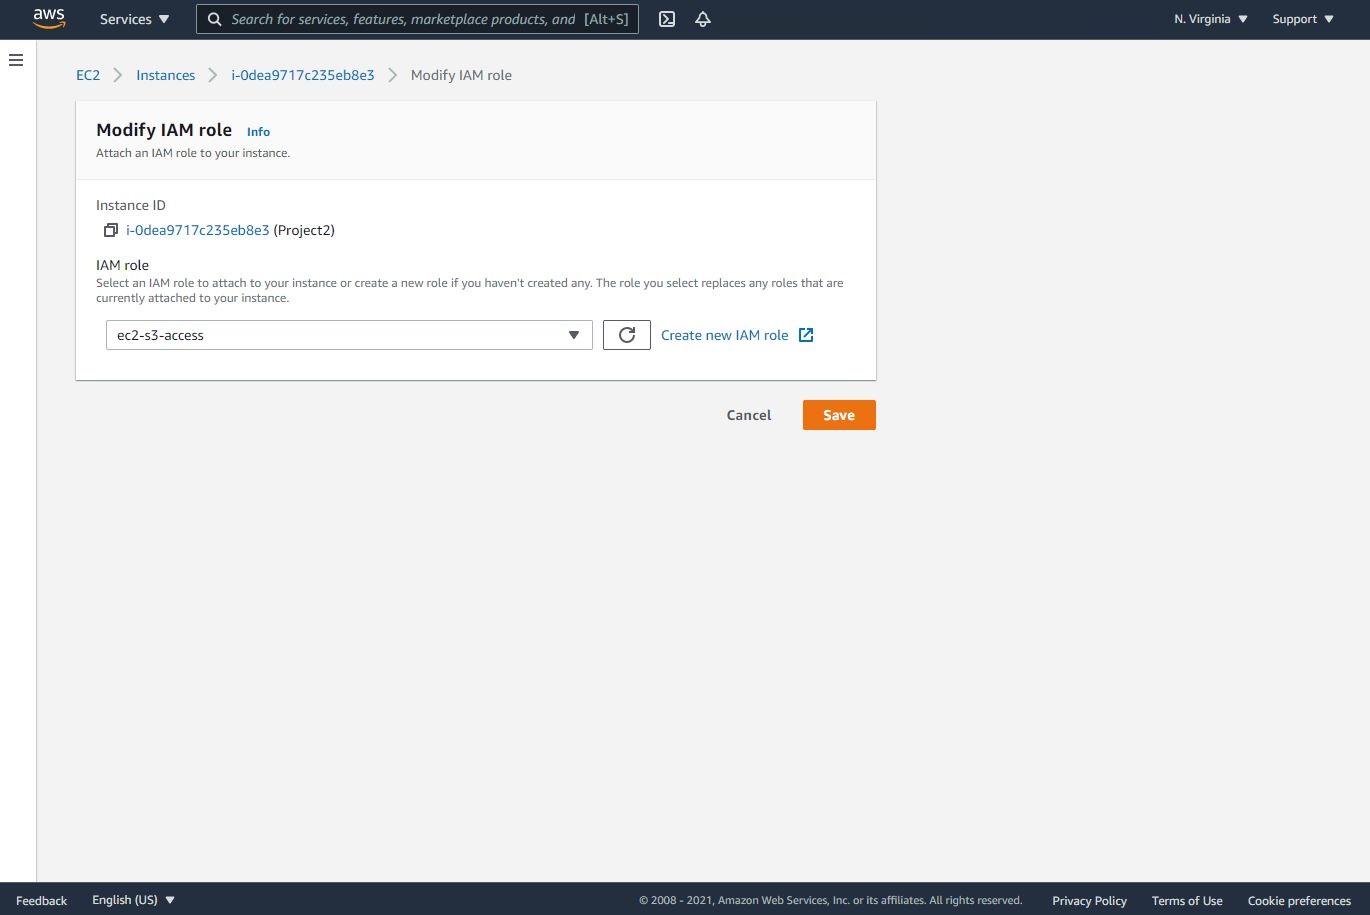
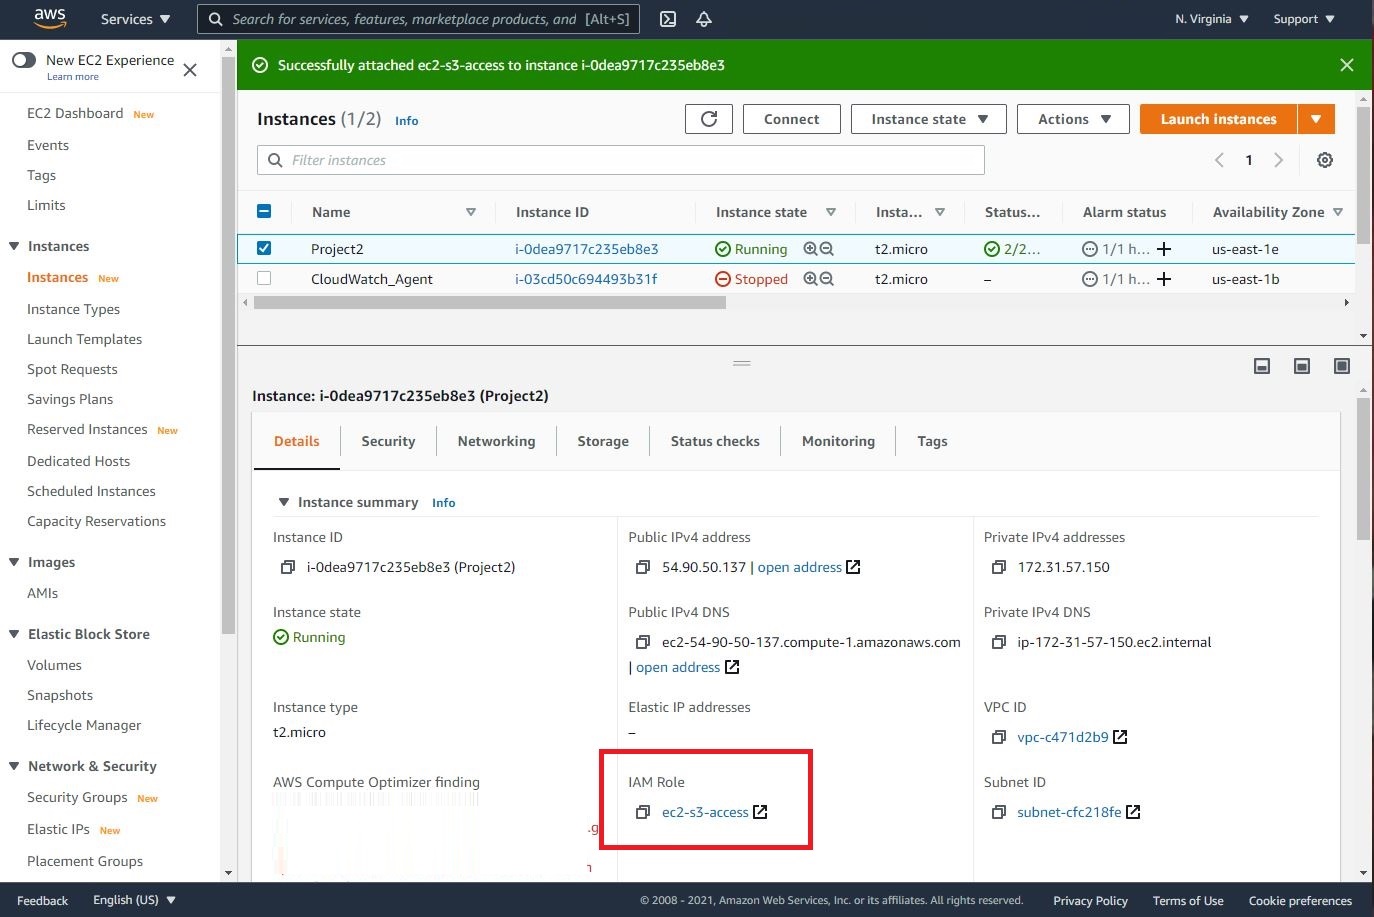
- Let’s go back to the EC2 and attach this role to it as shown below.
Step 6: Uploading the Python Code
-
Download the application zip file from my GitHub repo and save it to your local device.
-
Open the code using any code editor of your choice. I’m using Visual Studio Code as a code/text editor.
-
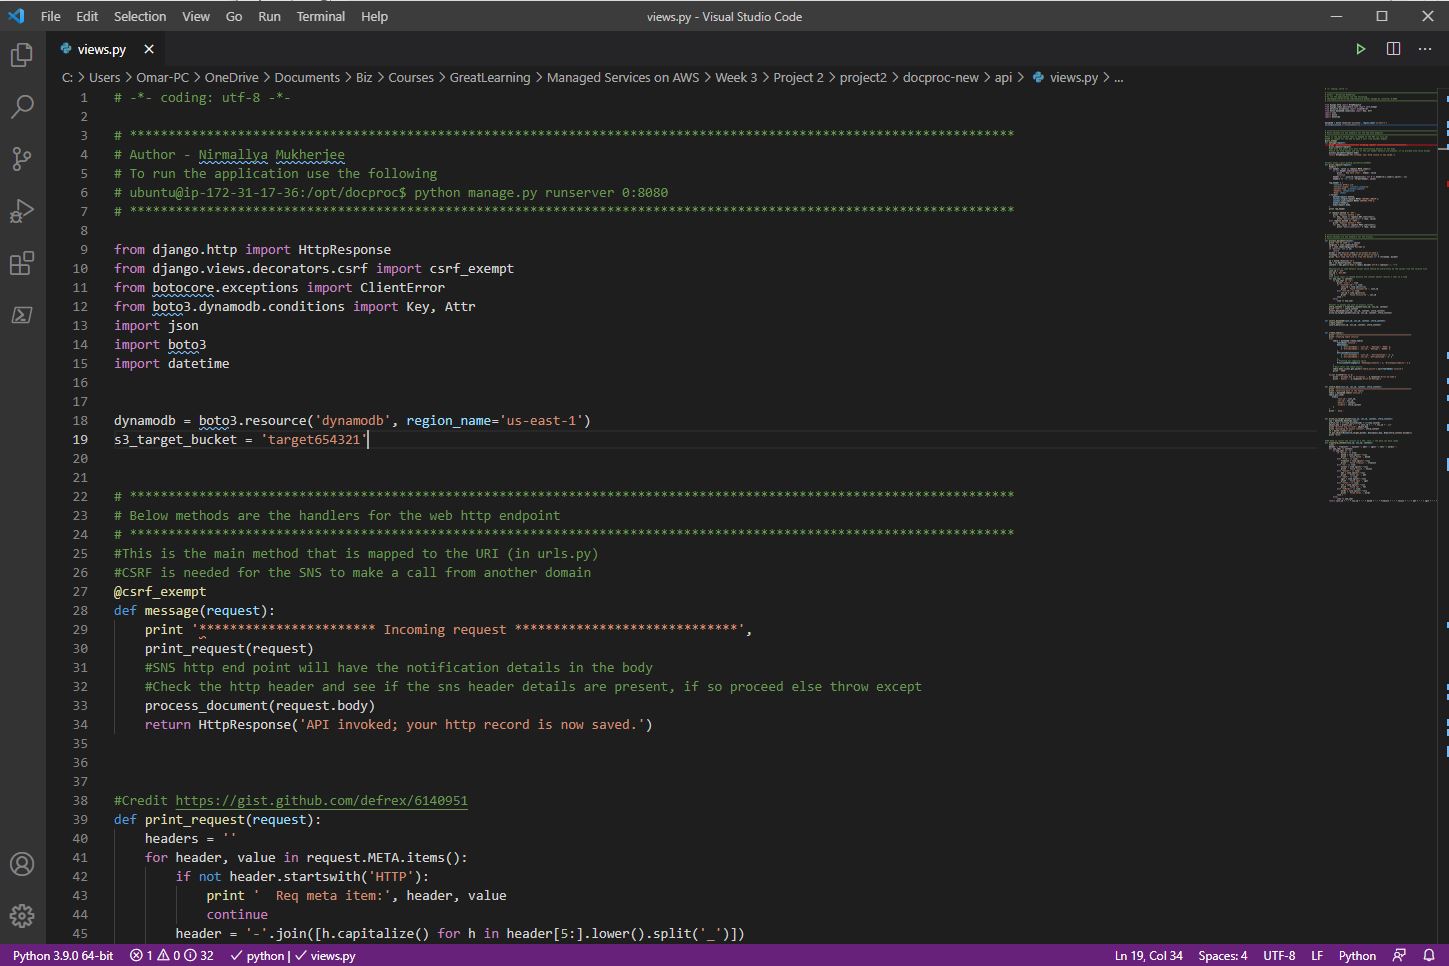
Unzip the file and navigate to docproc-new -> api -> views.py.
-
Open views.py with your choice of code editor and ensure that:
A. The name of the S3 target bucket must match the name of our target bucket’s name (line 19).
B. The region should match your region. Mine is us-east-1.
Then, let’s save the python file.
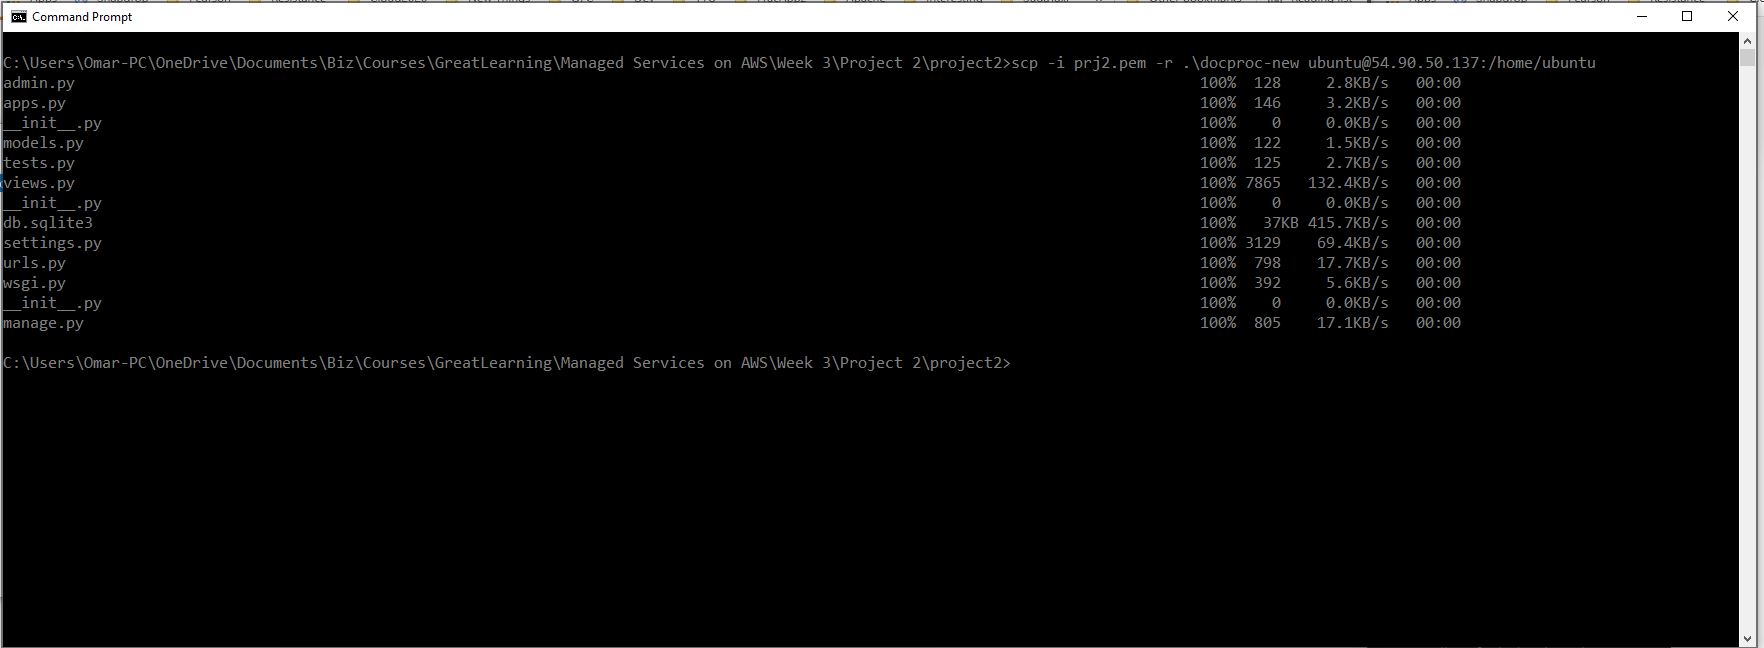
- Now, we need to copy folder docproc-new from our local device to the home folder of our Ubuntu EC2 instance using scp command as shown below.
Note: first you may need to navigate (cd) to where you have saved the pem file.
scp -i <Ubuntu pem file> ./docproc-new ubuntu@<Ubuntu public ip>:/home/ubuntu
If your transfer is successful, you shall see a message similar to the below.
Step 7: Source Code Installation
-
Let’s SSH into our Ubuntu EC2 instance. If you need help SSH’ing into the instance, please refer to my previous tutorial about SSH.
-
Now, we will run the following commands on our Ubuntu instance to update the operating system, install Python, Django, Boto3 and a virtual environment:
sudo apt update
sudo apt install python-pip -y
python -m pip install --upgrade pip setuptools
sudo apt install virtualenv -y
virtualenv ~/.virtualenvs/djangodev
source ~/.virtualenvs/djangodev/bin/activate
pip install django
pip install boto3
- Let’s create a directory and copy the source code.
sudo cp -r docproc-new /opt
sudo chown ubuntu:ubuntu -R /opt
cd /opt/docproc-new
- Now, let’s run the python code:
python manage.py runserver 0:8080
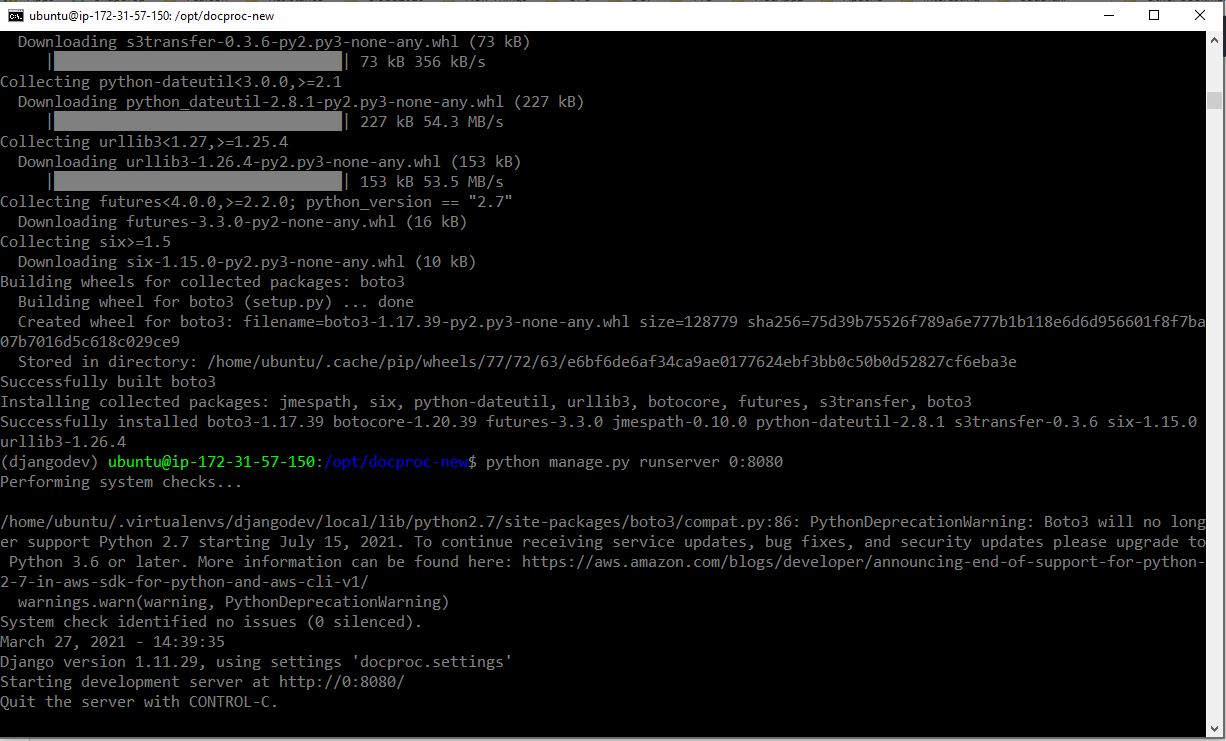
Note: make sure the development server is running on the CLI/Terminal
Step 8: SNS Subscription
-
Let’s navigate to SNS in the AWS Console and select the topic S3toEC2Topic
-
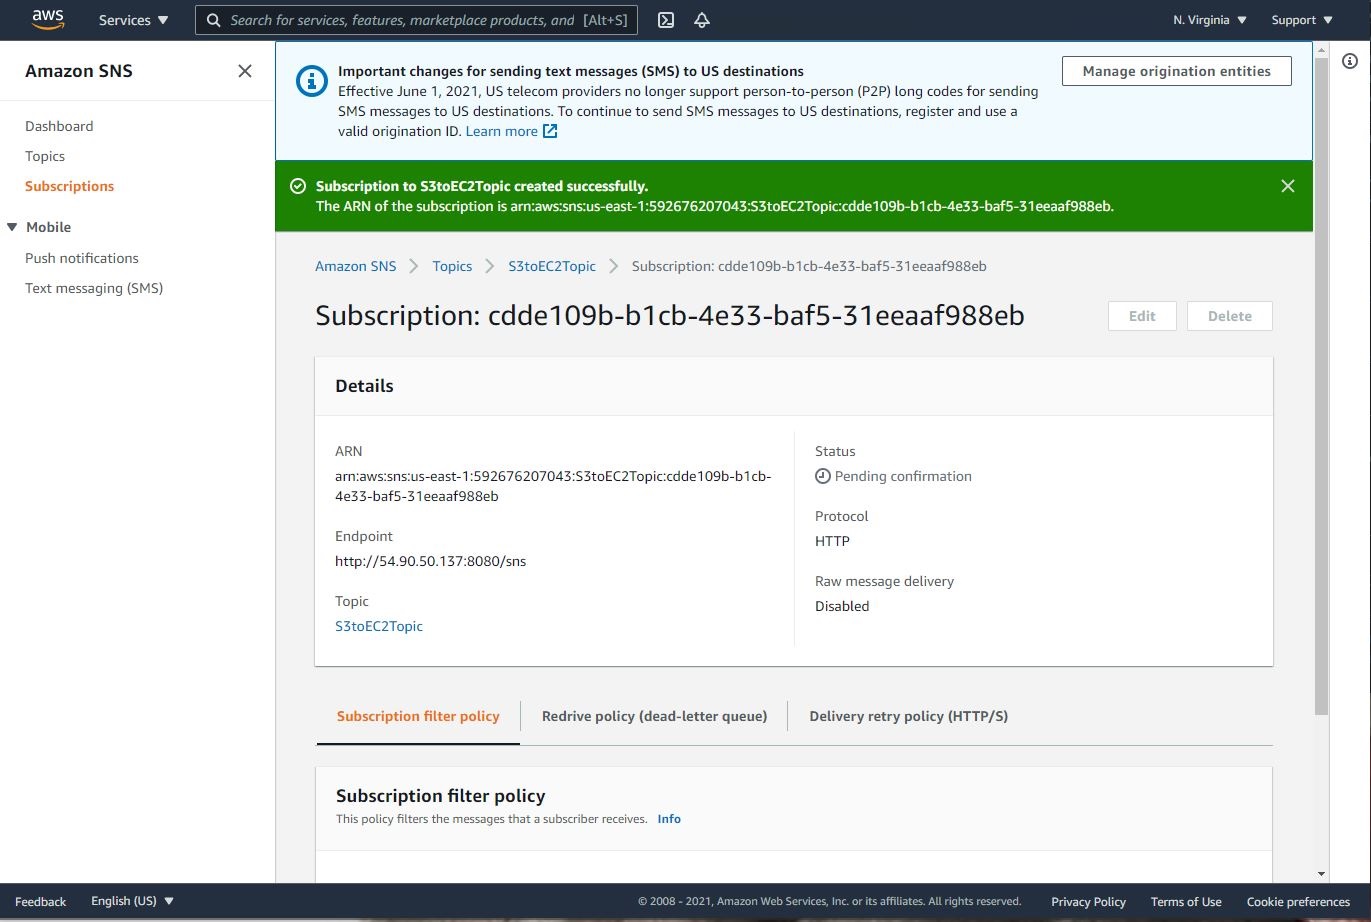
Click on Create Subscription
-
Enter the following details:
Protocol : HTTP
Endpoint : http://IP-address:8080/sns, where the IP Address is the public IP of the EC2 instance.
- In the EC2 terminal window, look for the field “SubscribeURL” and copy the entire link given without the prentices. This should be the token used to confirm the subscription.
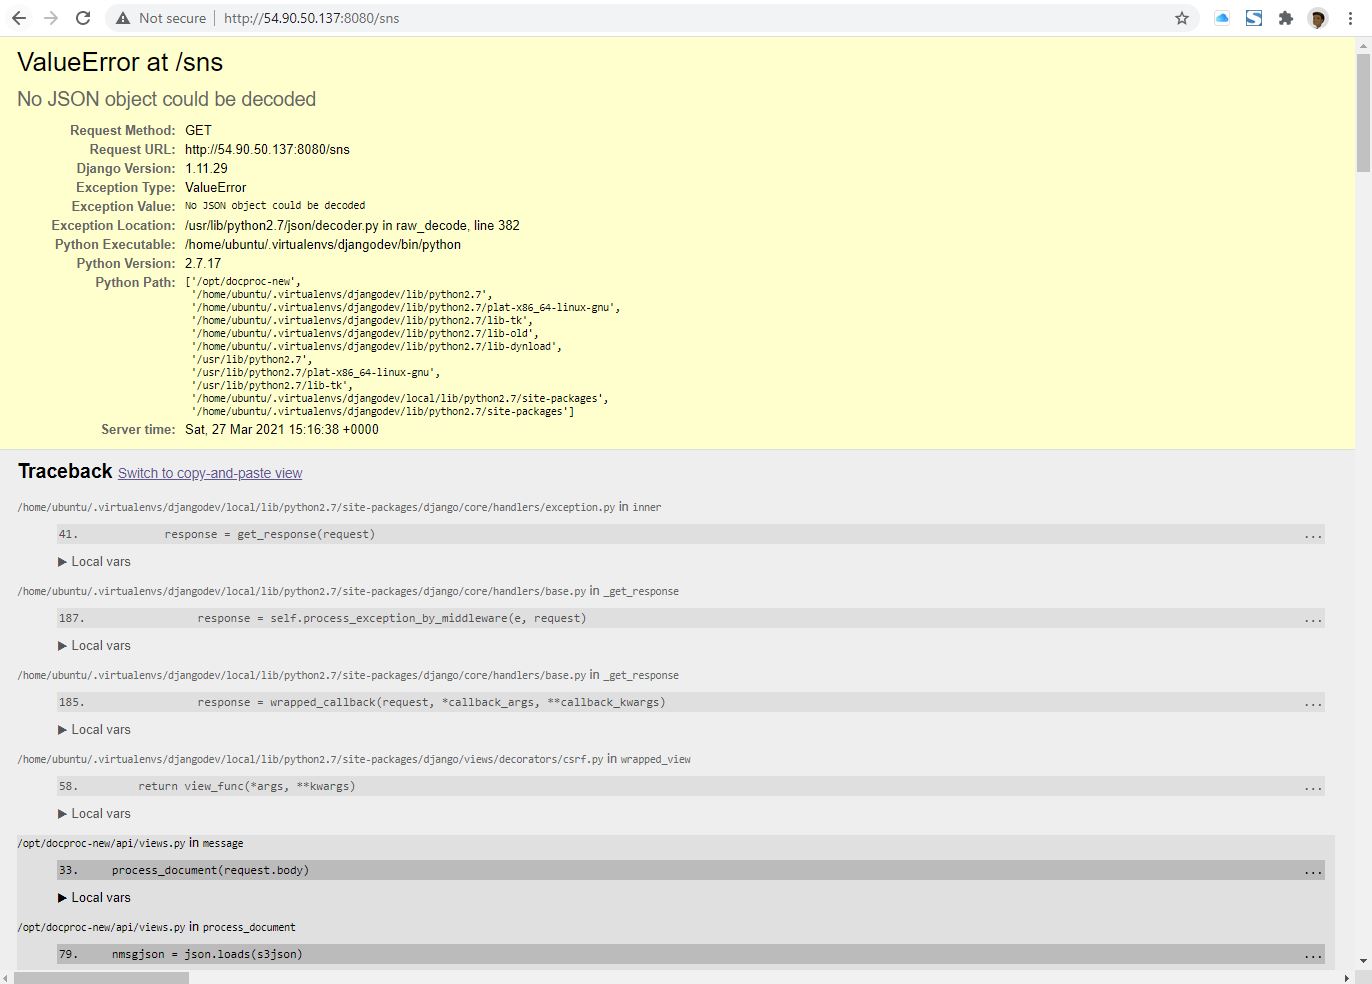
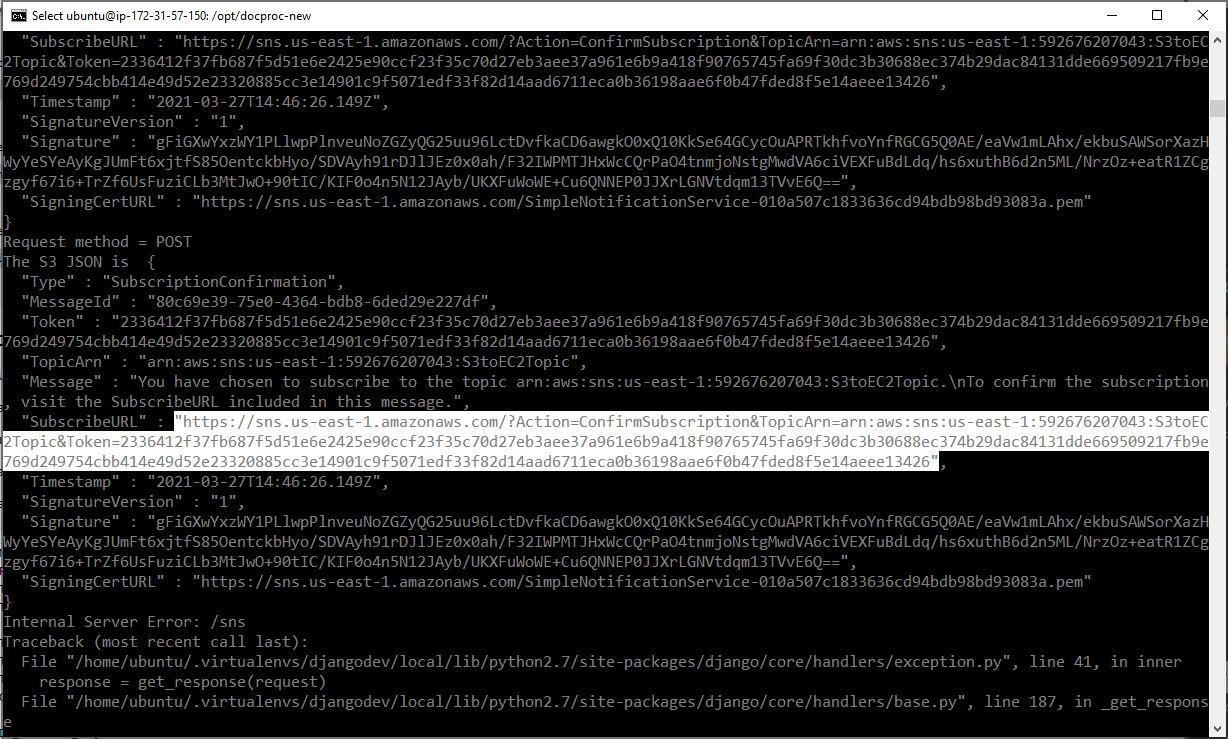 Note: If a message is seen “ValueError: No JSON object could be decoded”, it can be safely ignored.
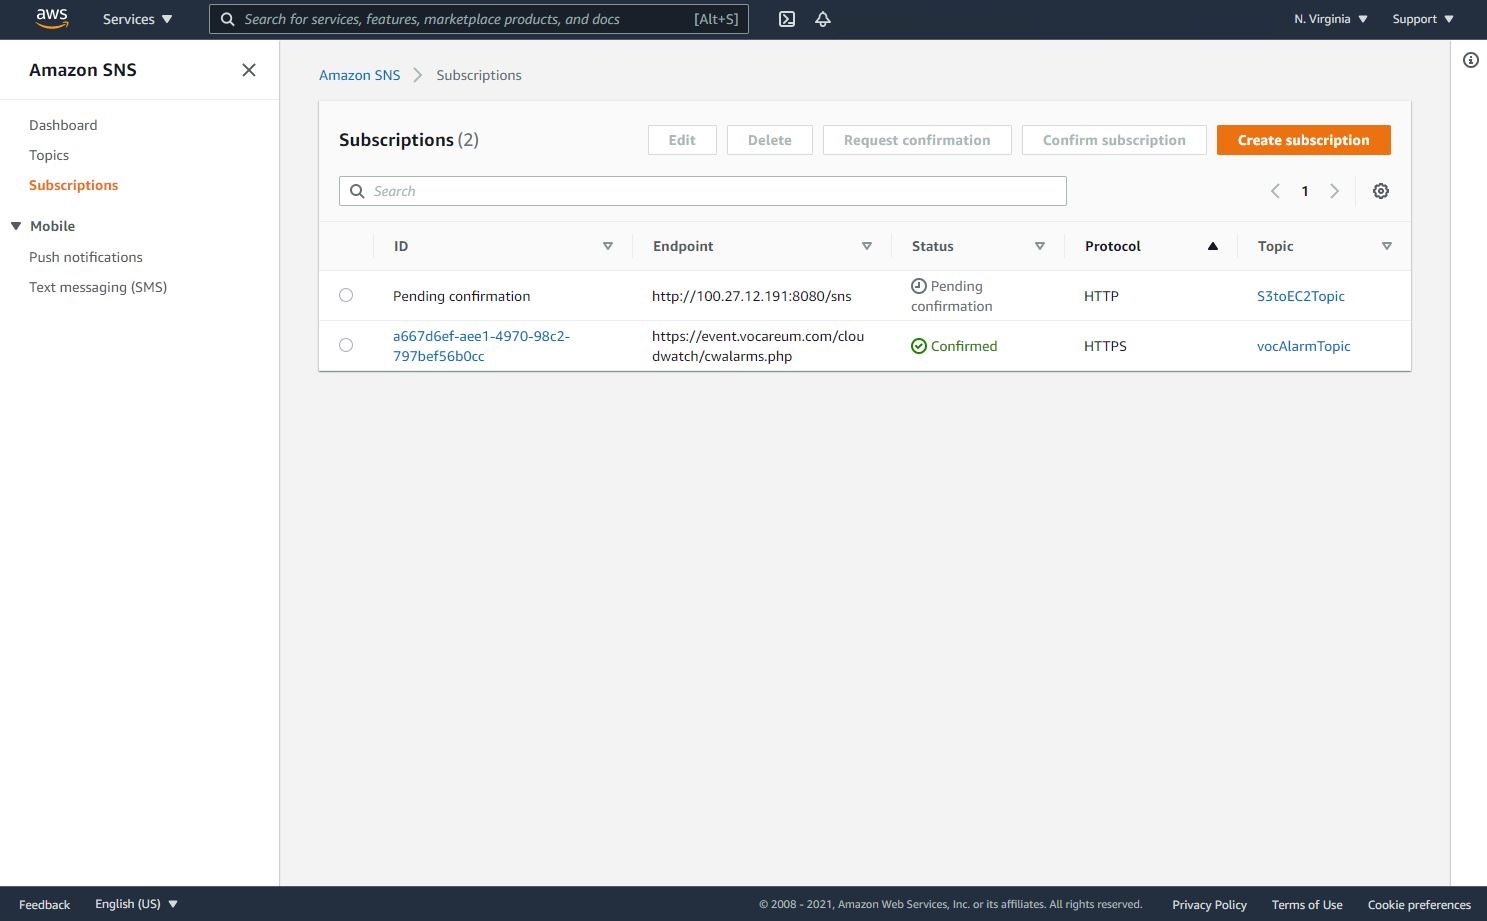

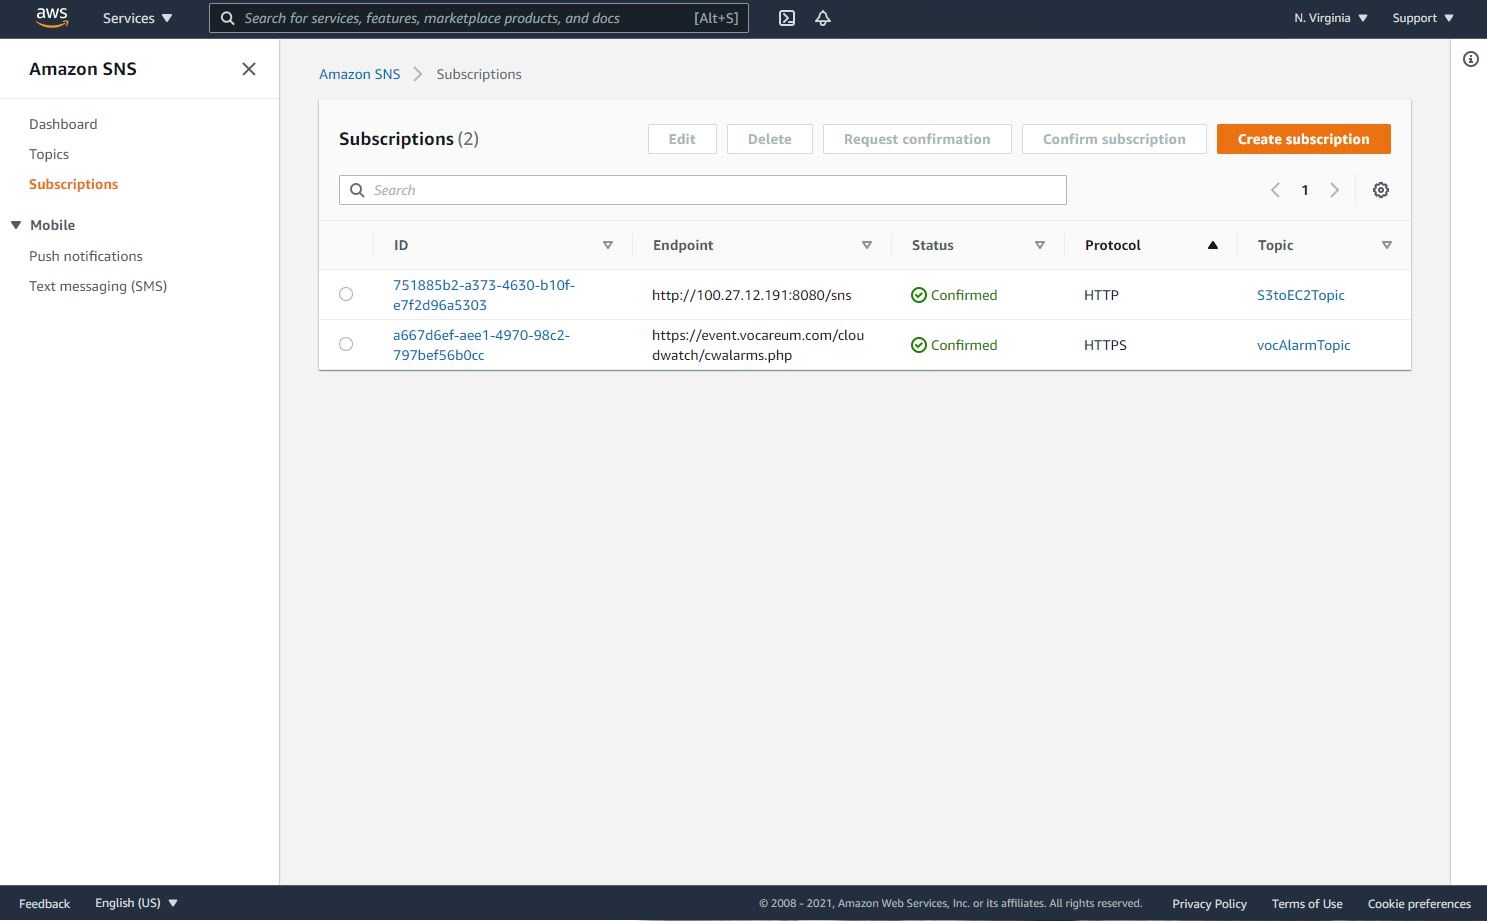
- Paste that URL into a browser window, http://<instance public IP address>:8080/sns*, to verify the SNS subscription (Ignore any messages received in the web browser).
When EC2 instance is stopped, its public IPv4 is released, and a new IPv4 is assigned to the instance once it starts back up. To read more about AWS Stop and start your instance.
Step 9: Generation of CSV File
In the project folder, we have docproc-invoice.txt which we will upload to our S3 source bucket.
- Navigate to S3 in the AWS Console.
- Upload the sample invoice file to the source S3 bucket using the default options.

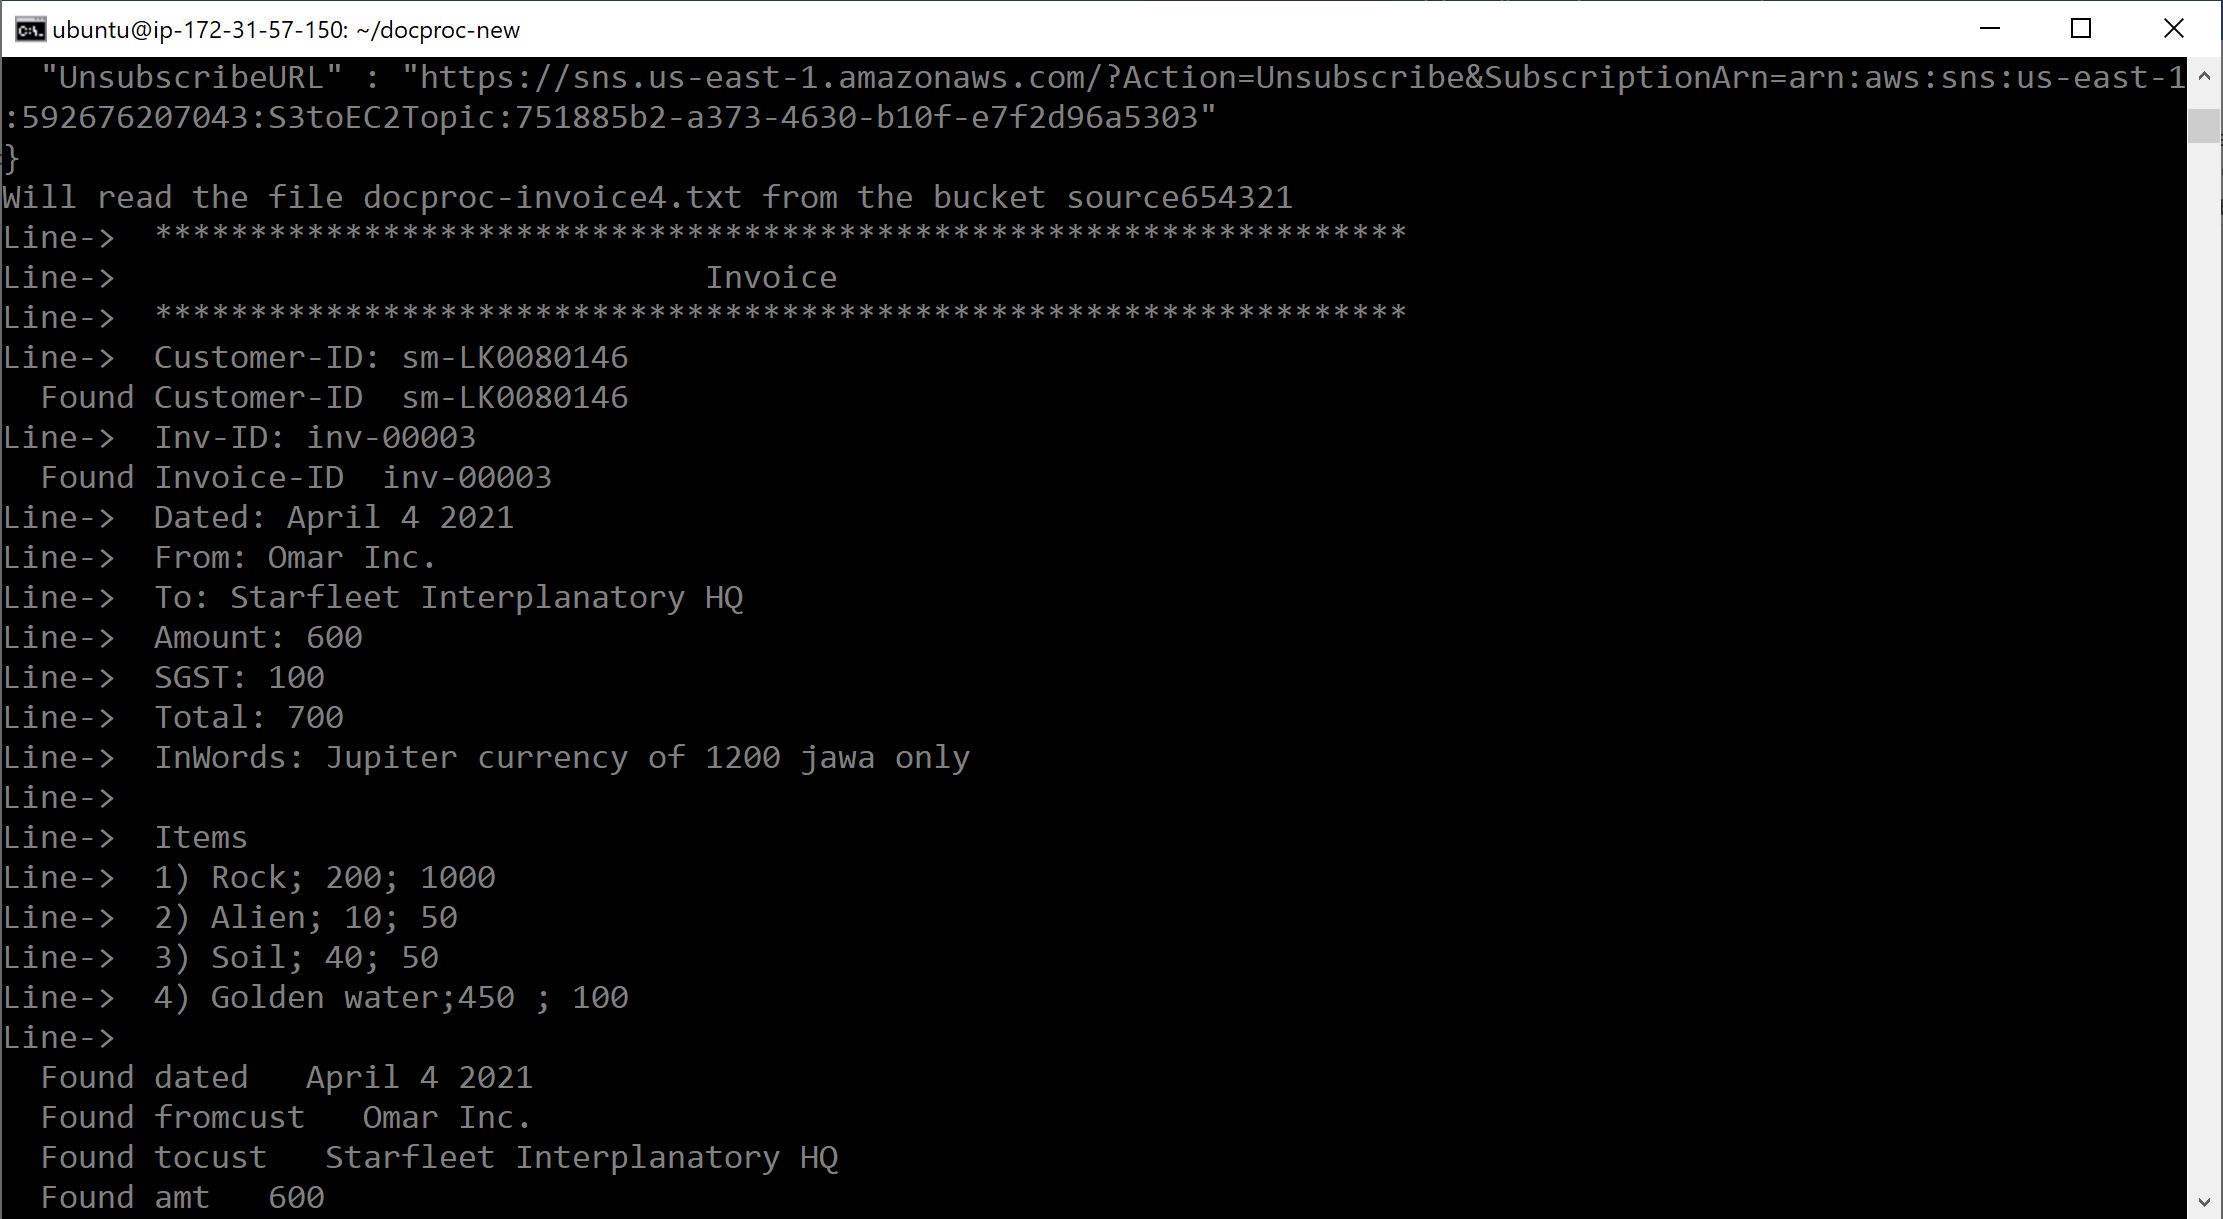
*Note: you should be able to track the processing of the file on command line/terminal as shown below.
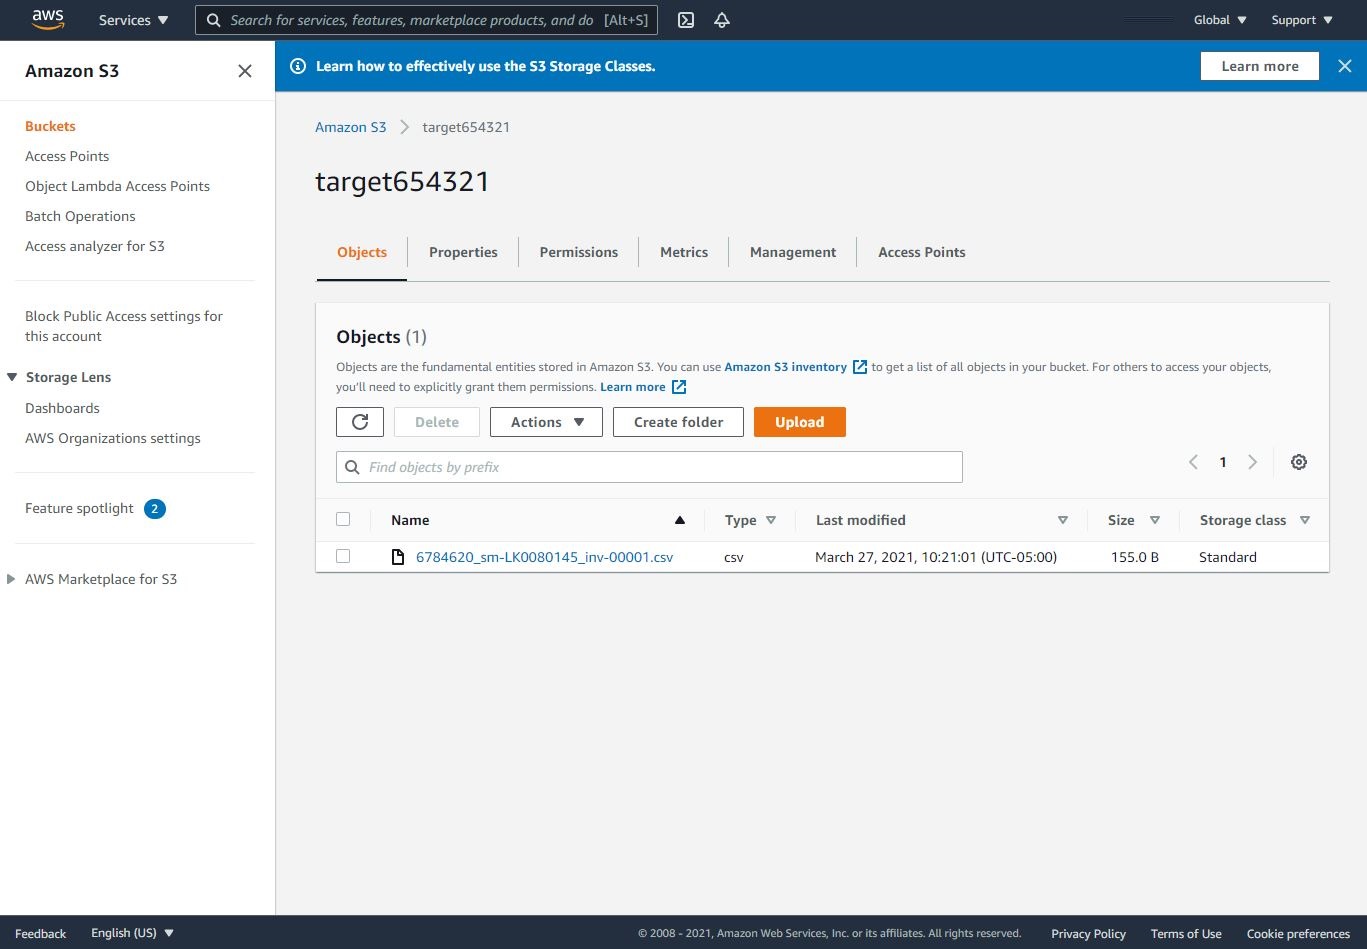
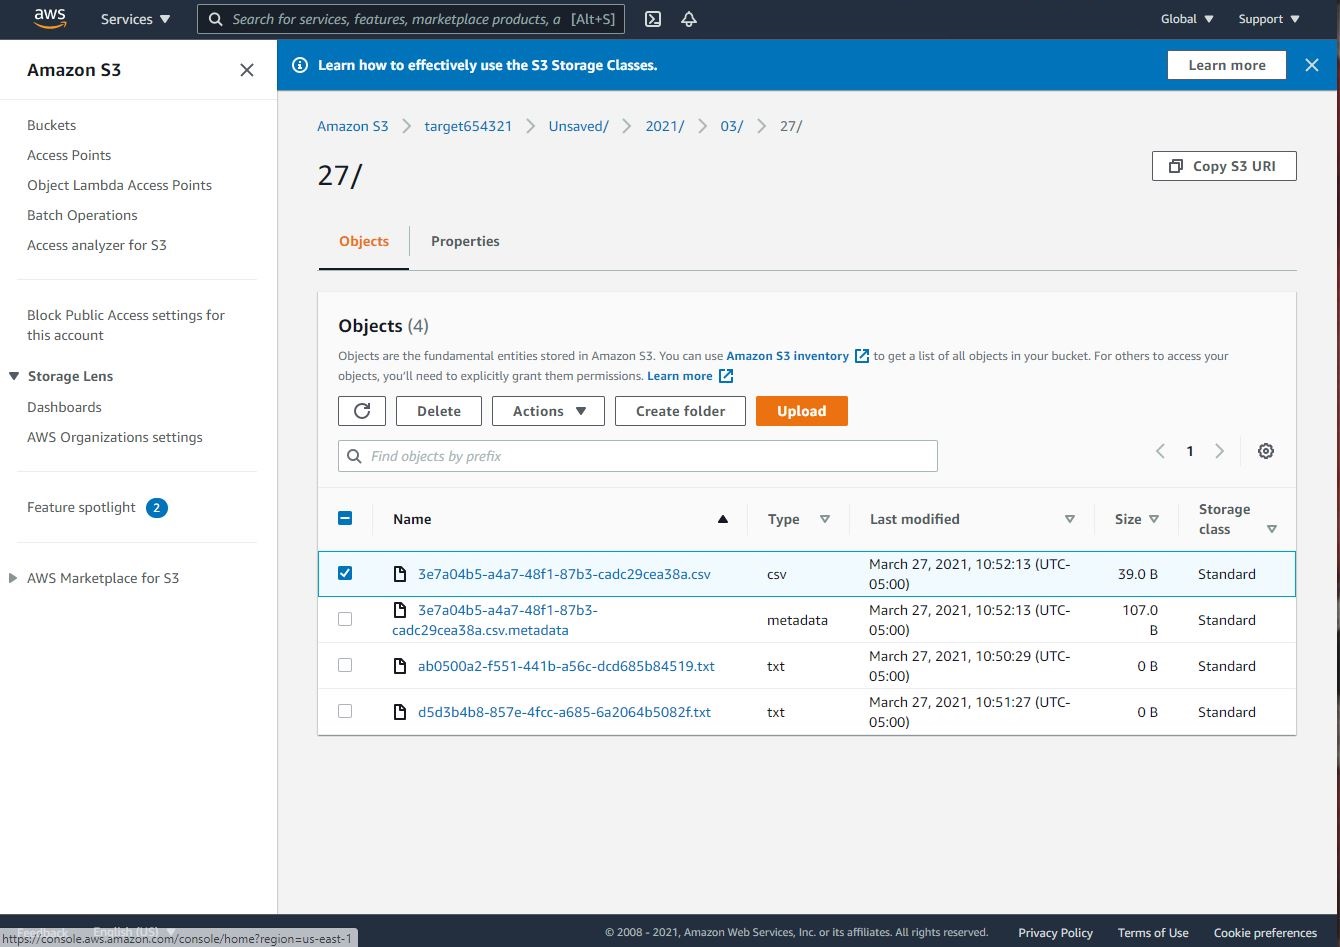
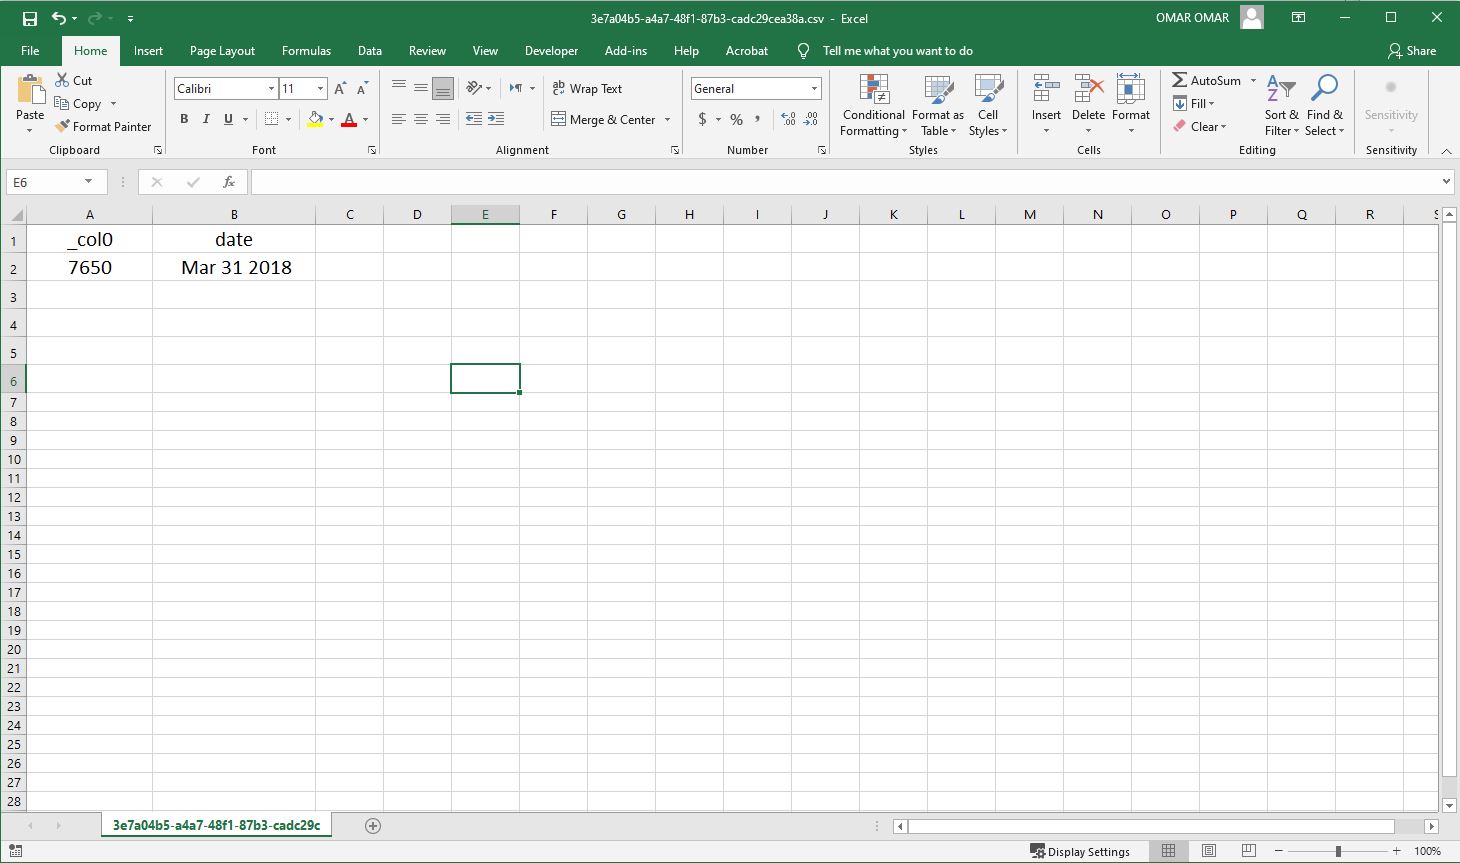
- Verify that a CSV file is generated in the target S3 bucket.
Step 10: Create a Table in DynamoDB
- Navigate to DynamoDB using the Services Menu.
- Click on tables on the left side.
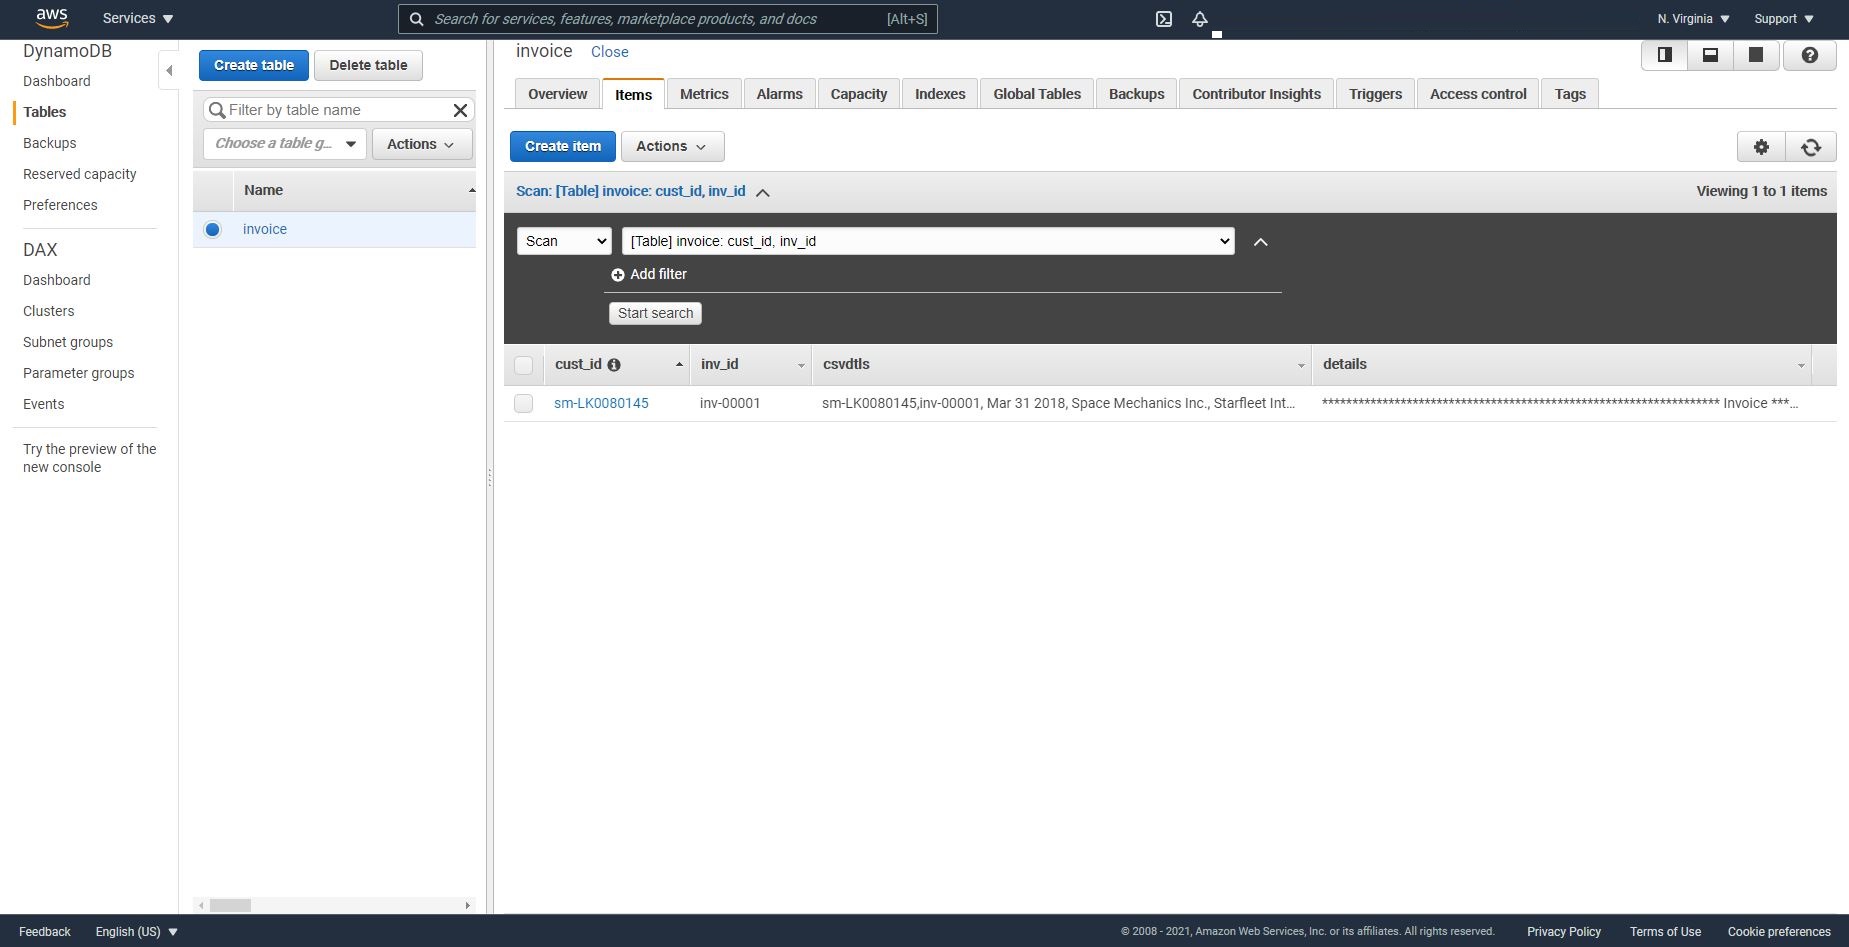
- Select the table “invoice”
- Click on the “Items” tab and verify that a record has been created in the table with the contents of the invoice file.
Step 11: AWS Athena Querying CSV File
- Navigate to AWS Athena in the AWS Console.
- Paste the following command in the query editor and Run query to create a database: create database proj2db;

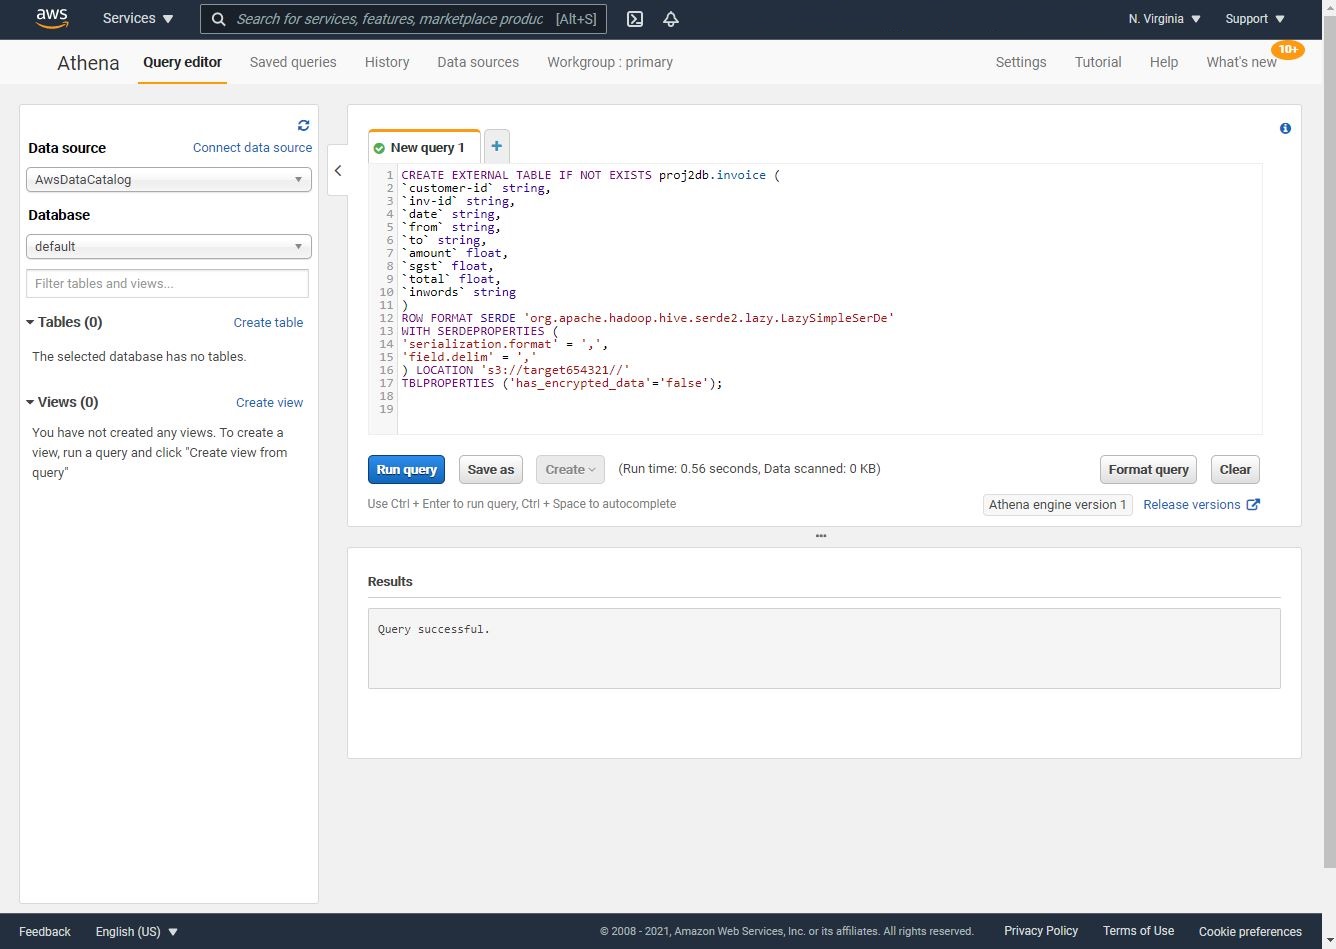
- Run the following query to create the table based on the generated CSV file:
Note: add your S3 target bucket name instead of <target S3 bucket>.
CREATE EXTERNAL TABLE IF NOT EXISTS proj2db.invoice (
`customer-id` string,
`inv-id` string,
`date` string,
`from` string,
`to` string,
`amount` float,
`sgst` float,
`total` float,
`inwords` string
)
ROW FORMAT SERDE 'org.apache.hadoop.hive.serde2.lazy.LazySimpleSerDe'
WITH SERDEPROPERTIES (
'serialization.format' = ',',
'field.delim' = ','
) LOCATION 's3://<target S3 bucket>/'
TBLPROPERTIES ('has_encrypted_data'='false');
- Paste the following query and run it to show aggregated expenses by date:
SELECT sum("amount"), "date" FROM "proj2db"."invoice" GROUP BY "date";
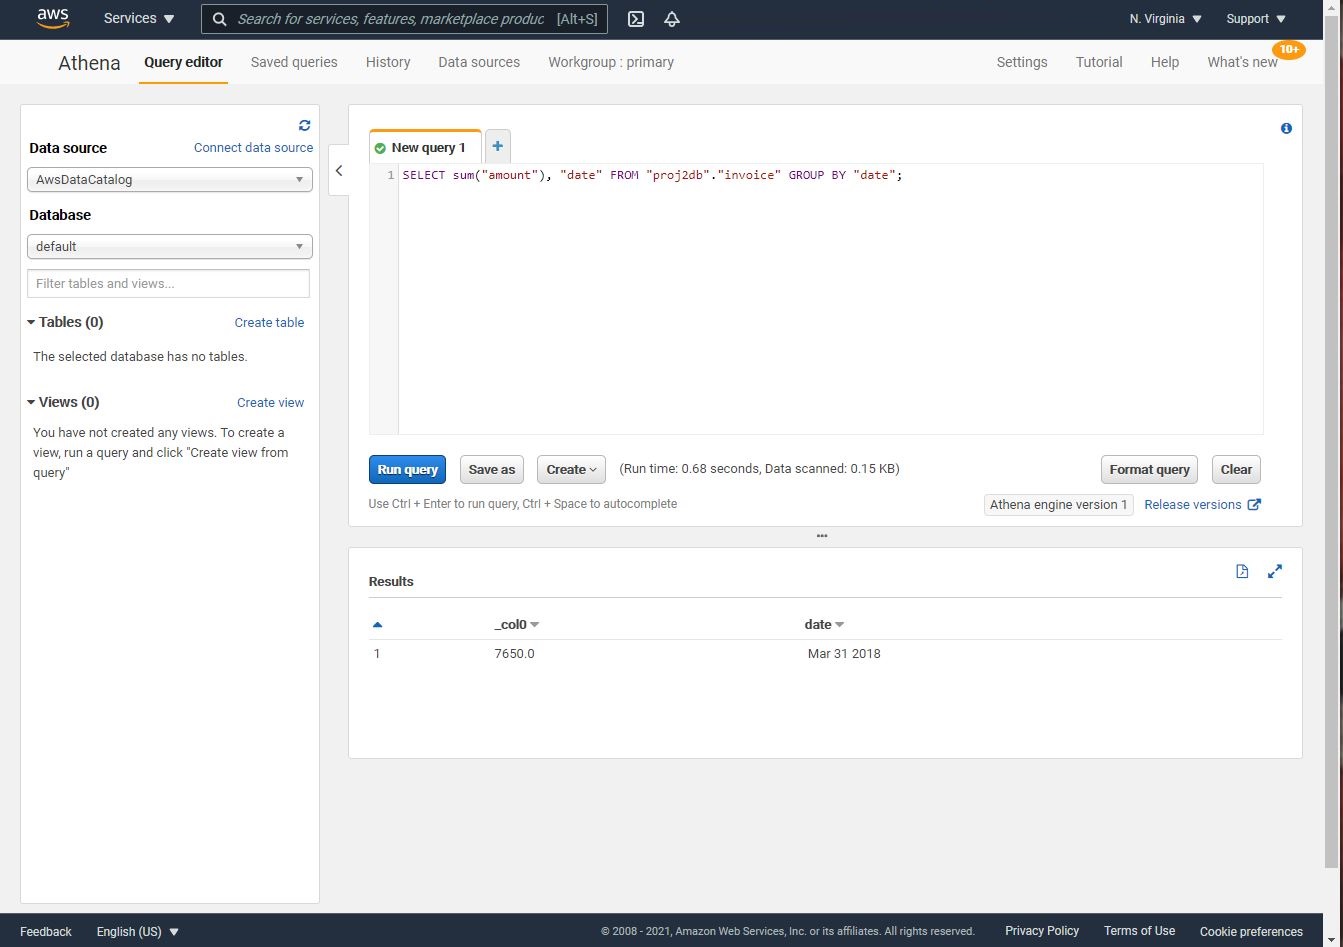
Shown below is the output of the Athena query to show aggregated expenses by date. Since we have only uploaded one invoice, we don’t have lots of the invoices to query.
Conclusion:
By the end of this tutorial, we have successfully created an Invoice Processing Application web. The application has utilized S3, SNS, EC2, DynamoDB and Athena.