Create a Terraform Template to Spin EC2 Instance from a RaspberryPi 4
What is Terraform?
Terraform is an Infrastructure as a Code - IaaC- service. It is a tool for building, changing, and versioning infrastructure safely and efficiently. Terraform can manage existing and popular service providers as well as custom in-house solutions. For more information about Terraform.
During this tutorial, we will create a sample Terraform template to spin an AWS EC2 instance from the Command Line Interface (CLI) on a Raspberry Pi 4.
Learning Outcomes:
- Download Terraform on a Raspberry Pi 4 arm64 architecture.
- Create AWS Identity and Access Management (IAM) user to run the Terraform sample template from the RPI-4.
- Create a Terraform sample template to spin an AWS EC2.
- Learn Terraform commands.
What you do you need to complete the tutorial:
- AWS Account Credentials.
- A Raspberry Pi 4.
- Shell script environment (any text editor of your choice).
Step 1: Download Terraform on Raspberry Pi 4
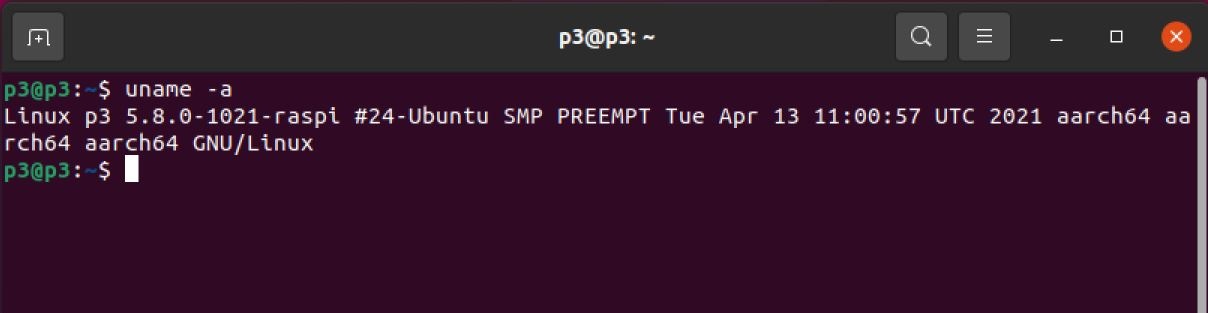
- First of all, if you’d like to check your device’s architecture, run the following command:
uname -a
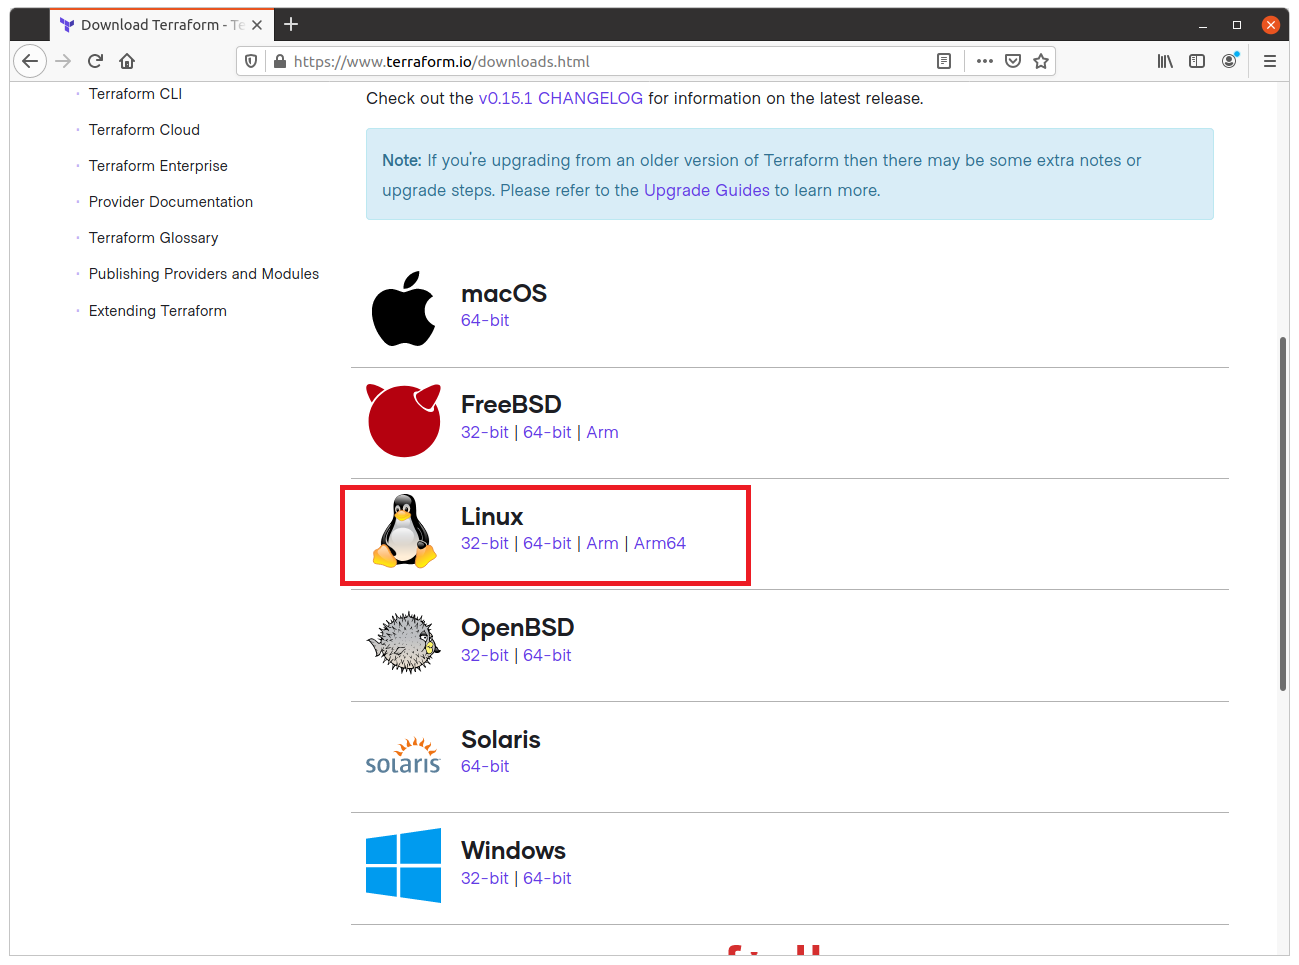
- Navigate to Terraform download page and download the proper package for your operating system and architecture. In my case, I chose to download the Linux package arm64 to my RPI-4.
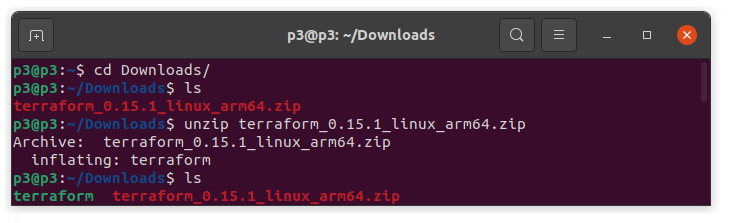
Now, let navigate to the folder where the package is downloaded and unzip it using the unzip utility. If you don’t have the unzip utility, use the following command to install it.
sudo apt install zip -y
Now, let’s unzip the package as shown below:
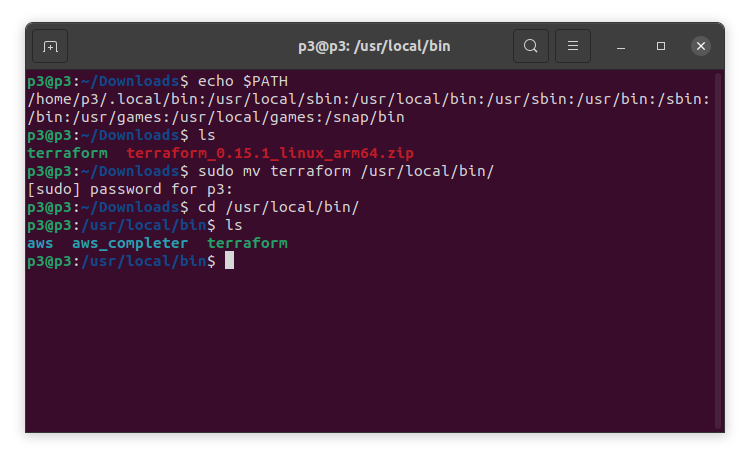
- We will run the following commands to move the Terraform zip file to our PATH. Firstly, we need to find the PATH.
echo $PATH
Then, we will move the Terraform zip file to our main PATH, which is /usr/local/bin/. This will allow us to run Terraform commands from any location without any restrictions.
sudo mv terraform /usr/local/bin/
Then, we will cd into the the bin folder as shown below:
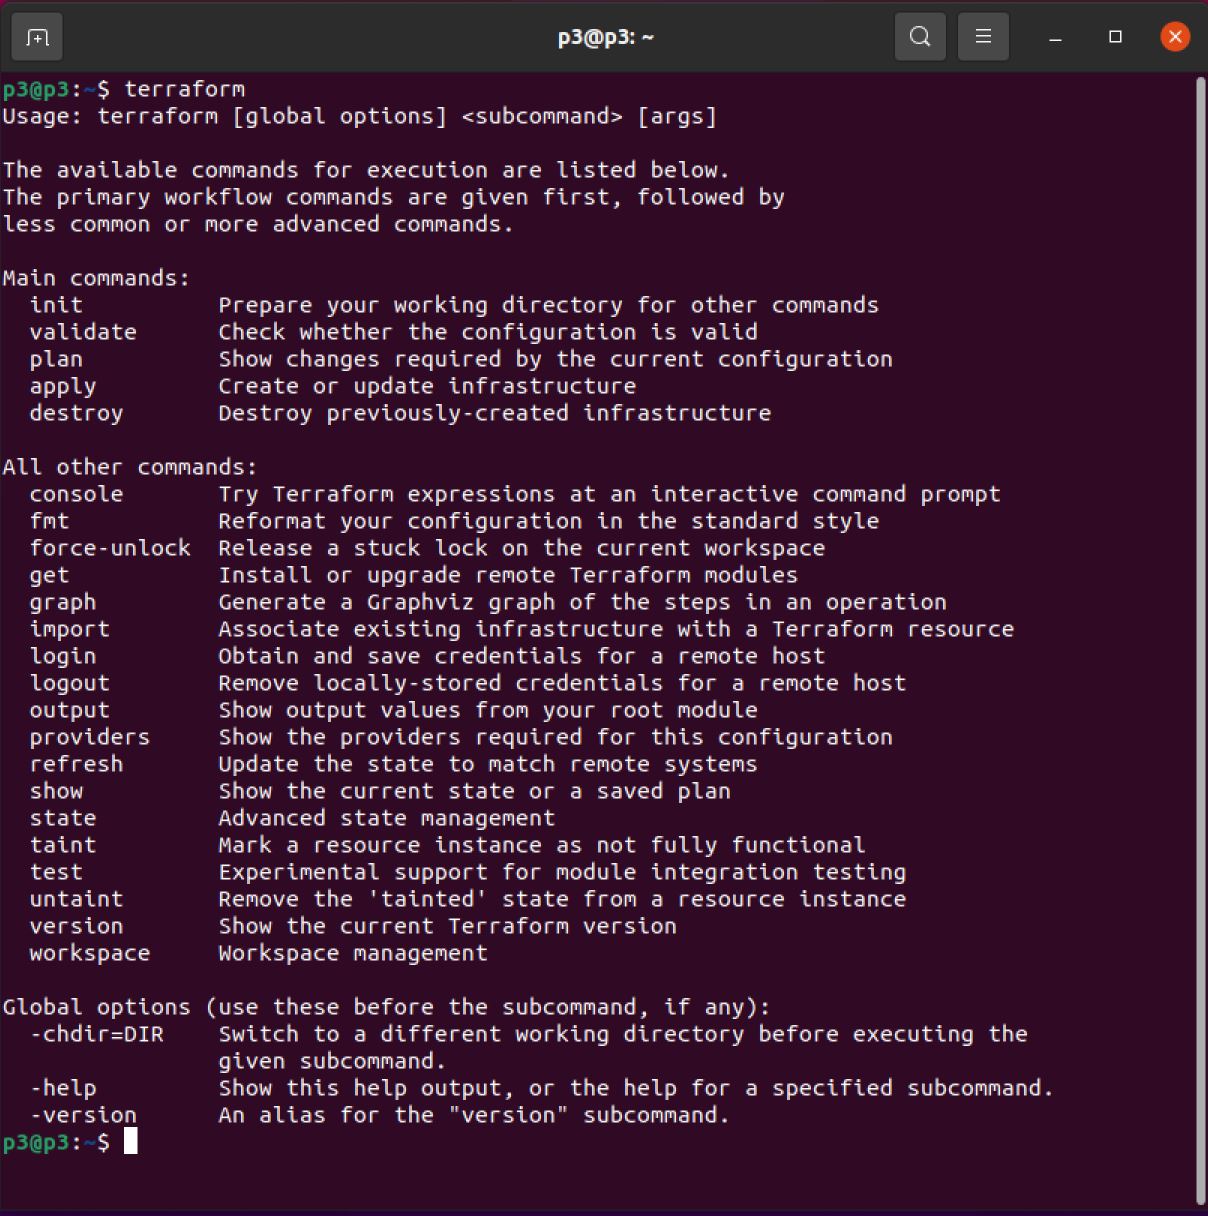
Now, let’s run the command terraform. If the results as shown below, we have installed Terraform successfully.
terraform
The results should be as shown below:
Step 2: Create AWS Identity and Access Management (IAM) user
Part 1:
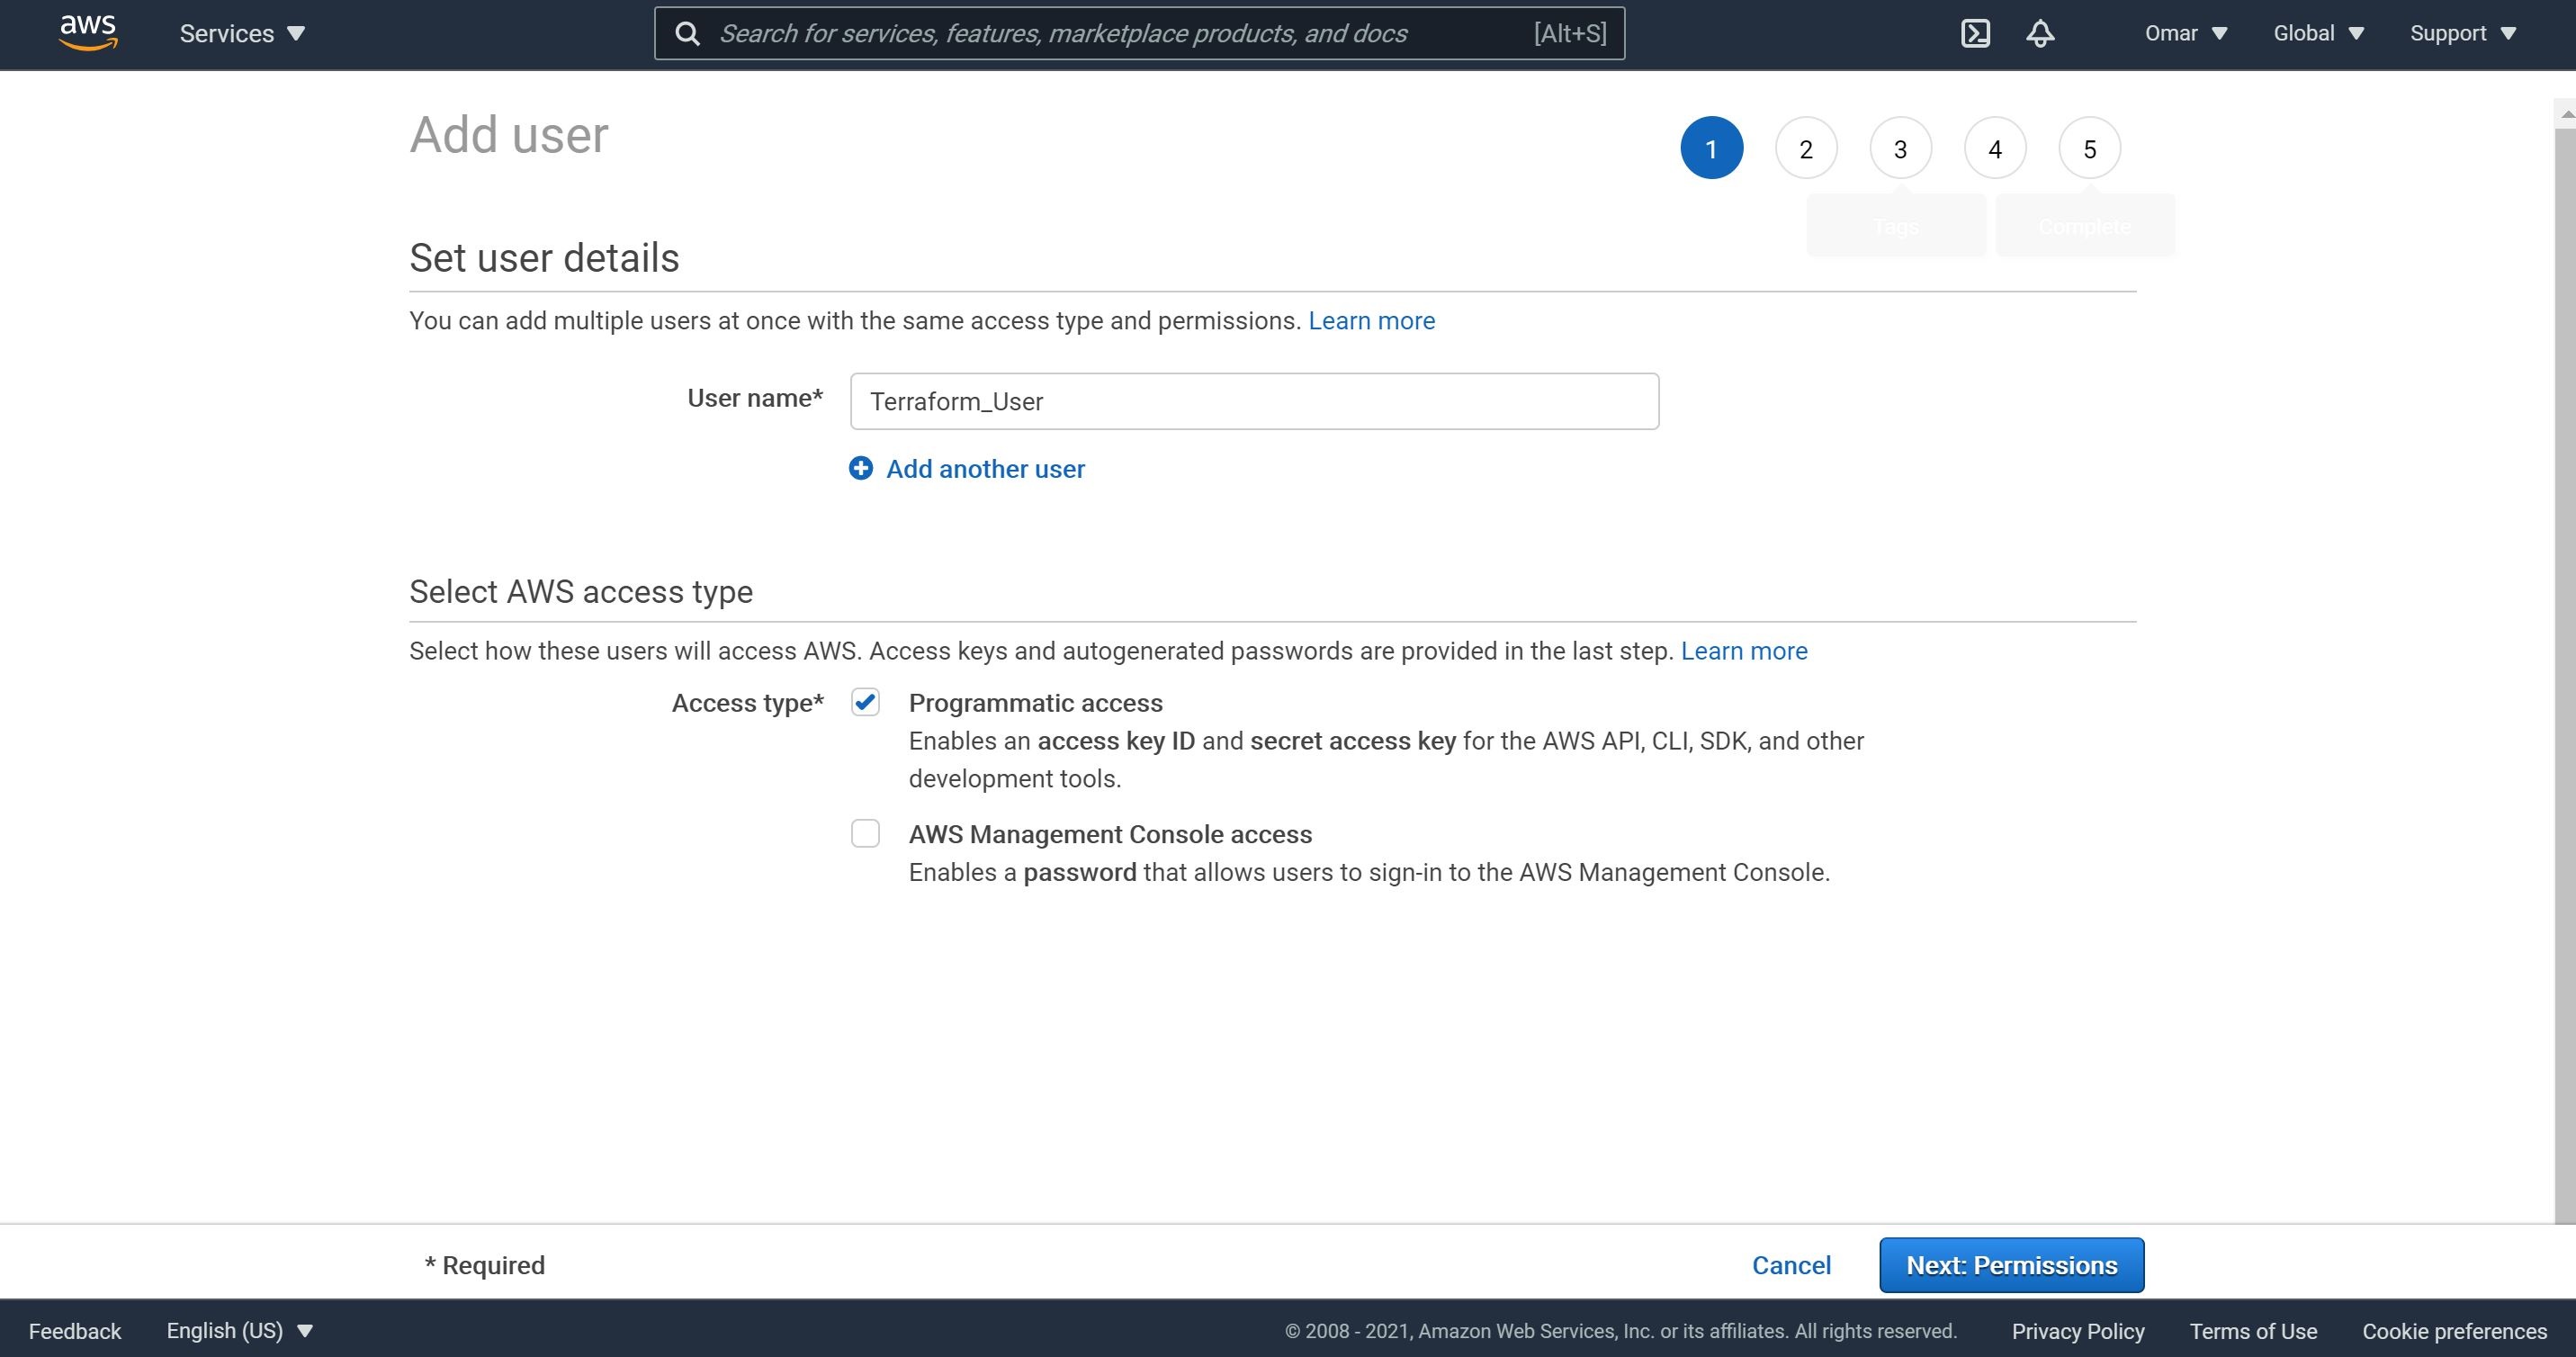
- Navigate to AWS console.
- Go to IAM and click on Users on the left hand side menu.
- Click on Add user and then add a user name and select access type as Programmatic access as shown below. Then, click on Next.
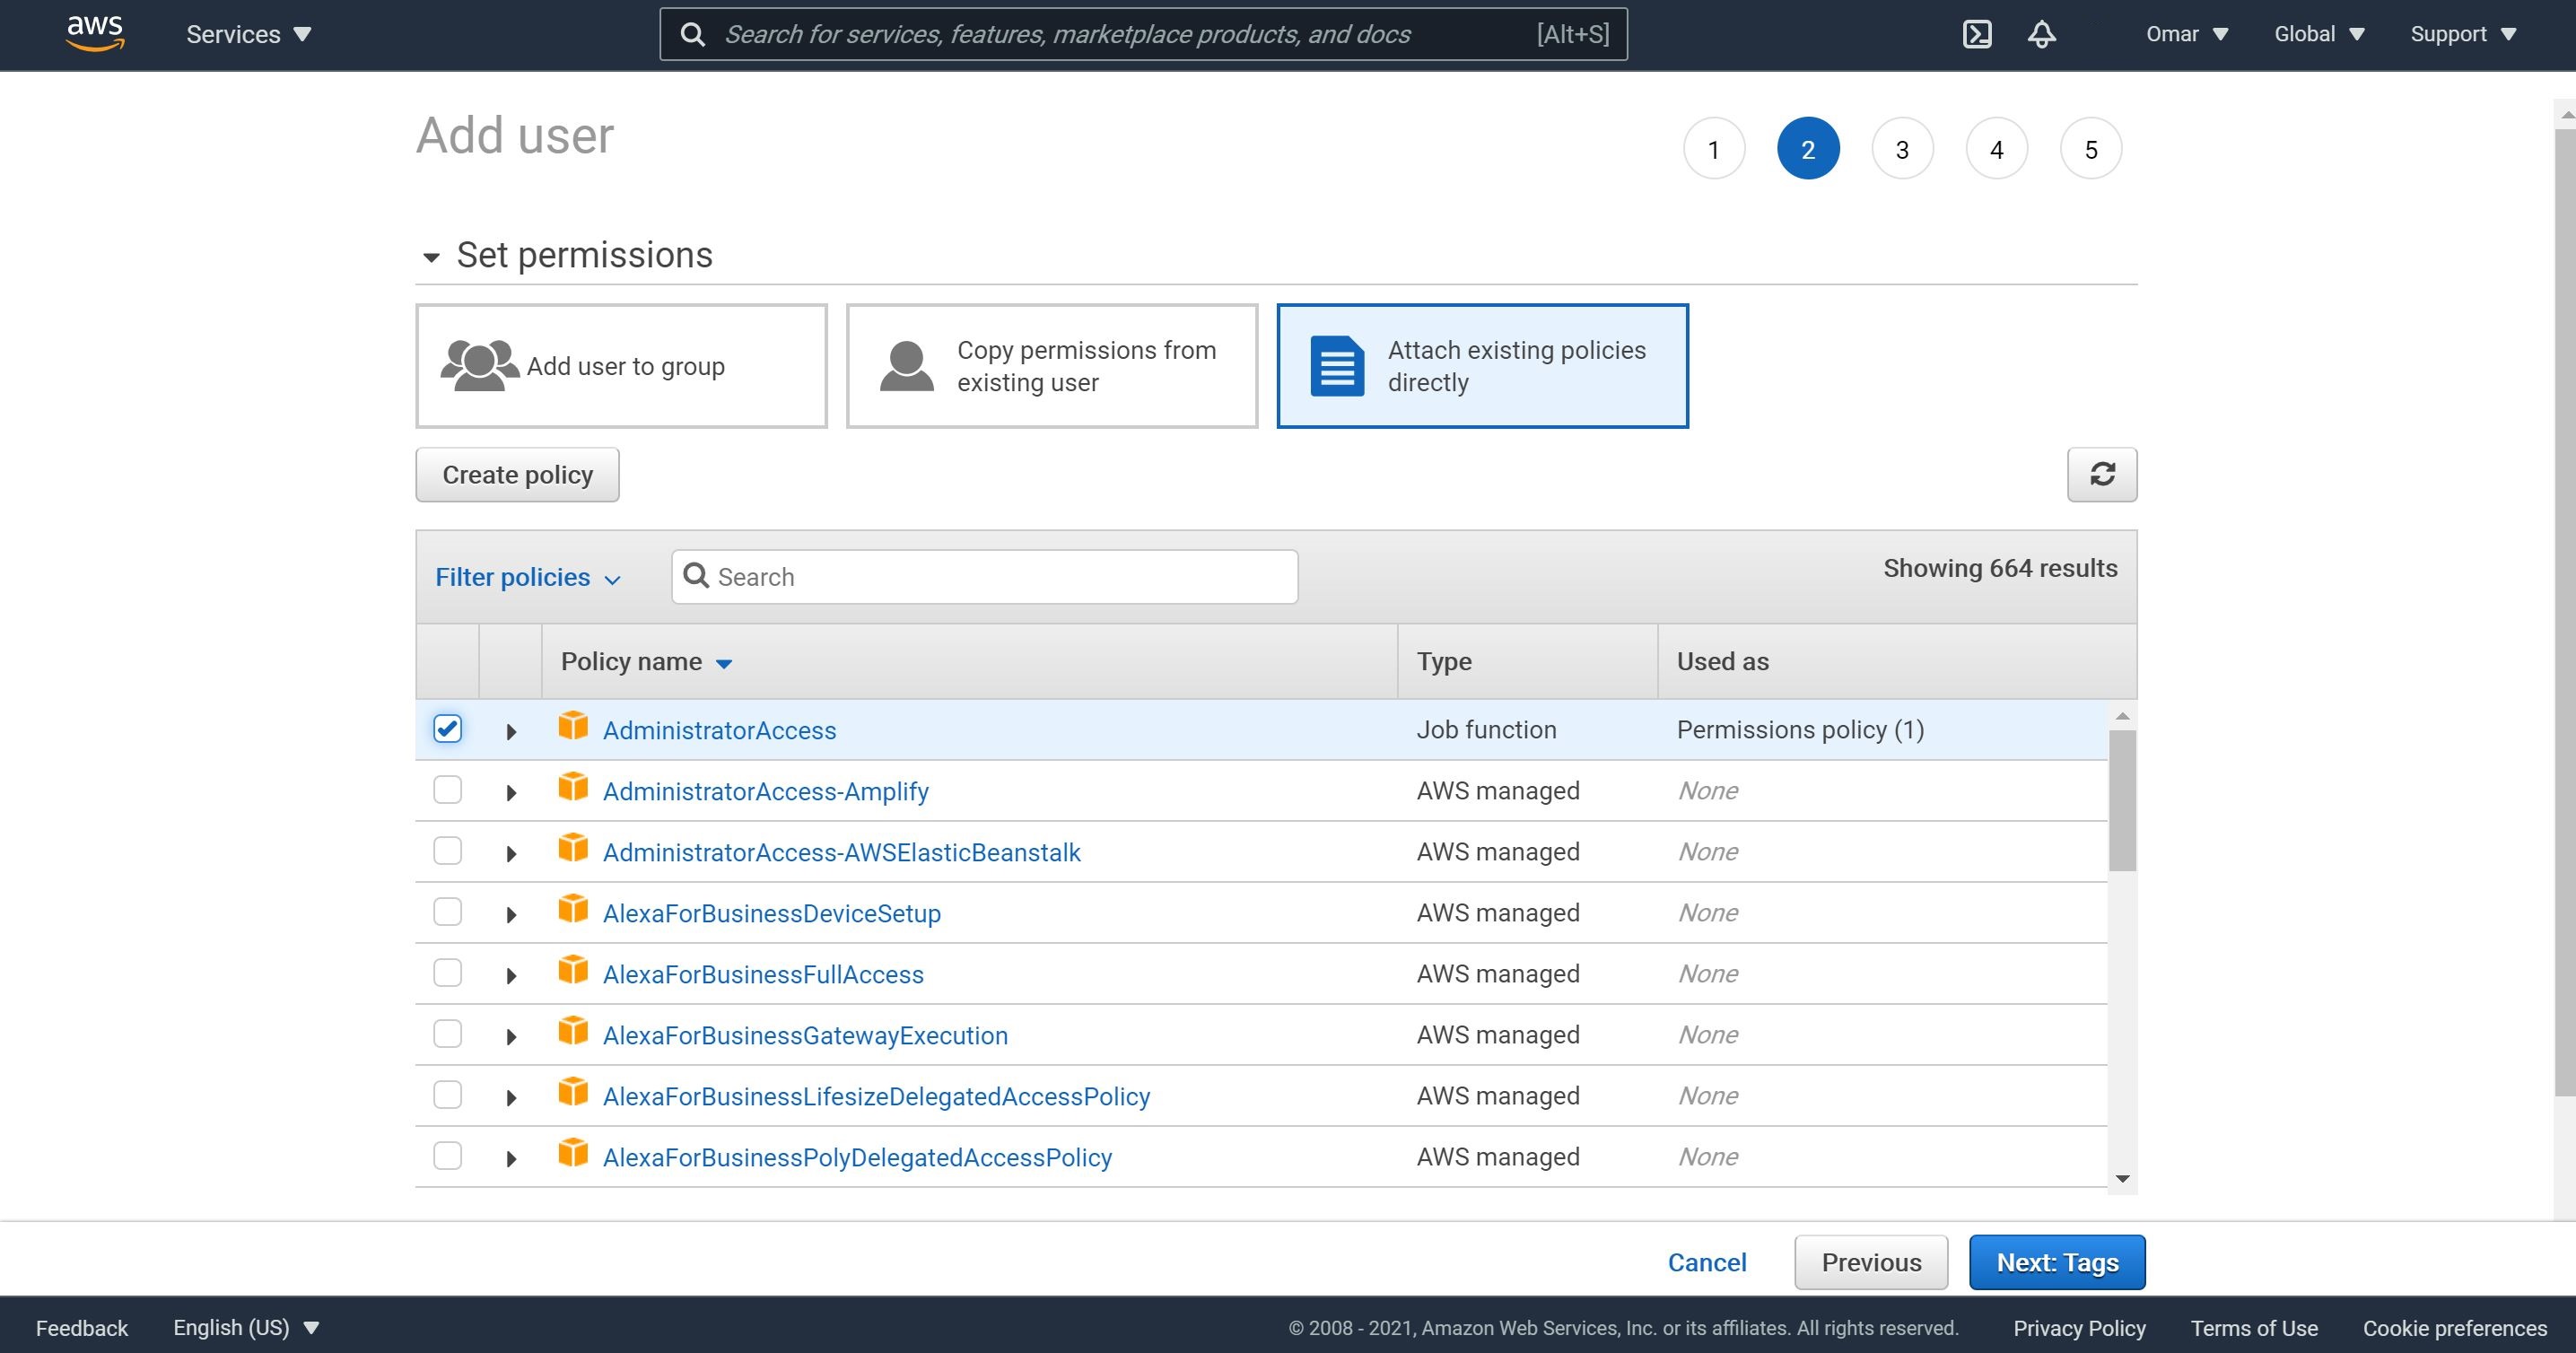
- On Set permissions, click on Attach existing policies directly. search for XX policy and check it. Then, click Next.
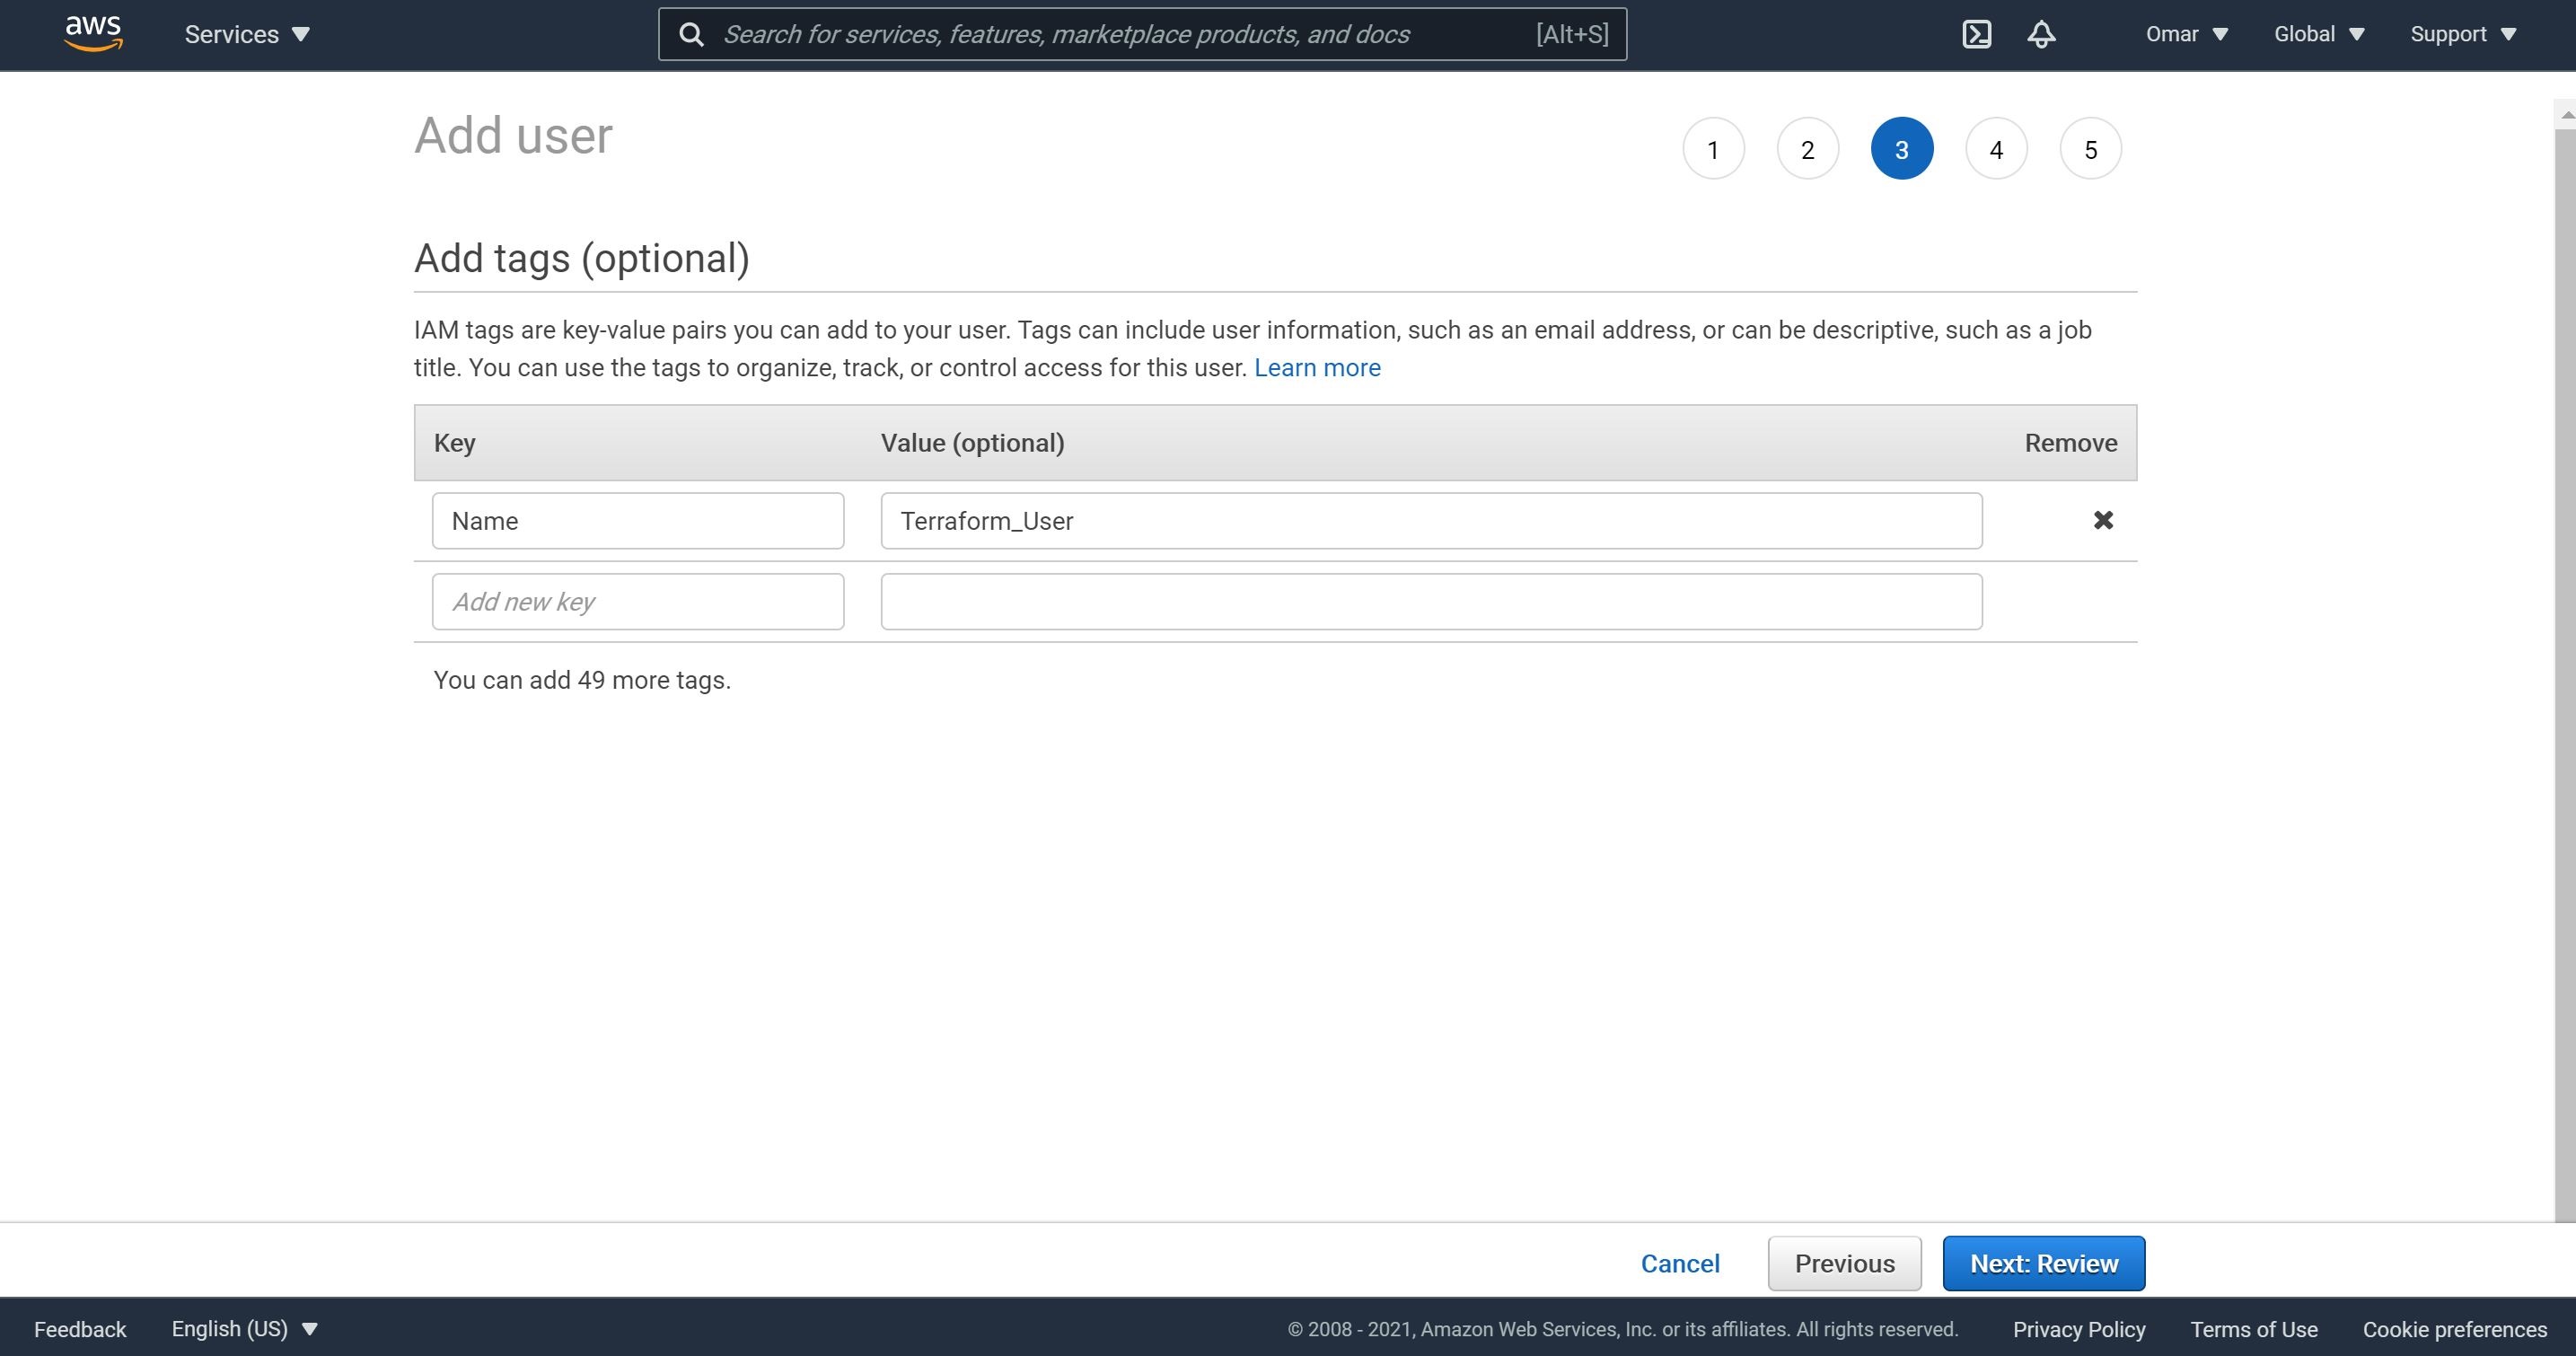
- On Add tags, it’s a best practice to use tags; therefore, adda key and value as shown below. Then, click Next.
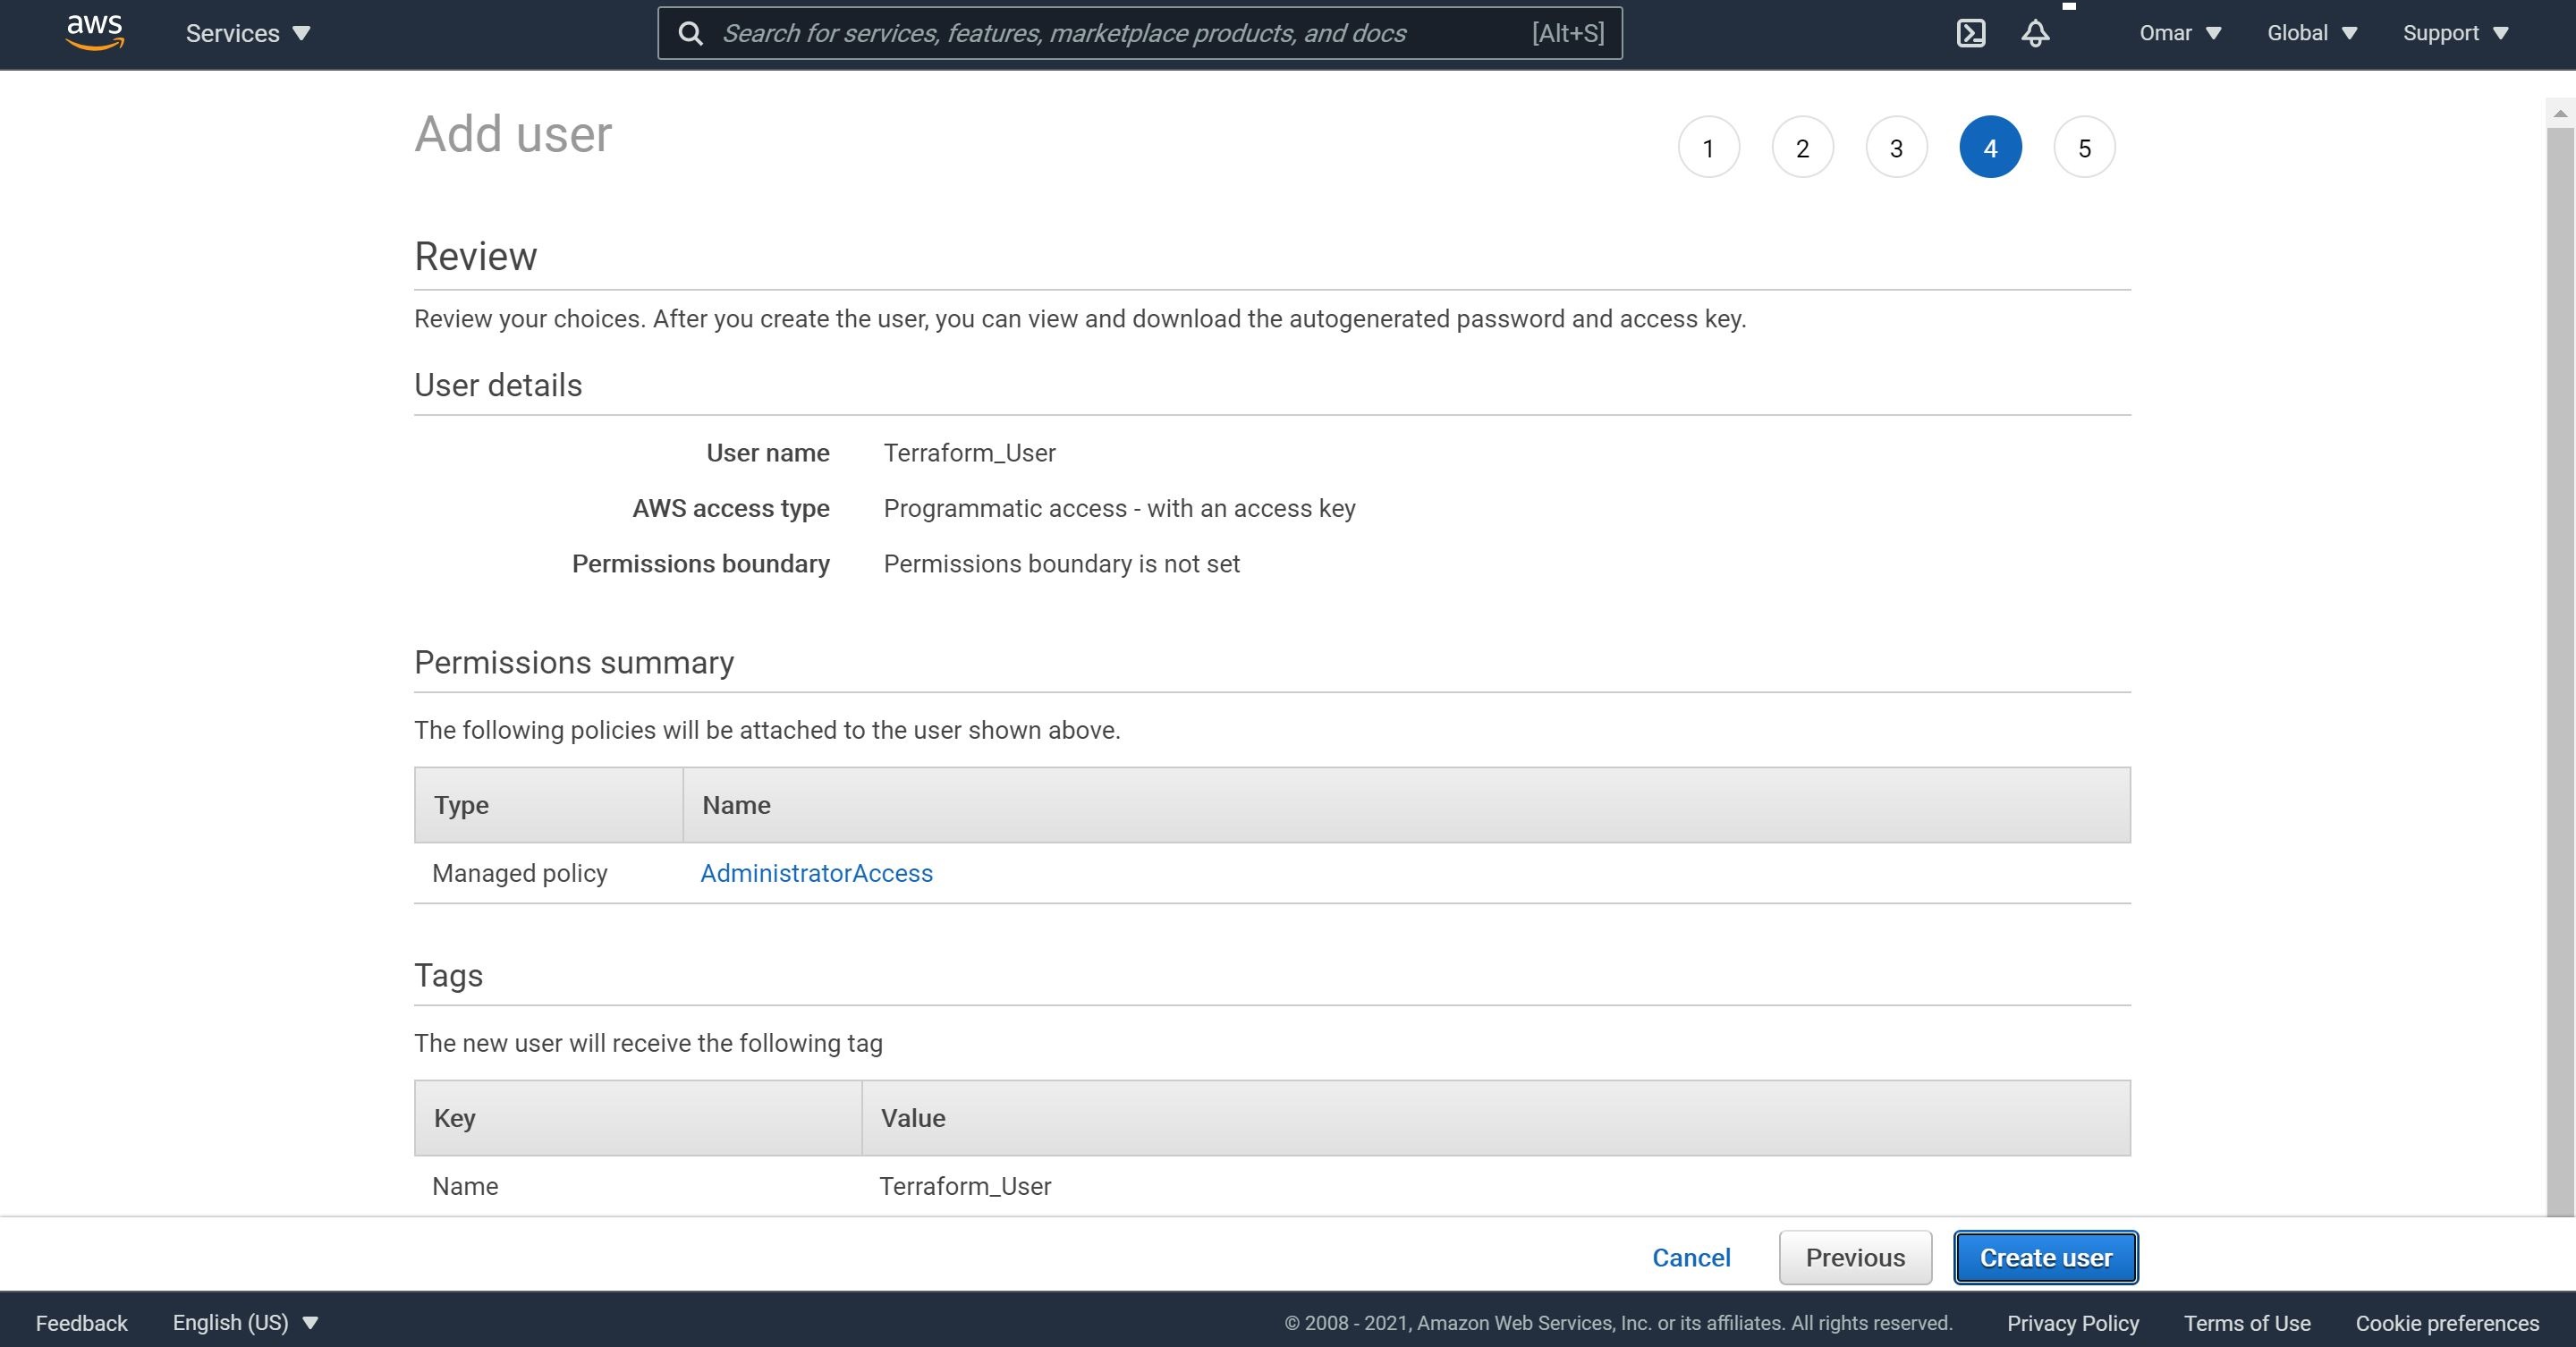
- Finally, review the add user details and permissions summary and then click on Create user.
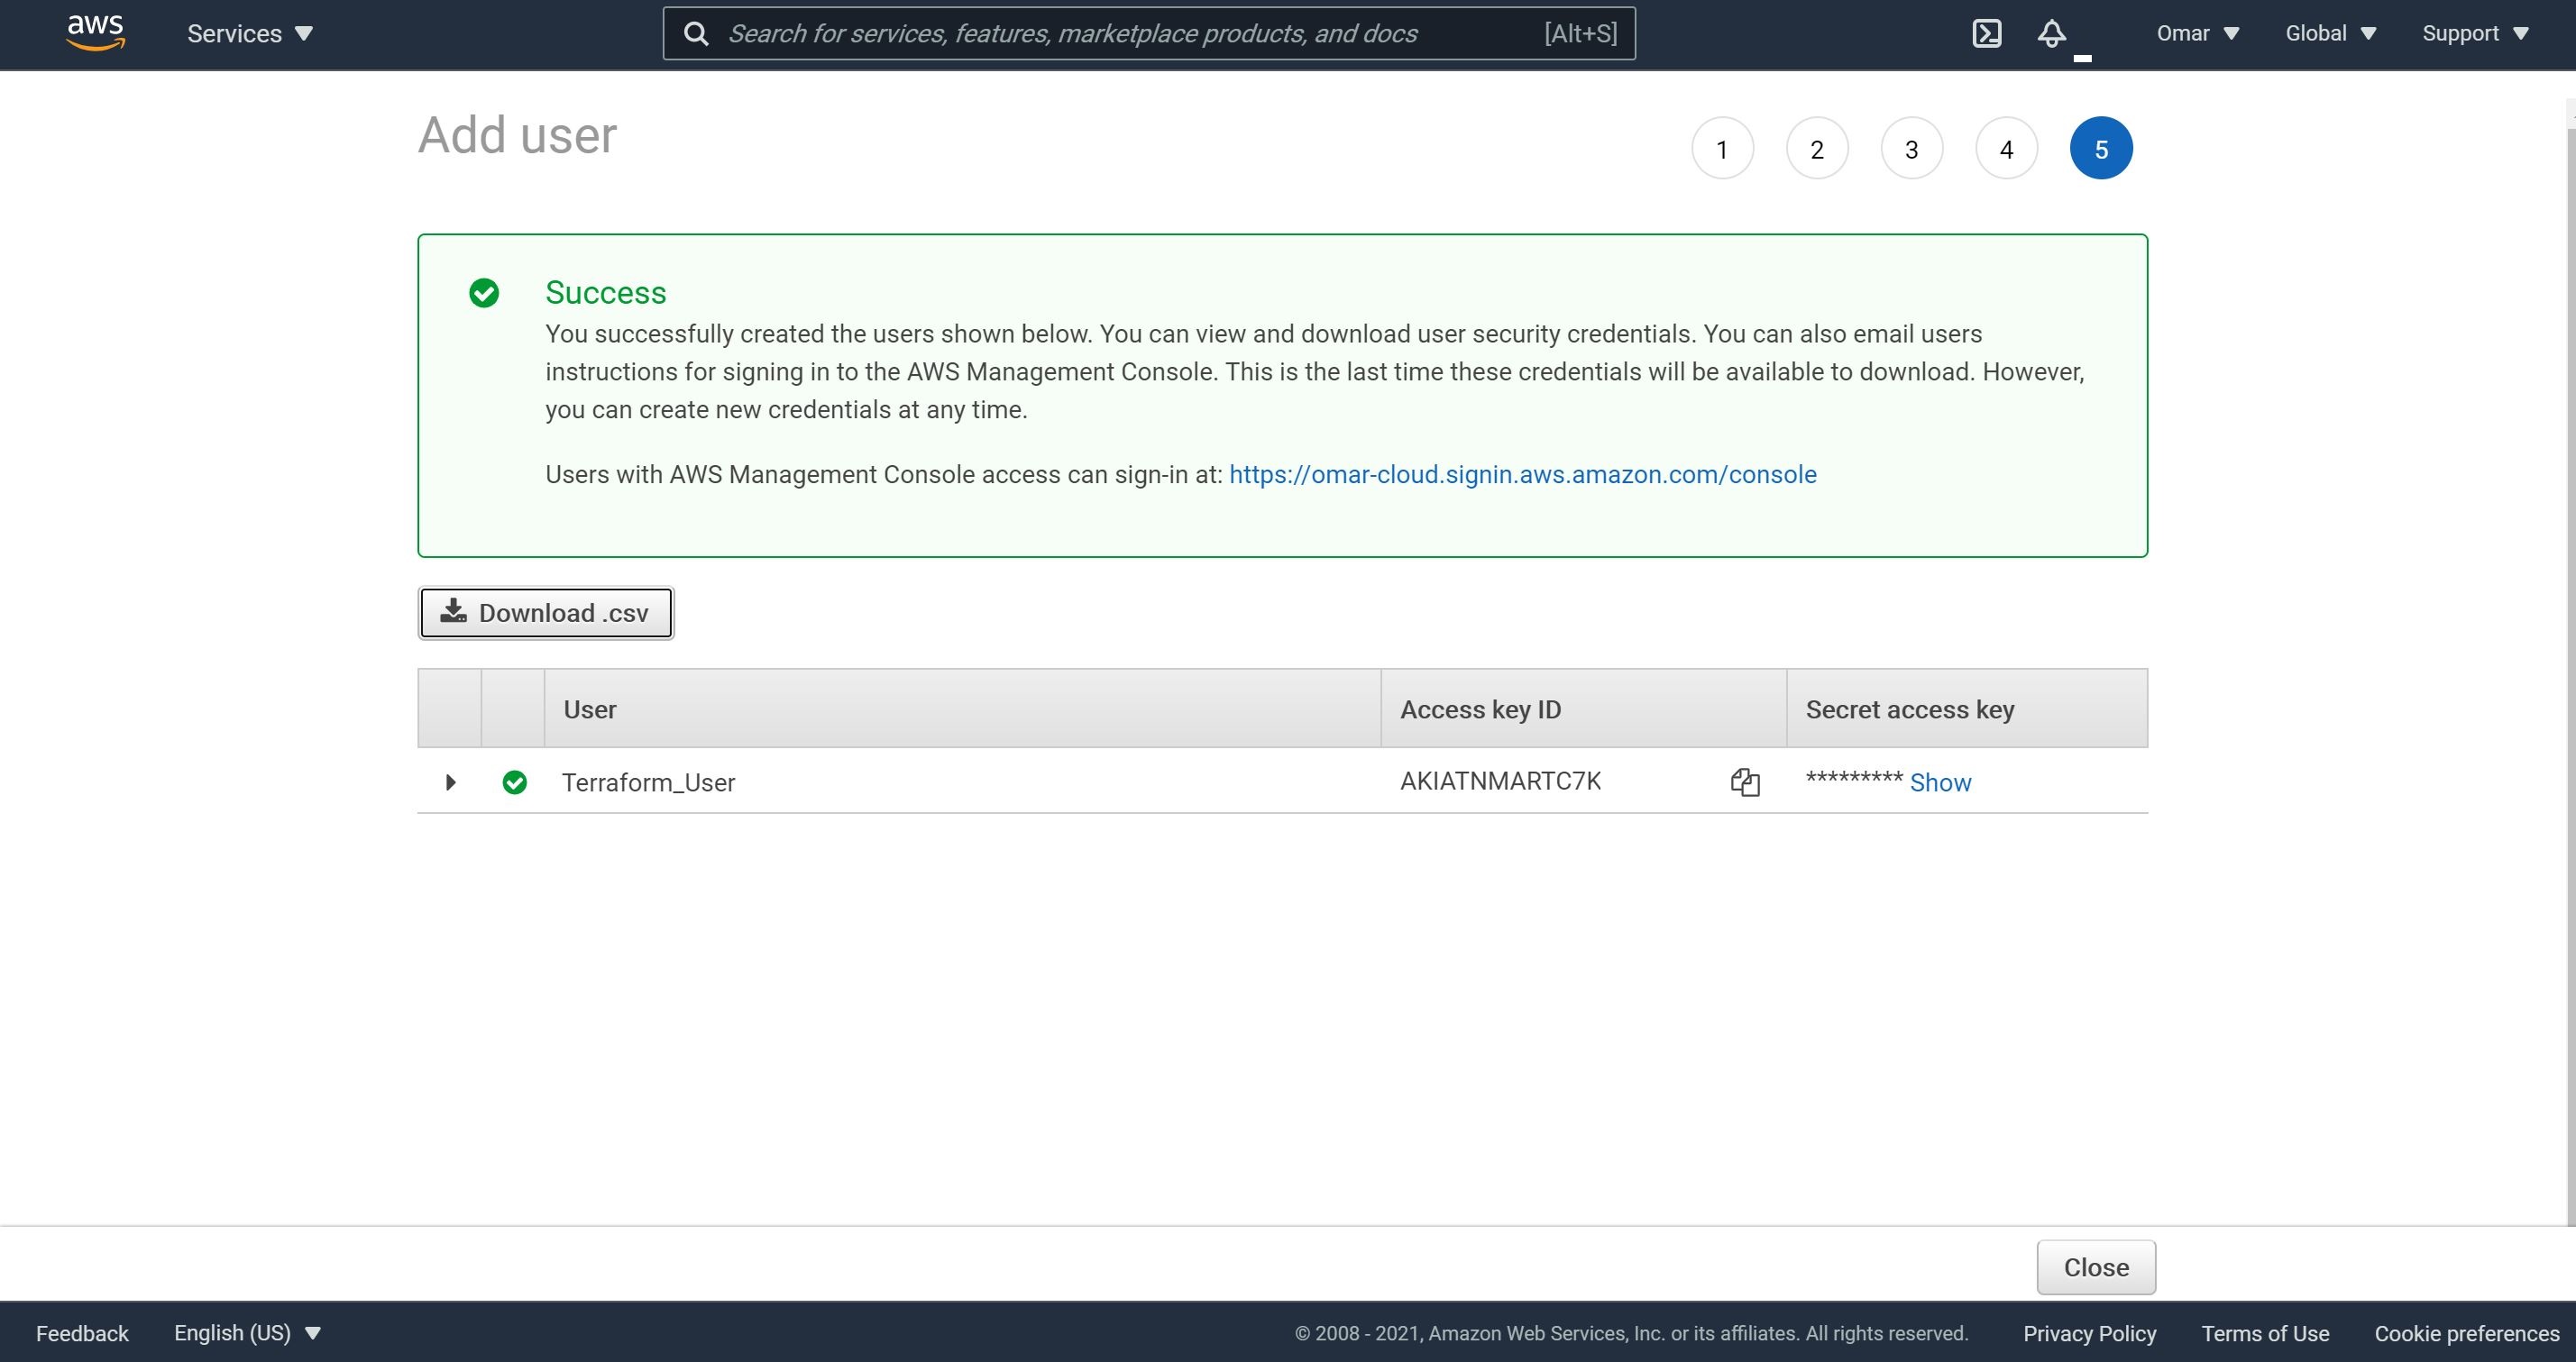
- Now, we have obtained the Access Key ID and Secret Access Key, let’s download the csv file and save it in a secure location for future reference.
Part 2:
Install the latest AWS Command Line Interface - CLI version 2 for Linux ARM architecture since my Raspberry Pi 4 is an arm64 architecture. However, you shall Choose the appropriate package for your operating system and device architecture.
curl "https://awscli.amazonaws.com/awscli-exe-linux-aarch64.zip" -o "awscliv2.zip"
unzip awscliv2.zip
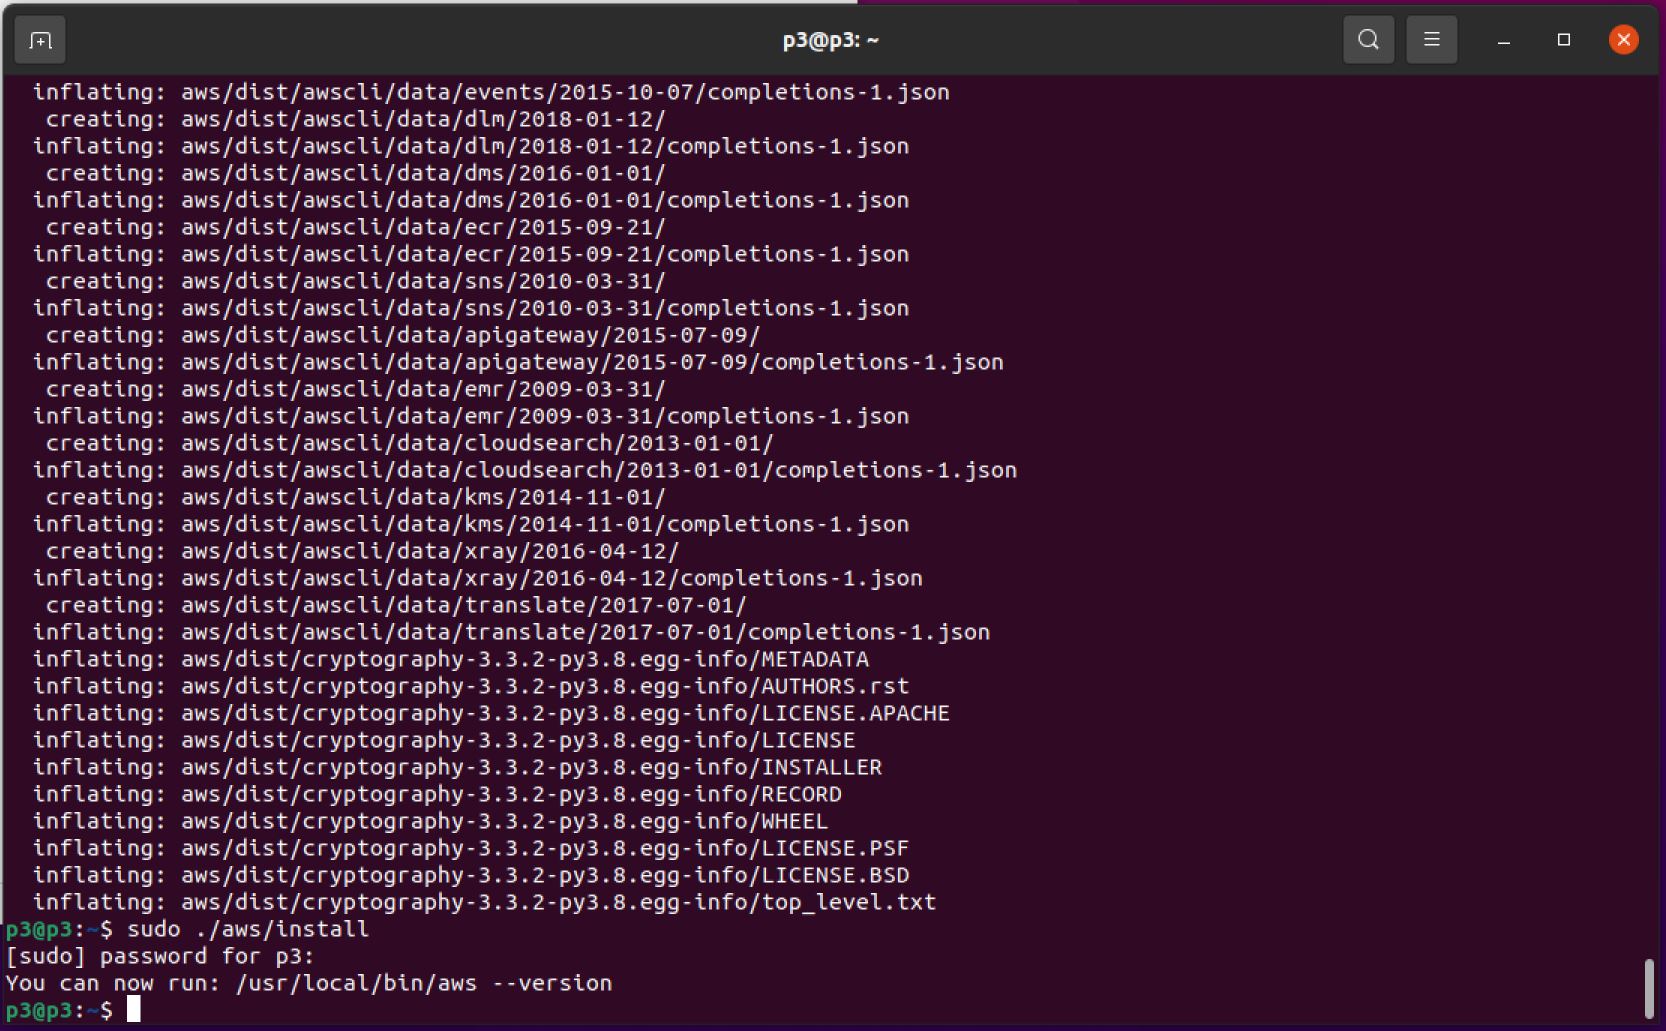
sudo ./aws/install

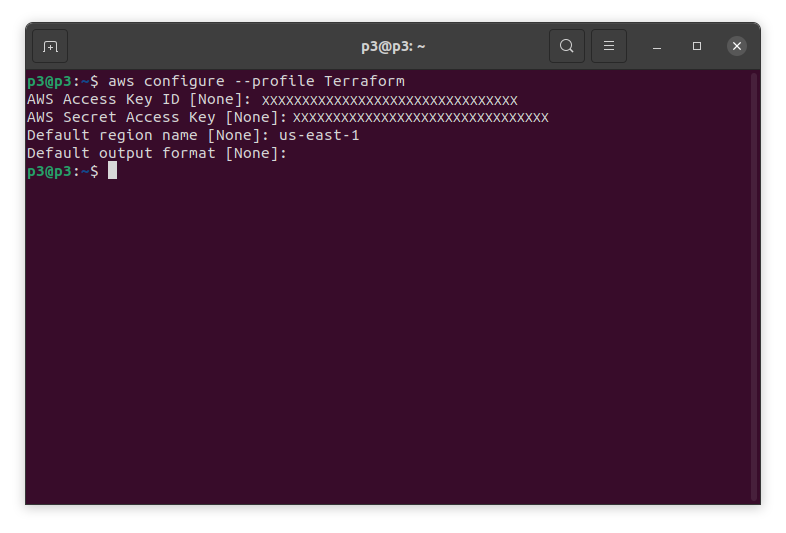
We will configure the aws on our device (RPI-4 in my case), which is the fastest way to set up our AWS CLI installation. When you enter this aws configure command, the AWS CLI prompts you for four pieces of information:
- Access key ID
- Secret access key
- AWS Region
- Output format
The access keys consist of an access key ID and a secret access key, which are used to sign programmatic requests that you make to AWS. If you don’t have access keys, you can create them from the AWS Management Console. As a best practice, do not use the AWS account root user access keys for any task where it’s not required.
Let’s start with aws configuration by using the following command in our CLI.
Example:
aws configure --profile [your profile name]
Actual:
aws configure --profile Terraform
To Check if the CLI and profile have been configured properly, run the following command which will lists all of your AWS EC2 instance resources using credentials and settings, which we have defined in the [your profile name] profile
aws ec2 describe-instances --profile [your profile name]
Step 3: Create a Terraform Sample Template to Spin an AWS EC2
Terraform Commands
| Commands | Usage |
|---|---|
| terraform init | Download any plugins required to run templates |
| terraform plan | Will give you a list of resources that will be created/deleted |
| terraform apply | WIll create/delete resources |
| terraform destroy | Will delete all the resources created by Terraform |
| terraform fmt | Will format the file with proper indentation |
Note: you could always reference Terraform Providers for more commands per provider.
Creating a Terraform Sample Template
- Utilize any Shell script environment or text/code editor of your choice to start the Terraform language code for Terraform sample template as shown below and save the file with a .tf extension:
provider "aws" {
    profile = "Terraform"
    region = "us-east-1"

}

resource "aws_instance" "demo_instance" {

    ami = "ami-042e8287309f5df03"
    instance_type = "t2.micro"

    tags = {
        Name = "Terraform_Demo"

          }

}
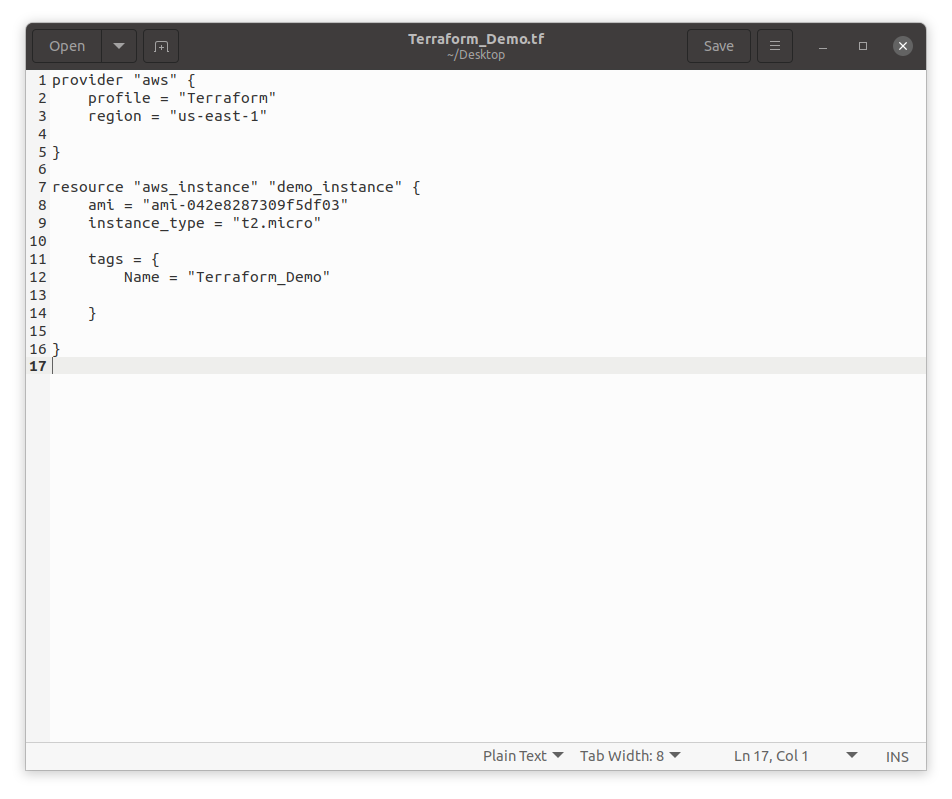
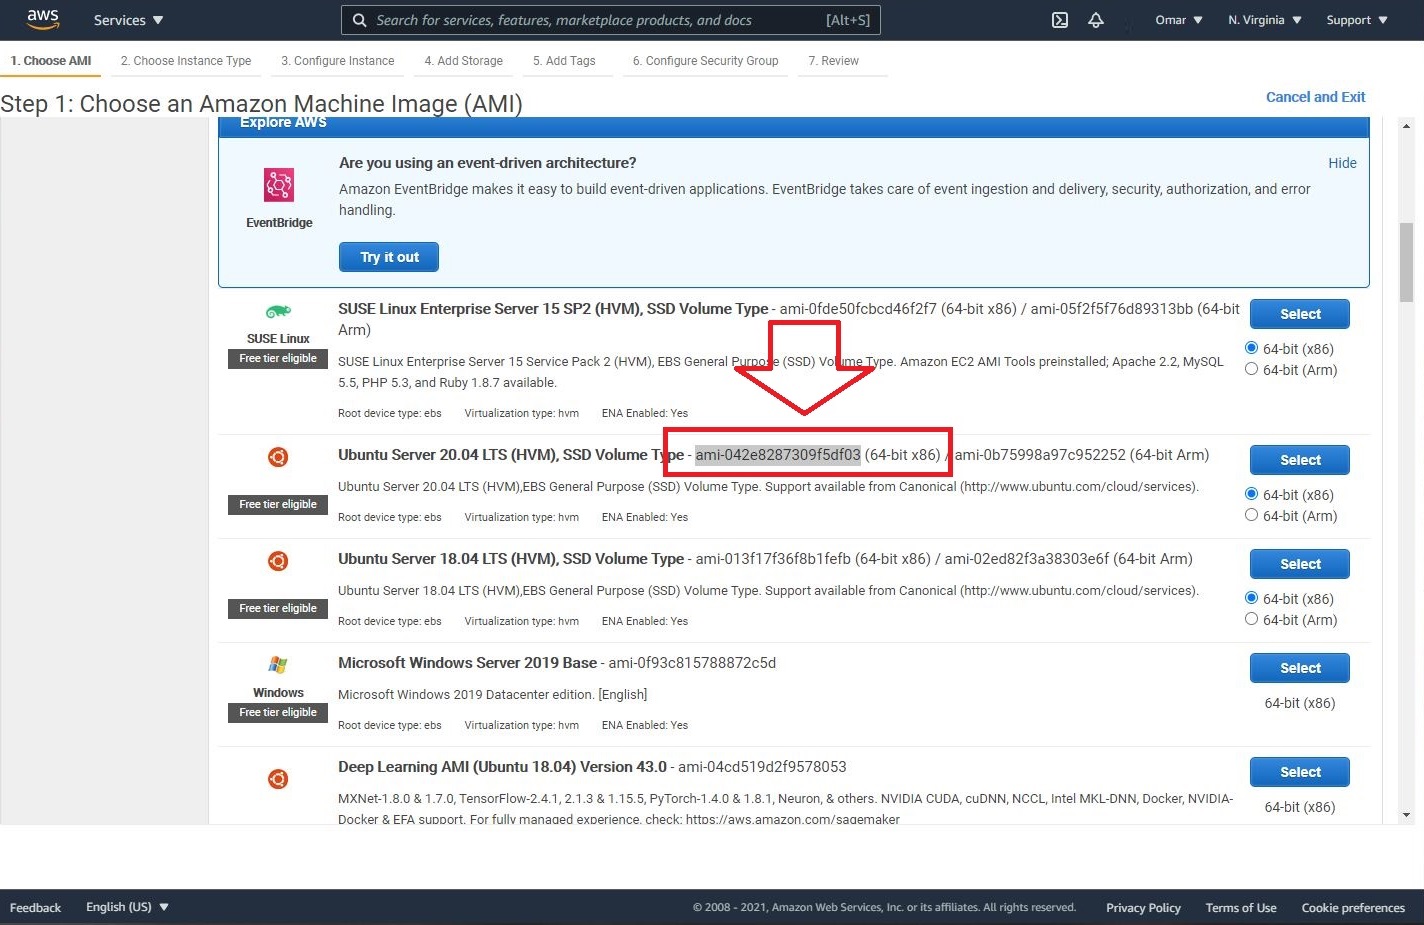
Note: every AMI has a unique ID and the Ubuntu 20.04 LTS we have chosen has the following AMI ID: ami-042e8287309f5df03. If you would like to spin a different AMI, replace the AMI ID. Also, don’t forget to replace the profile name with the name of AWS profile which we have created earlier (in my case is Terraform).
- Now, we are ready to run Terraform command. Let’s start with running terraform init, where we have the Template file saved.
terraform init
- The terraform plan command will inspect the template for resources.
terraform plan
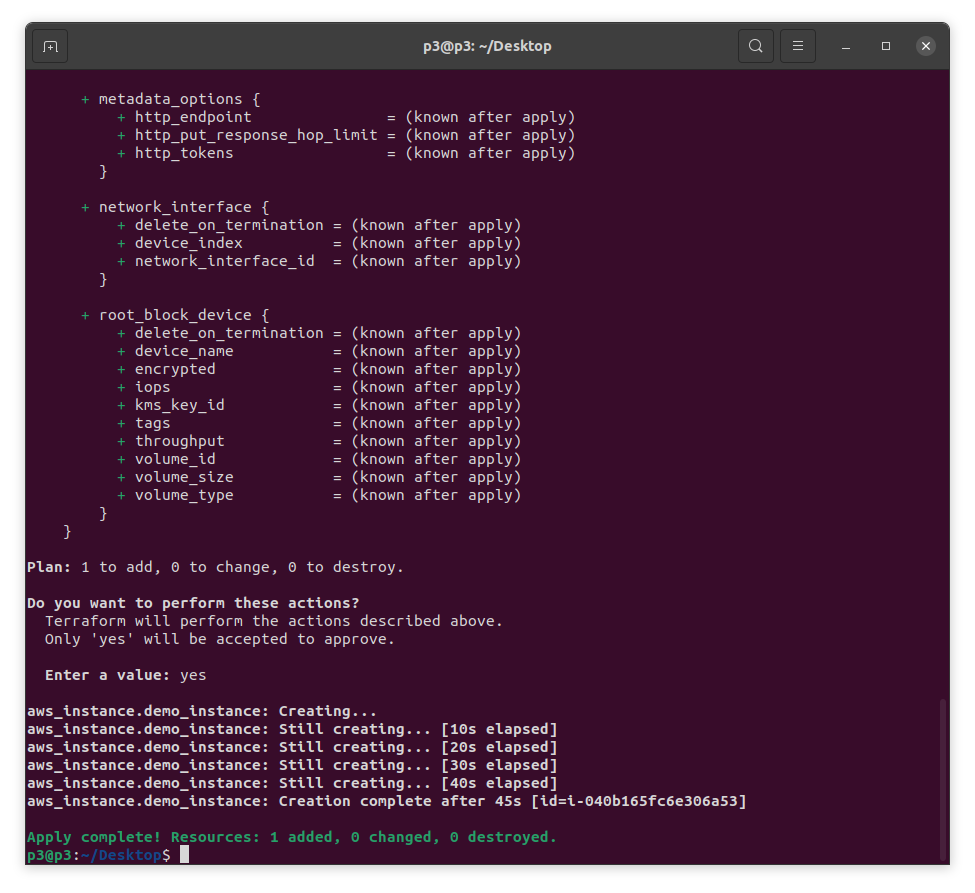
- Finally, we are ready to apply changes. Let’s run terraform apply. You will be prompted to enter yes to apply the changes requested by the template. Then, the resources requested will be created as shown below.
terraform apply
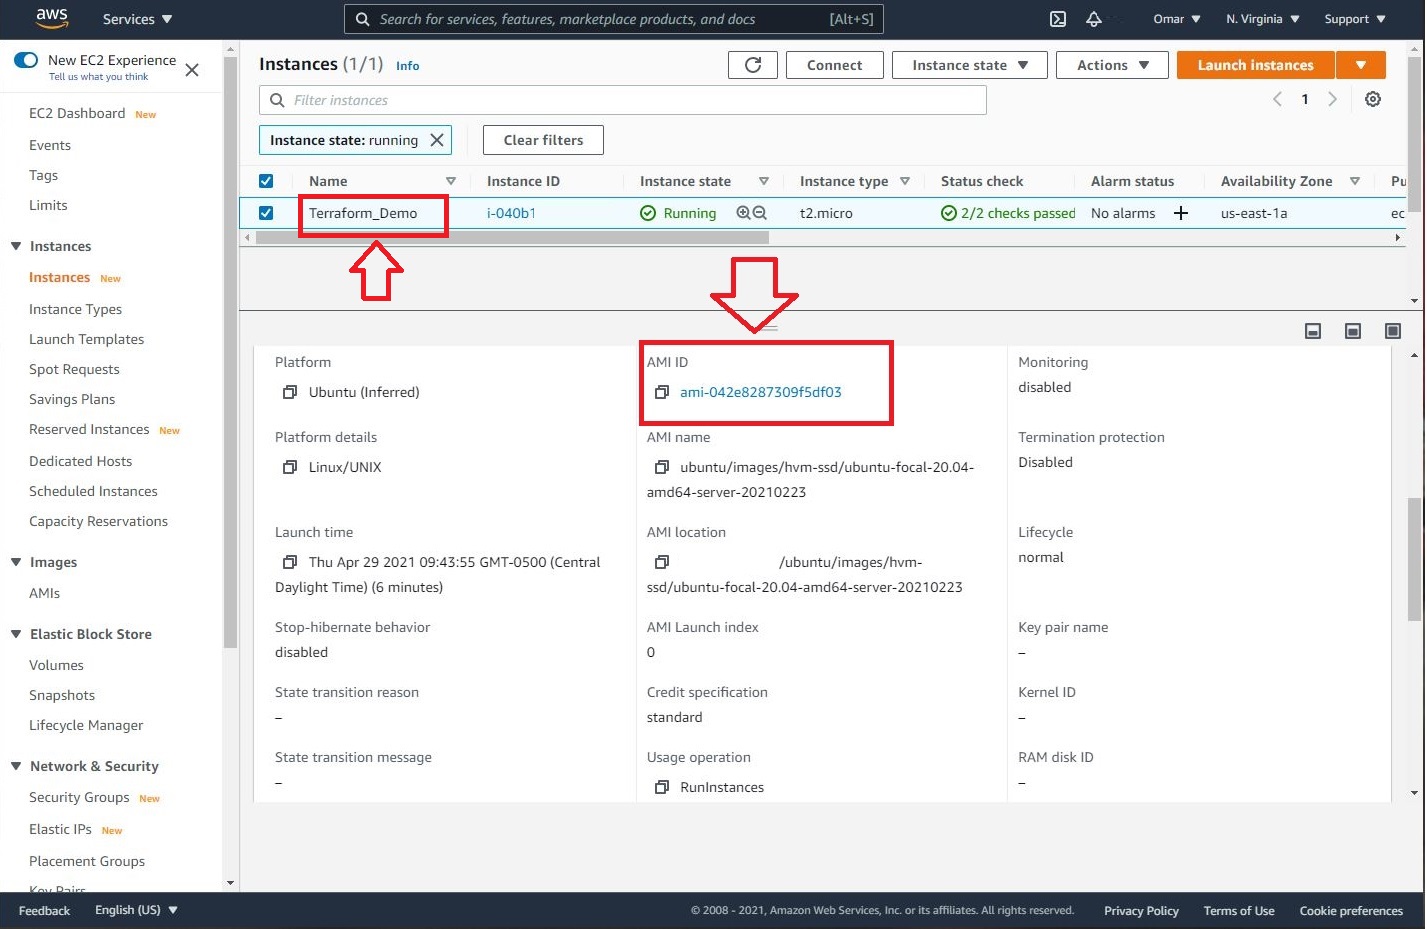
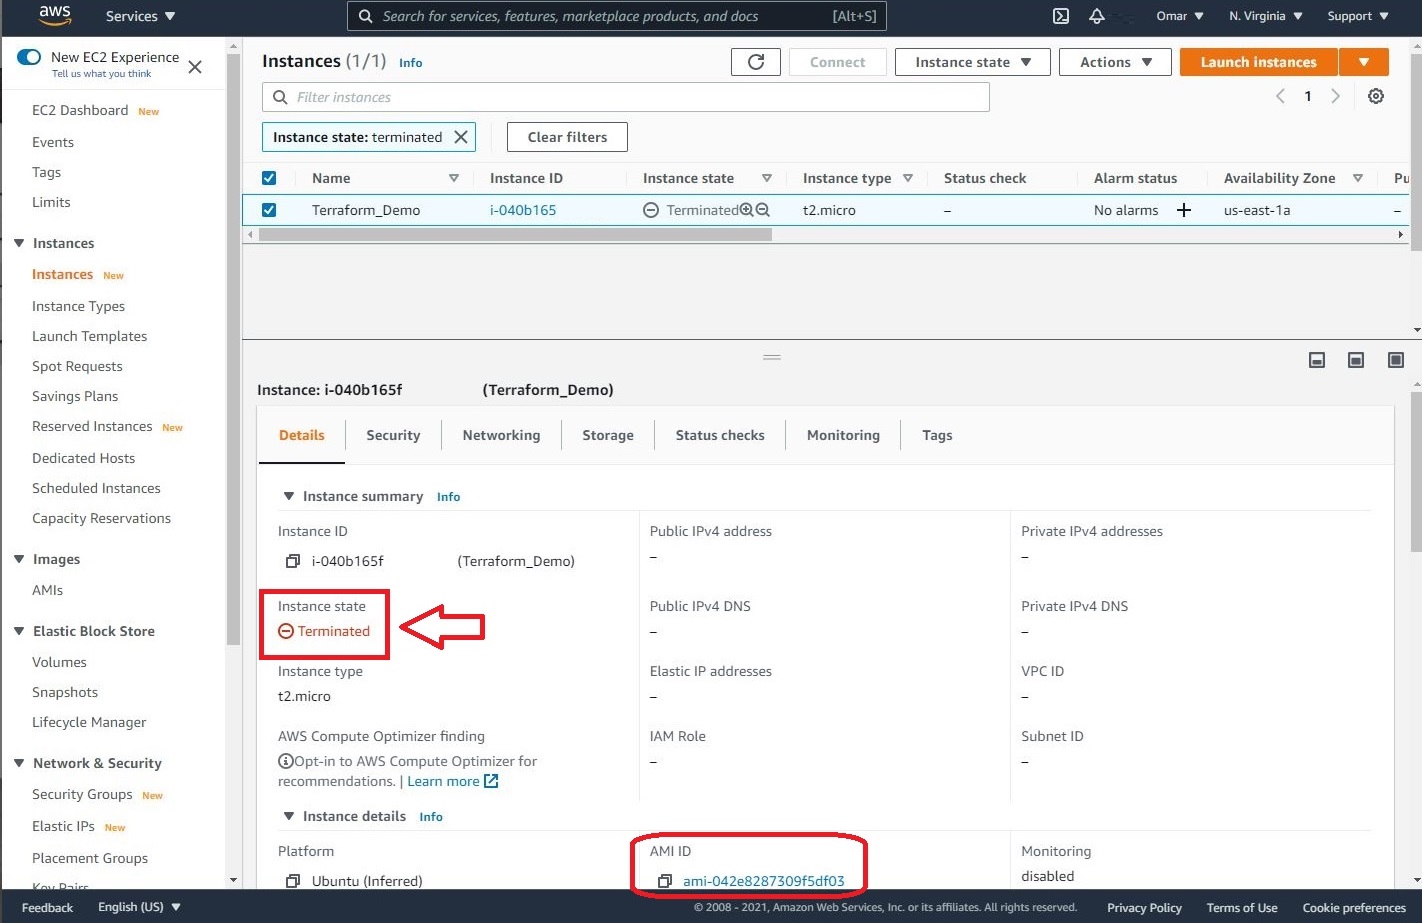
- We will head to AWS console to verify the status of our newly spun EC2. Let’s pay close attention to the name of the instance and the AMI ID which should match the names we chose in our Terraform sample template.
- Once we have completed the tutorial, we can utilize terraform destroy command to terminate the resources we have created and spun by our sample template. This command will only destroy the resources built by Terraform.
terraform destroy
Conclusion:
Congratulations!! We have created a Terraform sample template and ran it to spin an AWS EC2 instance successfully from the Command Line Interface (CLI) on a Raspberry Pi 4.