SSH into Ubuntu Instance
What is Secure Shell (SSH)?
Secure Shell is a network protocol uses encryption to secure connection between a client and a server. All user authentication, commands, output, and file transfers are encrypted to protect against attacks in the network. There are many tools available to establish SSH connection such as, PuTTy and WinSCP for Windows, CyberDuck for MacOS, OpenSSH for Unix and Linux and many other great tools.

I would suggest we utilize AWS Command Line Interface (AWS CLI) version 2. The AWS CLI is a open source powerful tool that enables you to interact with AWS services using commands in your local machine command line shell. In my case, I’m using AWS CLI version 2 from within my Windows Command Prompt. Please, follow the installation process as documented by AWS based on your machine type (local device).
With this brief introduction about SSH, we will proceed with tutorial from where have stopped. Next, let’s get to actually logging into our Ubuntu EC2 instance. To do so, you’ll have to open Terminal of the SSH tool, which you have chosen to use. As I have previously stated, I have downloaded AWS CLI v2 ;therefore, I will run Command Line (Command Prompt) on Windows.
On CL, the first to do is change the directory using the command cd into the directory/folder where we have saved our key pair (pem file). This is the file we have downloaded in Part 1 tutorial.
Example:
cd C:\Users\Omar\XXXXX\Documents\XXX\AWS\XXXX
cd C:\your full URL where you have saved the pem file for the instance>
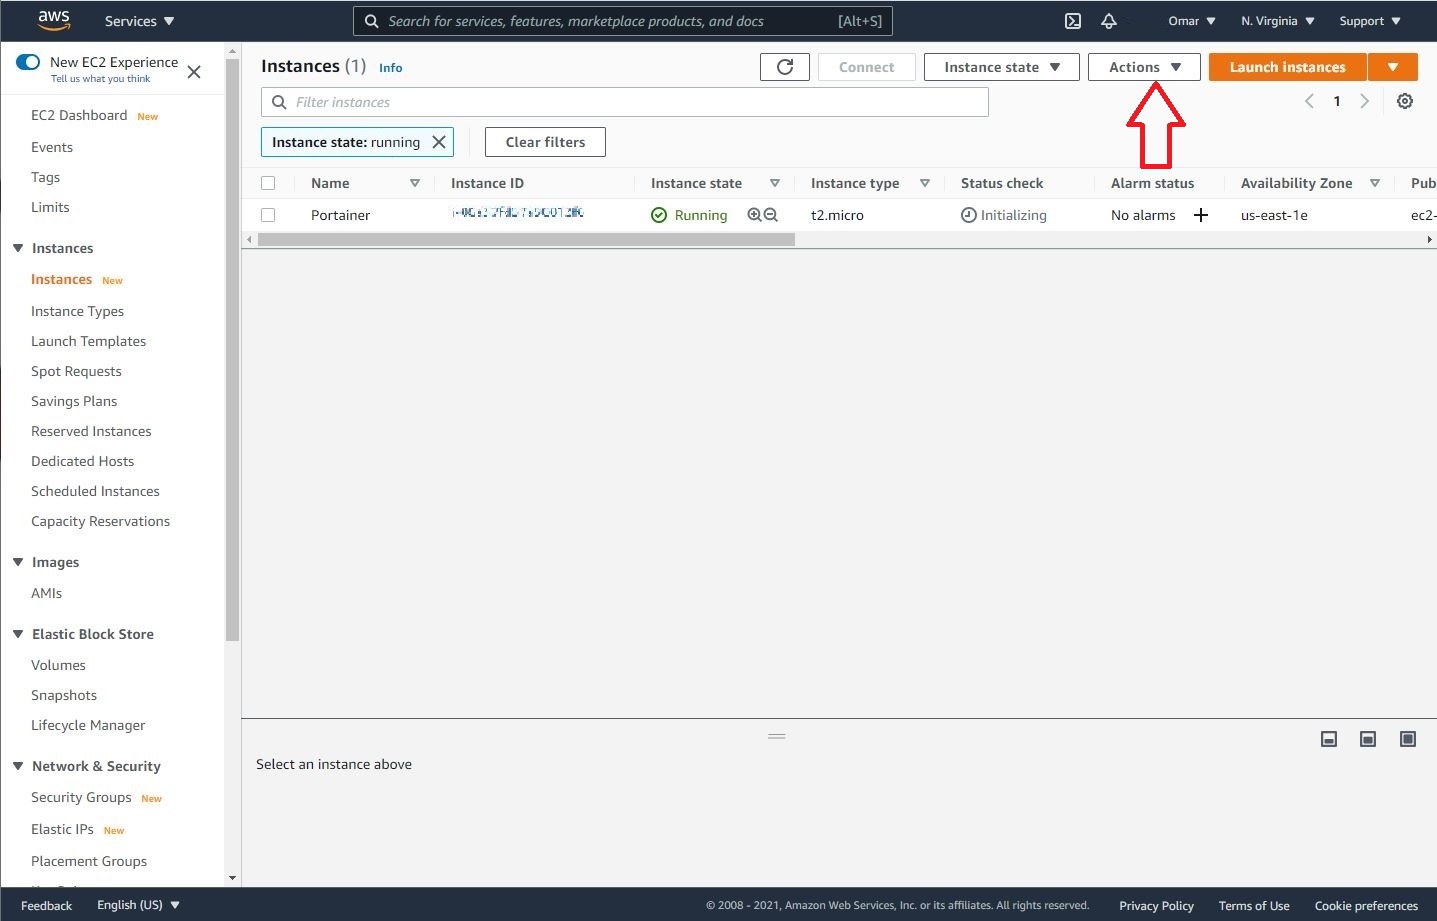
Back to the AWS console and on the Instances section, let select our Ubuntu instance and then click on Actions > Connect button.
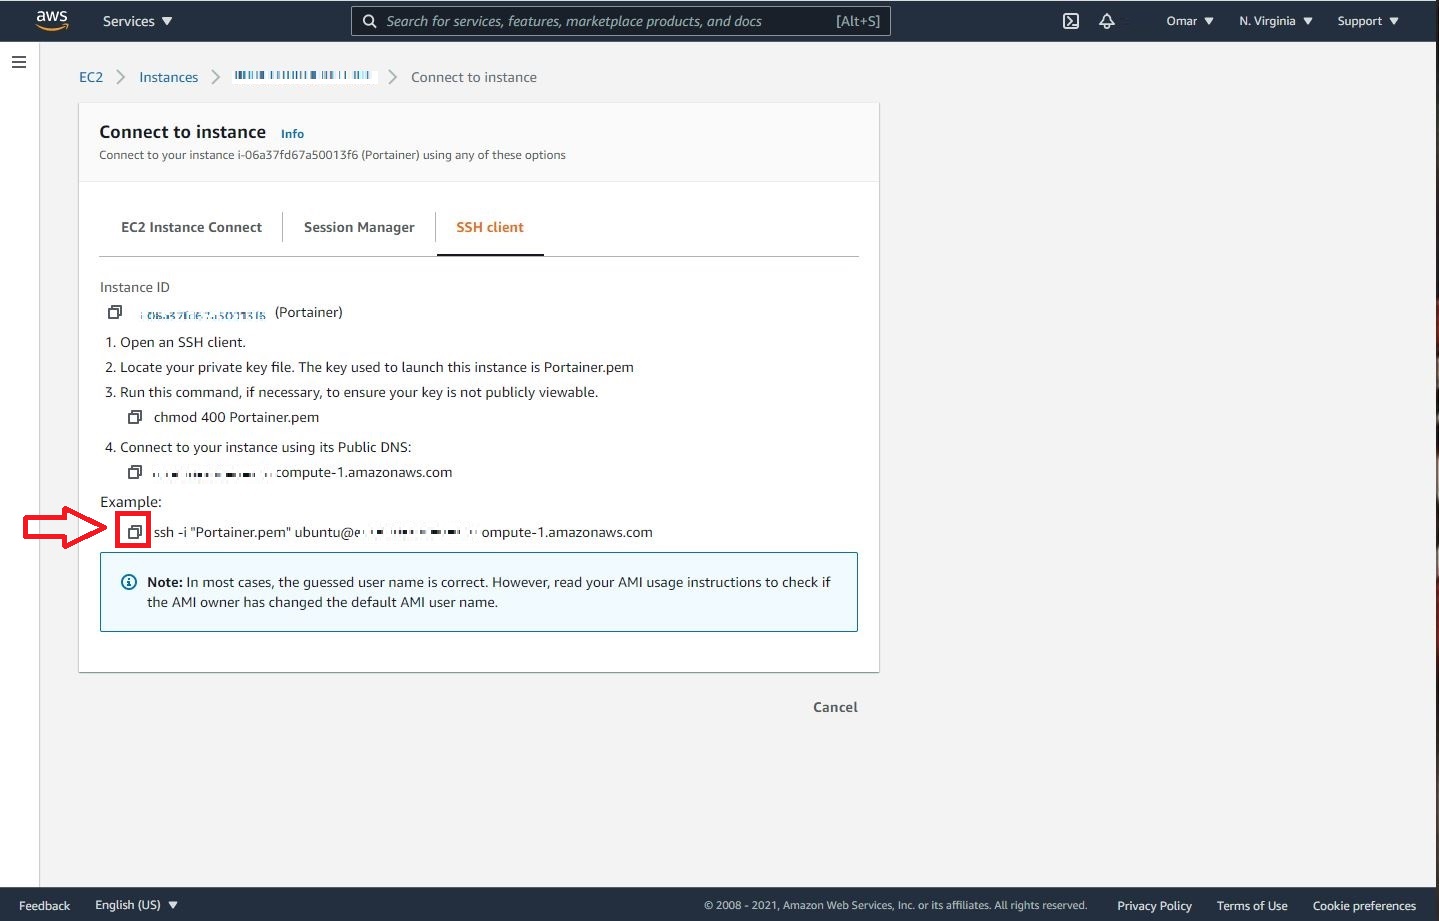
Then, let’s click on the third tab, SSH Client, and copy the SSH command line by clicking on the copy icon as shown below. This command has combined our pem file name, ssh command and our instance public domain name.
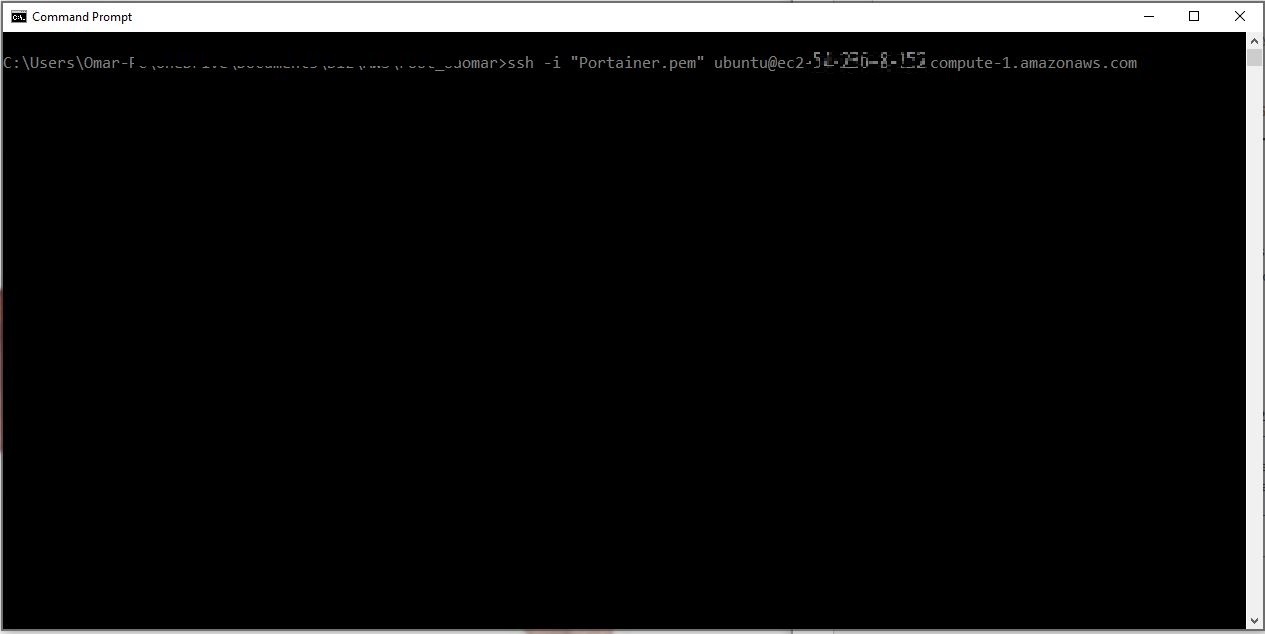
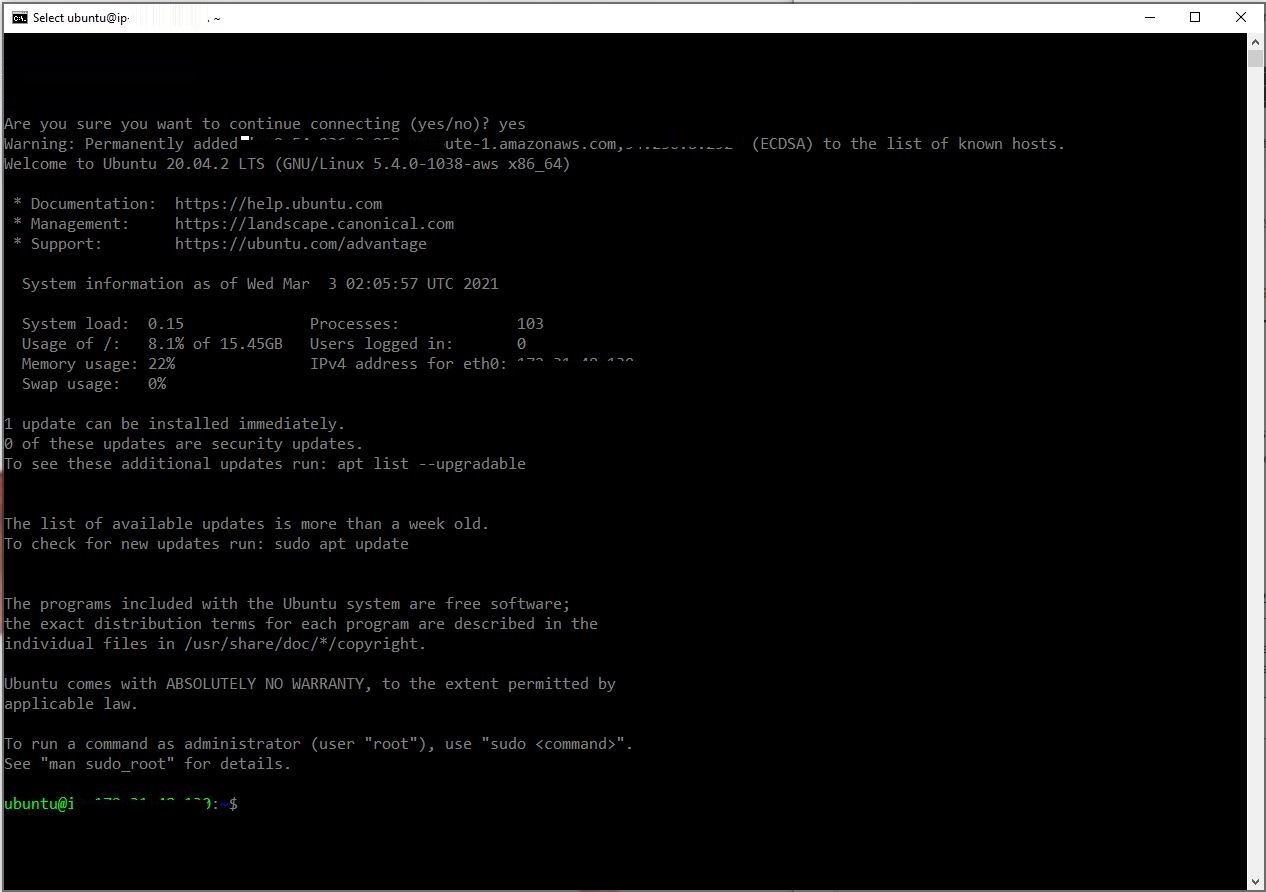
Let’s paste this command on our CL or your chosen SSH tool and click enter. During the authentication process, you will prompted, “Are you sure you want to continue connecting (yes/no)?”, type in yes.
cd C:\Users\Omar\XX\XX> ssh -i "Portainer.pem" ubuntu@ec2-xxxxxxx.compute-1.amazonaws.com
Congratulations, now we have successfully SSH into our Ubuntu 20.04 LTS instance.
on Now, time to connect to the instance using terminal or we can say securely SSH into the instance. Select the EC2 instance into which you want to SSH.
Please note that some parts of the images in this tutorial will be pixilated or hidden to hide all personal information such as account numbers, ip addresses and any other personal or sensitive information.
Conclusion:
This concludes the second section of this tutorial. We have successfully established a secure connection (SSH) with our Ubuntu 20.04 LTS EC2 instance. Let’s move on to Part 2 of the tutorial.


