Spin up Ubuntu Instance
What is Ubuntu 20.04 LTS?
Ubuntu is a complete Linux operating system. It is available with both community and professional support. The Ubuntu community should be available free of charge and people should have the freedom to customize it. To learn more about Ubuntu.
Please note that some parts of the images in this tutorial will be pixilated to hide all personal information such as account numbers, ip addresses and any other personal or sensitive information.
In order to complete this tutorial, you will access to an AWS account. Therefore, if you don’t have an AWS account, you should sign up and create an account. AWS offers a 12-month free tier account. With this free-trier account, AWS gives you 750 hrs/monthly of EC2 computing service in a single Availability Zone and t2.micro instance. If we have one instance running 24hrs X 31 days = 744 hrs, which is still below the AWS free-tier account limit of 750 hrs/monthly. Basically, you would have one EC2 instance running for an entire year for free.
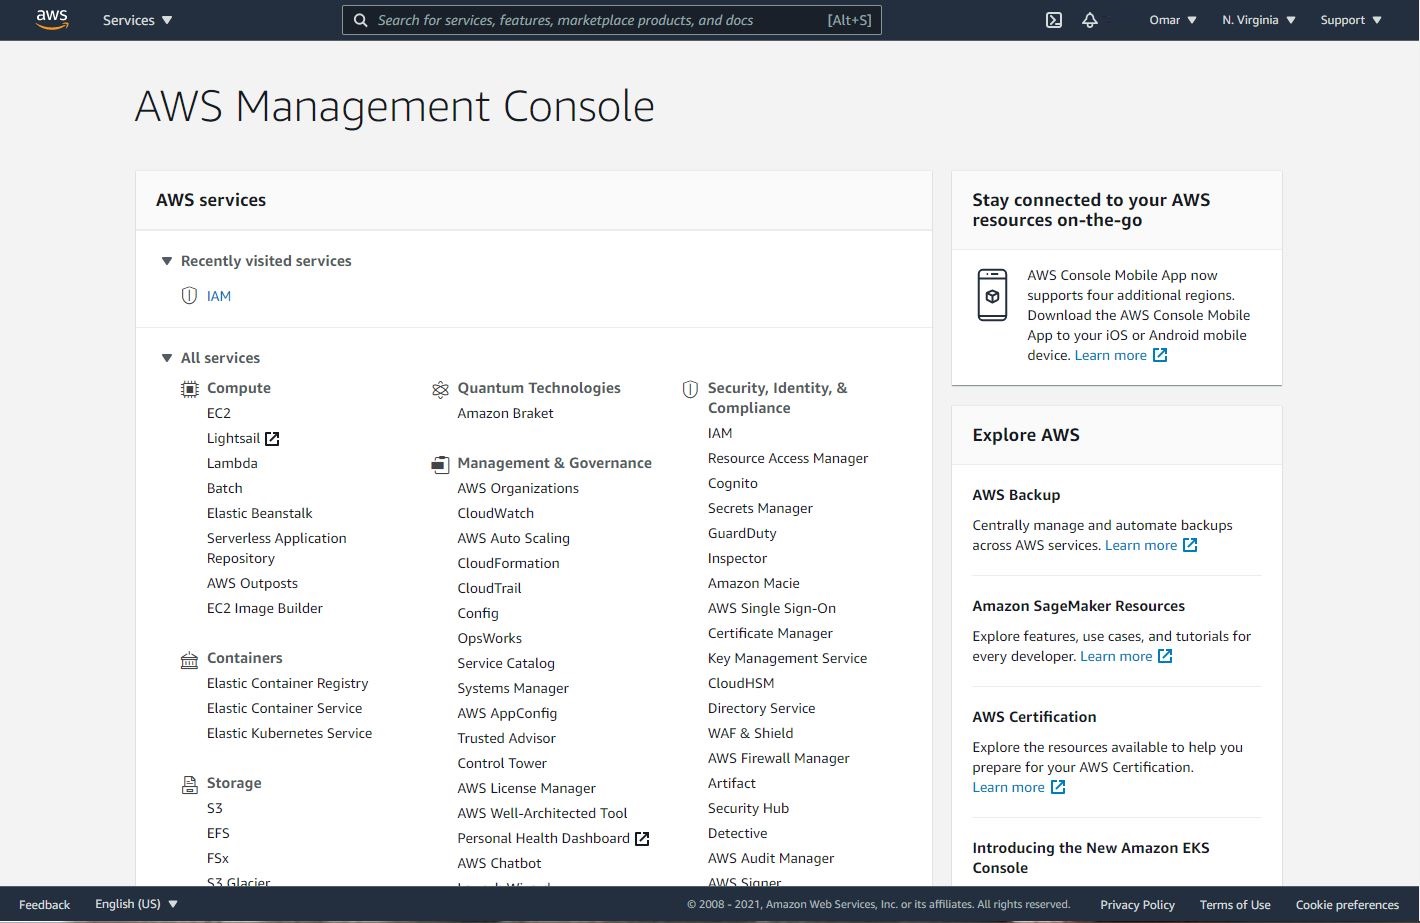
Once you’re logged in and on the home page, as shown below, make sure you select the region to where you want to spin your instance. Us East-1 (N. Virginia) is selected in my case. Then, click on EC2 under the Compute section.
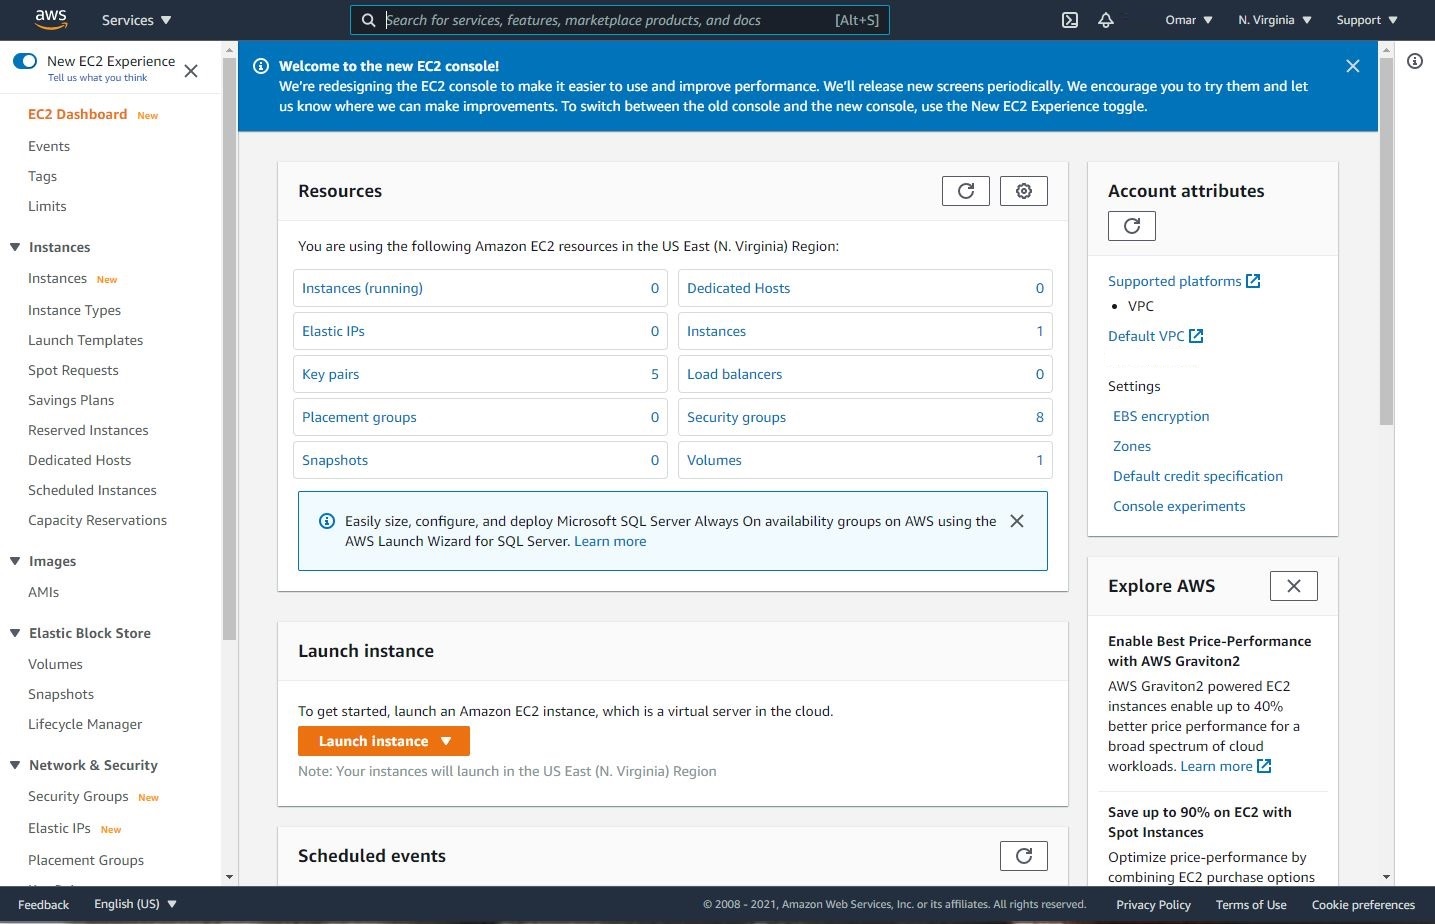
Click on Launch Instance On EC2 Dashboard
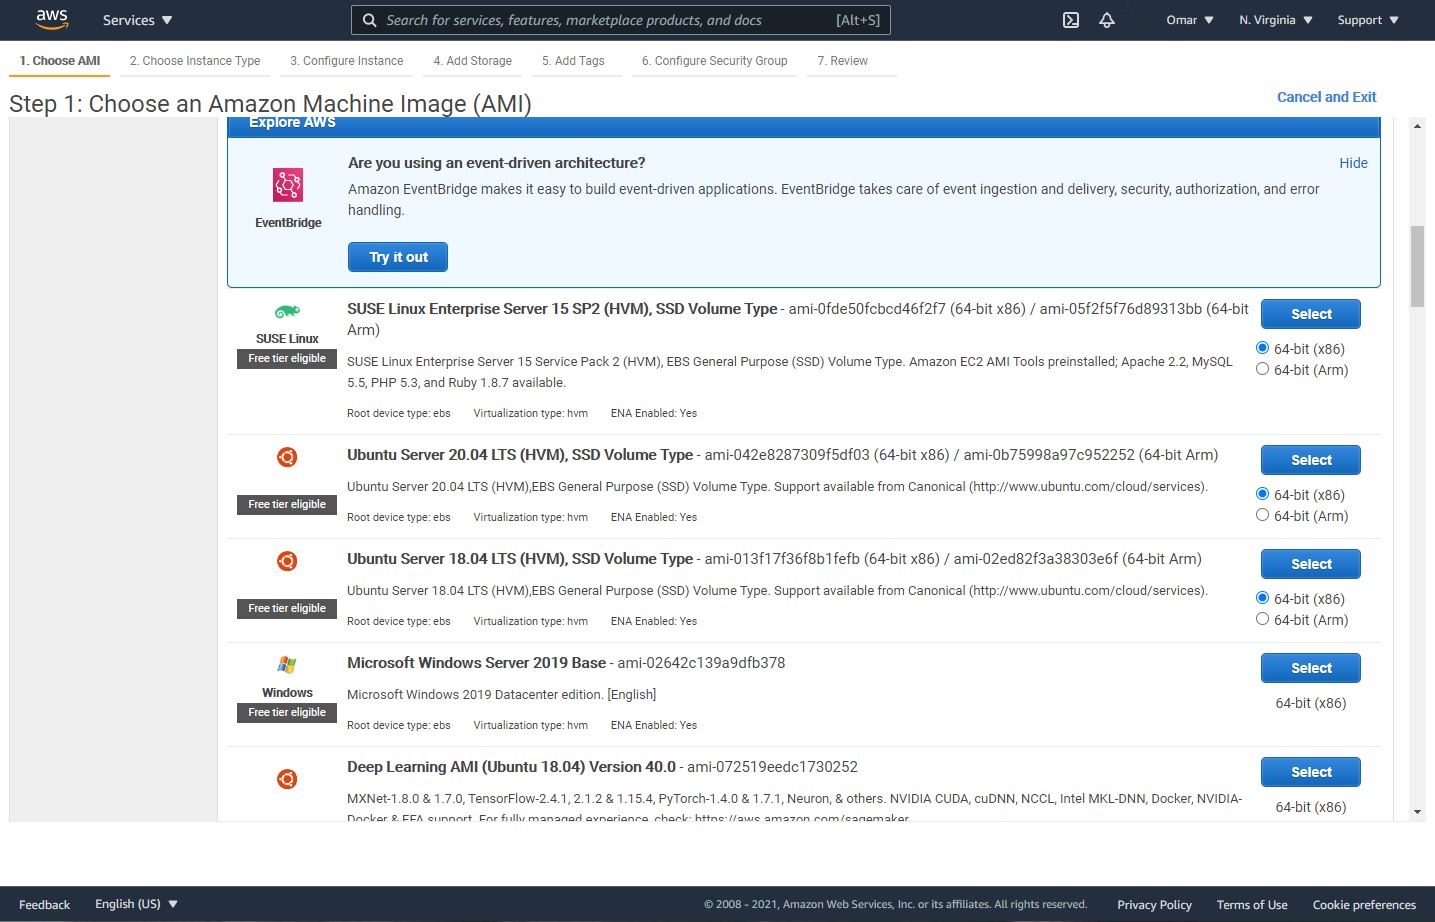
Choose AMI (Amazon Machine Image) Ubuntu 20.04 LTS. You might need to scroll down to find Ubuntu 20.04 LTS.
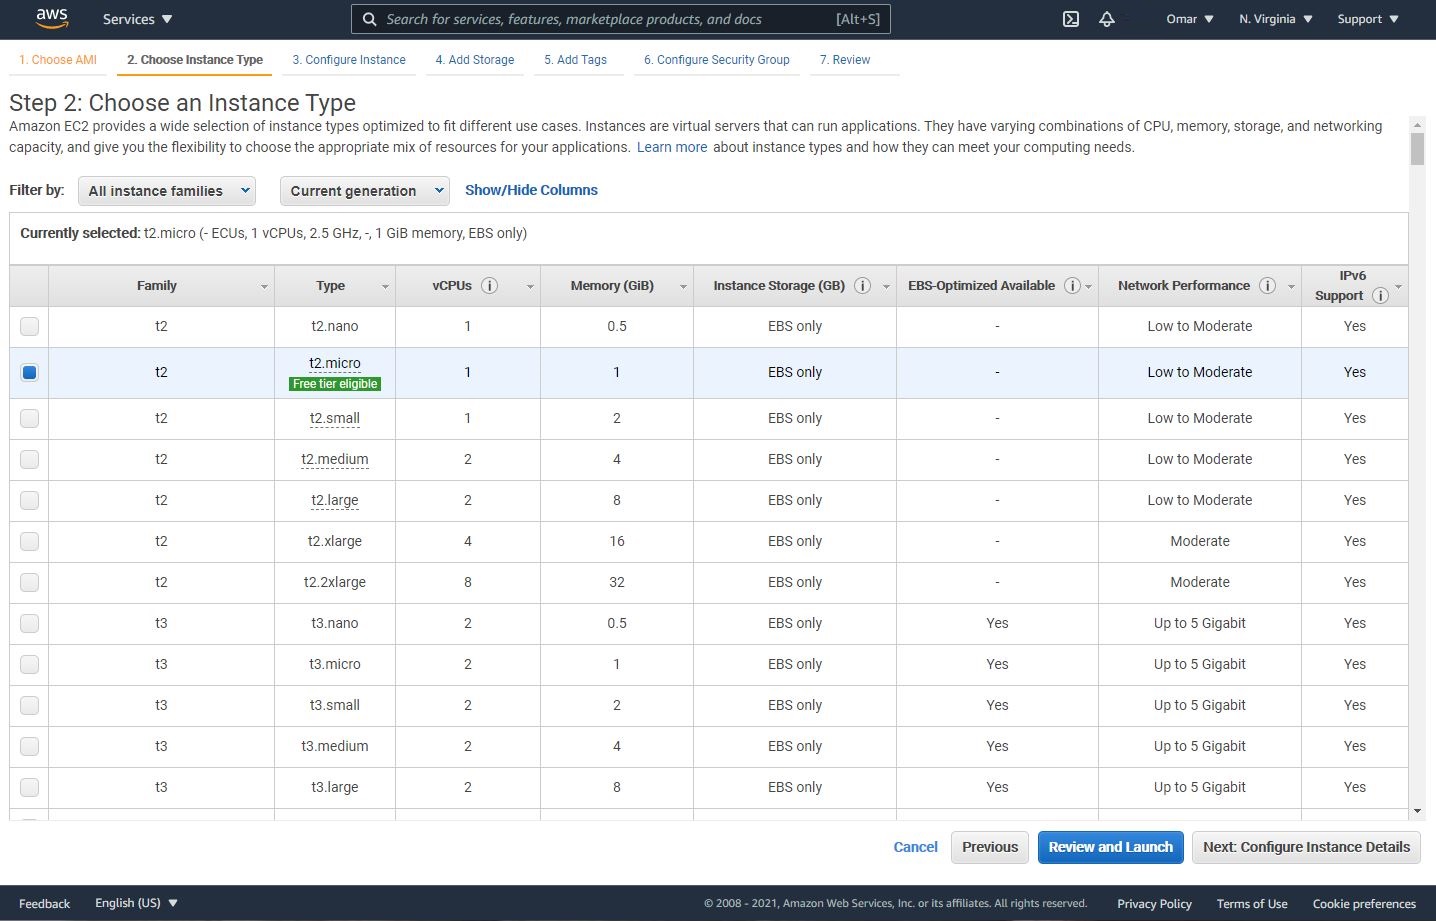
Choose Instance Type as General purpose t2.micro. This is the instance type identified by AWS for the Free-Tier account eligibility. Now click on Configure Instance Details
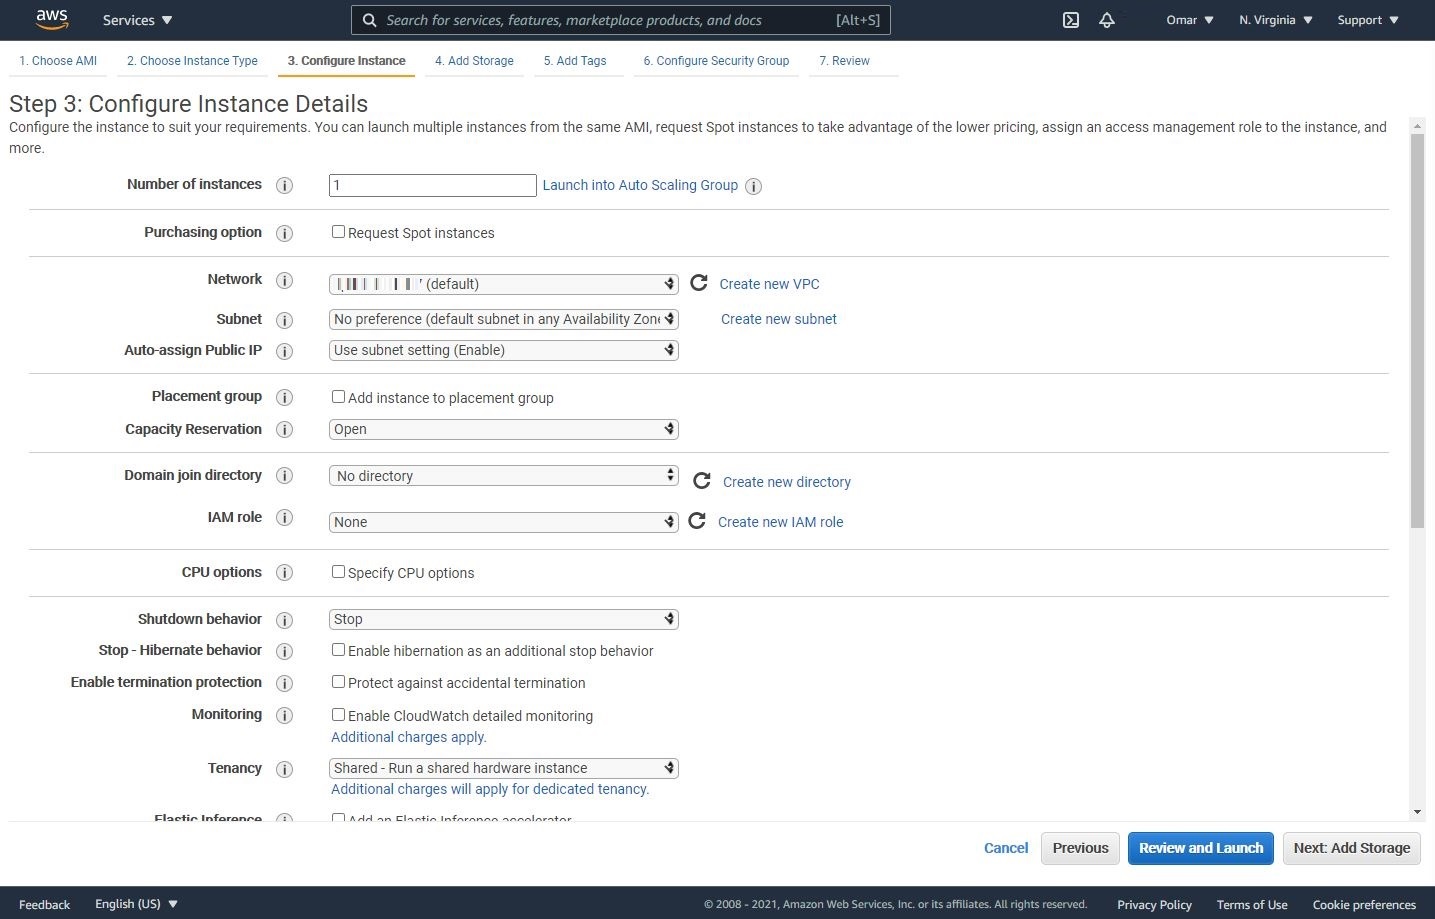
On the Configure Instance Details, we don’t need to make any changes. However, ensure that all selections are similar to what is on the below image.
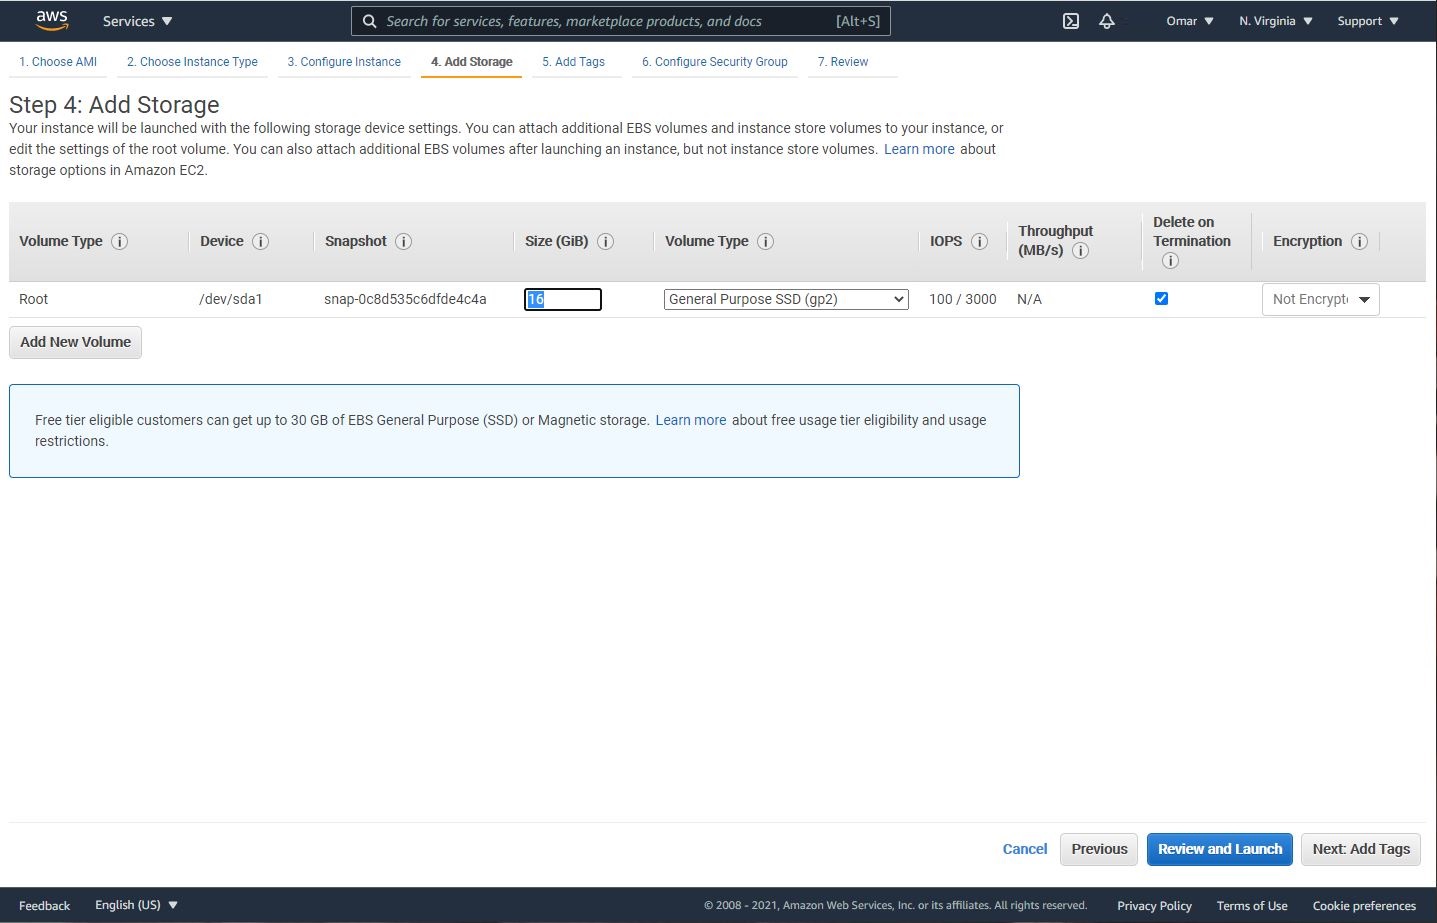
On Add Storage screen is where we can increase the storage size of the instance. AWS permits up to 30GB for free-tier accounts. Let’s take advantage of it. I increased mine to 16 GB, you could use more if you’d like.
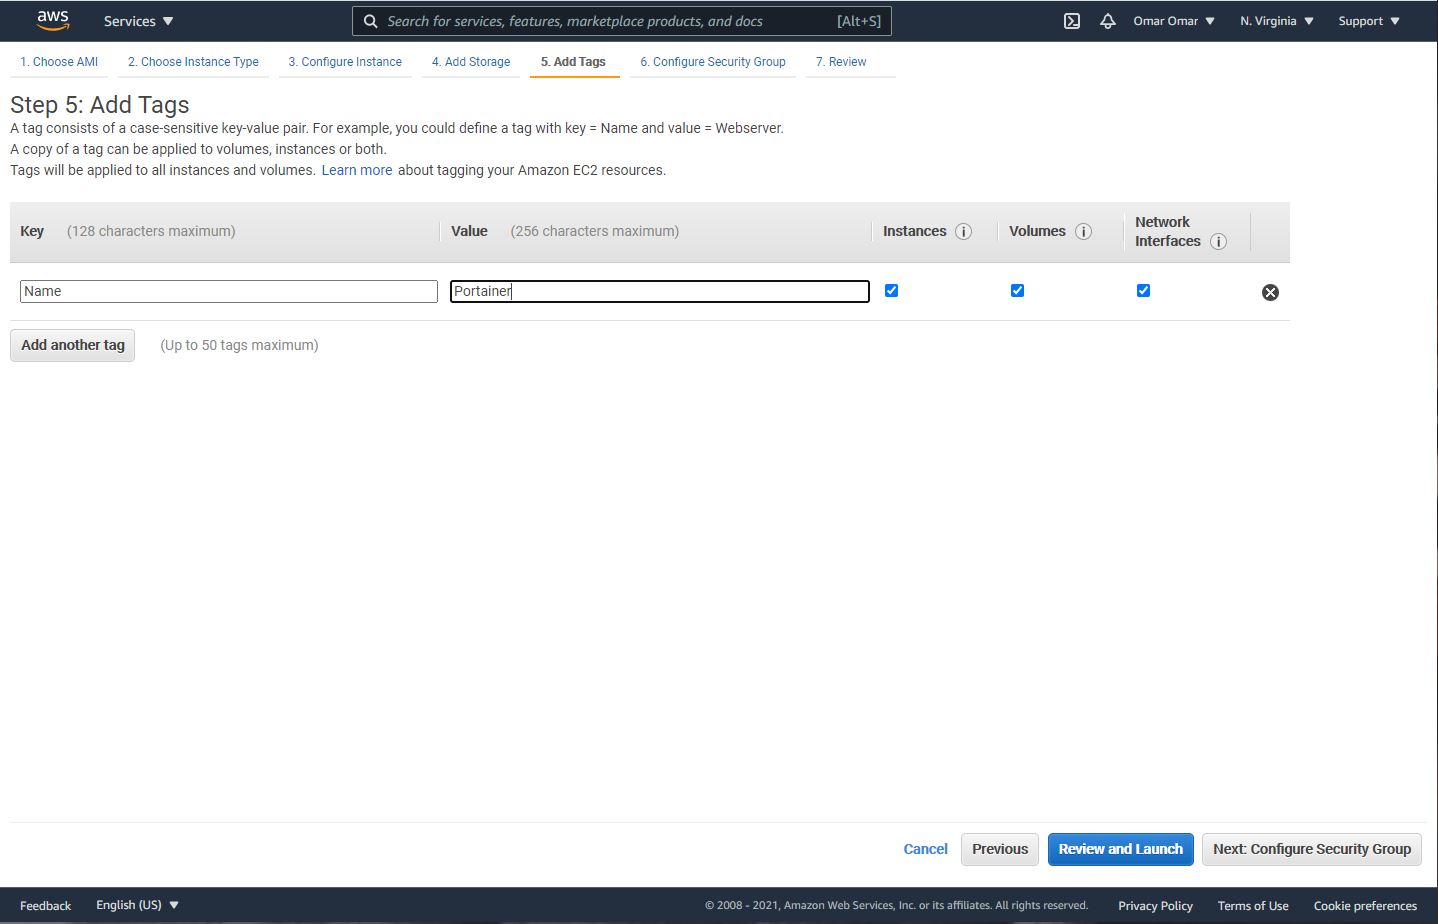
It is always a good practice and good a habit to have when it comes to adding tags. Since I have multiple Ubuntu instances, I would like to dedicate this to Portainer. You could tag your instance under any name you would like.
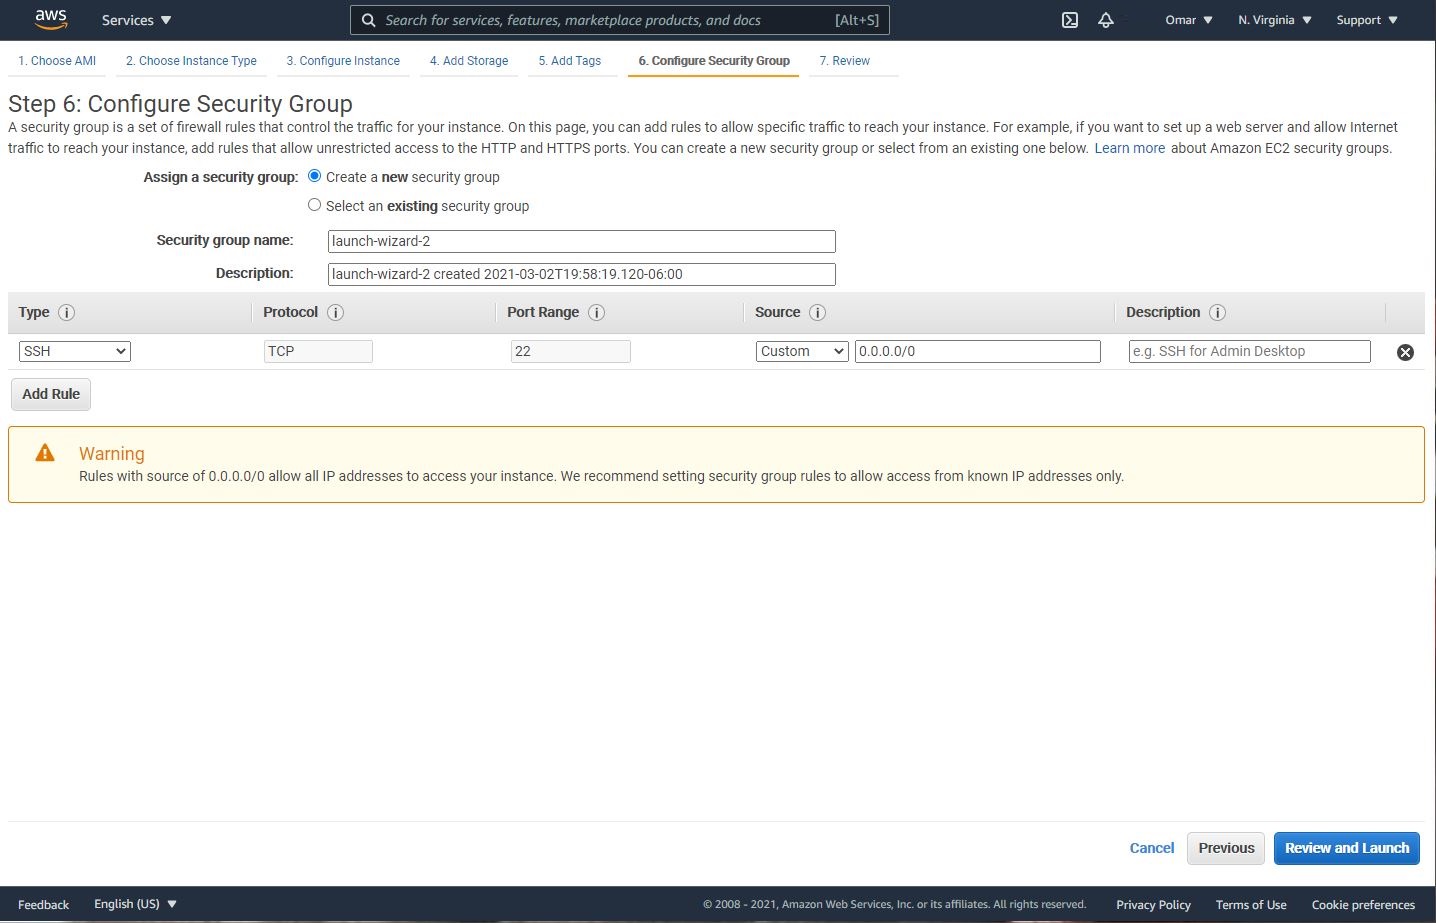
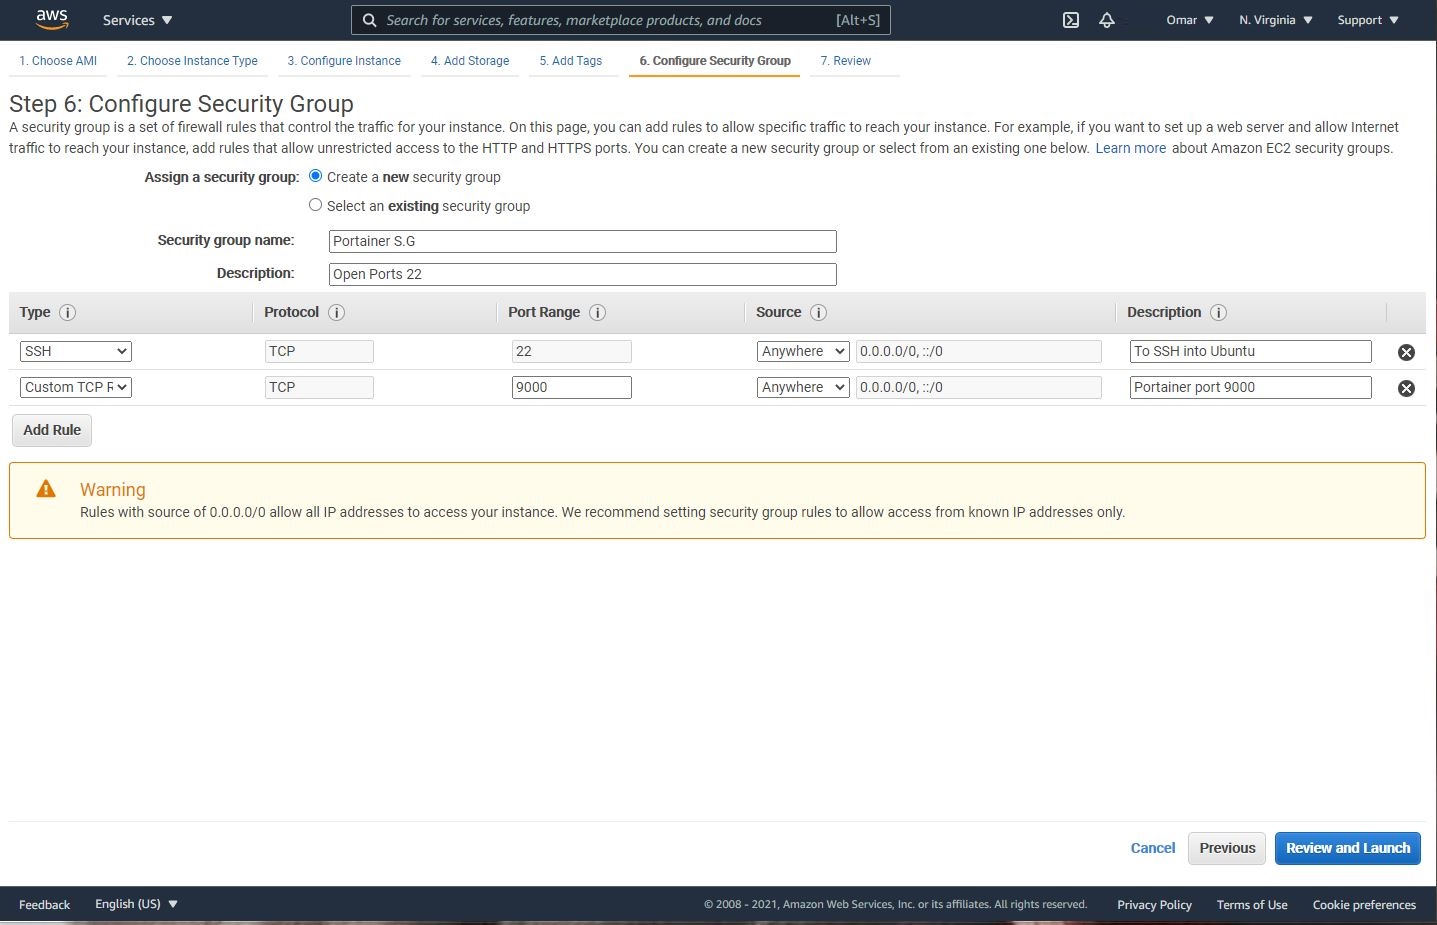
Configure Security Group is where we create security groups and specify Ports to open for the EC2 instance. Note that we will only ports that will allow us to install and run Portainer for now. We will open more ports down the road based on the ports required by the web application we will run.
Be very careful when you open ports to the world.
On Create a new security group, name your security group and give it a description.
These are the two ports we need to open at this stage.
| Type | Port |
|---|---|
| SSH | 22 |
| Custom TCP | 9000 |
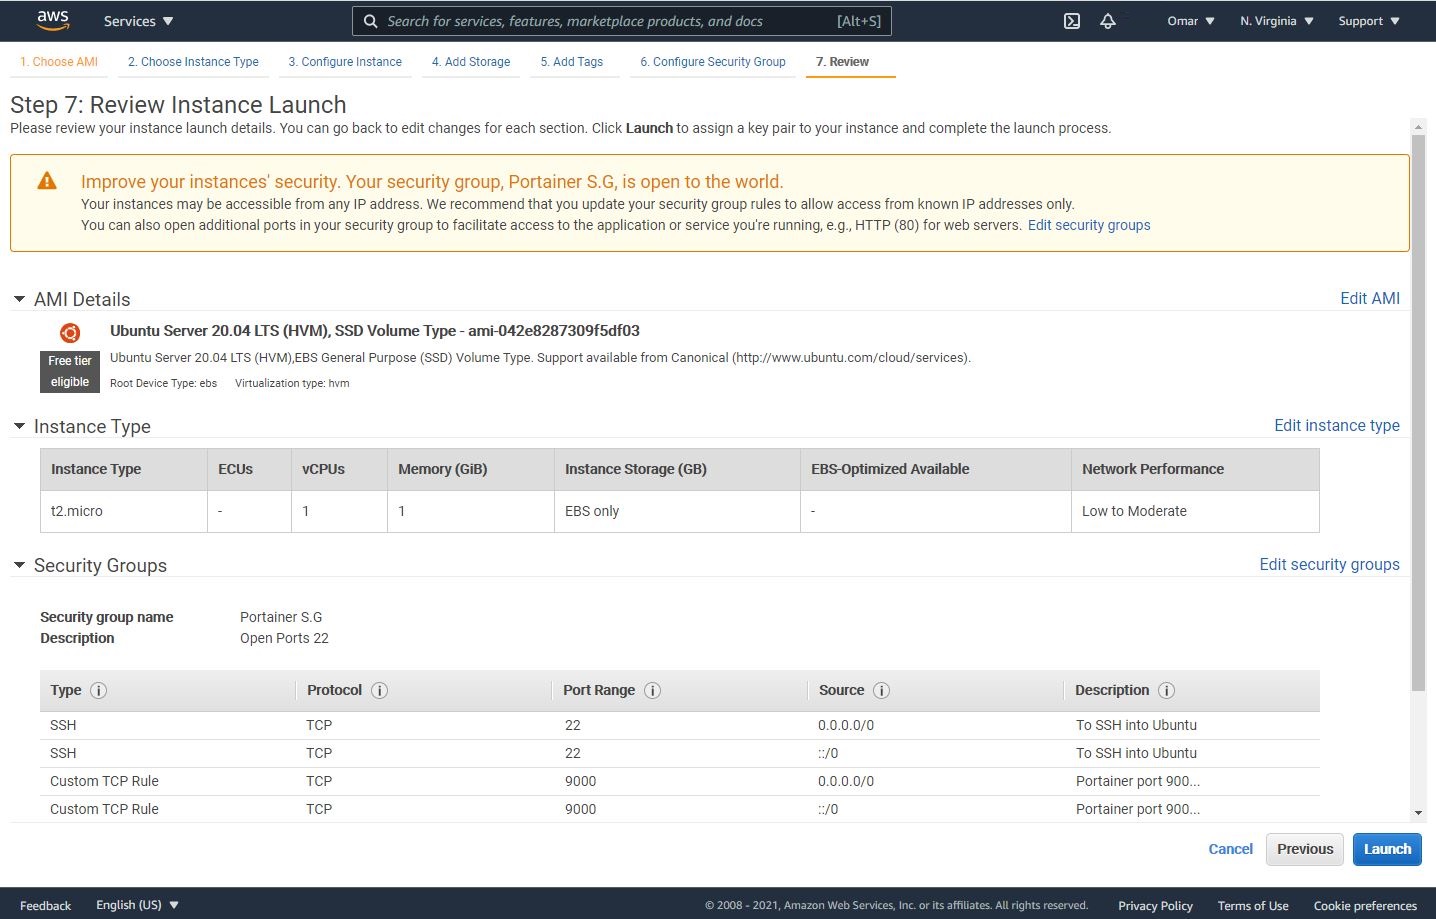
The final stage of this process is Review Instance Launch. Once you have reviewed the instance configurations, click on Launch.
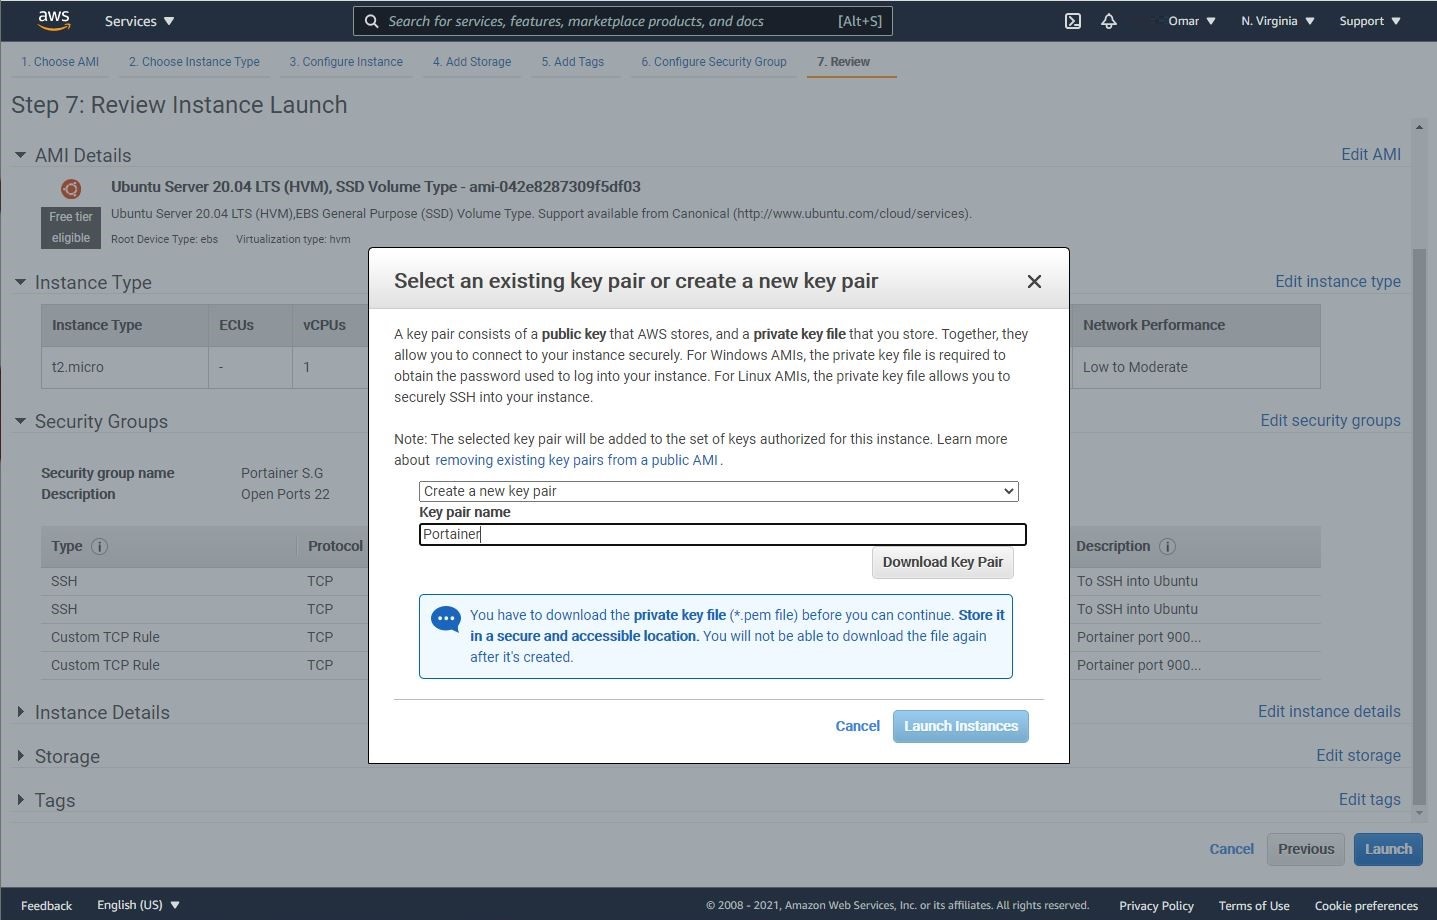
We will create a key pair to connect (SSH) to our EC2 instance from our local machine. Let us download the Key Pair and keep it in a secure location. Without this key, we will not be abe to connect to the EC2 instance.
A key pair, consisting of a private key and a public key, is a set of security credentials that you use to prove your identity when connecting to an instance. Amazon EC2 stores the public key, and you store the private key. You use the private key, instead of a password, to securely access your instances. Anyone who possesses your private keys can connect to your instances, so it’s important that you store your private keys in a secure place. To read more about a key pair from AWS.
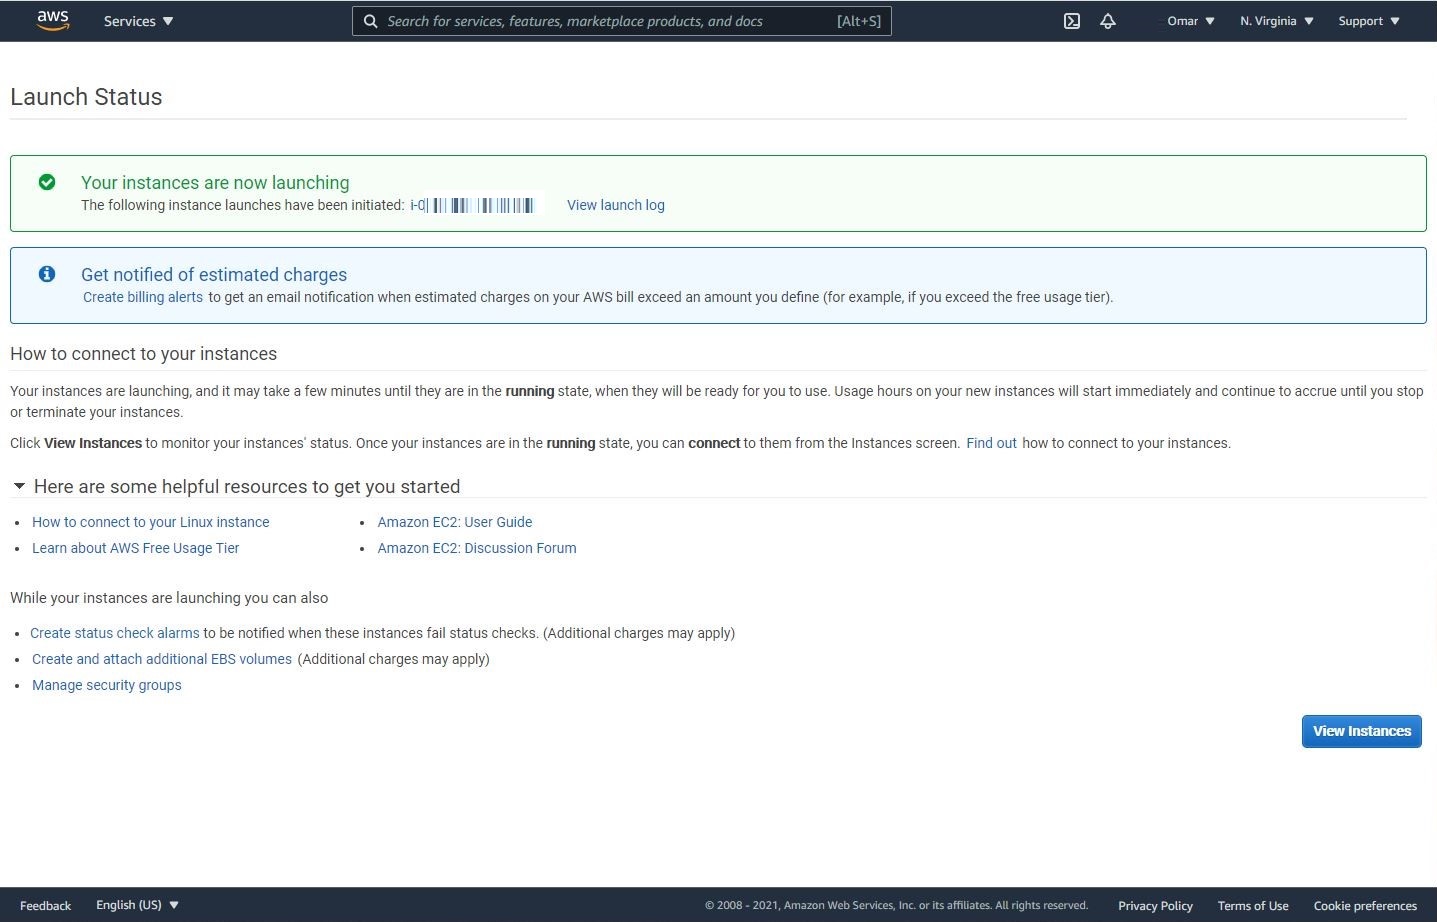
Click on Launch Instance
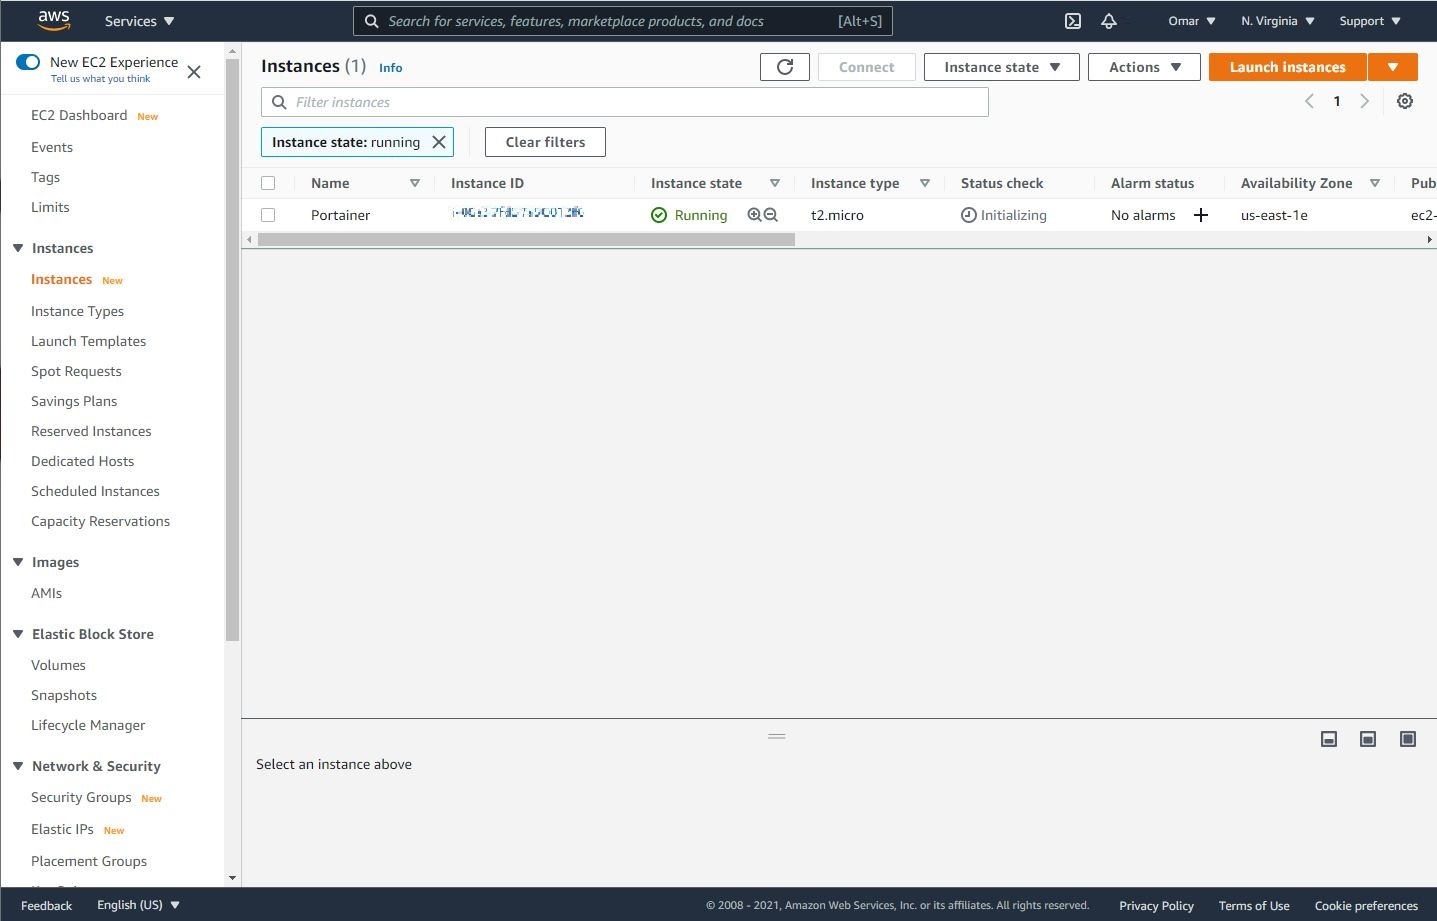
Let’s wait until the Instance State is updated to “running” status. The running status “Green” is indication that our EC2 instance is fully provisioned and ready to be connected to.
Conclusion:
This concludes the first section of part one of the tutorial. We have successfully spun a Ubuntu 20.04 LTS EC2 instance. In the next section, we will learn how to SSH into the instance.
